Time decides which of these wood pieces is yours more than taste does.
Some projects, like the Wood Slices Wall Decor or the Layered Wood Crosses, fit a free afternoon with basic tools, while the Carved Wood Butterfly Wall Art and the Inlaid Wood Landscape Frame are better spread over several sessions.
The range runs from builds that rely on grain and contrast, like the Wavy Wood Wall Decor, to carving and interlocking joinery like the Interlocking Wood Puzzle Art, so pick by the hours you can give, then by the wall you want to fill.
1. Wood Mountain Wall Art
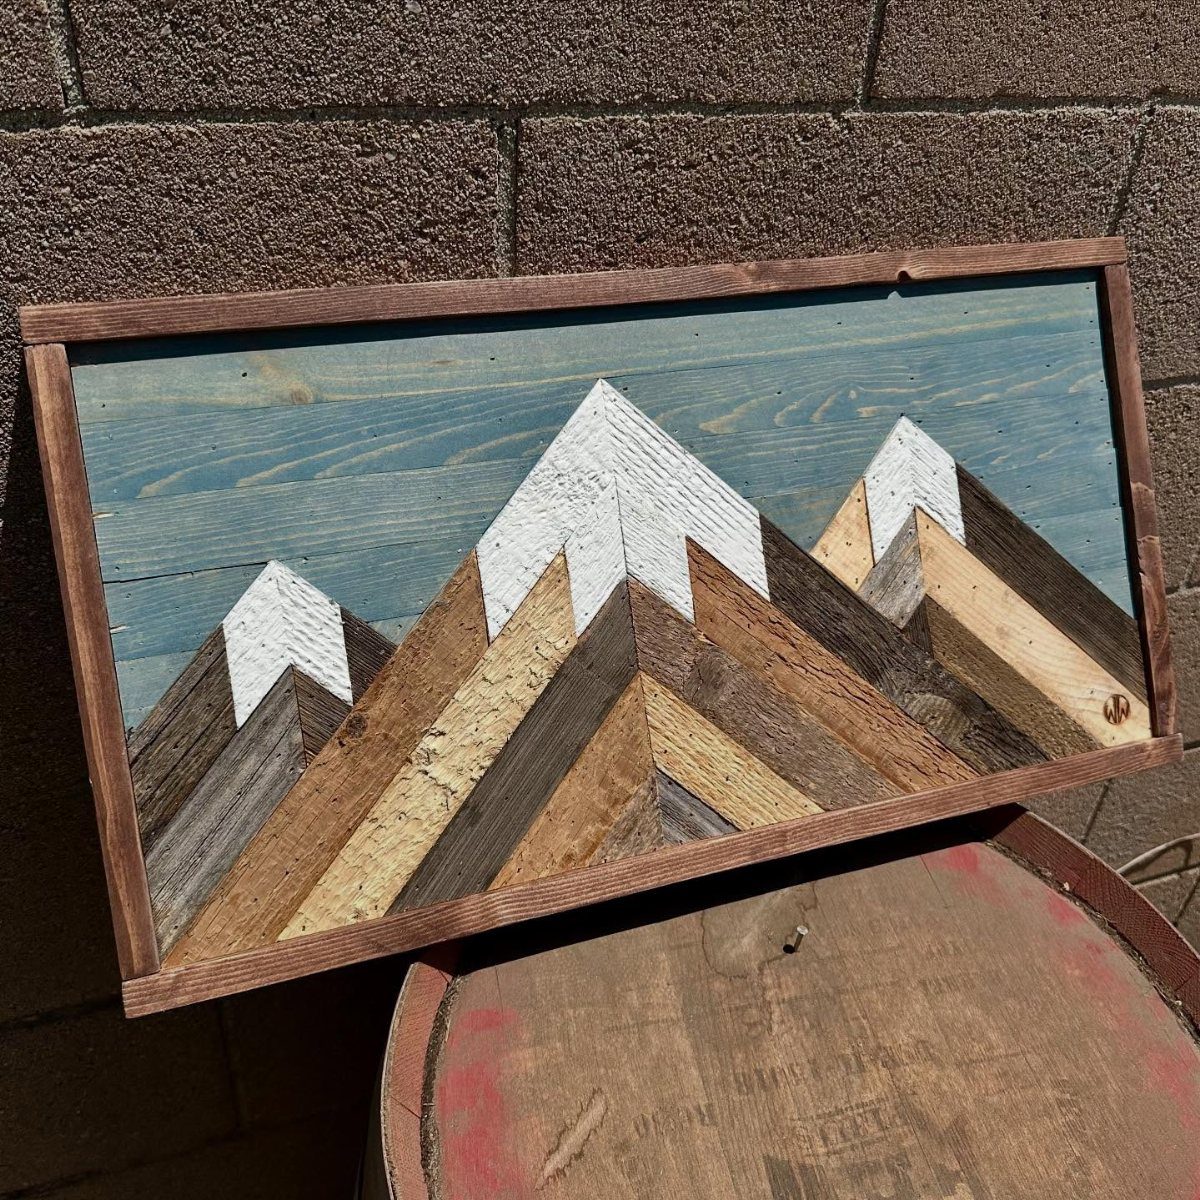
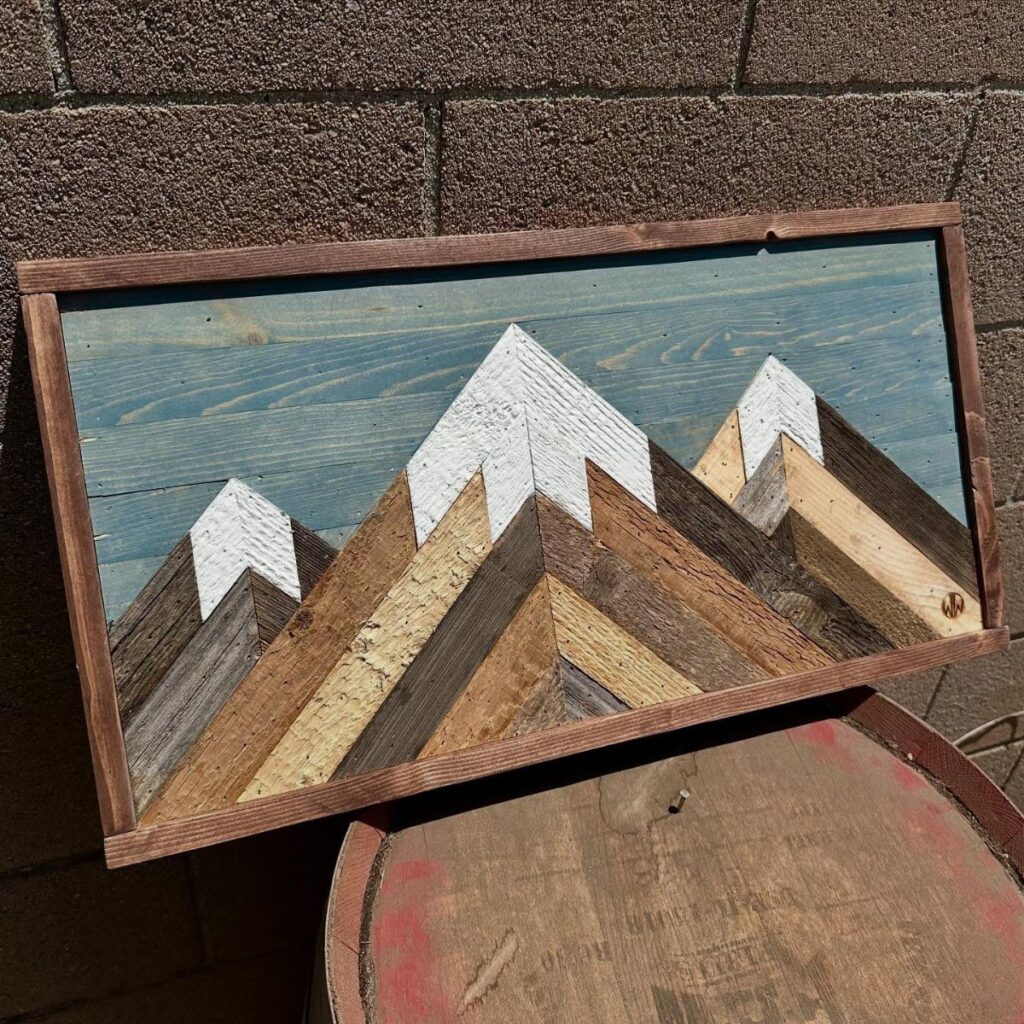
3 peaks stacked at different depths give a flat board real shadow lines, and that depth is what makes a mountain piece worth hanging.
Cut each ridge from its own layer of wood, then glue the layers so the front peak sits proudest.
White caps against a blue sky make the contrast easy to read from across a room. Paint the sky last so no color creeps onto the peaks.
A piece this size also leans nicely on a shelf or mantel if wall space is tight.
2. Geometric Wood Wall Panels
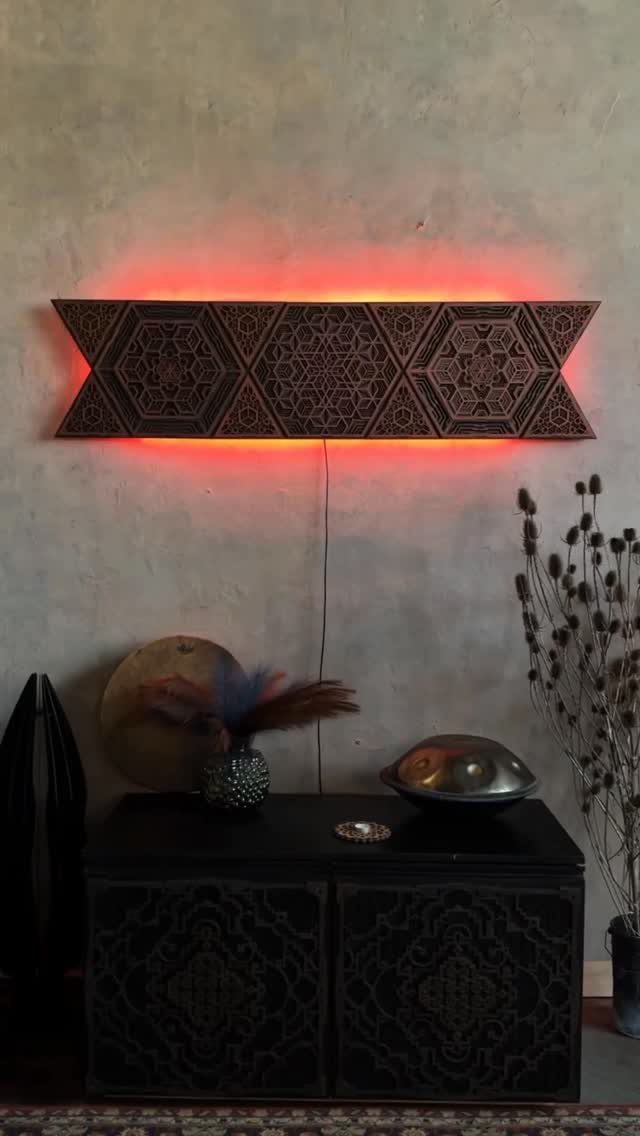
Carved geometric lines catch light in a way plain boards never do, so a panel like this earns its spot over a console or cabinet. Repeating angles are forgiving: a slightly off cut disappears into the pattern.
Backlighting is the upgrade I’d choose. A colored light behind the panel turns the grooves into glowing edges and makes a grey wall feel warmer.
Mark your pattern with a pencil and straightedge before any cutting. Skip the light if you want a calmer look.
3. Rustic Wooden Pallet Wall Art
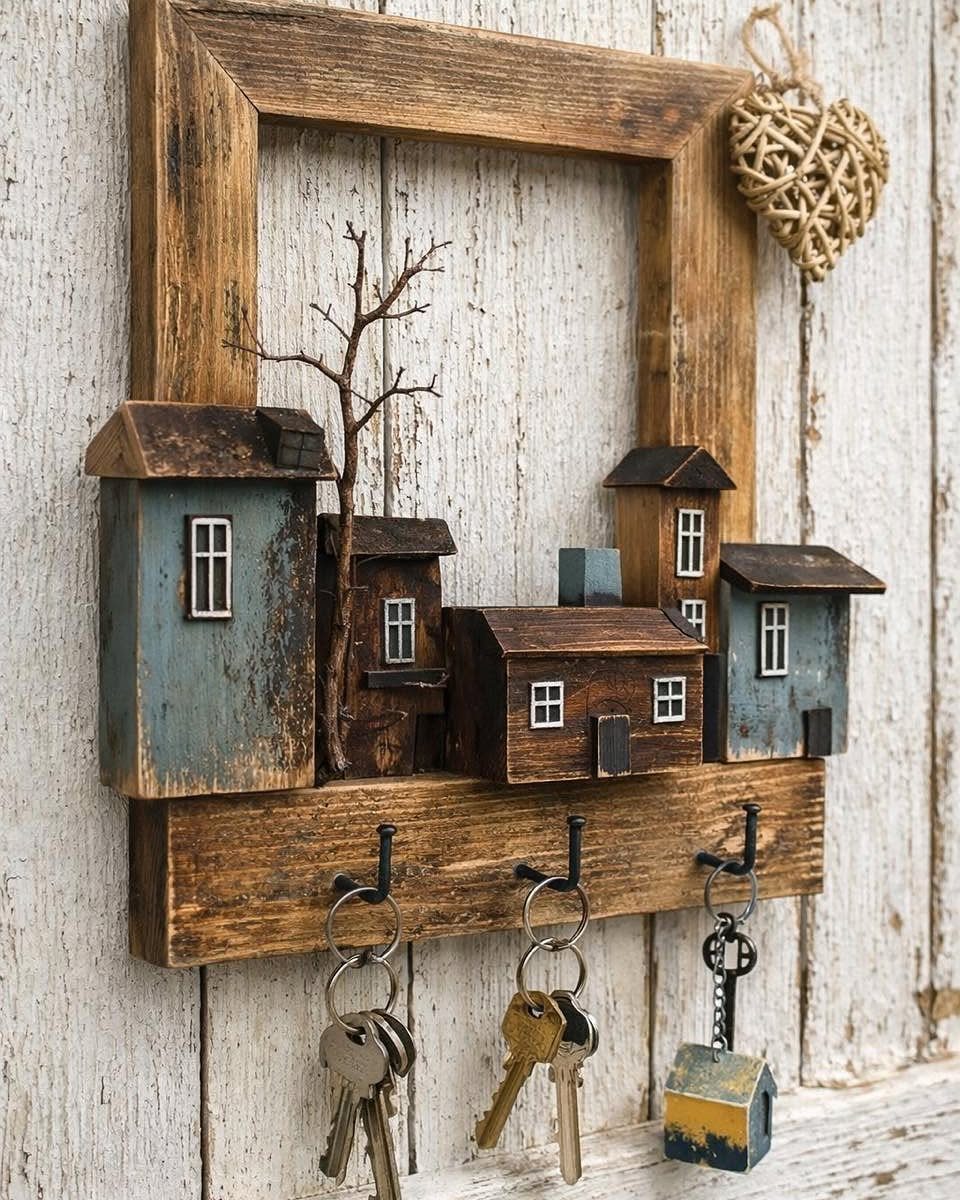
A key holder is a small project with a daily job, which makes it an easy first build from scrap boards. Frame the backing, then fix miniature wooden houses along it with hooks beneath them.
Weathered white boards give the rustic look, and pallet slats are cheap enough that a mistake costs little. Sand the rough faces well before you hang anything, since keys snag on splinters.
Hang it by the door where your hands already go.
4. Wooden Pet Portraits
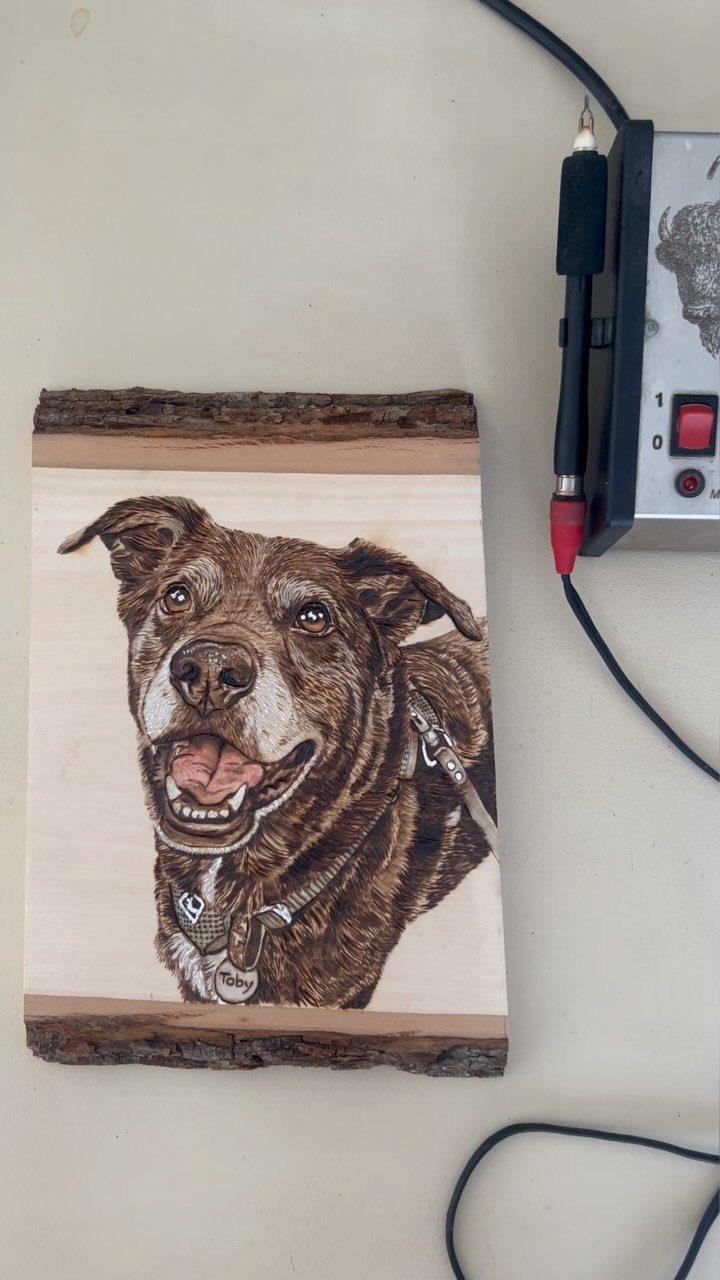
Burning a pet’s face into a wood slice gives you a keepsake that no store sells. Leave the bark edge on; it frames the portrait without any extra work.
Start with a clear reference photo and trace the main shapes lightly in pencil. Build fur with short strokes that follow the direction the hair grows, and burn the eyes last and darkest so they stay the focal point.
Adding the pet’s name beneath, as in this piece, makes it personal. Practice on a spare slice first.
5. Wood Slices Wall Decor
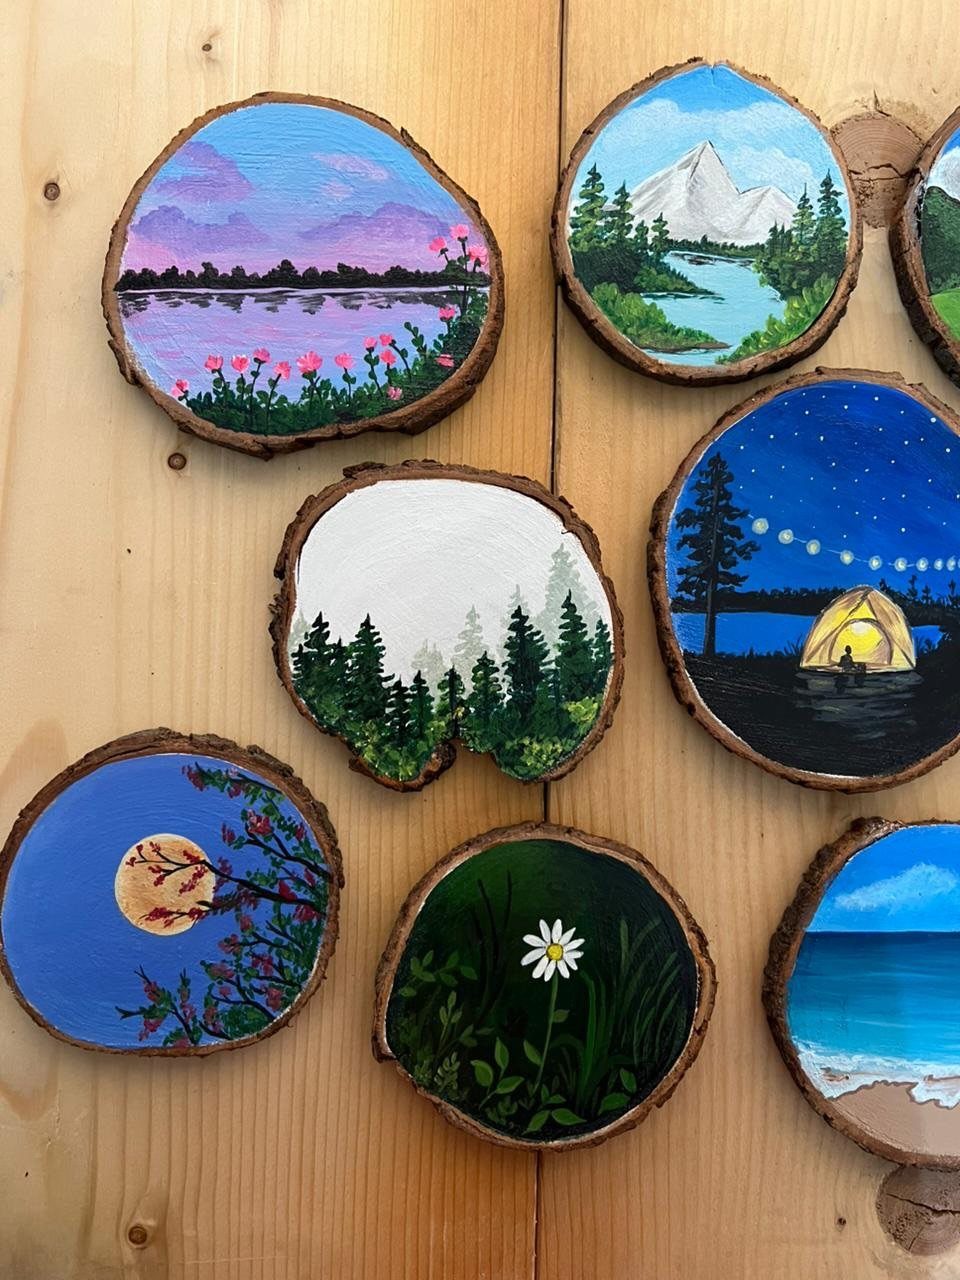
Small painted scenes on slices are a good fit for a tight budget and a free afternoon. Each round is its own tiny canvas, so a mistake costs you one slice, not the whole project.
Keep the bark edges; they act as the frame.
Sketch your horizon line in pencil, then paint sky, hills and trees in simple layers. Painting a set of different landscapes lets you cluster them on a wall in any arrangement.
Sand each face smooth before painting so the brush glides.
6. Word Art Wood
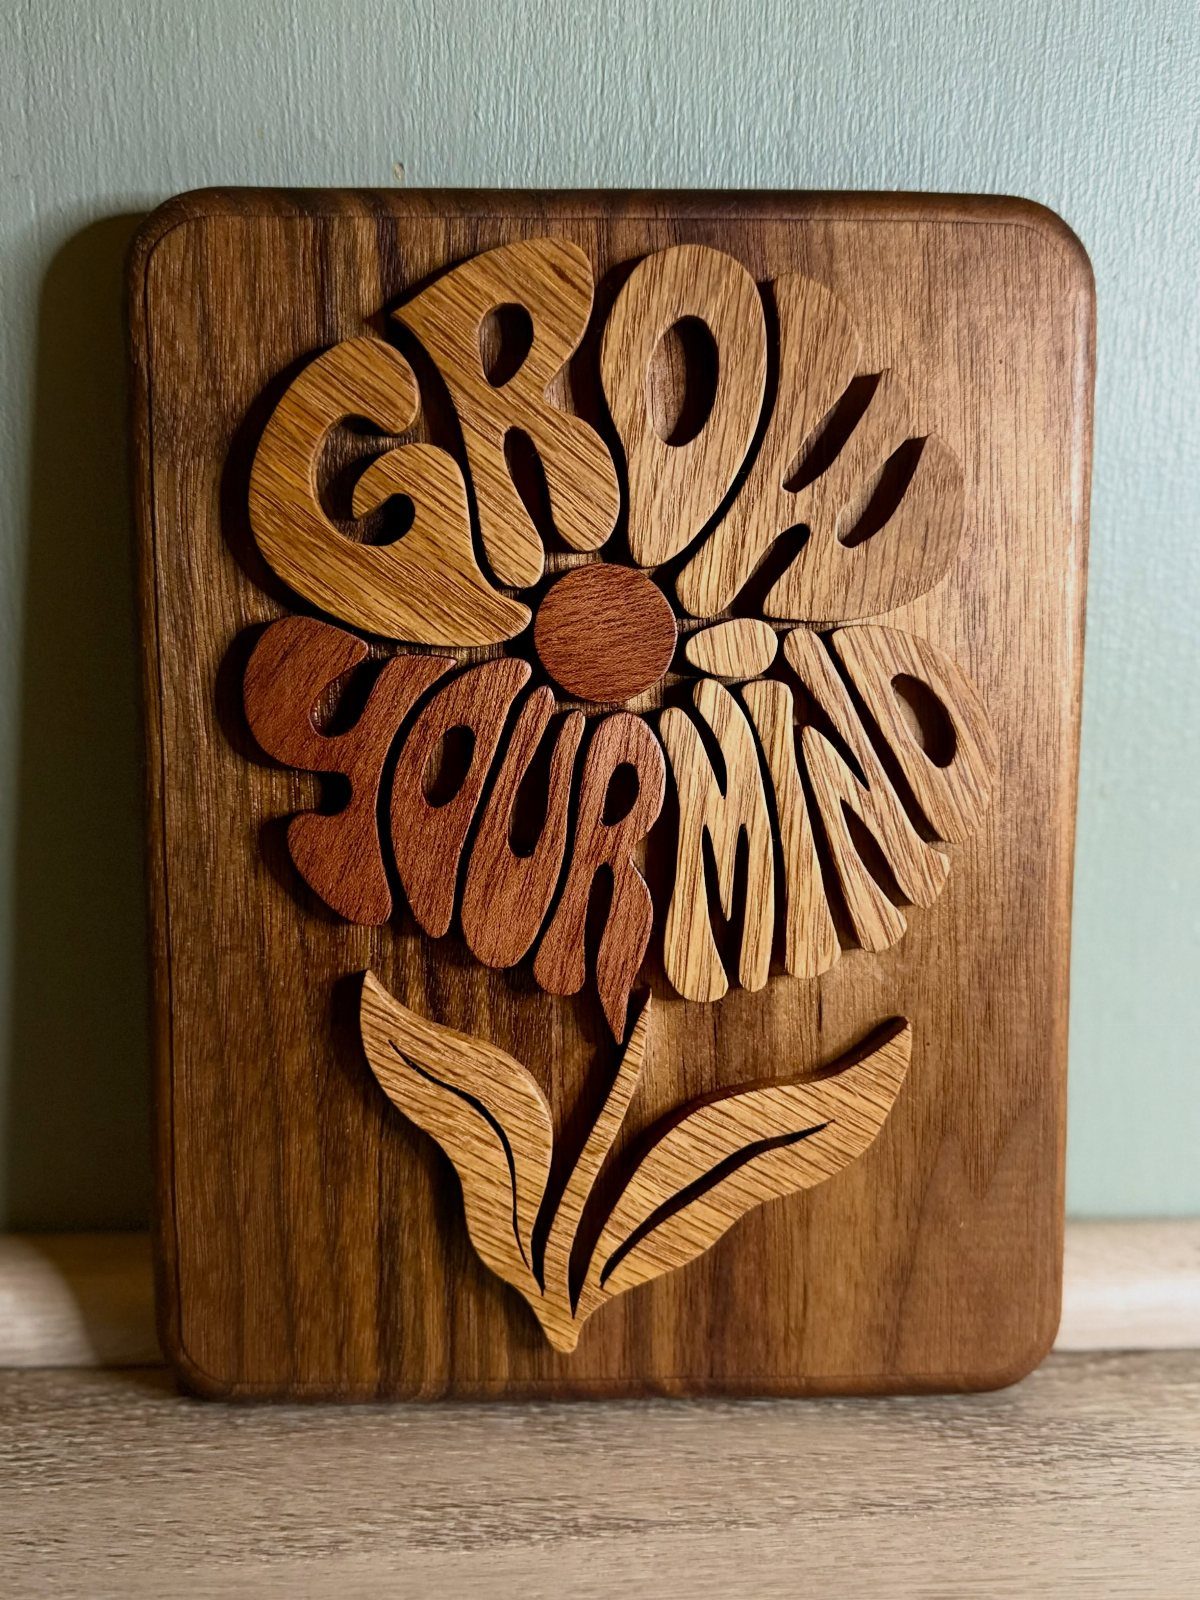
Letters that sprout petals and stems let the word and the picture read as one piece, so the message feels grown into the design instead of stuck on top of it.
Words that read well in a flower shape are short ones, which is why a phrase of 3 words works so nicely.
Raised, carved letters add shadow and depth that flat paint can’t match. Plan the layout on paper first, because spacing is hard to fix once you cut.
A plain wall suits a plaque like this. Pick a phrase you will enjoy seeing daily.
7. Bauhaus Wood Wall Art
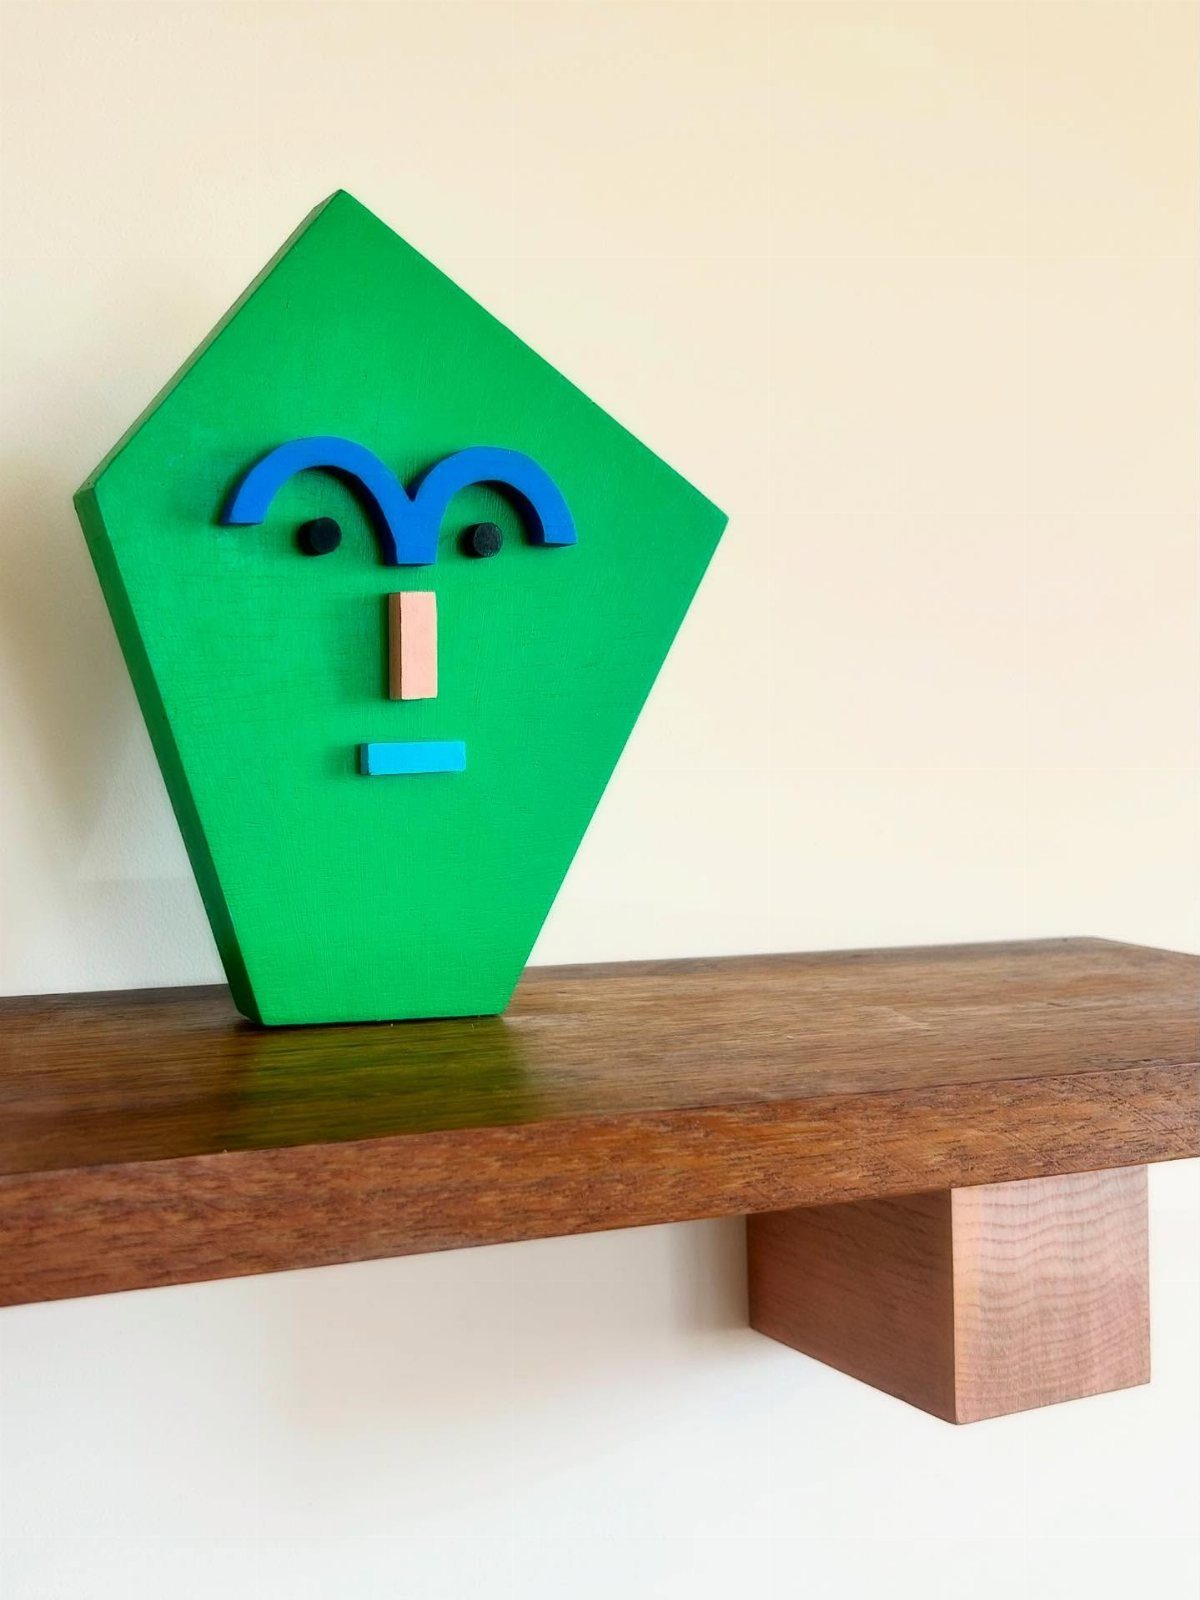
Flat shapes in solid color are the whole language of Bauhaus, and a diamond face built from a few wooden pieces speaks it well. Green, blue and pink against warm brown wood keep the palette tight.
Cut every feature as a plain geometric block: a diamond for the head, slim bars for the brows, a small wedge for the nose. Paint each piece before gluing so edges stay crisp.
A shelf suits it better than a nail in the wall, and a bare white wall behind it keeps the look clean.
8. Wavy Wood Wall Decor
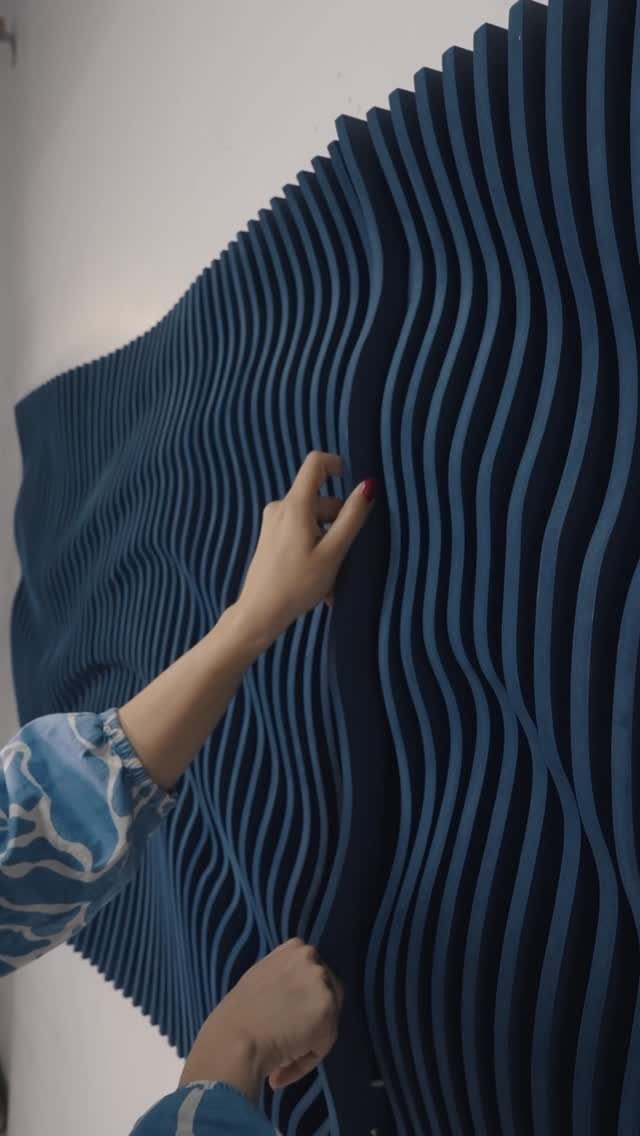
Vertical slats cut in a rolling curve turn a straight wall into something that looks like moving water. Dark blue deepens the effect, and a hand run across the ridges tells you how smooth the sanding needs to be.
Wavy wall decor is a bigger build than a typical afternoon project, because every slat needs its own cut. I’d make one template, trace it onto each slat, and sand the faces before painting.
Space the slats evenly. Uneven gaps ruin the rhythm.
9. Wood Wall Sculpture
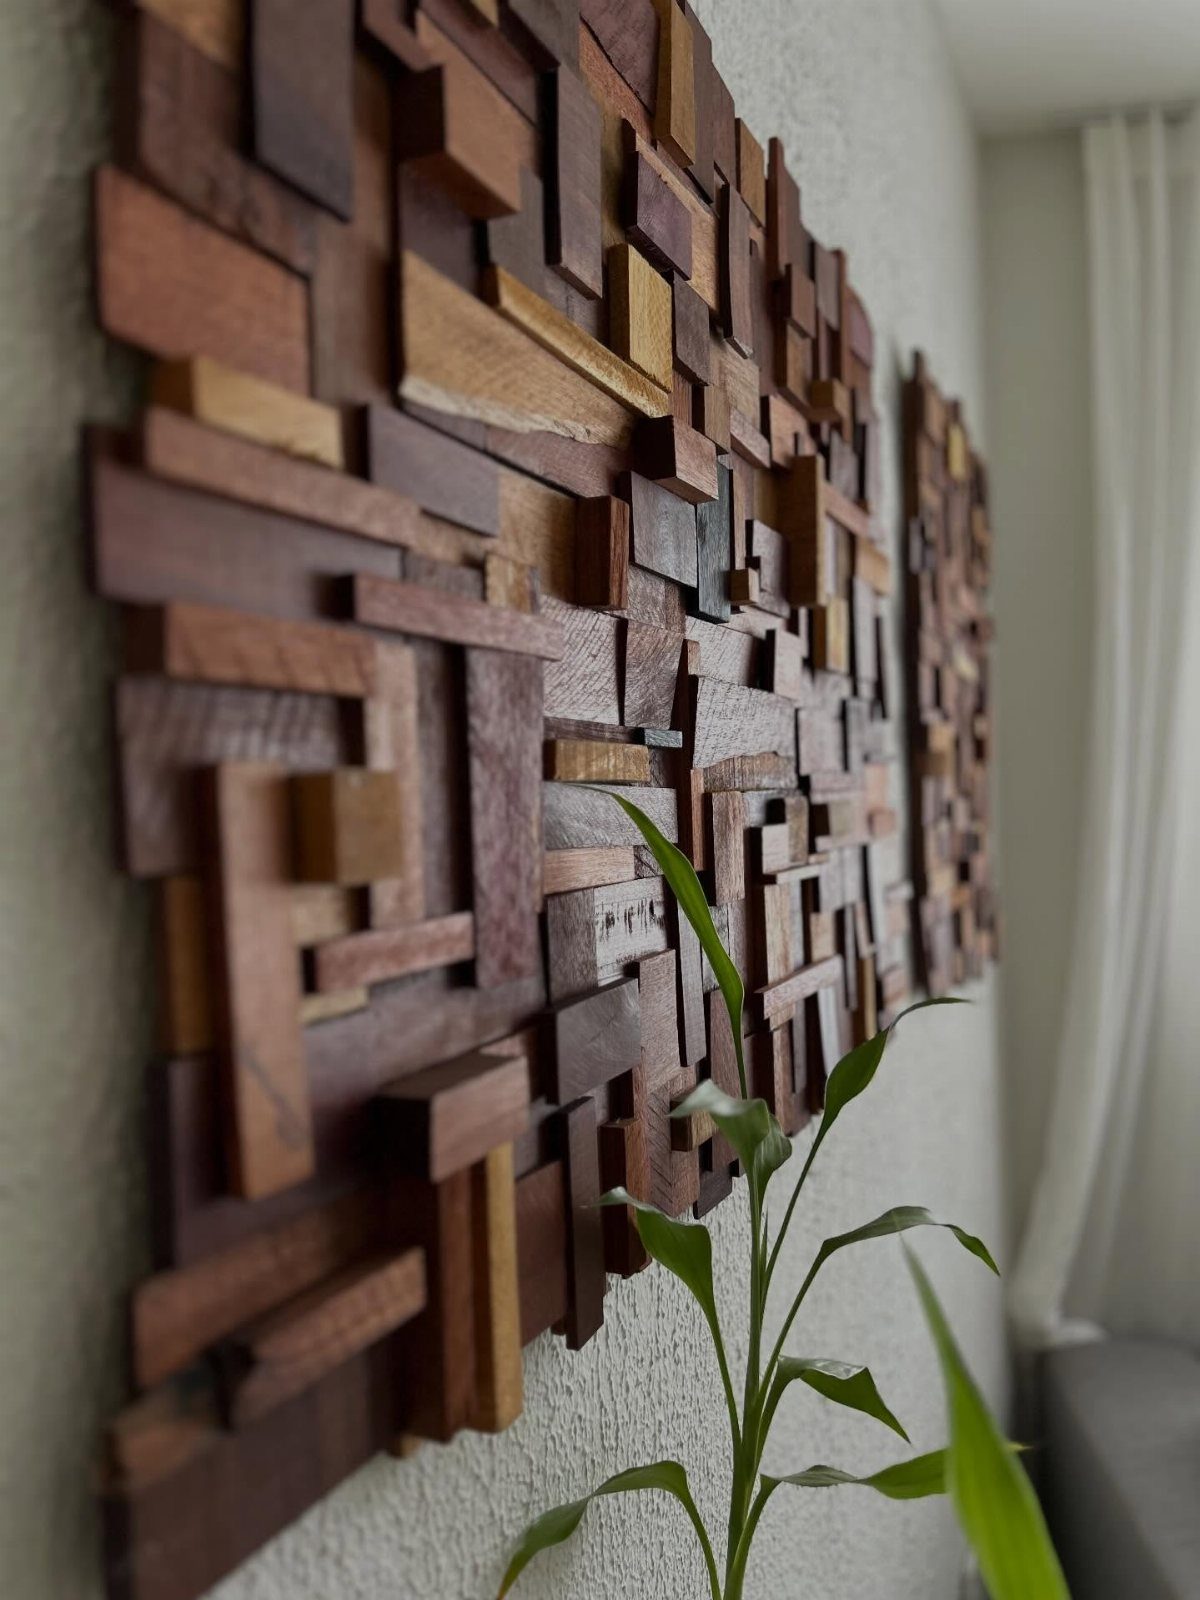
Rectangular blocks set at different depths make a wall sculpture that changes with the light. Mixing wood tones does the work of paint, so you can skip the brush entirely.
Cut offcuts into rectangles of varying length and thickness, then arrange them dry on a table before gluing anything. Move pieces until the heights feel balanced, with the thickest blocks off center.
A white wall shows the shadows best, and a plant nearby softens all those hard edges.
10. Barn Quilt Wall Art
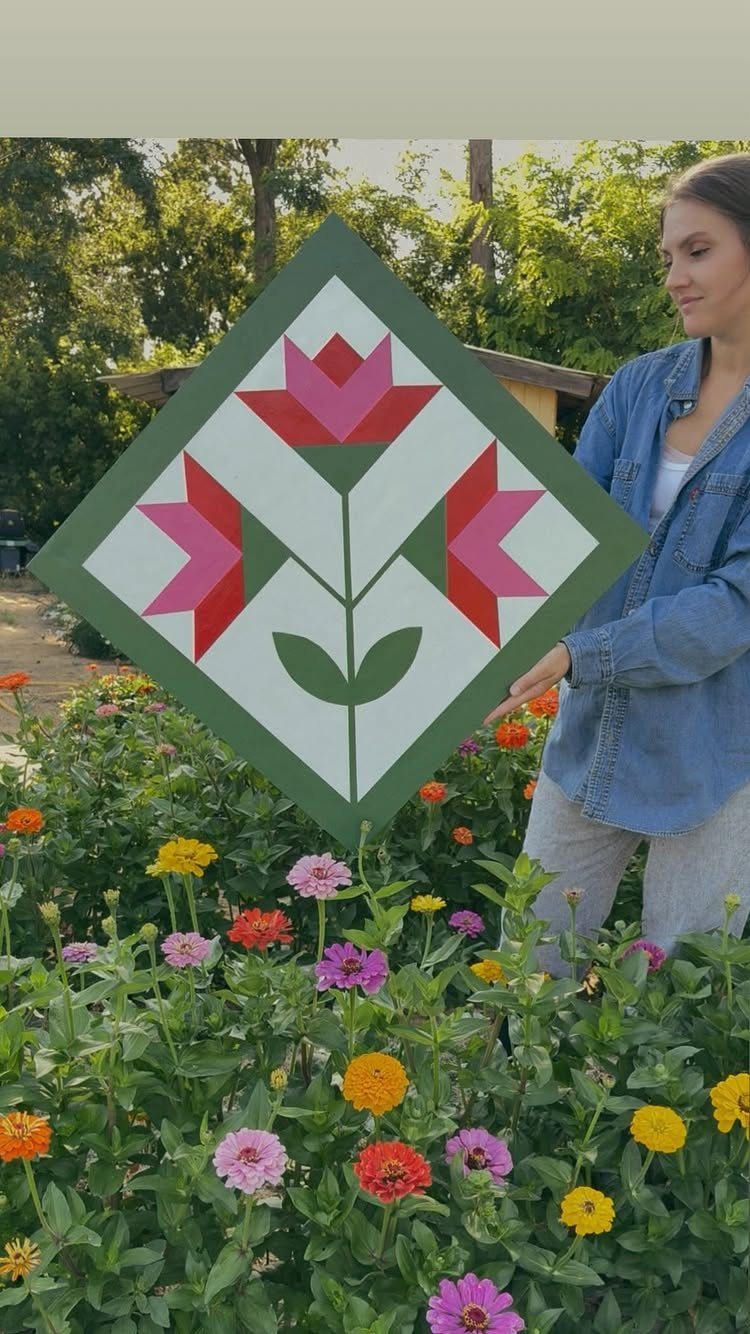
A barn quilt is a painted square board, and a diamond layout with a flower at its center makes the pattern feel like fabric. Pink petals read clearly because the shapes underneath are simple.
Mark the grid in pencil first, then run painter’s tape along every line so the colors stay sharp. Paint one color at a time and let it dry before taping next to it.
Hang it on a fence or porch wall, or lean it in a garden bed.
11. Wood Mandala Wall Art
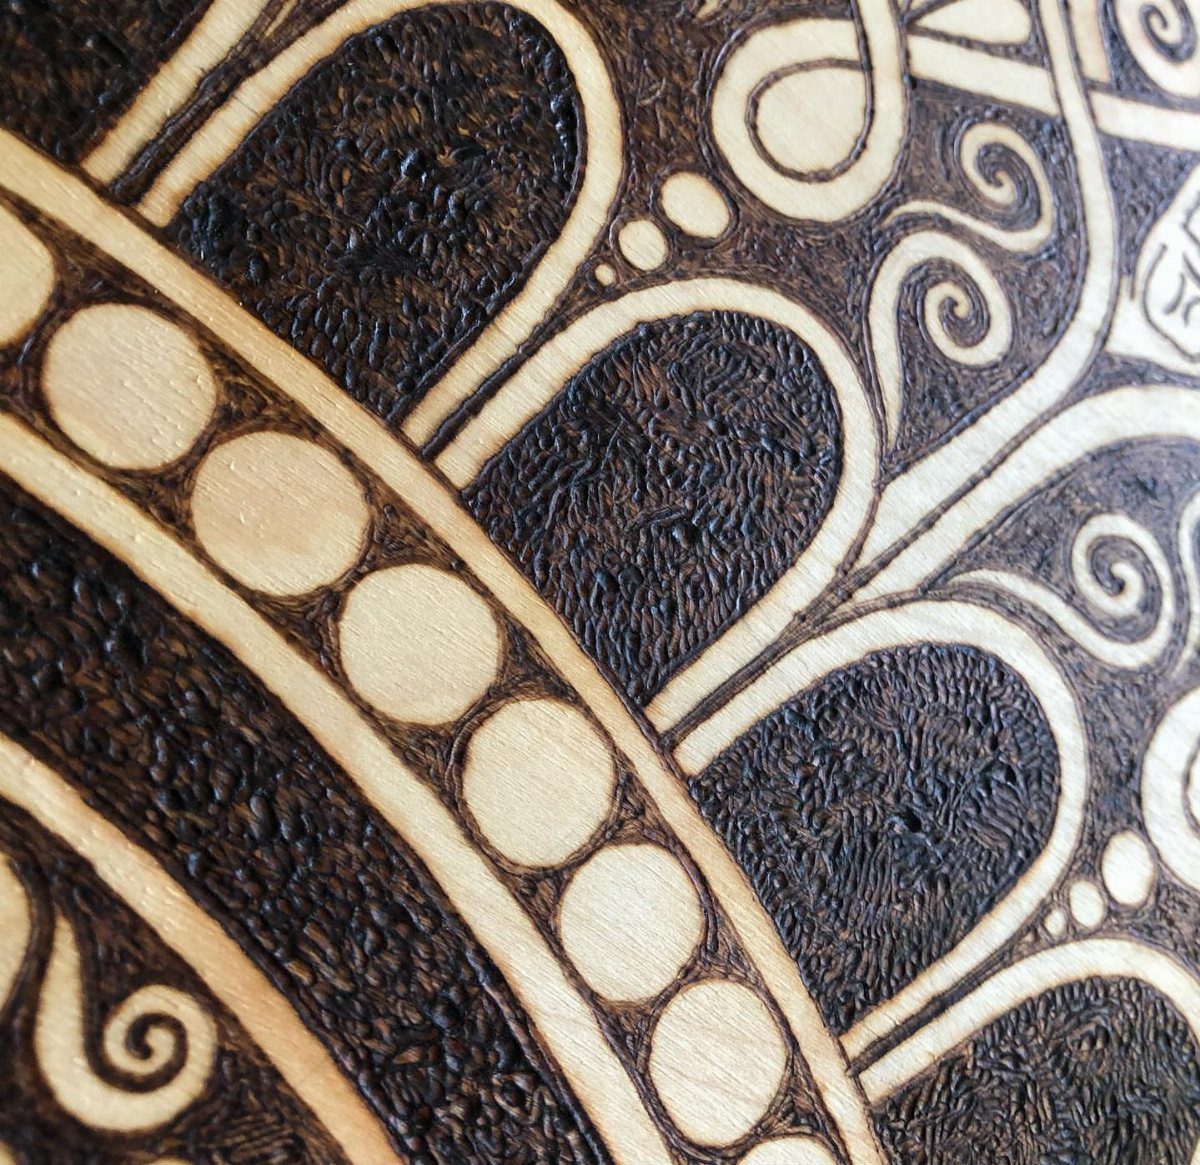
Wood burning suits a mandala because the pattern is built from repeating rings and swirls, and dark burned areas sit beautifully against pale wood. Light wood gives the strongest contrast.
Draw the circles lightly with a compass, then divide them into equal sections before burning.
Work from the center outward so your hand never smudges finished lines. Fill some shapes solid and leave others as outlines for texture.
It takes patience. Plan on a full afternoon for a detailed one.
12. Brown Rustic Abstract Teak Wood Wall Decor
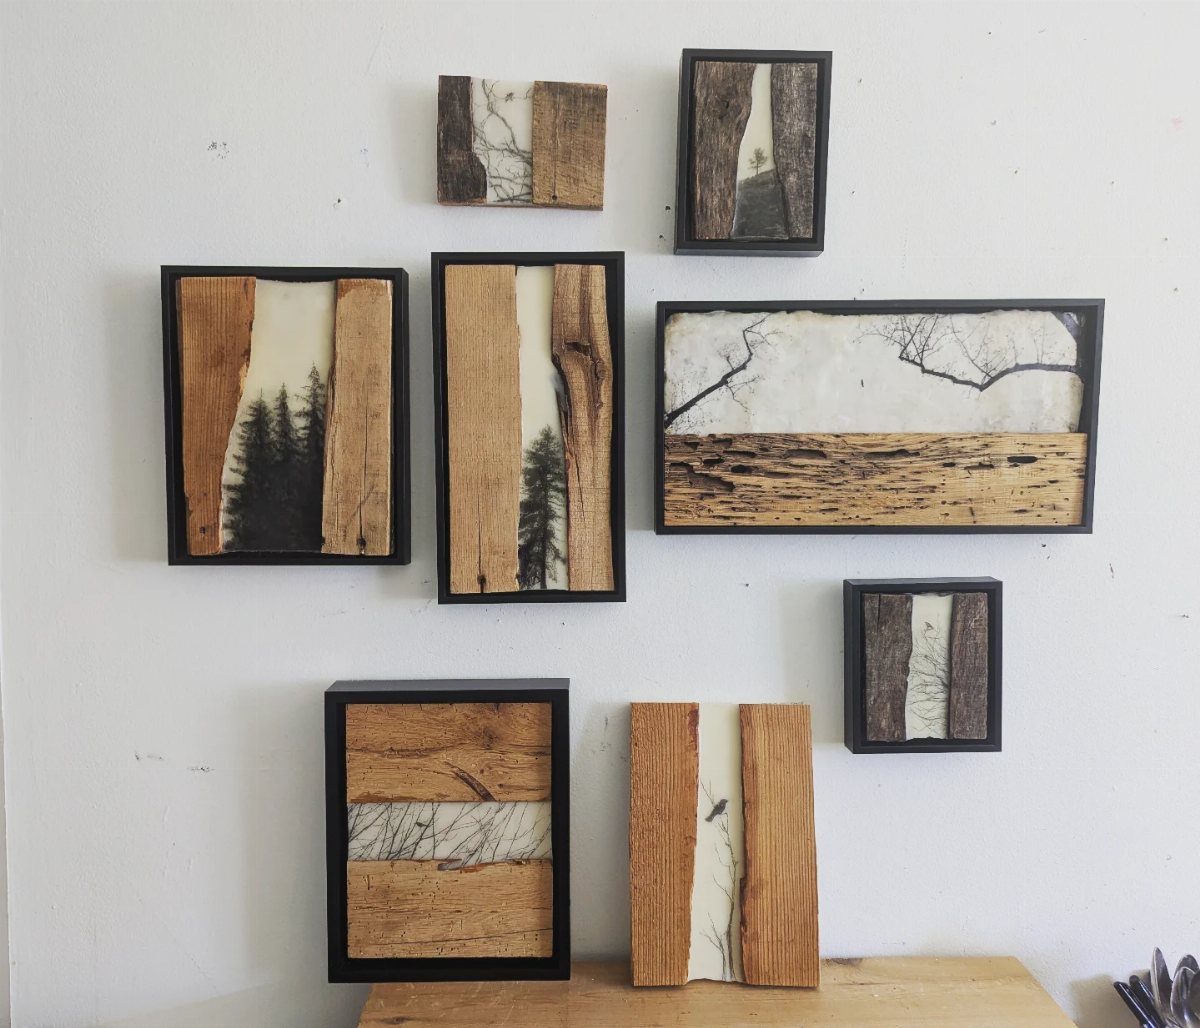
Grouping several small abstract pieces in earthy browns gives a wall the weight of one big artwork, and it costs far less. Wood slices and resin sit well together, since both can be made in small batches.
Mix framed and unframed pieces, and keep the colors in the same brown family so the group holds together. Lay everything on the floor first and shift the arrangement until the gaps between pieces look even.
Hang them above a low surface like a console.
13. Geography Wooden Wall Art
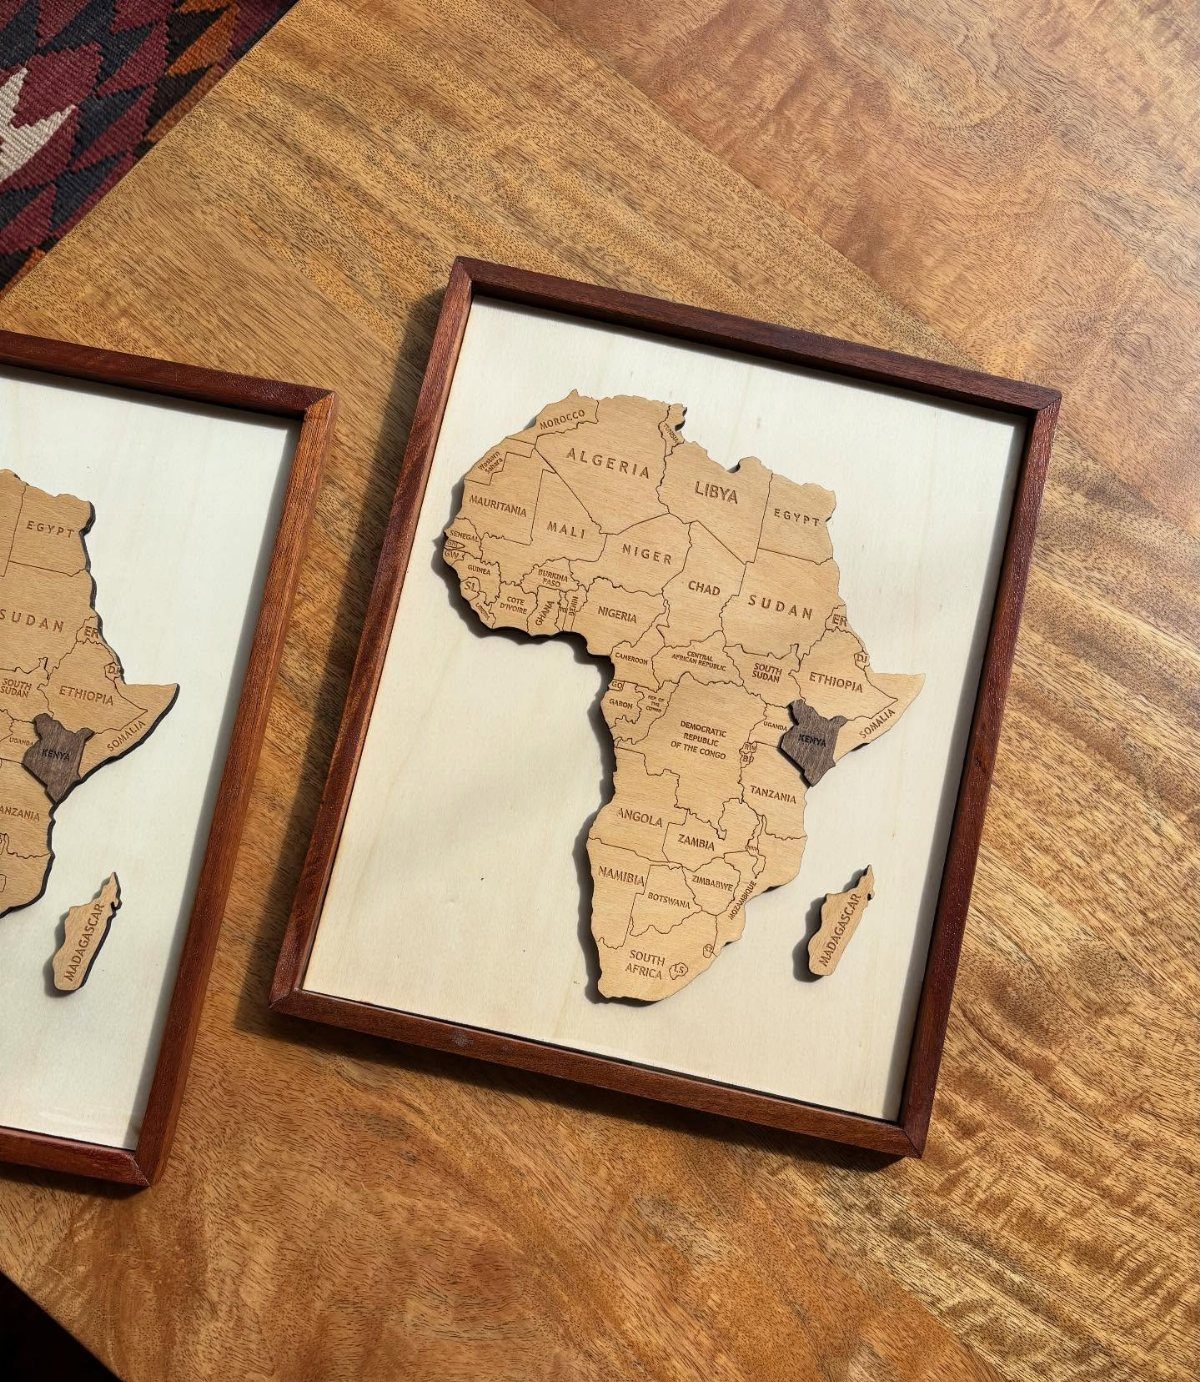
An engraved map turns geography into a quiet piece of wall art.
A square frame keeps the continent’s outline front and center, and small country names add detail that only shows up close, so keep the lettering fine and the lines steady.
Pick a place that means something to you, like where family comes from or a spot you want to visit. Keep the lettering small and even so the borders stay readable.
A tabletop or shelf works as well as a wall for a frame this size.
14. Rainbow Wood Wall Decor
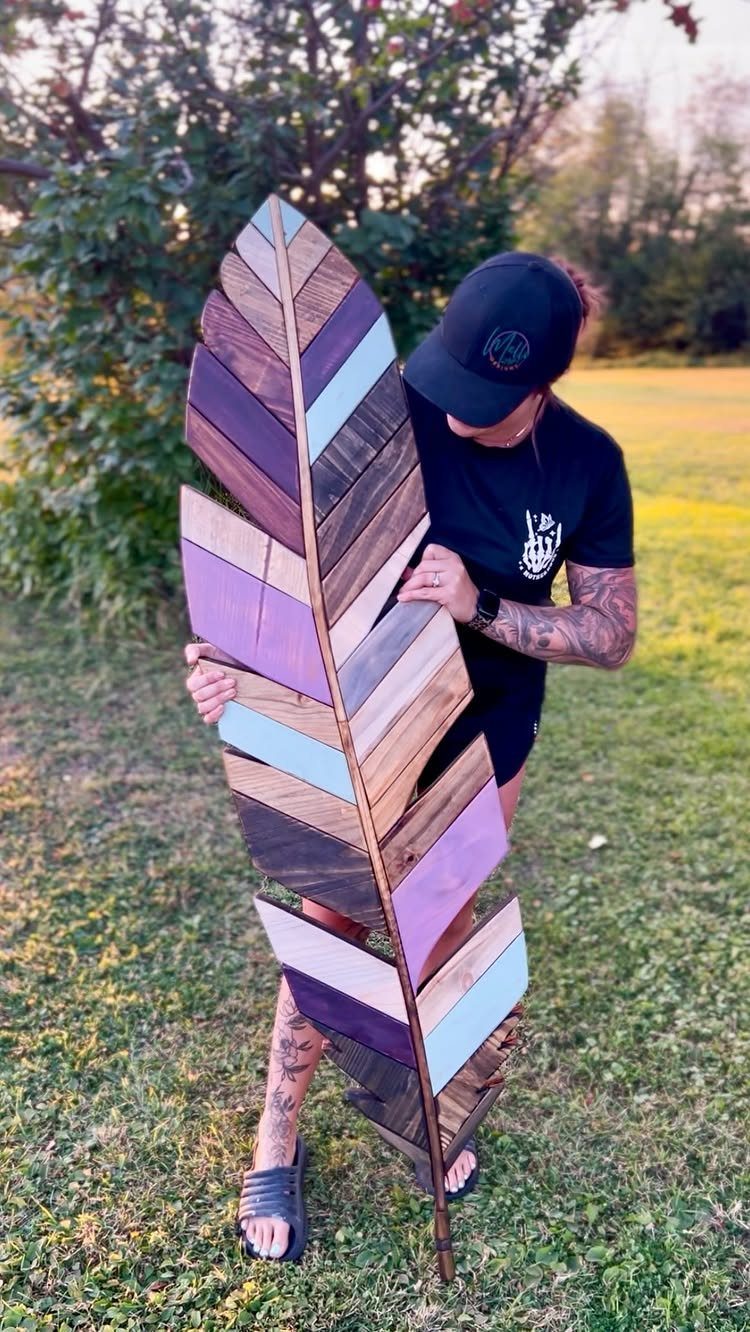
Slats in graduated colors make a leaf or feather shape that fills a wall with color, and purple shading into blue is an easy pairing to copy.
Cut the slats in staggered lengths so the outline tapers like a real feather.
Paint each slat before you glue it to the backing, or the brush will never reach the seams. Set the colors in order on a table first and adjust until the gradient looks smooth.
Wood scraps keep the cost low.
15. Scandinavian Wood Art
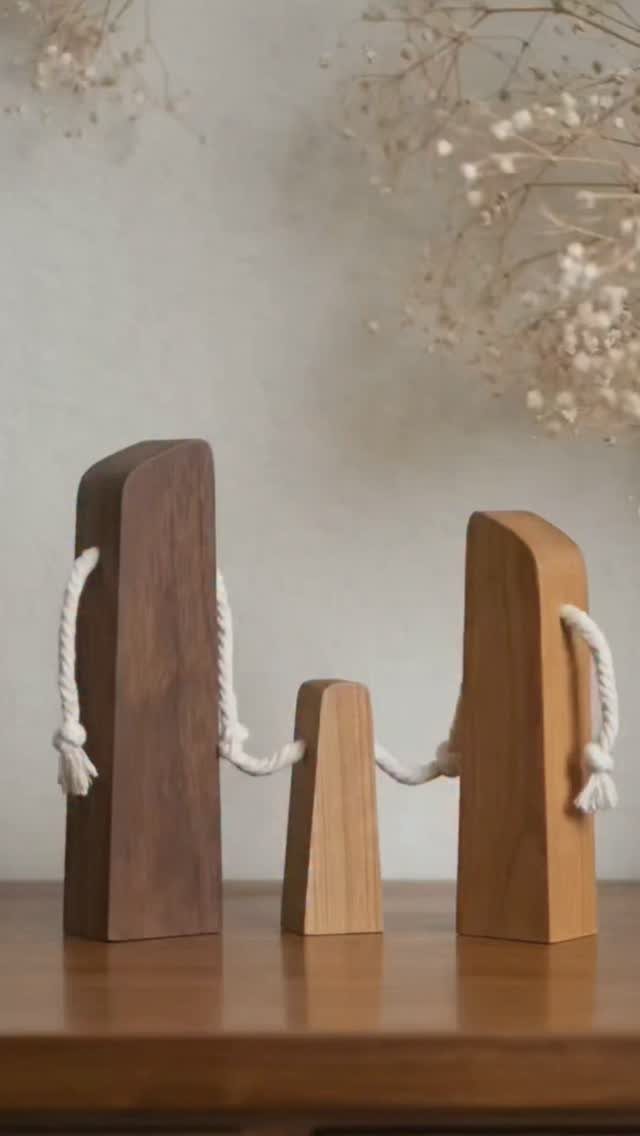
Blocks in 3 heights, linked by a loop of white rope, read as a small family and need no paint at all. Keep the carving minimal: a simple face or shape is enough, and the wood grain does the rest.
Sand the blocks smooth so the plain finish feels good in the hand. Drill a hole through each one for the rope, then tie it loosely enough that the blocks can be rearranged.
A shelf or side table suits a small piece like this, and dried flowers beside it echo the muted, natural tones.
16. Botanical Wood Wall Art
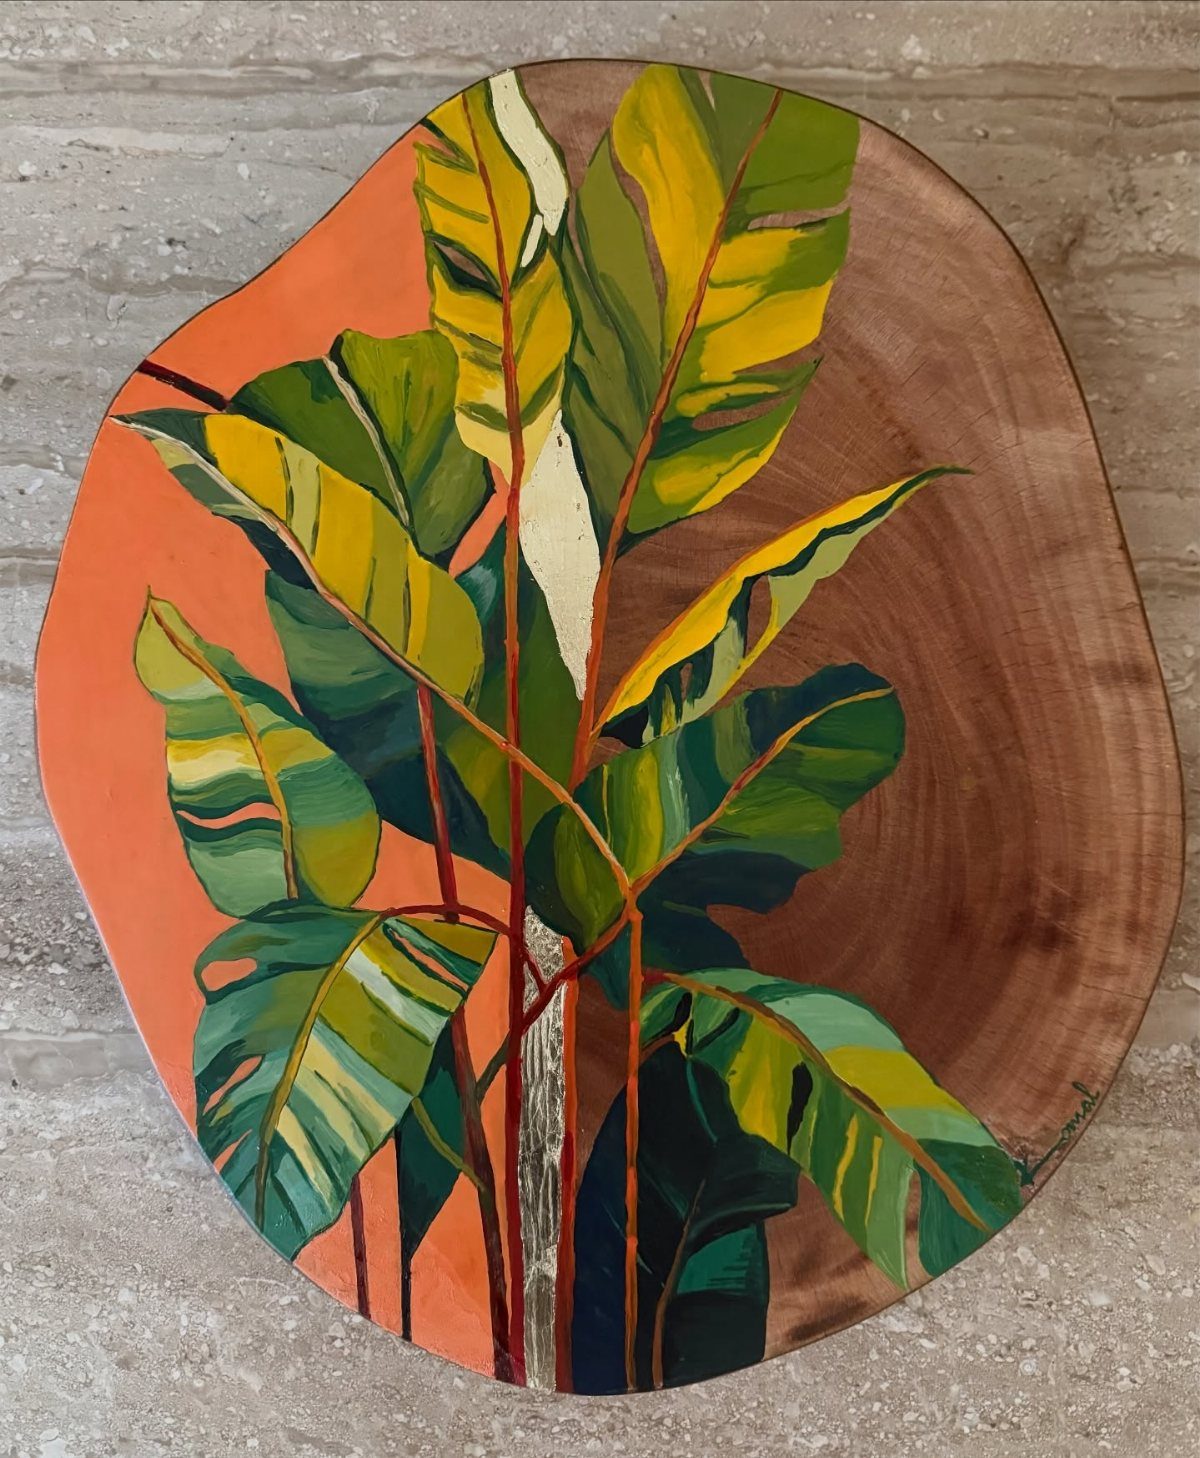
Green and yellow look fresh against the warm tone of the wood, and an uneven edge gives the piece a natural frame.
Sketch the leaf shapes in pencil, then paint in layers, light yellow first and green over it. Sand the slice before you begin so the paint goes on evenly.
A grey wall makes the colors stand out.
17. Luna Wood Wall Art
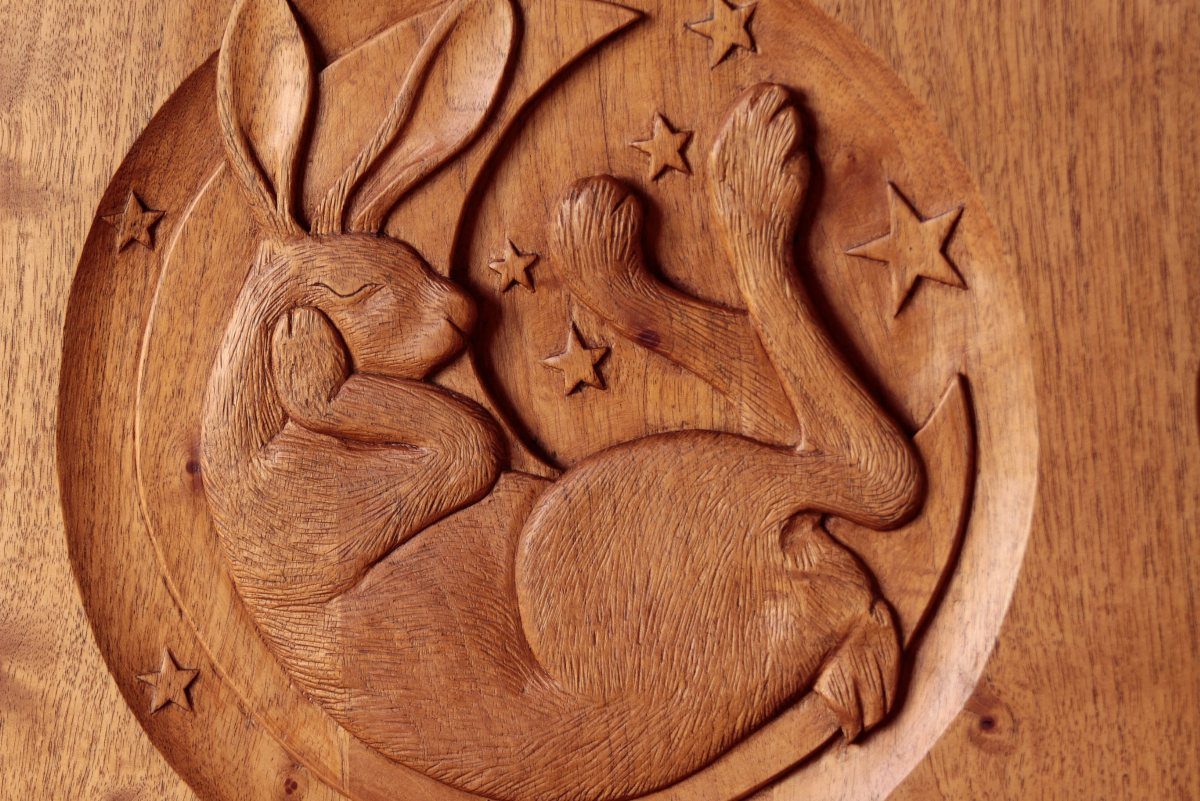
Carve the moon deeper than the rabbit so the animal looks tucked into the curve.
Draw the whole scene on the circle in pencil before cutting. Keep the stars small and simple, since tiny details are the easiest to chip.
This is carving work, so give it more than a quick hour. A bedroom or nursery wall suits the mood.
18. Carved Wood Butterfly Wall Art
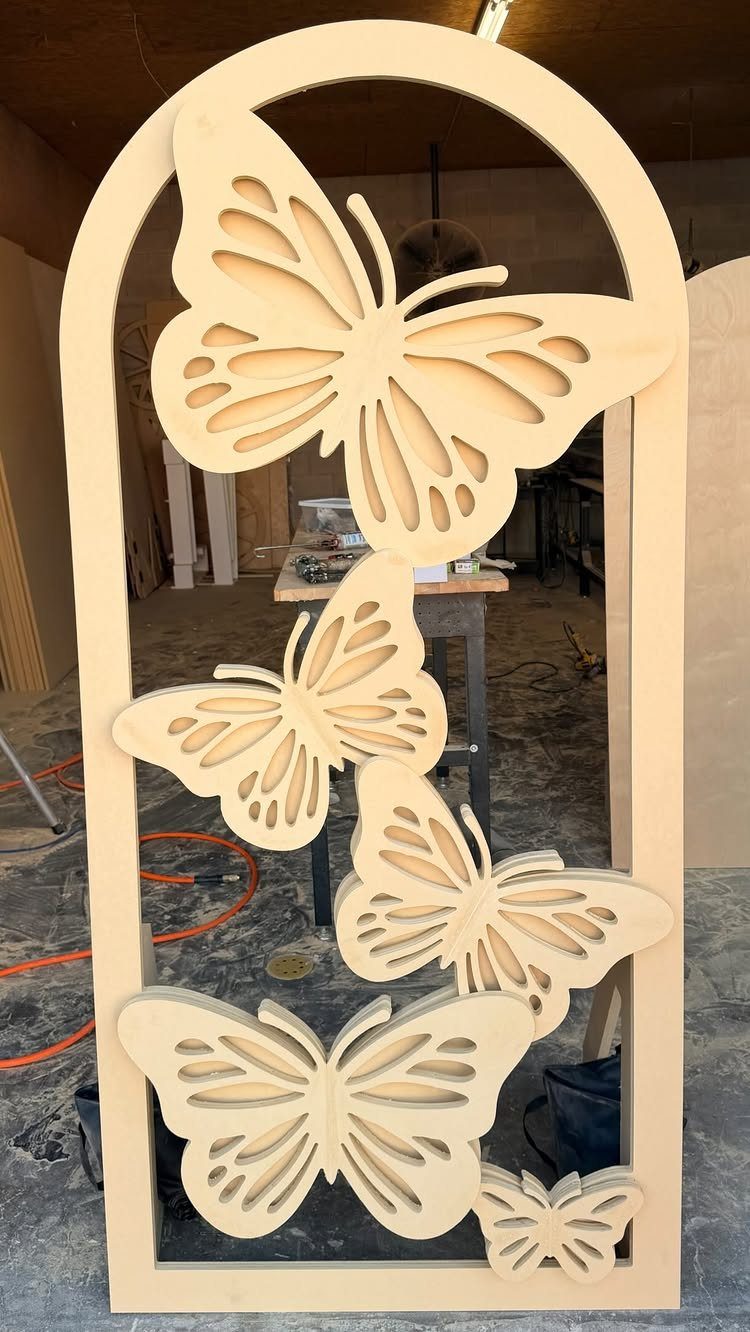
Butterflies carved in several sizes and set inside a tall arched frame look like they have just landed. Mixing large and small ones makes the group feel natural, and carving them with dimension casts soft shadows on the backing.
Cut the arch from plywood or solid boards and fix each butterfly with a dab of glue. Arrange them dry first, leaving breathing room between wings.
Each butterfly is its own carving, so this is a project to spread over a few sessions.
19. Multi-Layered Wood Silhouette Art
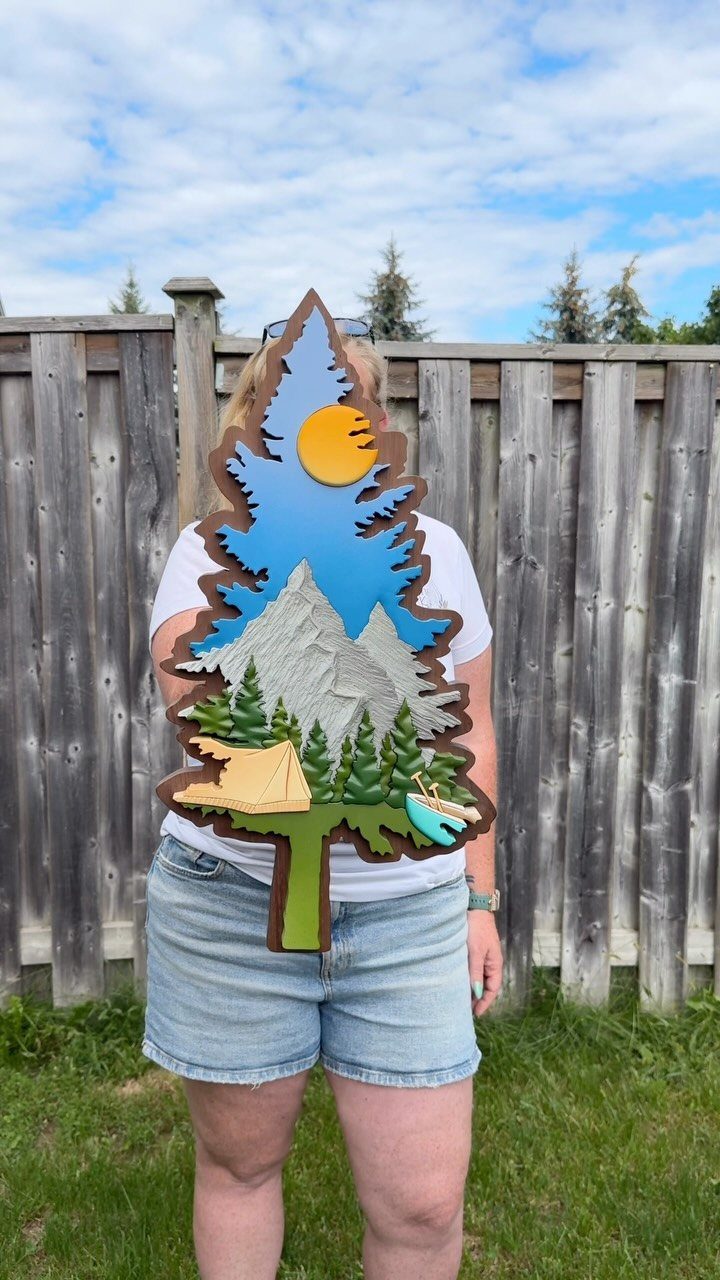
A pine-tree outline holding a whole mountain scene is a clever way to give a layered piece its own shape. Stack thin painted layers so each ridge, tent and treeline sits a little forward of the one behind it.
Color each layer on its own before assembly, because once the pieces are stacked the gaps between them are out of a brush’s reach.
Cut the tree shape from the back layer first, then size each layer smaller than the one beneath.
A fence or porch wall suits a piece like this.
20. Hand-Carved Wooden Figurine
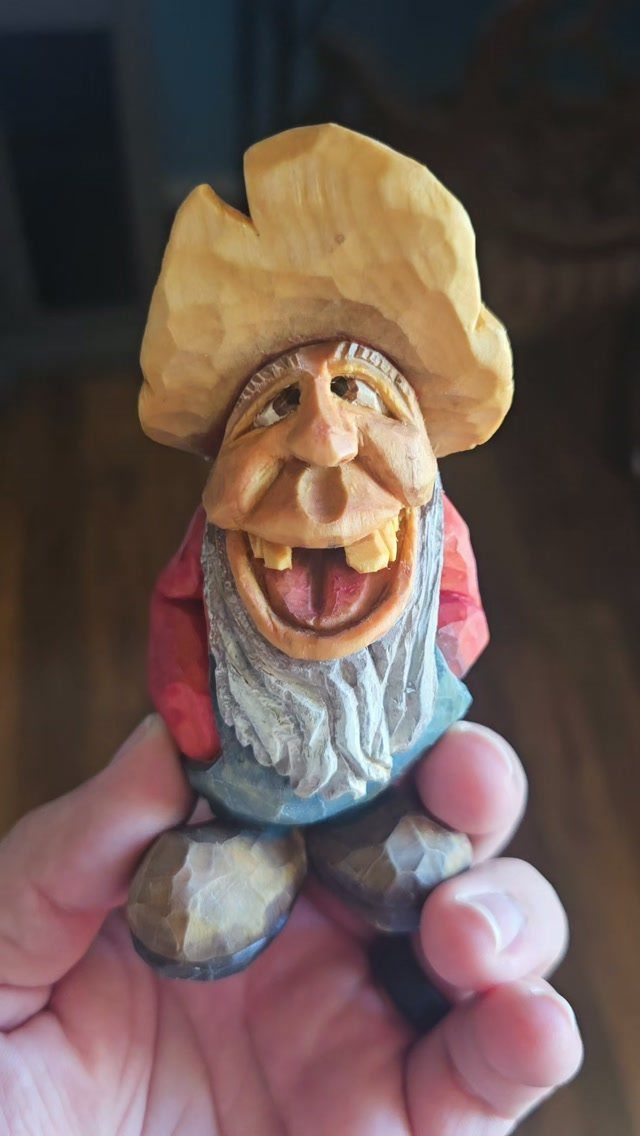
Big hat, white beard, red coat: a whimsical character carved small enough to sit in one hand is a forgiving place to start carving.
The oversized hat hides the face, so you carve less detail where it is hardest to get right.
Keep the shapes chunky and let the paint finish the character.
Make a few at once. They are quick to repeat.
21. Inlaid Wood Landscape Frame
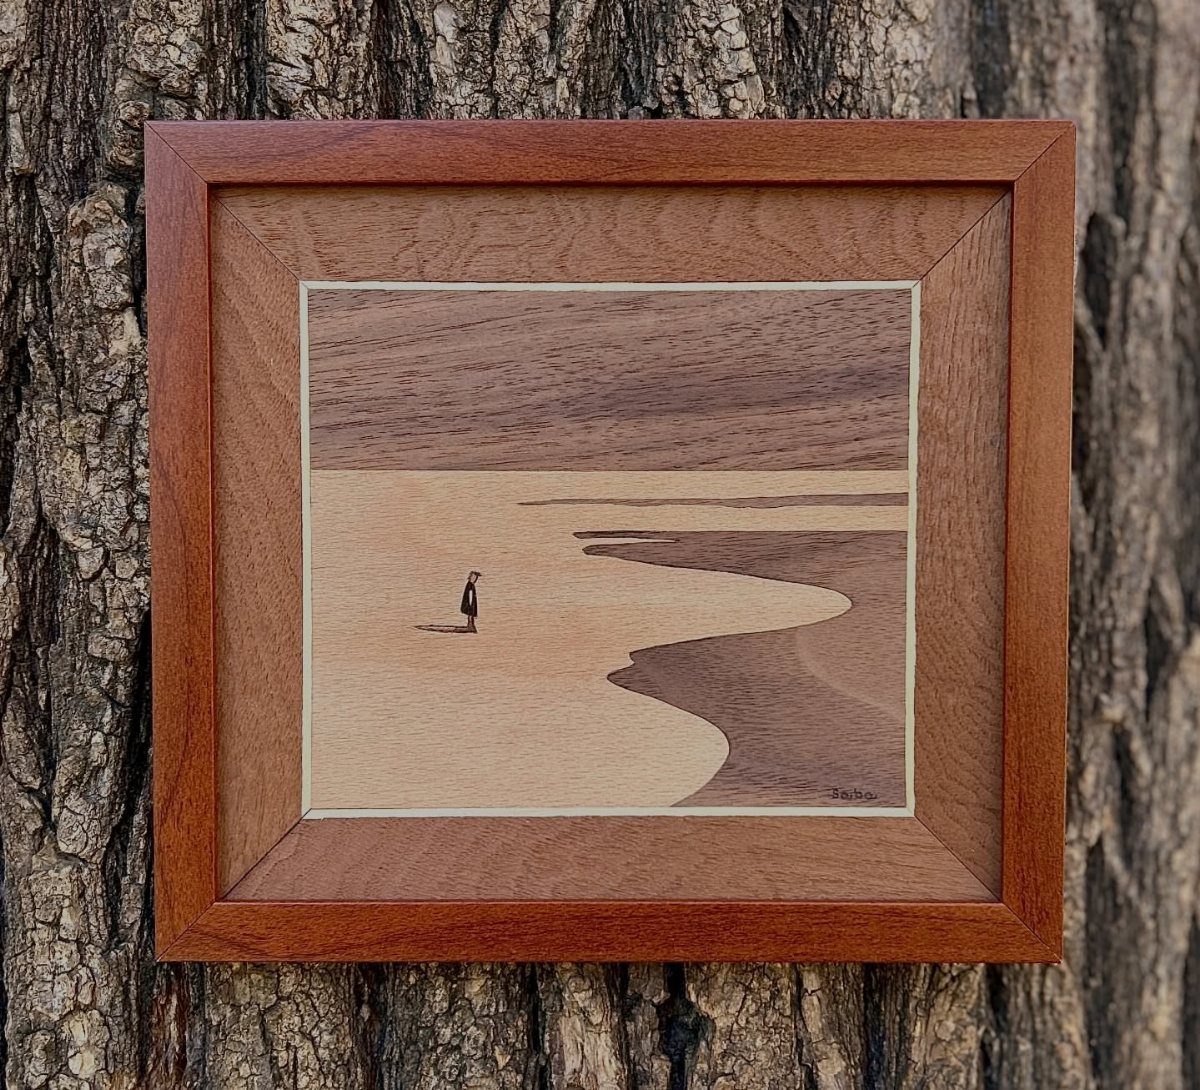
Natural wood tones can paint a beach scene without a drop of paint. Choose pieces whose grain already looks like sand, sky or water, then cut and fit them together like a puzzle.
A single small figure and a lot of open space keep the scene calm, and a textured trunk-like piece at the side adds weight. Cut each piece slowly, because inlay gaps show.
This is patient work, better spread over several sessions than squeezed into one afternoon.
22. Tabletop Wooden Butterfly Sculpture
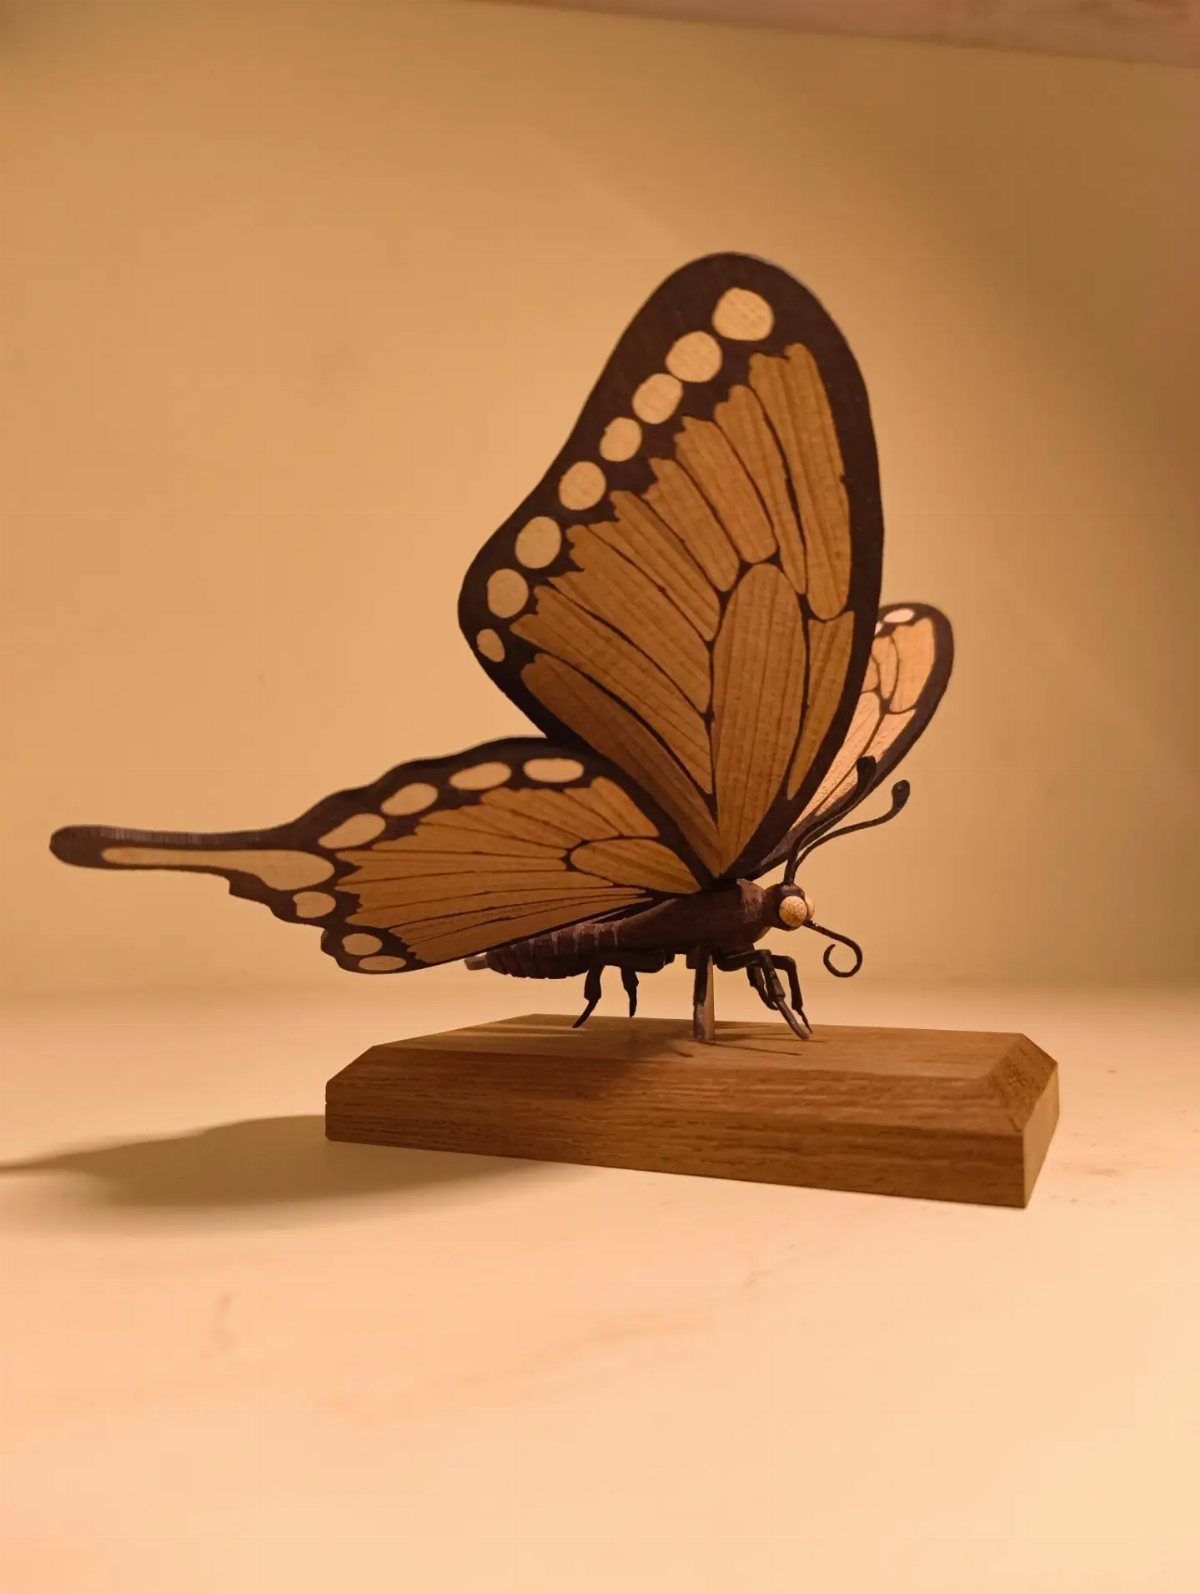
Mounting a carved butterfly on a block of natural wood turns it into a tabletop piece, with no wall space needed. That makes it a good fit for a small apartment or a shelf with room to spare.
Shape the wings first, then finish them with a clear coat or a light stain so the natural wood grain and the brown and tan tones carry the pattern.
Fix the body to the base with glue once the paint has dried.
Leave the block unpainted. Bare wood sets off the color.
23. Layered Wood Crosses
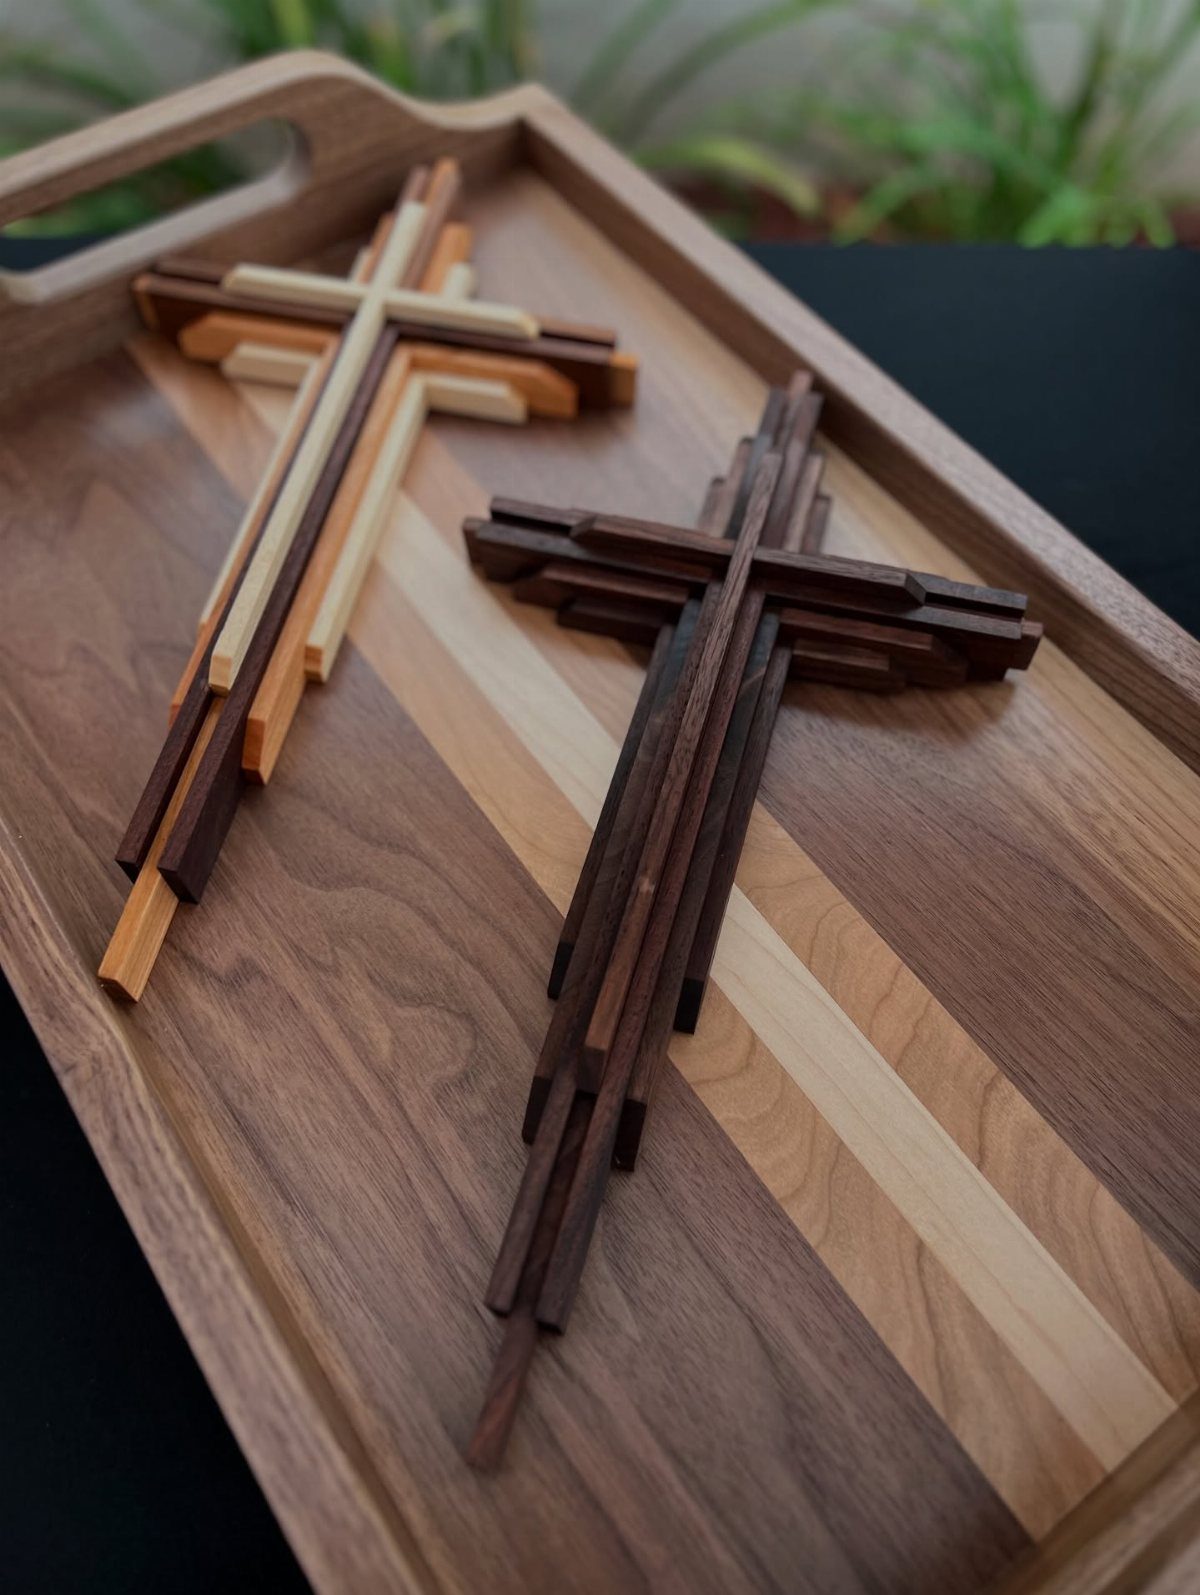
Strips of light and dark wood, glued side by side, make a cross with built-in stripes. No paint is needed, because the contrast between the tones does the work.
Cut all the strips to the same width so the layers stack cleanly, and alternate light and dark as you glue. Sand the edges flat once the glue sets.
Make two in different brown mixes and set them on a tray, where they look like a matched pair.
24. Carved Gnome Shelf Decor
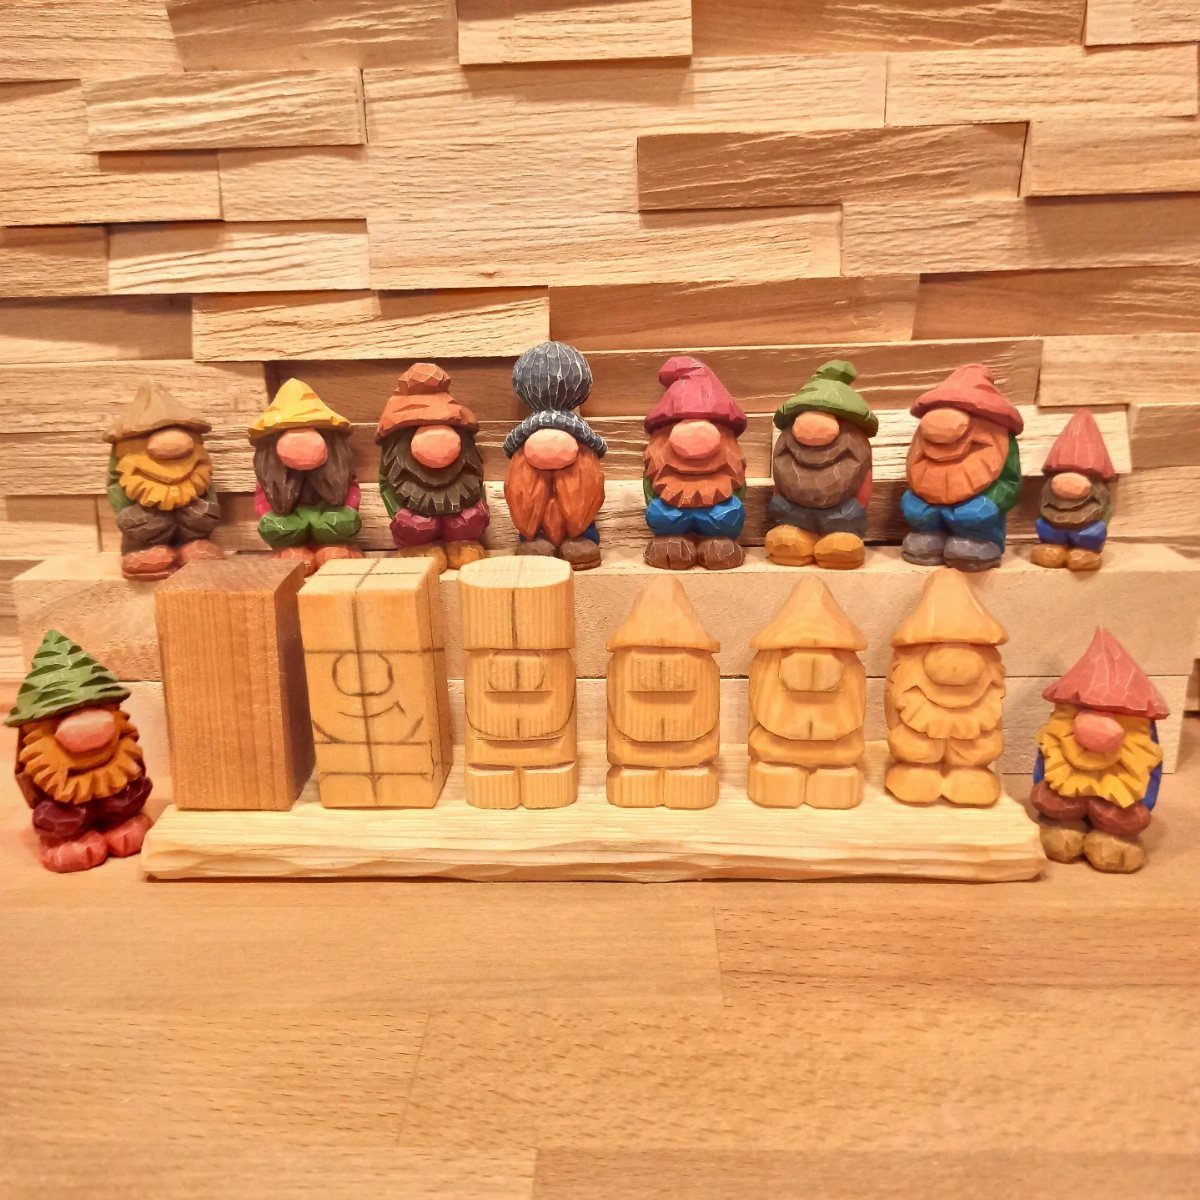
Small gnomes are an easy way to fill floating shelves, because each one is a short carving. Give every gnome a different hat color and the group feels lively even when the bodies are plain wood.
Carve some standing and some from simple blocks, which makes for a nice change in height.
Carve a gnome whenever you have a spare hour, and the shelves fill up one small figure at a time.
25. Interlocking Wood Puzzle Art
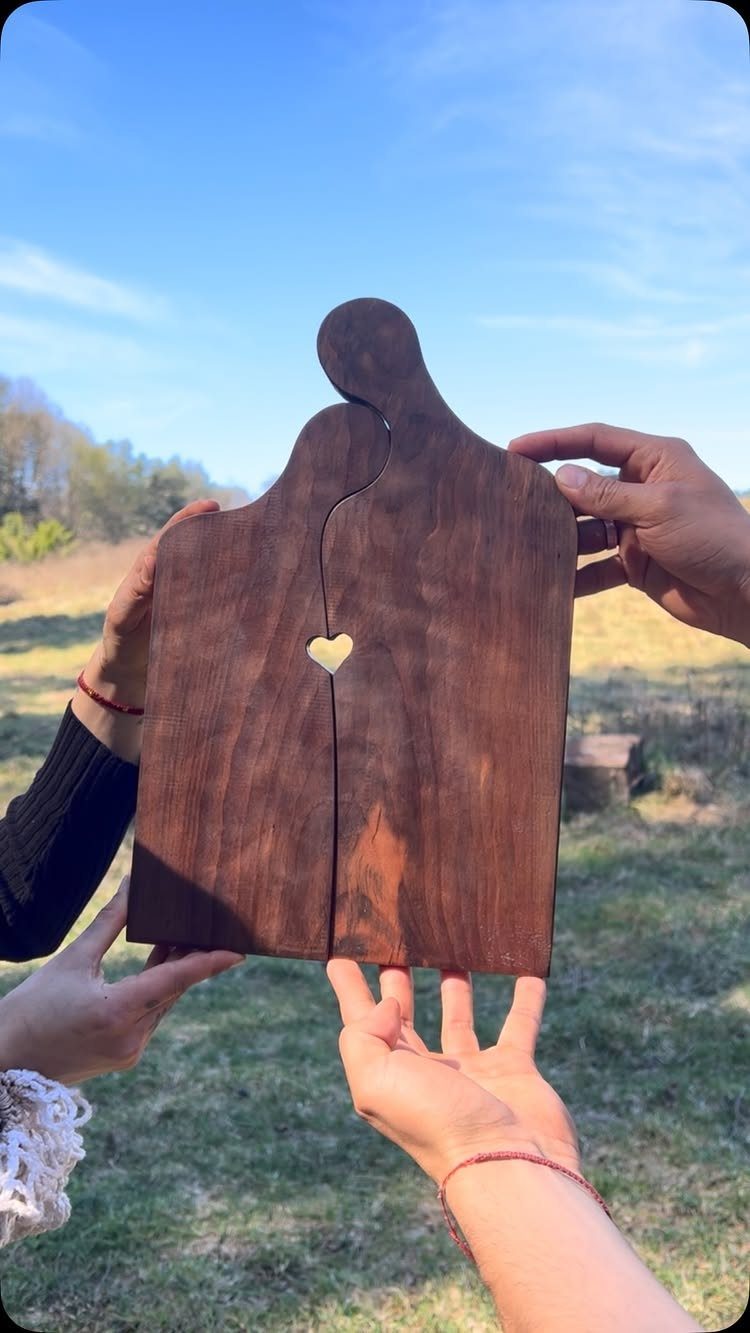
Two dark wooden pieces that lock together into a kissing couple, with a heart cut out between them, make a puzzle you can hold up like a small sculpture.
The dark wood keeps the silhouette bold, and the heart is the only detail it needs.
The whole design depends on the joint. Draw the outline on paper first, trace it onto the wood, and cut the dividing line slowly with a scroll saw or coping saw.
A fit that is too tight won’t slide together, and one that is too loose looks sloppy.
Test the pieces on scrap before cutting the real wood. Sand the cut edges lightly so they slip into place.
What to Know Before Buying
Time is usually the first thing to settle, so decide how many hours you have before you weigh anything else.
Wood art comes painted, printed or carved, and each reads differently on a wall. Painted pieces bring color, printed ones give you crisp detail, and carved ones add shadow and texture.
Measure your wall space before you shop, and mark the footprint with painter’s tape so you can judge the scale in the room.
Then ask what you want to see every day. A piece you like in a photo can feel wrong at full size.
Multi-piece sets are common, and a single pack often holds several matching designs, which can work out cheaper per piece than buying one at a time.
That can be a good way to fill a wall on a budget, but only if you like most of the designs in the set.
Quality Factors
Weight matters more than most buyers expect, because anything on a wall has to stay there. A lightweight piece is safer to hang and easier to handle, and a heavy one can come crashing down if the hanger is wrong.
Because wood weighs so little compared with metal or stone, nearly any piece will hang on a home or office wall without much fuss. Still, lift it before you commit, or check the listed weight when buying online.
Choose a piece that comes with mounting hardware.
It saves a trip to the store, and the hardware is usually matched to the piece. Check that it is attached firmly to the back before you hang it.
Common Wood Types
Cedar, fir, mahogany and pine are the woods you will see most often in wall art, and many others turn up as well.
The wood depends on how the piece is made, so a carved piece and a painted one may start from different boards.
Pine is a good all-around choice. It is easy to find, takes paint well and cuts cleanly.
Cedar brings a warm tone and a pleasant scent. Mahogany gives a richer, deeper color, while fir has a straight, visible grain.
If weight is a worry, look at lightweight woods like balsa and spruce.
They suit large pieces that need to hang easily. Balsa is very soft, so handle it gently.
Frequently Asked Questions
What kind of paint for art on wood?
Pine takes paint well, so almost any paint you already own will work on it. Smooth each face with sandpaper before painting, because a clean surface lets the brush glide and the color settle evenly.
For pieces with several colors, paint each part before gluing and run painter’s tape along the lines to keep edges crisp.
What things can be made out of wood?
Wood suits layered mountain scenes, geometric wall panels, burned pet portraits and painted slices.
It also works for mandalas, barn quilts, wavy slat walls and carved figures like gnomes and butterflies. Smaller projects include a pallet key holder, a layered cross or an interlocking puzzle, and most start from scrap boards or offcuts.
What are the different types of wood art?
Wood art comes painted, printed or carved, and each reads differently on a wall.
Paint adds color, printing gives sharp detail, and carving brings shadow and texture to the surface. Burned designs and inlay, which fits natural wood tones together like a puzzle, are 2 more ways to work.
Is wood artwork for walls safe to hang?
Yes, in most cases, because wood weighs so little compared with metal or stone. Before you buy or hang anything, lift the piece in your hands or read the listed weight if you’re ordering online.
A heavy piece can fall if the hanger is wrong, so use an anchor and a stud for large ones, and check that any included hardware is firmly attached to the back.






