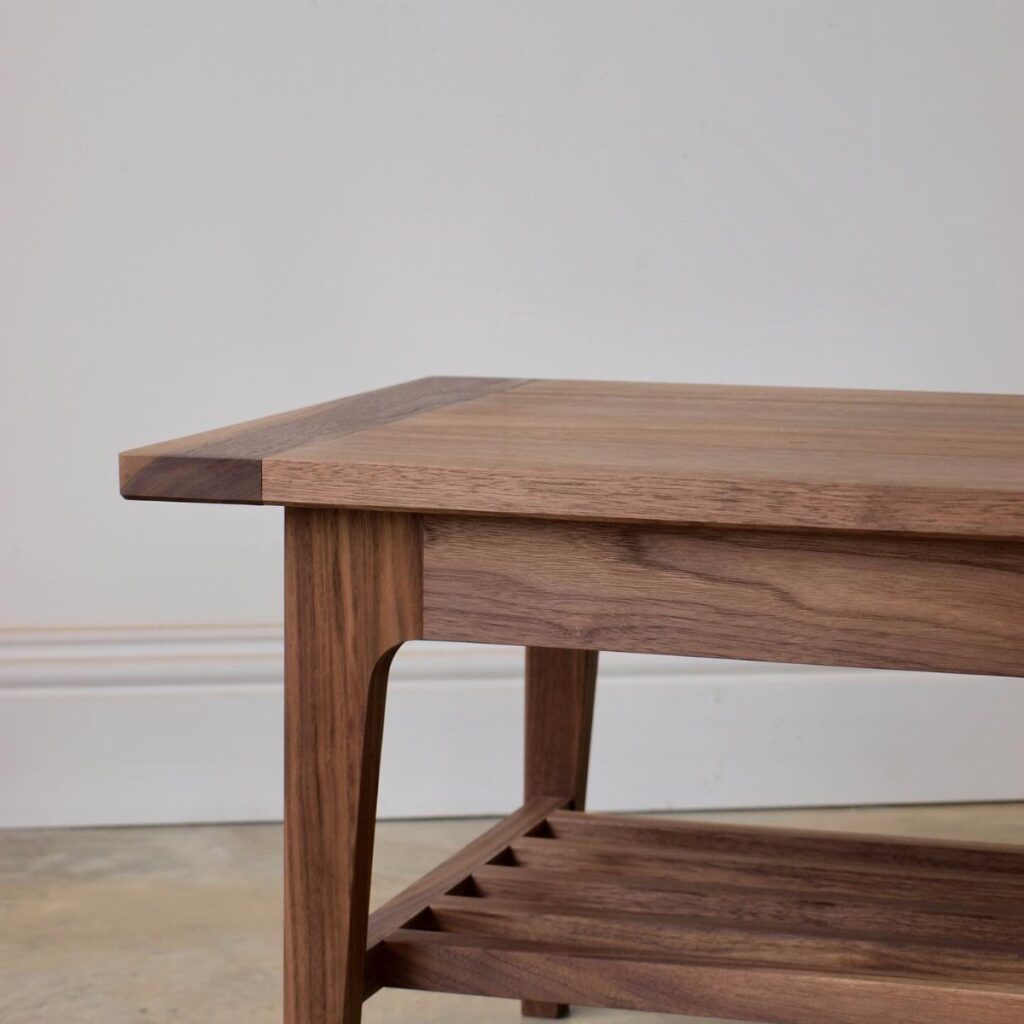
The 9 tables below run from a pallet build that costs little or nothing to a live edge slab, and the shop you already have decides which one you should make.
With no welder in the shop, pick a design that needs only a saw, a drill and a few clamps, like the pallet table or the rustic storage one with a lower shelf.
A concrete top is heavy enough that it asks for a helper, and the lift-up lid needs hardware rated for your top’s weight.
1. DIY Concrete and Wood Coffee Table
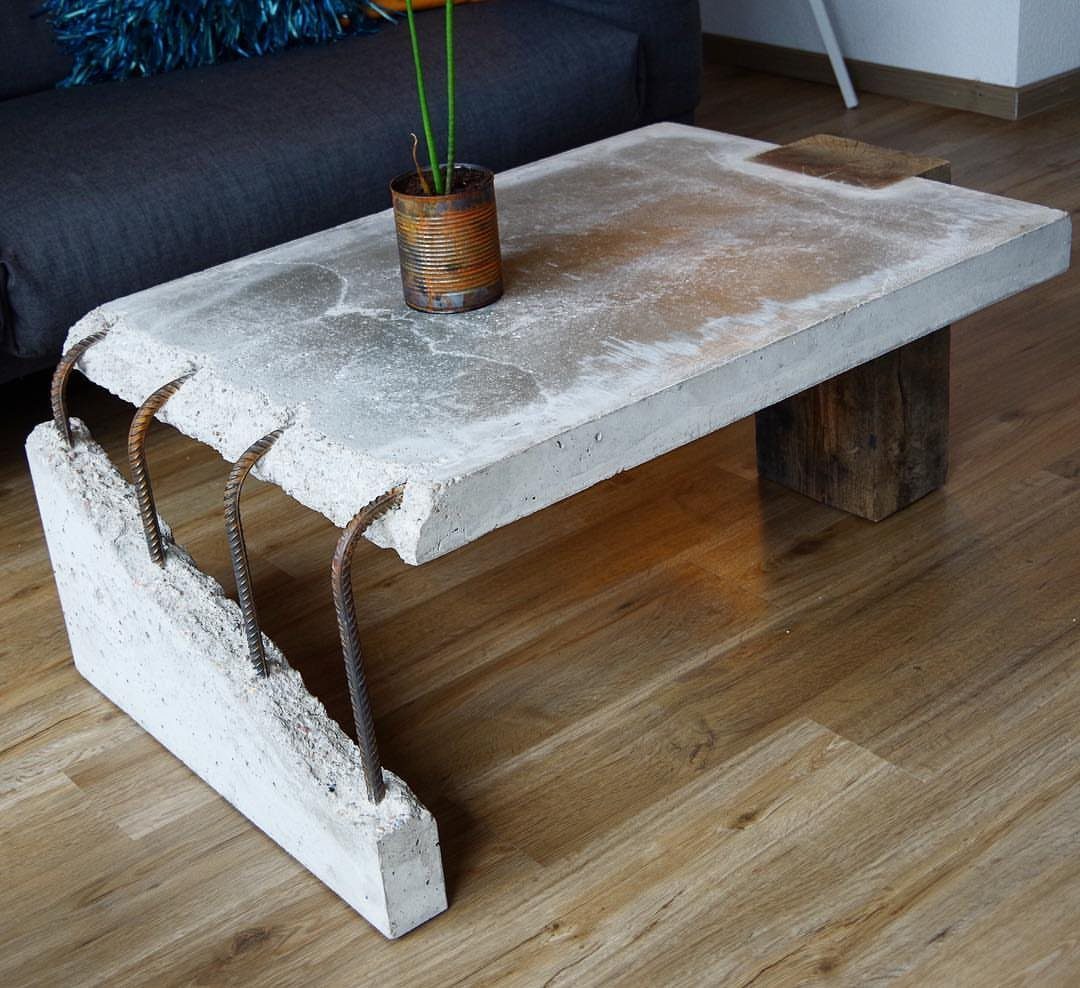
A thick concrete slab sitting on a block base gives this table real visual weight, and the wood keeps it from feeling cold. Concrete is heavy, so build the base in place or move the slab with a helper.
Rebar in the base adds strength, which matters more than looks once a slab this size is loaded. For a budget build, a mold made from scrap lumber costs almost nothing.
I would keep the wood plain and lightly finished, since the concrete already supplies the drama.
2. DIY Live Edge Coffee Table
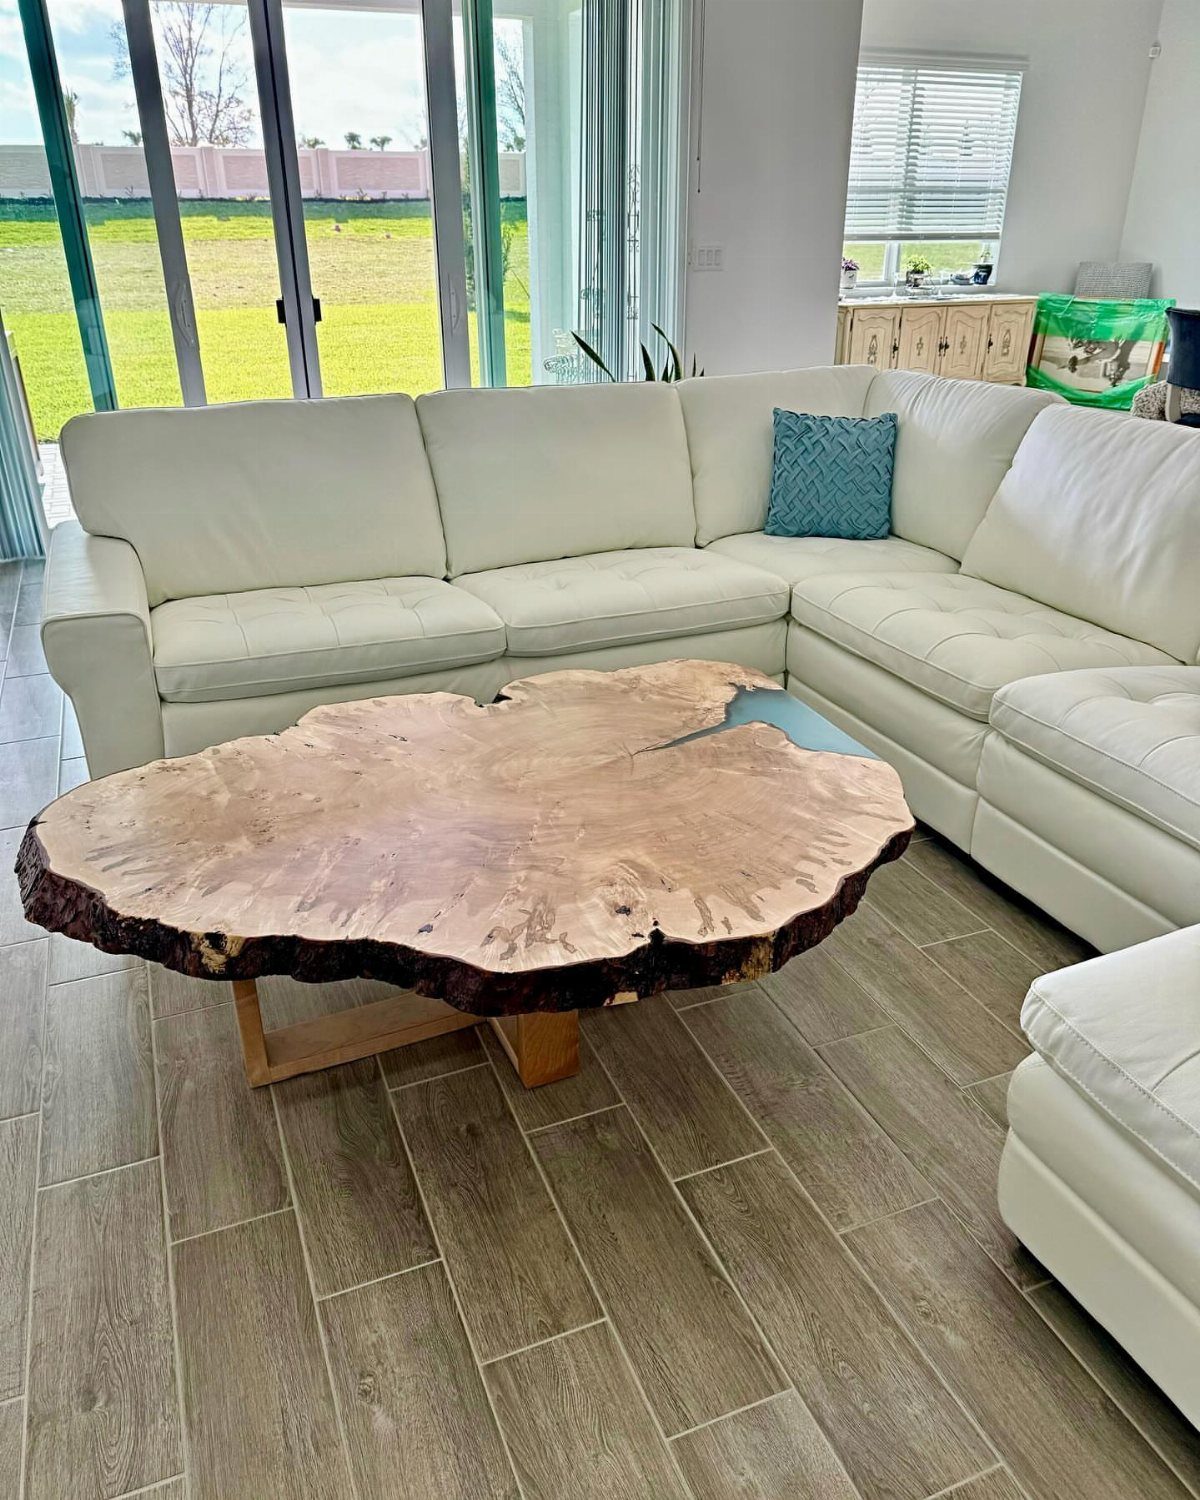
Slab choice decides everything here. Pick one whose edge has the curve and character you want, because that edge is the whole design.
The blue resin inlay fills the gaps in a way that reads as a river through the wood. Resin is the pricey part, so a small inlay keeps the cost down.
Sand the top smooth before finishing, and keep the base simple. A slab this lively needs quiet legs.
3. DIY Pallet Coffee Table
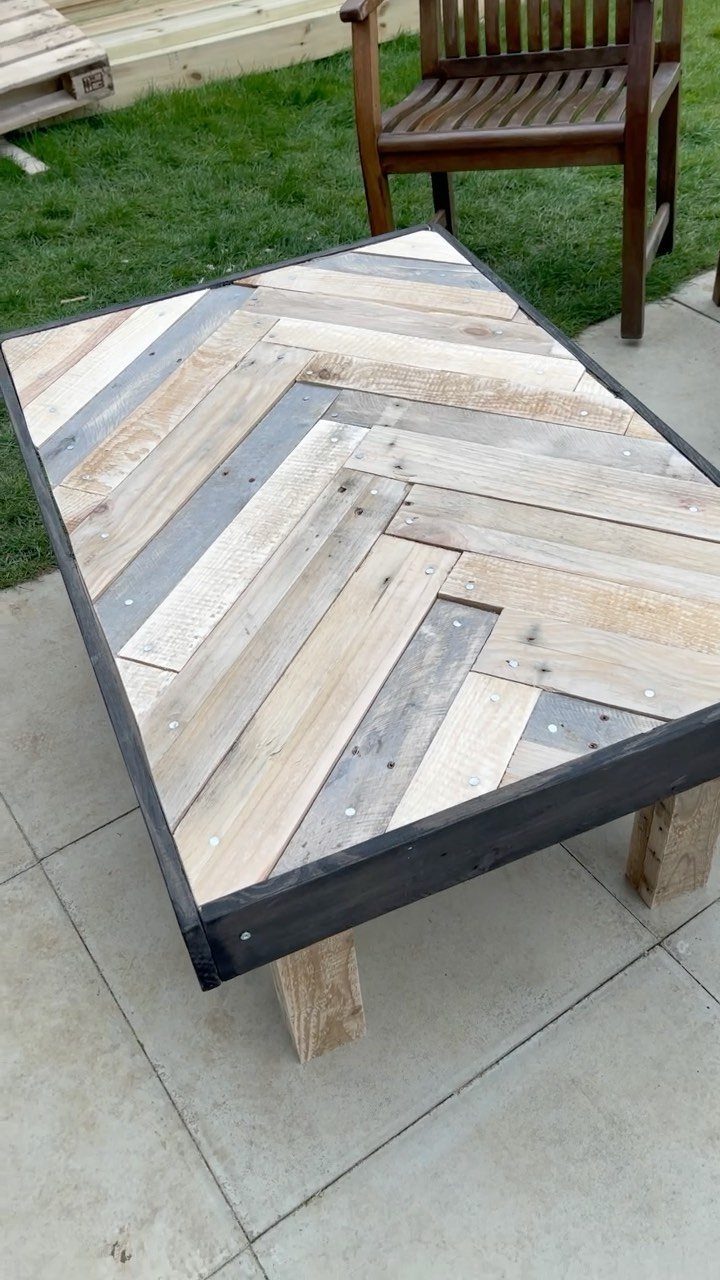
Pallets cost little or nothing, which makes this the friendliest build on the list for a tight budget. The chevron top is just planks cut at matching angles, so mark one template and repeat it.
Pull the planks apart carefully and sand them well; reclaimed boards are rough. A dark frame, like the black metal one here, tidies up the uneven edges.
A patio setting suits it, though a sealed top would help outdoors.
4. DIY Wood and Steel Coffee Table
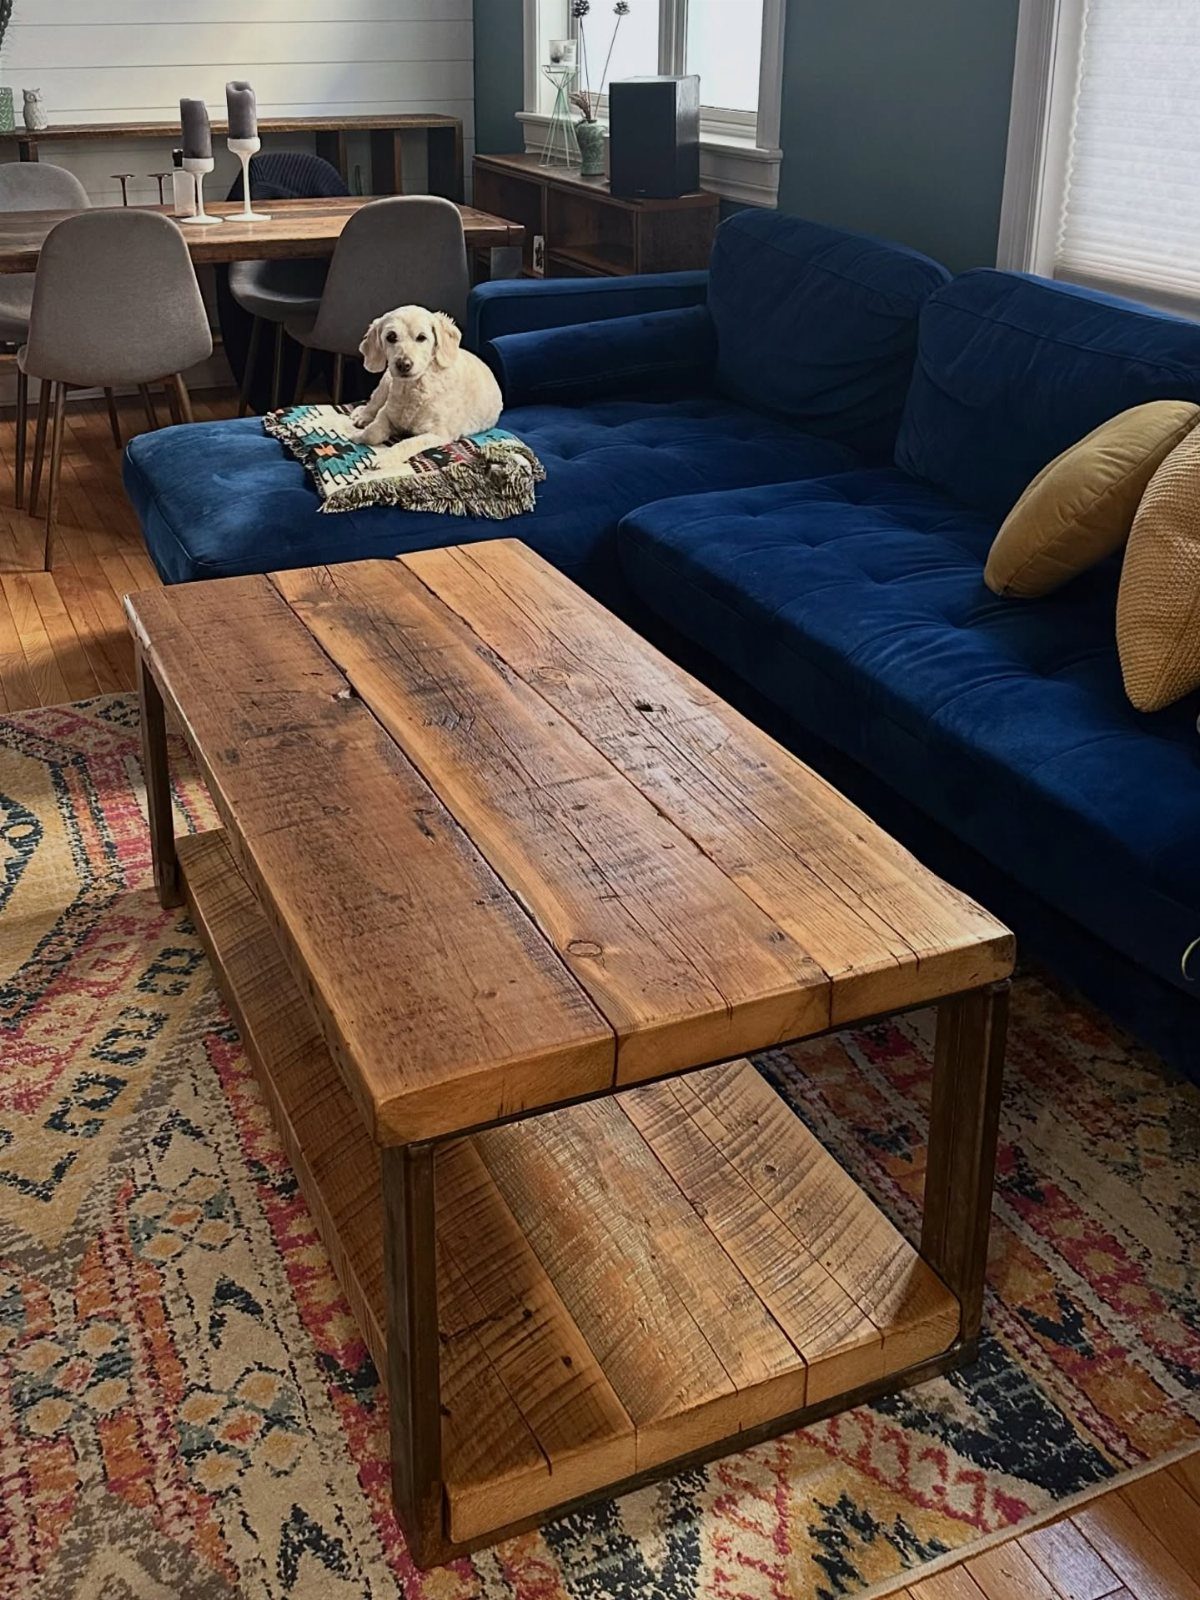
Wood against a steel frame is a pairing I keep coming back to, because each material makes the other look better. Rustic boards give warmth, and the metal gives the table a straight, solid skeleton.
If you can’t weld, bolt the frame together or buy a ready-made steel base and build only the top. That keeps the project inside an afternoon or two.
Choose boards with visible grain and knots; the rougher the wood, the more the industrial look comes through.
5. DIY Chunky Coffee Table
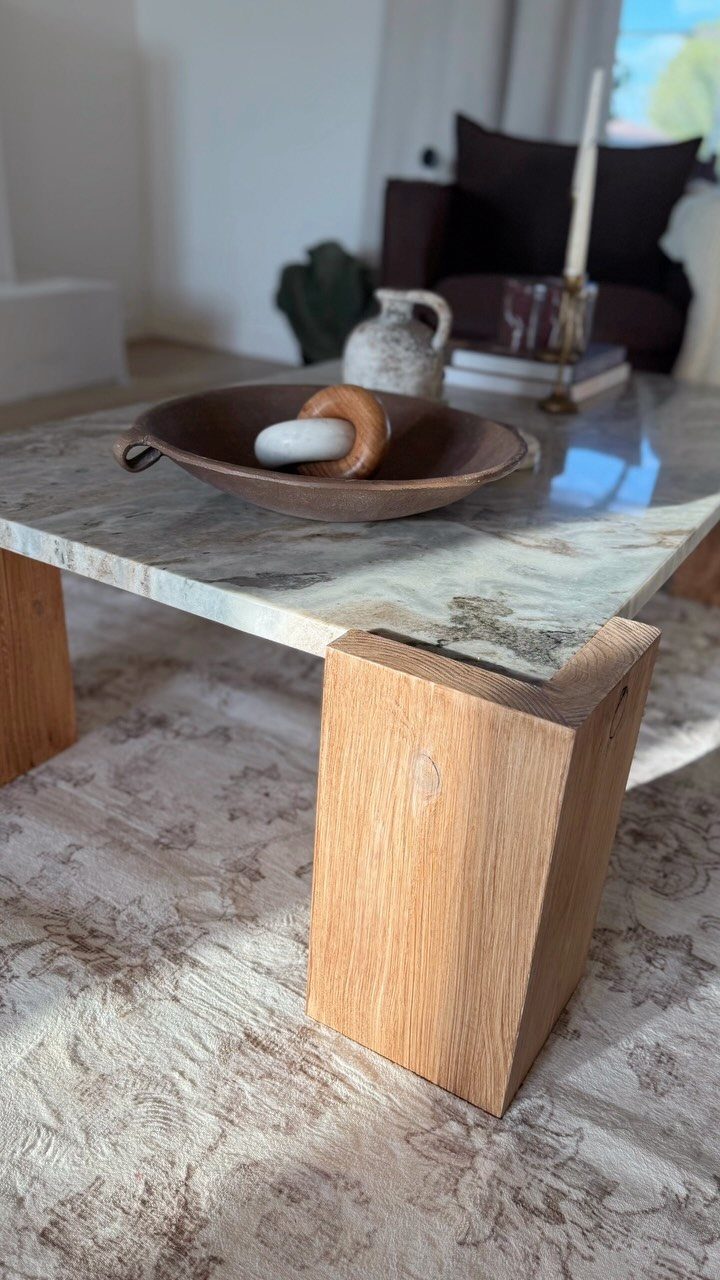
Thick block legs, 4×4 or glued-up 2×4 stock, give a table a planted look, and a marbled stone or faux-marble top adds a smooth contrast to all that chunky timber.
Keep the top slightly inset so the stone sits flush with the frame. Heavy square stock is easy to work with basic tools: cut, sand, and join.
Keep the legs the same length, or the top will rock. I like a plain finish on the wood so the stone pattern gets the attention.
Stone tops can be bought as an offcut or remnant, which helps the budget.
6. DIY Round Coffee Table
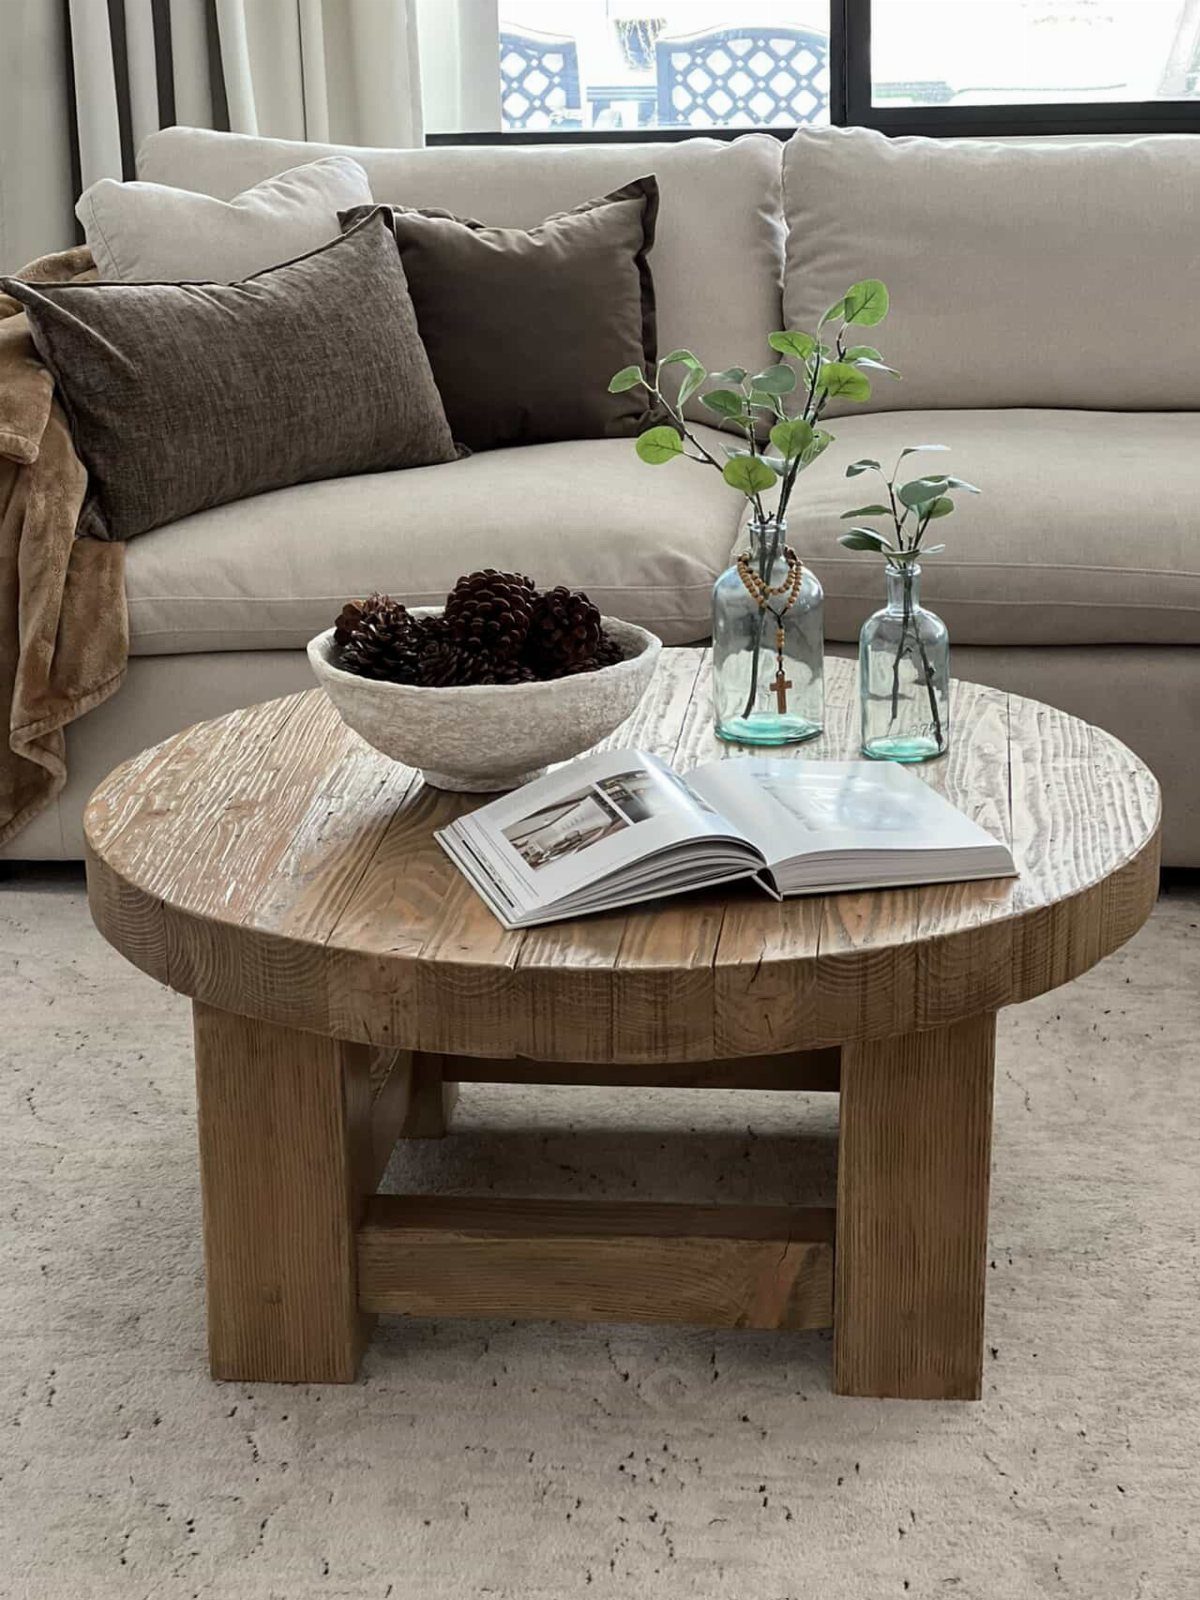
A round top has no corners to bump, which is a real plus in a tight living room.
Cutting a clean circle is the hard part. A jigsaw and a trammel pivot, or a router on a string-and-nail guide, will get you there, then sand the edge smooth.
Glue up boards for the top if you lack one wide piece.
7. DIY Farmhouse Coffee Table
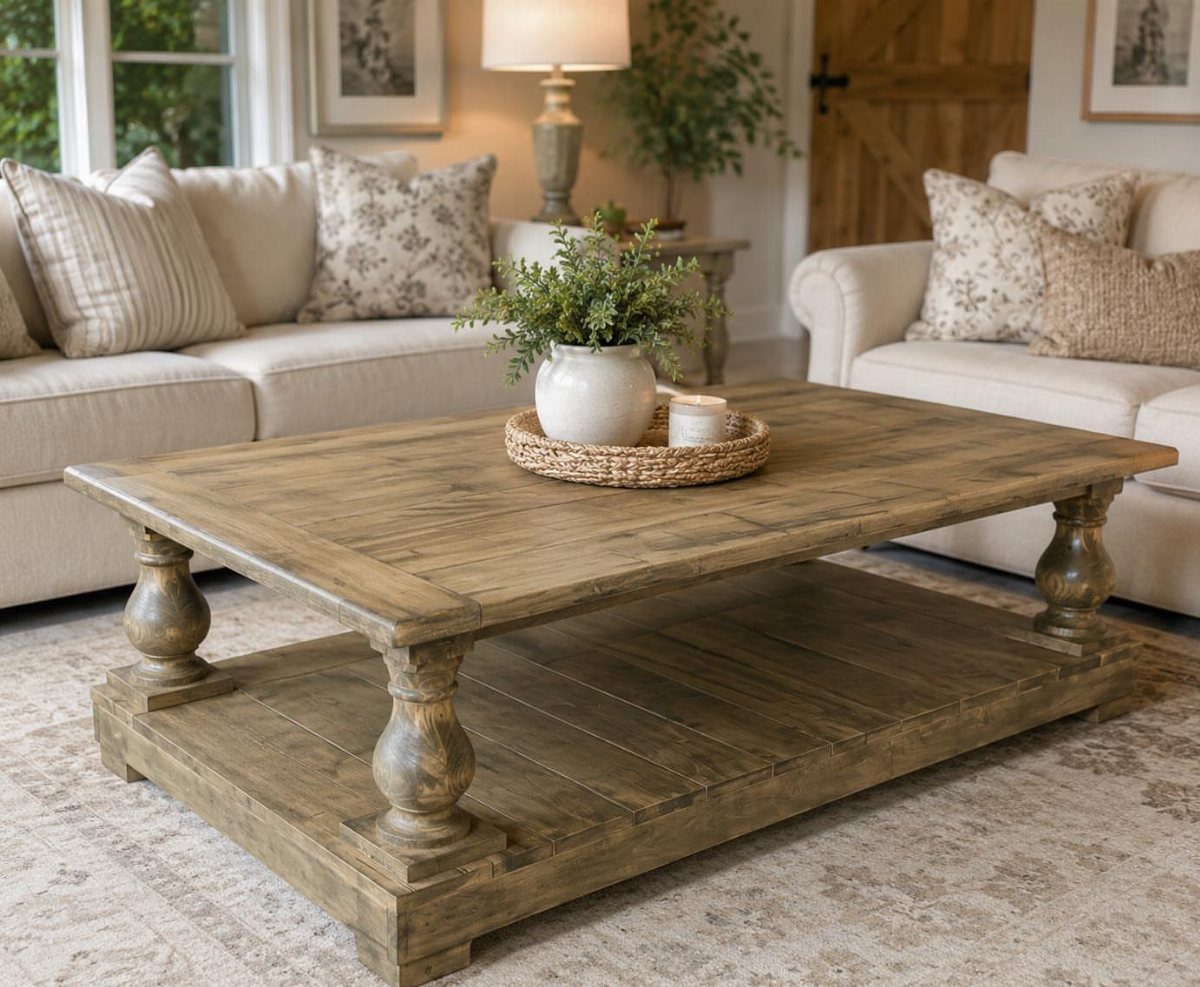
Turned legs and a lower shelf are what make this table read as farmhouse, and the pairing stays friendly to a home shop.
Buy ready-made turned legs rather than making them, since a lathe is the one tool most of us don’t have.
The lower shelf does double duty: it stiffens the frame and gives you a spot for books or a basket. I’d keep the finish soft and natural so the wood grain carries the rustic feel.
Any difference in leg length shows up as a wobble, so mark the cut line once and clamp a stop block to the saw so every leg matches.
8. DIY Rustic Storage Coffee Table
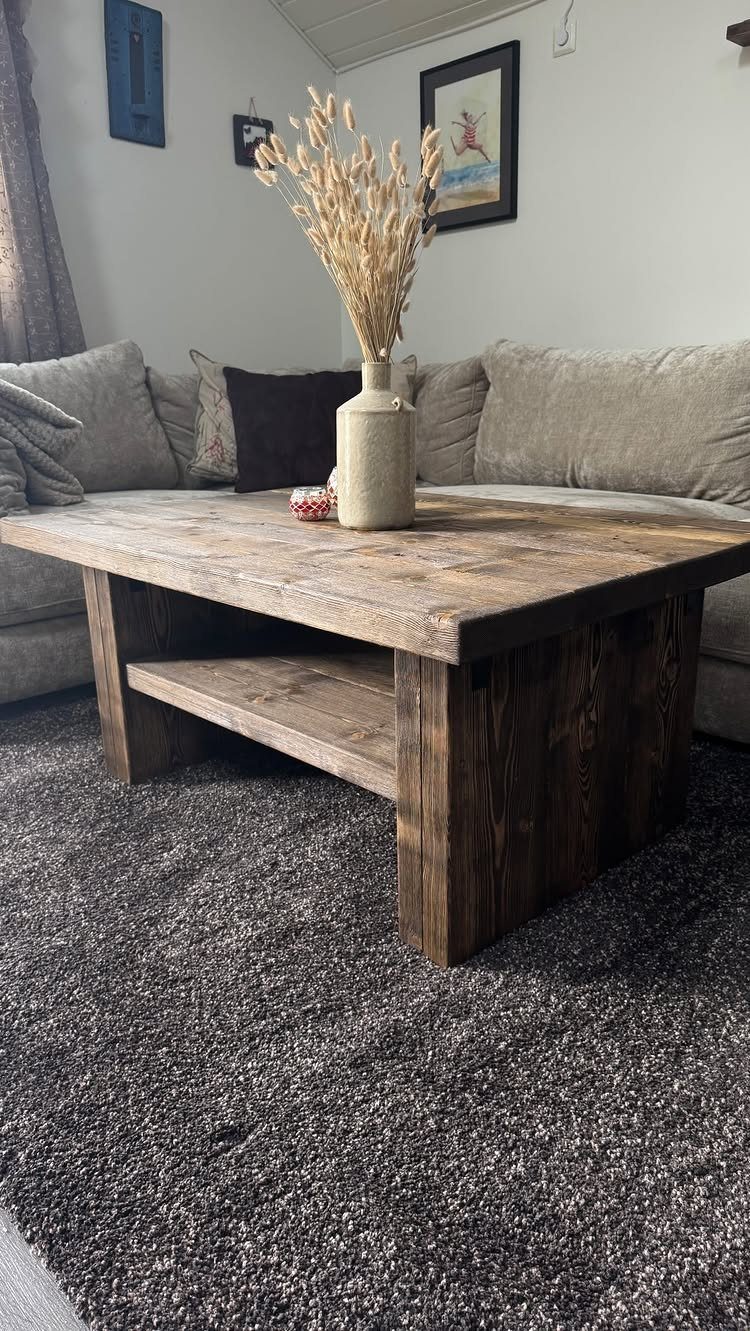
A table like this is a good first build for beginners: a top, a lower shelf and legs, with no tricky joinery. The shelf is the storage, so it needs no drawers or hinges.
A dark stain hides small flaws in the wood, which forgives a first build. Sand evenly before staining, because blotches show up fast on a dark finish.
I would set the shelf high enough to hold a basket or stacked magazines, and keep the top clear for a vase.
9. DIY Coffee Table with Lift-Up Top
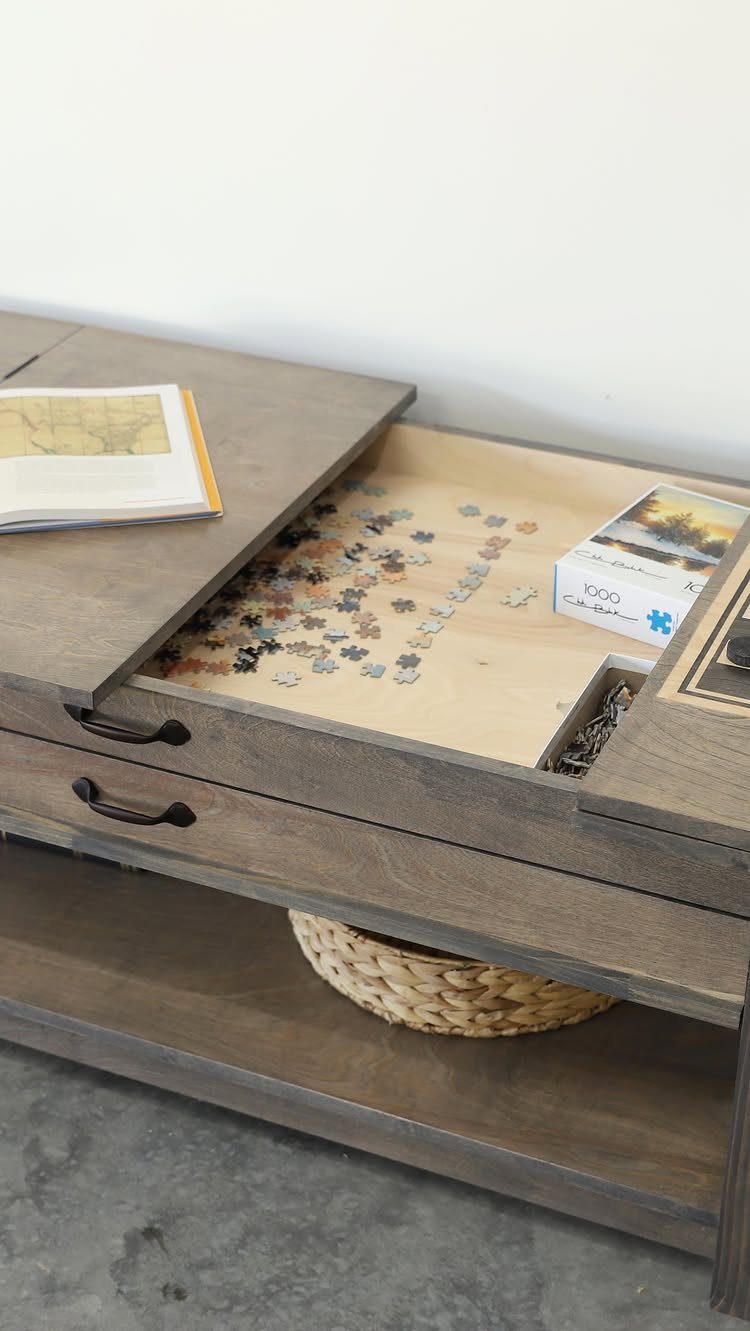
A lift-up top turns a plain coffee table into hidden storage, and a gray-brown finish helps keep the hinges and lift mechanism out of sight. The space under the lid can hold a puzzle, games or remotes.
Hinges alone won’t do the job, since a lid that drops shut can pinch fingers. Look for lift-top hardware made for coffee tables, and check that it suits the weight of your top before building.
A bottom shelf with a basket adds a second spot for clutter.
Beginner-friendly Projects
Mistakes on a piece this size are cheap to fix, and a miscut board can often become a shelf slat or a test piece.
A homemade table lets you pick the exact dimensions, wood and finish, and the lumber usually runs well under what a store charges for a comparable piece.
Pick a design with straight cuts and basic screw or glue joints for your first one, and save angled or curved work for the next.
Materials and Tools Needed
Most coffee tables start with the same short shopping list: boards for the top, boards or square stock for the frame, legs, wood glue, and screws. Sandpaper in a few grits and a finish of your choice round it out.
The tool list is just as short.
A saw, a drill, a tape measure, a square, and a few clamps handle most builds. A circular saw with a straightedge guide cuts cleanly if you don’t own a miter saw.
Buy a few extra screws and a spare board. Pre-drill every screw hole near a board end, since splits happen fast in softer lumber.
Customization Options
Size is the easiest thing to change. Measure the sofa first: a top about two-thirds the sofa’s length usually looks balanced, and the table height is commonly kept close to the seat cushion height, or slightly below it.
Finish changes the look more than any other choice. Test stain, paint, or oil on a scrap from the same board, because the same product looks different on pine than on oak.
Style comes from small decisions: square or tapered legs, a plain or beveled edge, a light or dark tone. Change one detail at a time and the table still goes together the way the plan says.






