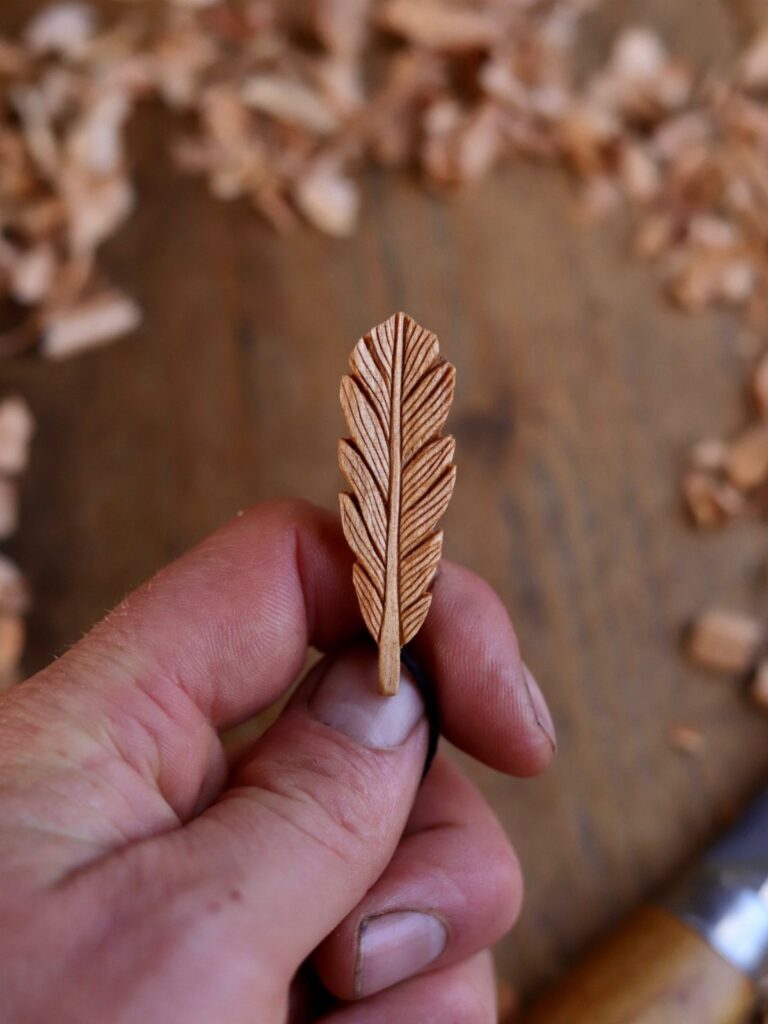
The projects here start with twig plant markers that cost almost nothing and climb toward the carved box with lid, and the effort rises along the way.
Your tool decides the pick: with one small knife, go for geometric chip carving, miniature pine trees or the carrot; with a few gouges and a plank, relief carving fits.
Fitting a lid snugly onto its body takes patience, so the carved box with lid is the slowest project here and works best after you’ve finished something simpler.
1. Relief Carving
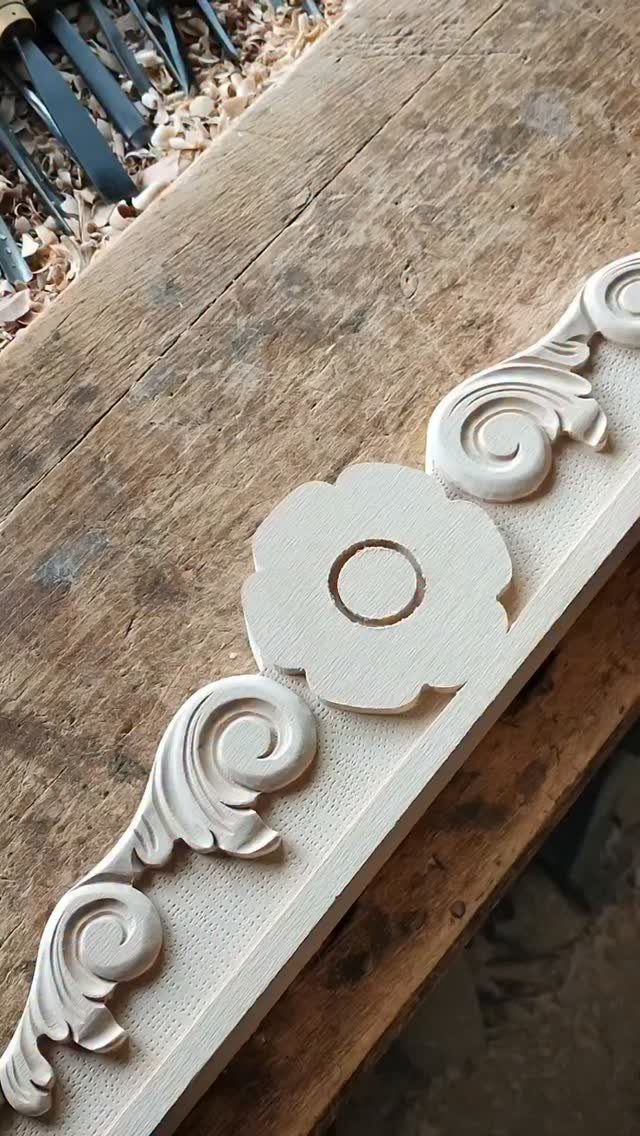
Flat wood and a few gouges are all relief carving asks for, which keeps the start-up cost low. The design stays attached to the board, so there is no 3D shape to lose track of.
Pick a light, even-grained plank such as basswood or pine; pale wood shows the cut lines clearly, and tight grain keeps the gouge from tearing out.
Start with scrolls and simple petals before tackling a full floral layout. Draw the pattern in pencil, outline it with shallow cuts, then lower the background a little at a time.
A clamp holding the board to the bench frees both hands and keeps them behind the cutting edge, where a slip can’t reach them.
There will be times during your woodcarving projects that you’ll wish you could speed things up; especially the drying process. But take things slowly and try to enjoy each step of the process.
— Dremel
2. Spoon Carving
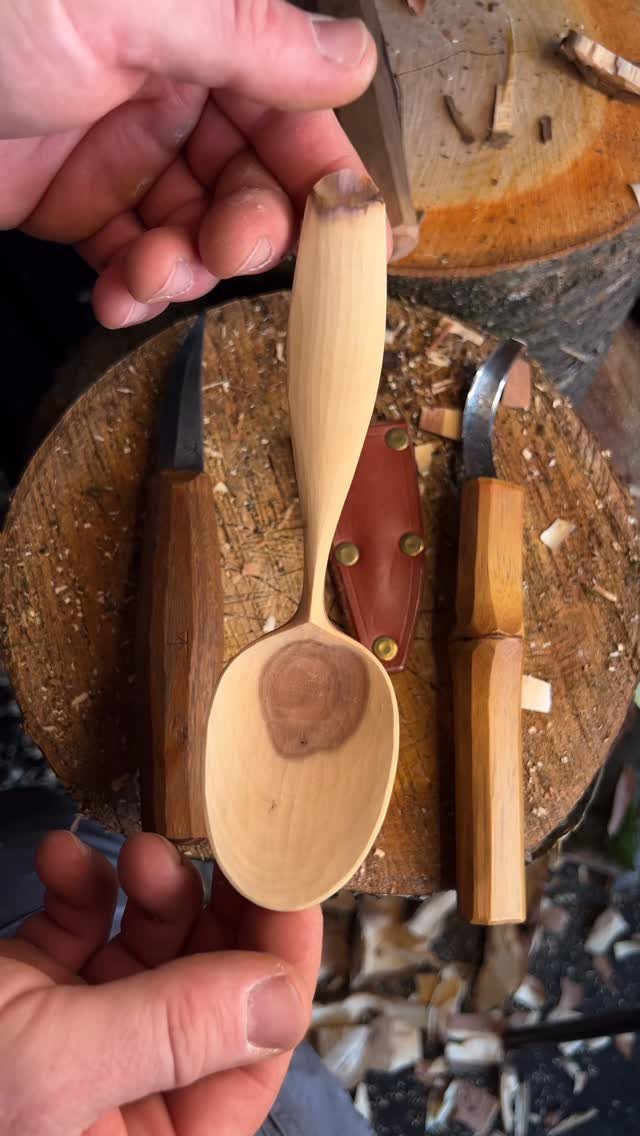
A spoon teaches more about grain than almost any other first project, because the bowl, neck and handle all cut differently. Every cut shows you which way the wood wants to split.
2 knives are enough, as the pair on the log shows, and a sheath keeps the edges safe between sessions.
Take light, controlled strokes and work with the grain, not against it. Expect the bowl to be the slow part.
Start by removing the bulk of the wood to find the basic shape, and save the finer shaping for later passes. Rushing the bowl is how spoons crack.
3. Twig Plant Markers
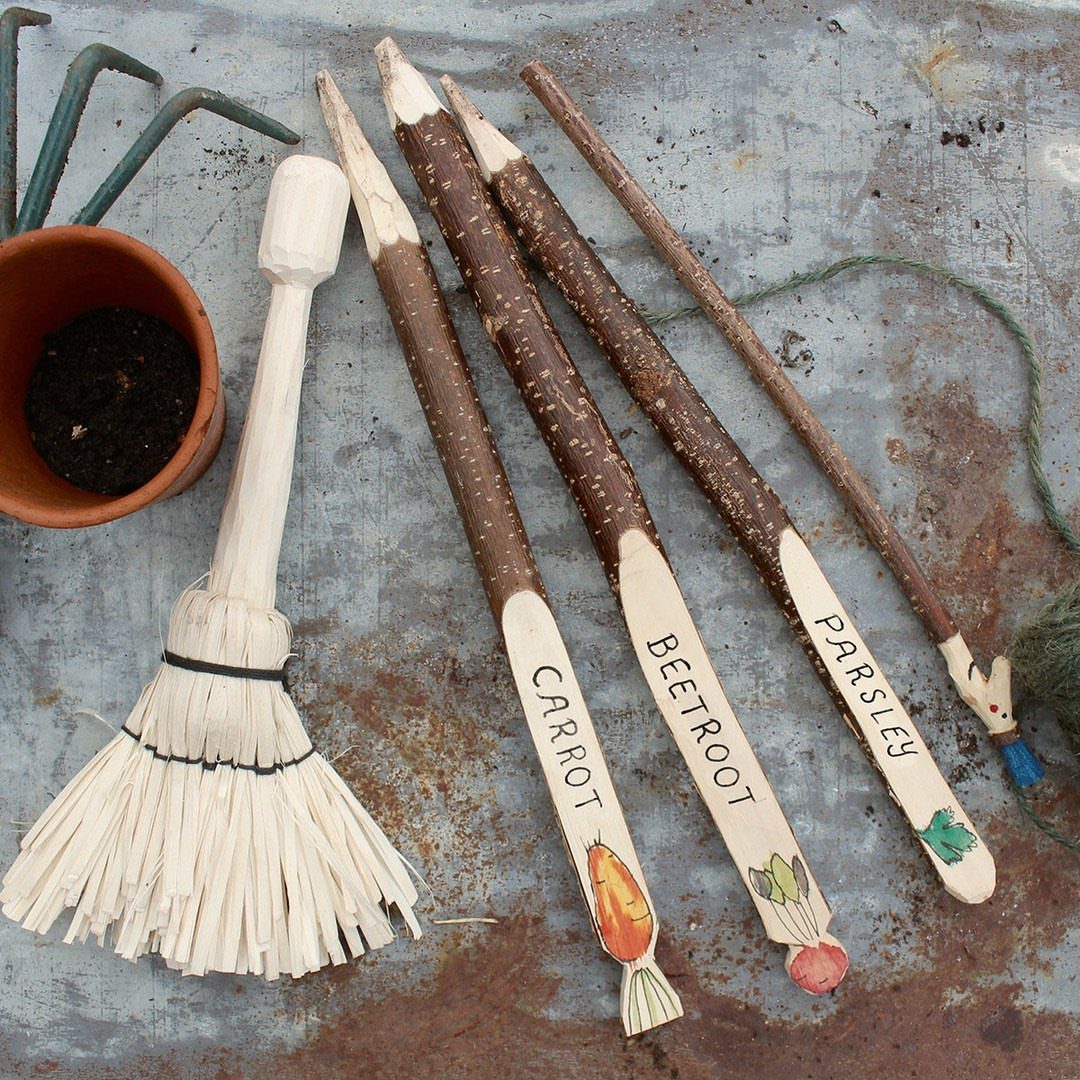
Garden markers turn a few fallen branches into something useful, and the cost is close to nothing. Each twig gets a flat face carved on one side, which gives you a clean spot for a plant name.
Shave the face smooth, then write or draw on it, as the carrot, beetroot and parsley markers do.
Sharpen the other end into a point so it pushes into soil easily. A small drawing next to the name helps you spot the row at a glance.
Pencil first, then ink if you want it to last.
4. Small Wooden Animal Figures
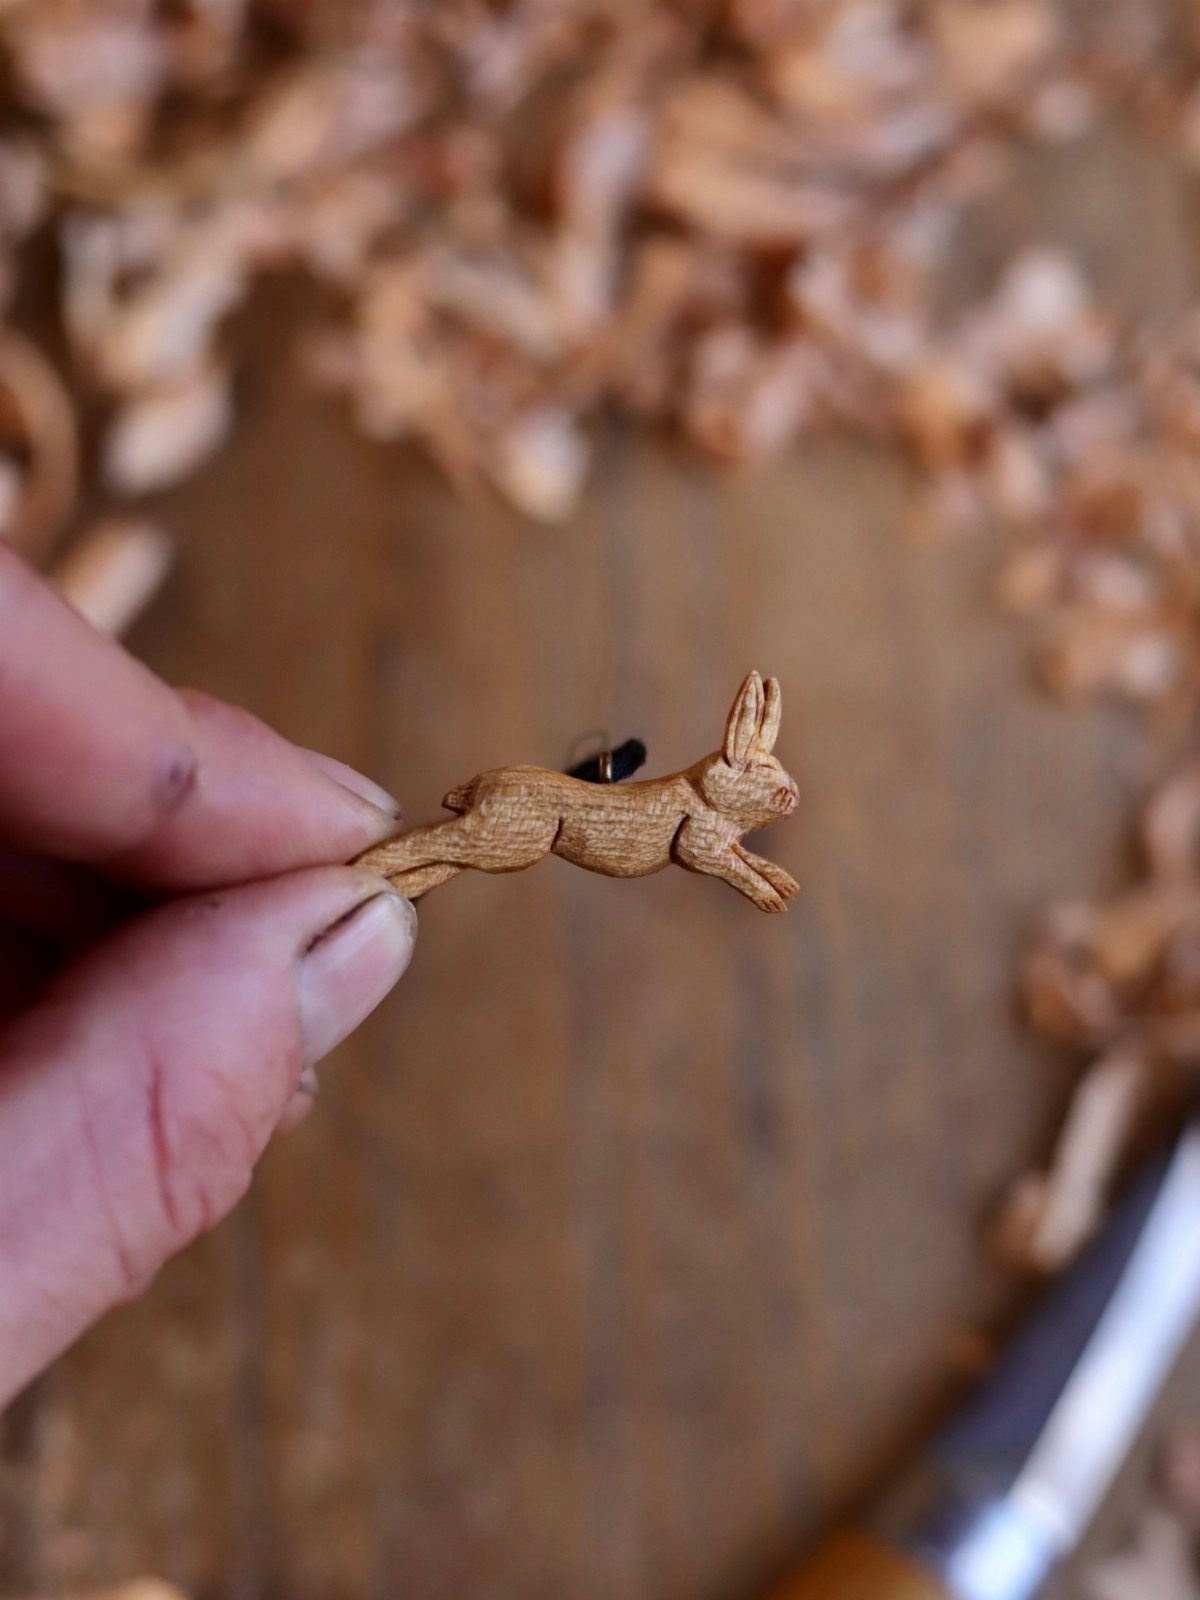
Hold a small carved rabbit in your palm and you see why animals are such a satisfying project: the whole piece fits in one hand.
Nothing needs to be perfect, since a simple body, rounded head and 2 ears already read as a rabbit.
Start with a small block of soft wood and cut away the corners to make a rough egg shape.
Add the ears last, because thin parts break easily. Keep your thumb out of the blade’s path.
A pile of light shavings is a good sign you are removing wood gradually.
5. Carved Wooden Box with Lid
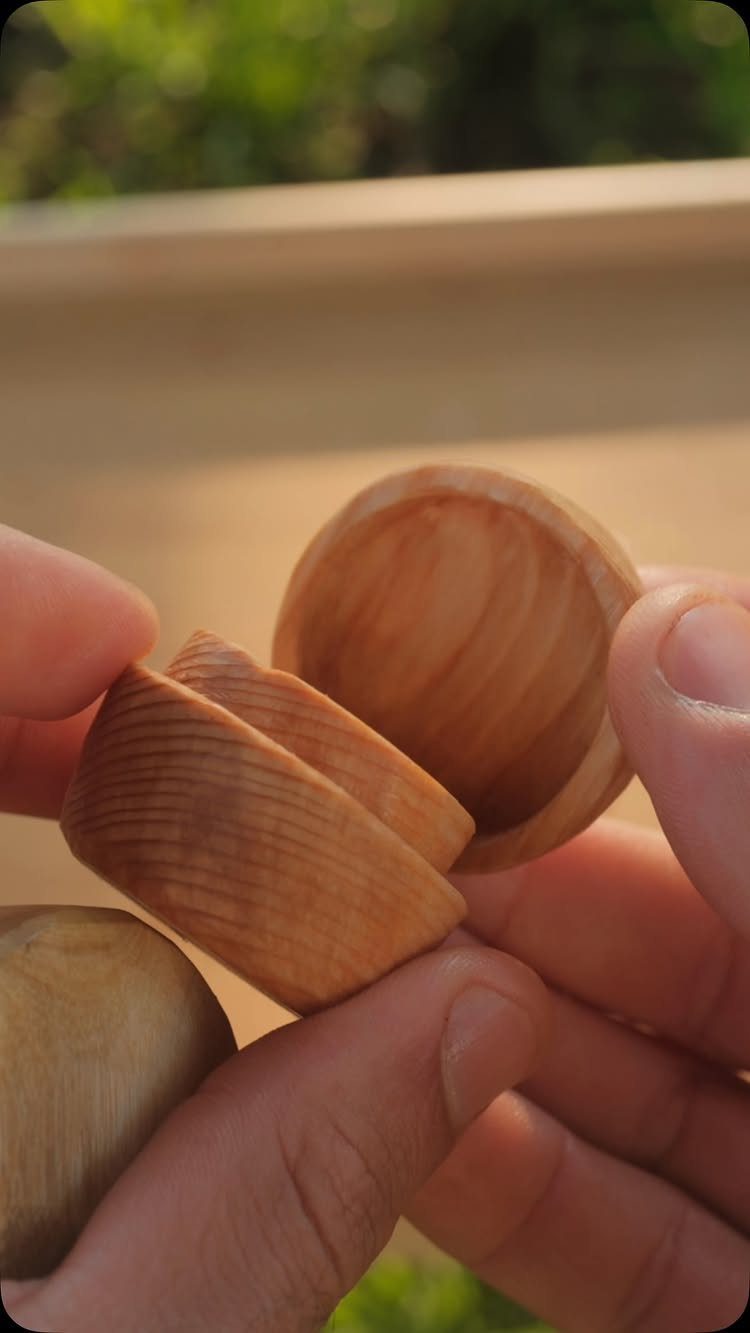
Scrap is a perfectly good starting material for a lidded box. One maker carved theirs from a piece of scrap wood found in the trash, so the cost can be zero.
The challenge is the lid, which has to sit snugly on the body.
Carve the opening first, then shape the lid to match, checking the fit often. Remove a little at a time, because taking off too much cannot be undone.
This one takes longer than a spoon, so I would try a simpler project before it.
6. Carved Letter Coasters
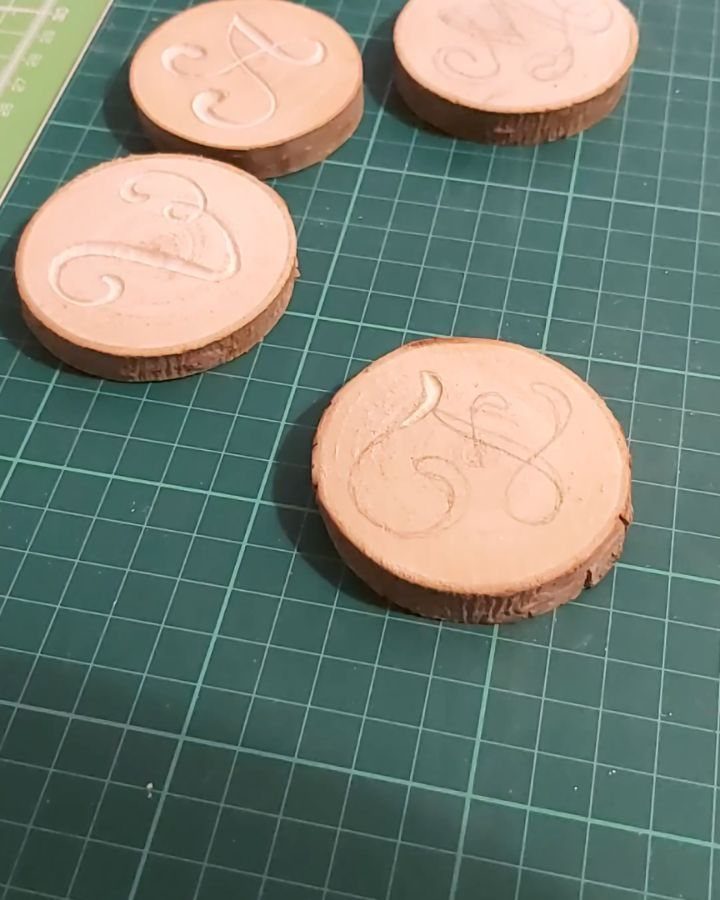
Wood slices with cursive letters make a good way to practice curved cuts on a small, forgiving surface. A round of wood already looks finished, so the lettering is the only real work.
Pencil each letter first and cut along the lines with a small V-gouge or knife.
Cursive rewards slow, shallow passes; the thin connecting strokes are easy to chip. Cut across the grain with care, since it can tear.
Practice the letters on one slice before moving to the good ones, and put a cutting mat underneath to protect your table.
7. Geometric Chip Carving
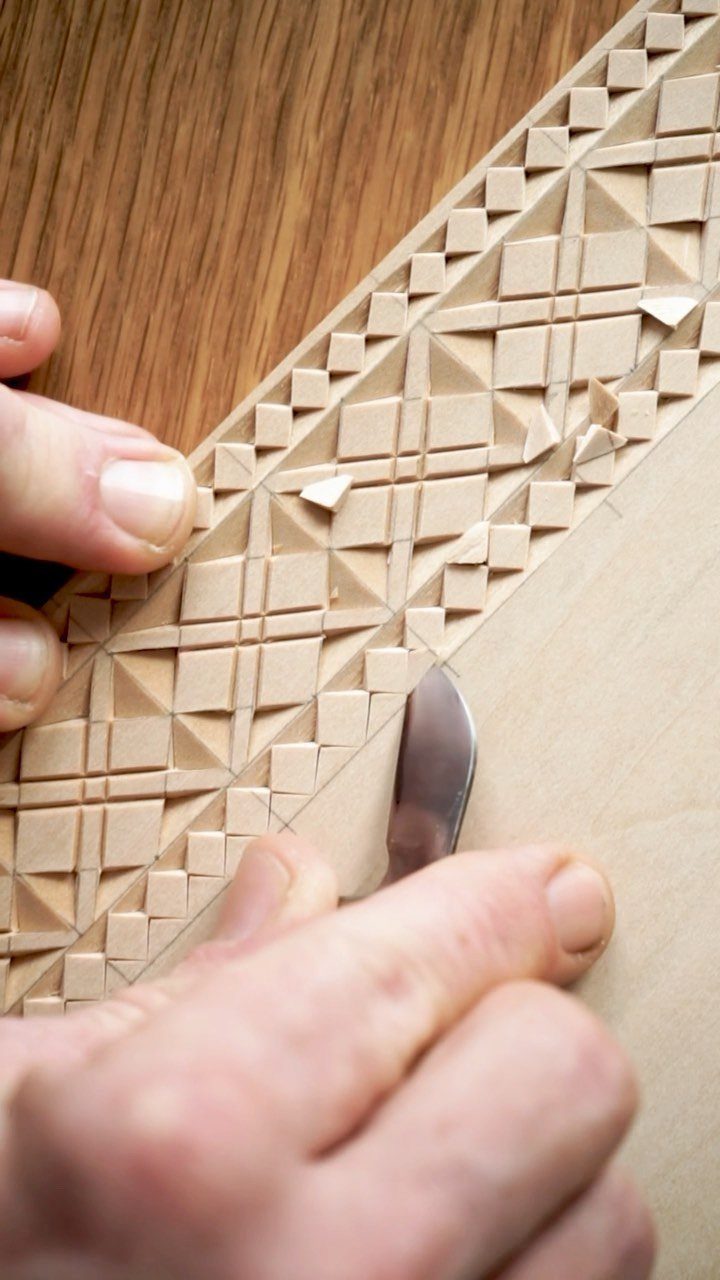
A single small knife is the whole toolkit for chip carving, and the flat board stays put on the table while you work. Each pattern is built from tiny triangular cuts, so you learn control one chip at a time.
Pick light, fine-grained wood so the pattern reads clearly.
Pencil a grid first, since even spacing is what makes geometric work look crisp. Cut slowly and keep each chip shallow; a few practice triangles on scrap save the good board.
Straight lines and simple triangles come before anything intricate.
8. Carved Miniature Pine Trees
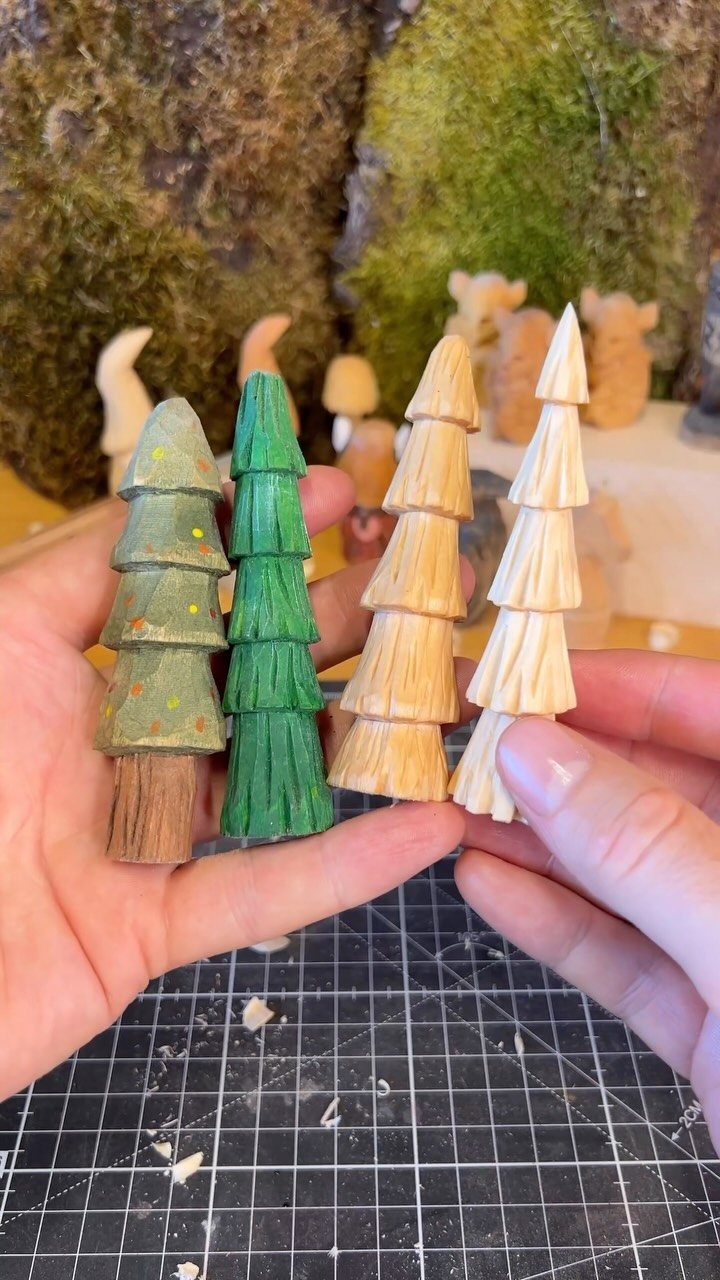
Little pine trees are close to the easiest carving there is: a tapered cone with stepped notches for branches. Soft wood and a basic knife are plenty.
Whittle a point at the top and cut shallow V-notches around the trunk, working upward in tiers. Painting is optional.
Green with small dots gives a festive look, while bare wood shows off your cuts. If you want both, carve a few and paint only some.
Make several at once; the second tree always looks better than the first.
9. Small Wooden Carrot Carving
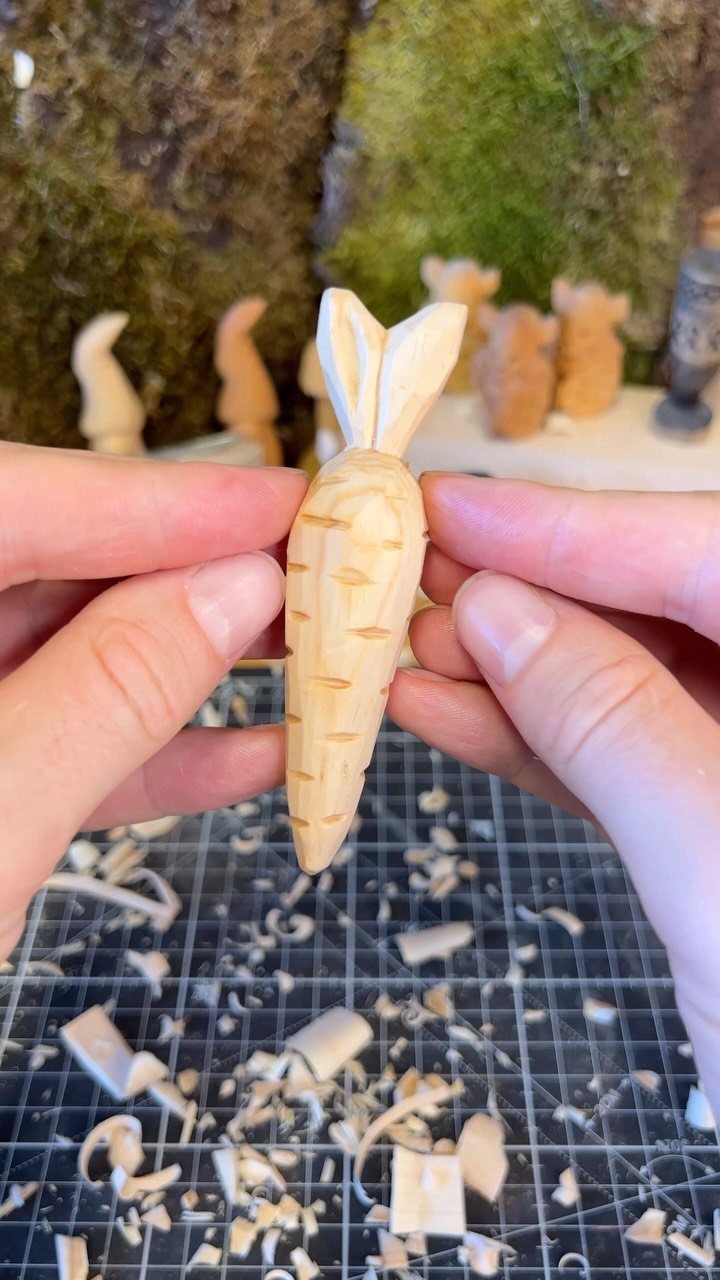
A carrot is a tapered cone with a few ring notches, which makes it a forgiving shape for a first small carving. Even a wobbly one still reads as a carrot.
Whittle the wood down to a point, then cut shallow notches around the body for the ridges.
Leave a stub at the top for the greens, or add them last so they don’t snap. Paint it orange if you like, though bare wood looks good too.
Work over a mat so the shavings are easy to sweep up.
10. Curved Wand or Stick
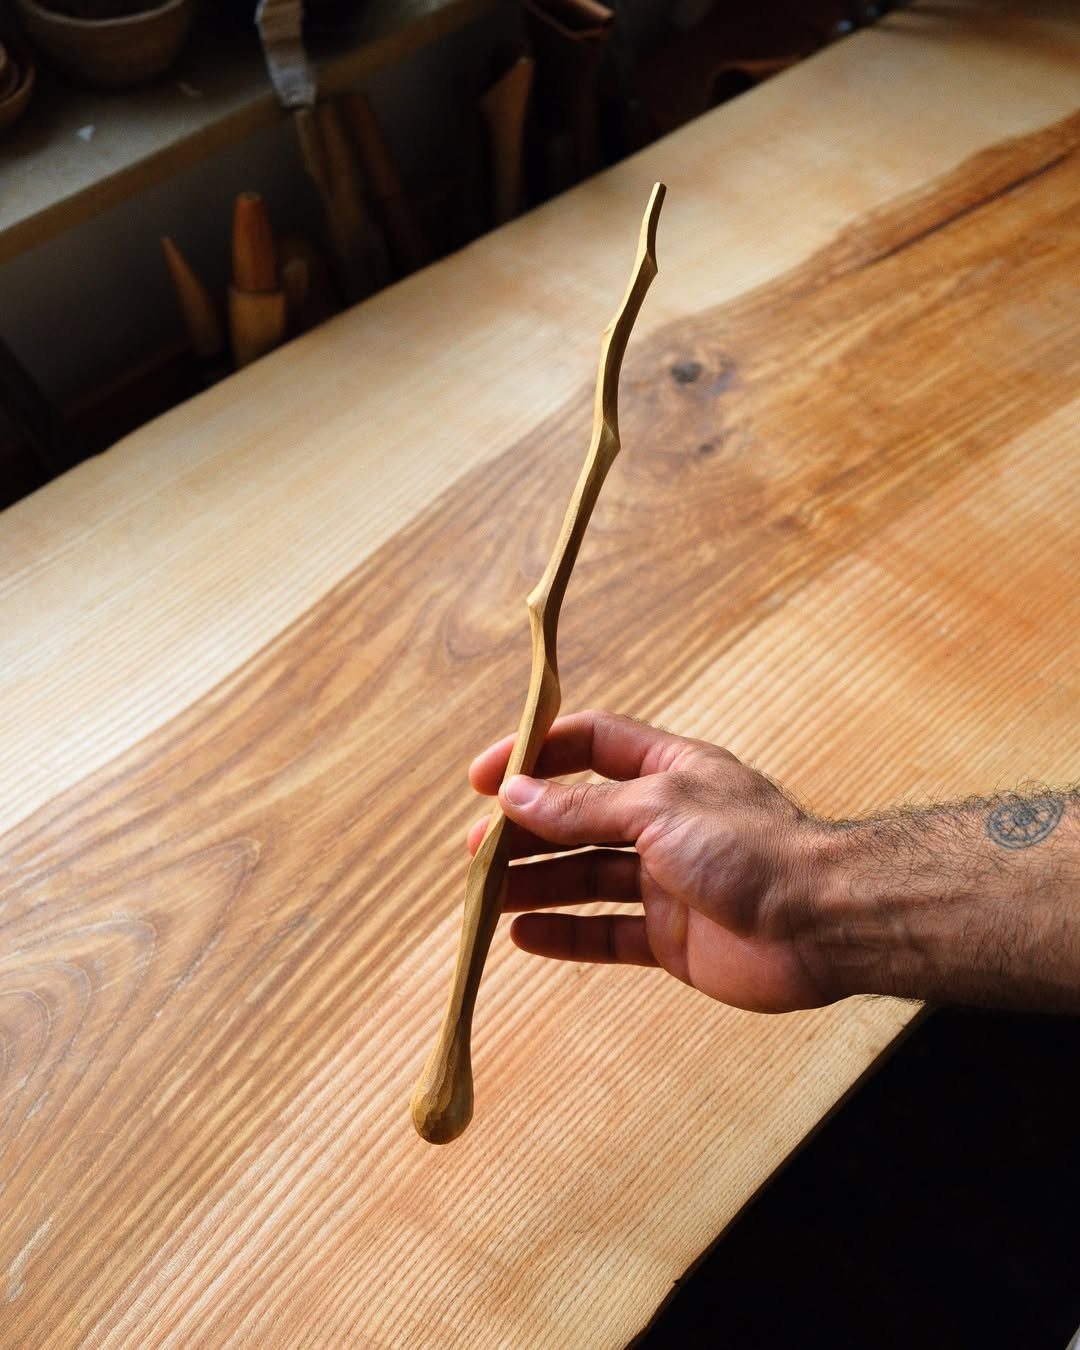
A slender curved stick lets you skip detail and focus on flow. The only goal is a smooth, even shape that feels good in the hand.
Choose a branch that already bends, because following its natural curve means less cutting and less chance of snapping the thin parts.
Remove bark first, then shave long, light strokes with the grain. Finish with sandpaper until it feels soft.
Go slowly near the tip, where the wood is thinnest and breaks easiest.
Basic Carving Techniques
3 cuts cover most of what a beginner needs.
The push cut moves the blade away from you with your thumb braced on the back of the knife, the pull cut draws the blade toward you in a short controlled stroke, and the stop cut is a straight incision that sets a boundary so the next cut ends cleanly instead of running on.
Carve with the grain whenever you can. If the wood starts to lift or tear, turn the piece around and come at it from the other direction.
A V-gouge cuts clean lines, and carving in the round means working a piece from every side. Hold off on both until the 3 basic cuts feel steady in your hands.
Quality matters here, because a sharp, well-made tool cuts more precisely and slips less.
Project Ideas for Beginners
Pick one project and learn it before moving to the next. Choose shapes that lean mostly on push cuts, and treat basswood as the easy-going option for practice.
A mushroom teaches more than its simple shape suggests. The cap and stem split at a stop cut; after that, it’s a matter of rounding the curves and sanding smooth.
A simple fish is the next step up. It builds outlining and smoothing, and it teaches you to follow curves and keep both sides matching.
If you have no wood yet, a stick from the yard is enough to practice push cuts.
Whittle it down into a smooth, even shape, and don’t chase perfection. Plain and simple is fine, and not every piece will be a keeper.
Add detail only as the tools start to feel comfortable in your hands.
Frequently Asked Questions
What is the easiest thing to carve from wood?
A small carrot or a miniature pine tree is about as easy as carving gets.
A block of basswood or pine and one sharp knife cover the supplies, and any dry stick from the yard will do for practicing push cuts.
What is the best way to start wood carving as a beginner?
Before anything else, practice the push cut, the pull cut and the stop cut, because nearly every beginner project is built from those three.
Then put them to work on one simple project, such as a small animal, a mushroom or a spoon, and finish it before starting another. Fine detail can wait until the knife feels like a natural extension of your hand.






