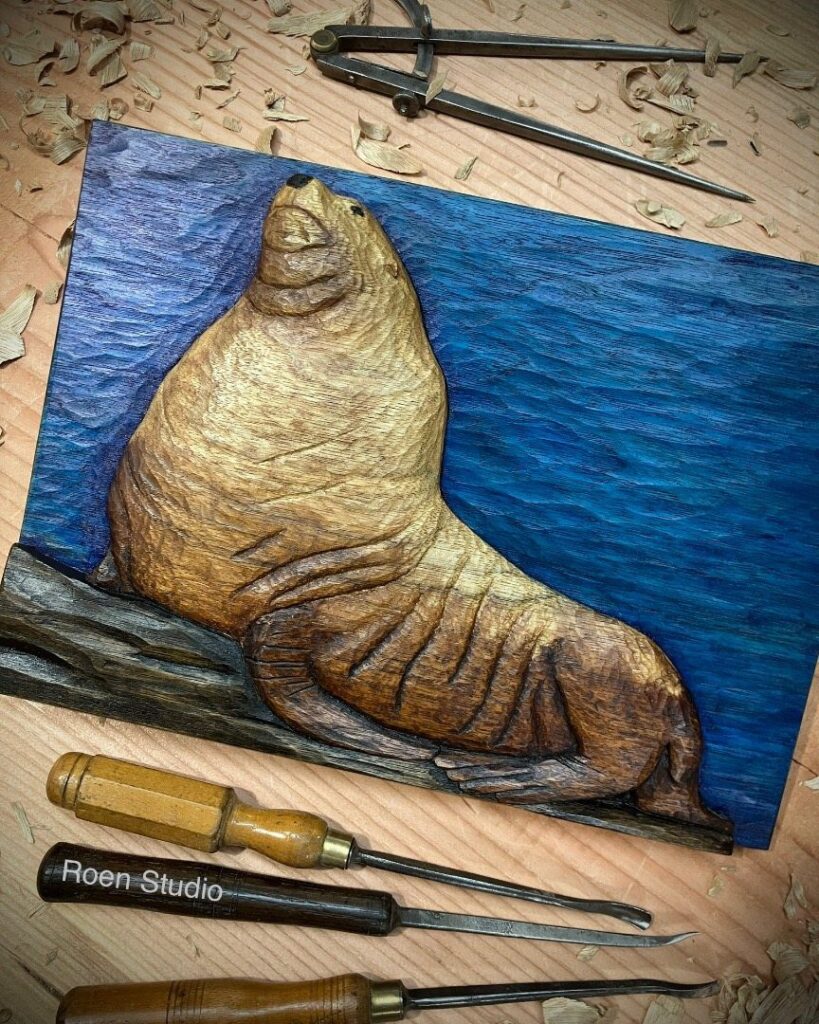
Thin parts decide which of these wood carving animals suits you: a penguin or pig with short, thick limbs forgives a slip, while rabbit ears, moose antlers and a ram’s horns snap if you rush them.
The projects run from a round-bodied cat, a pig and a mouse with a string tail that a basic knife handles in an afternoon, up to a seahorse relief plank and a ram’s head that ask for more planning.
Pick by how much slender wood your skill can carry, and start with basswood, which is soft and holds small details well.
1. Carved Aquatic Seal
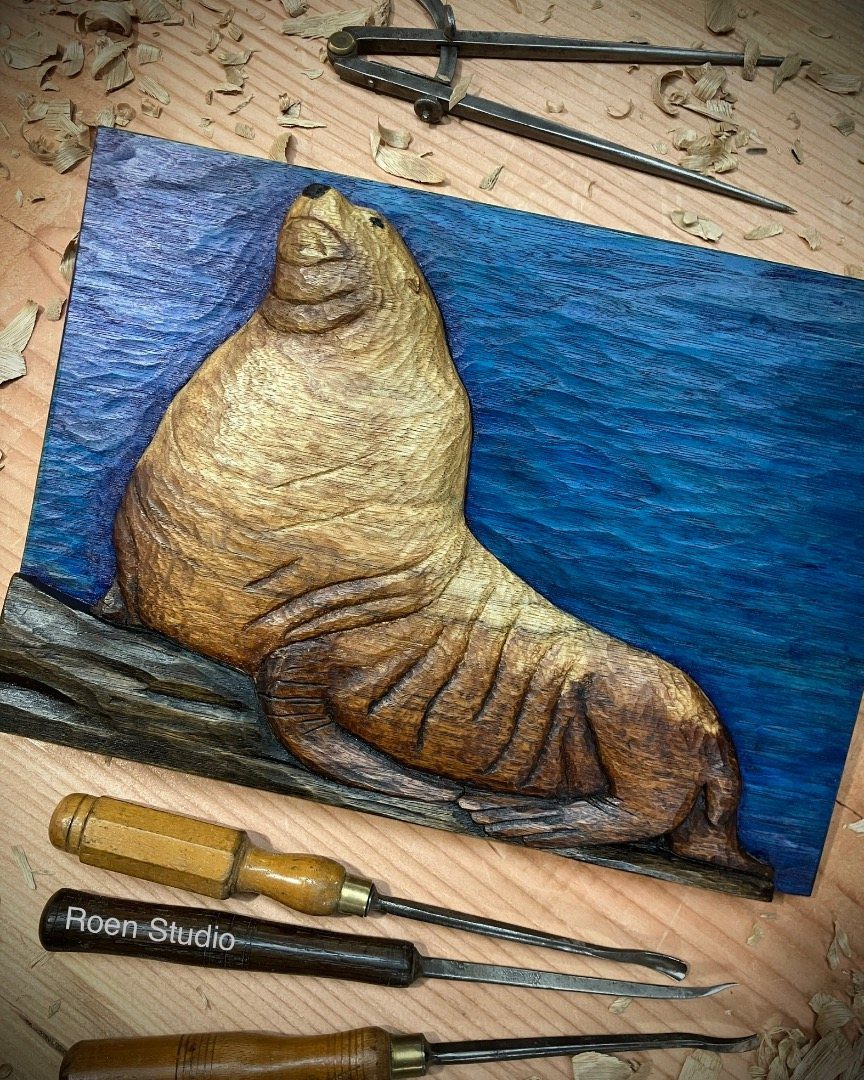
A seal carved in relief, rather than in the round, is a forgiving first project because the flat blue background does half the work of telling the viewer what they’re looking at.
You only have to shape one face of the wood, and the curve of the body can stay simple.
Leave the carving tools and shavings in your workspace and paint after the cuts are done. A solid color behind the seal makes the smooth, rounded back stand out, so I’d choose a bold blue and keep the animal lighter.
2. Fat Lazy Cat Tutorial
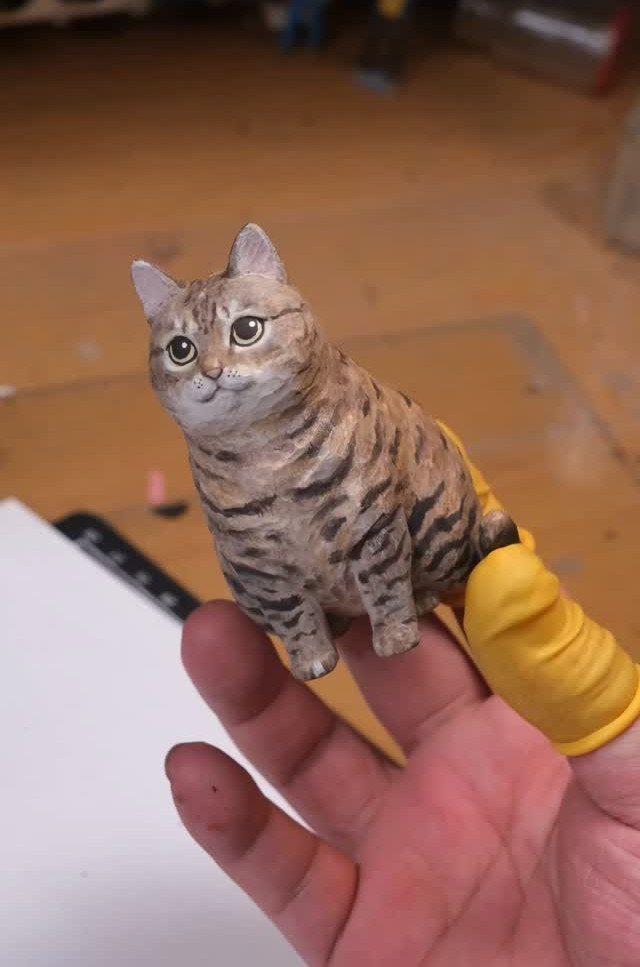
A fat cat only works if the body stays round and wide, so leave extra wood through the belly and haunches and resist trimming it down.
A fat tabby needs almost no fine detail: a heavy belly, a small head tucked into the shoulders, and short stubby limbs.
This is a good afternoon piece for anyone with a knife and a small block. Stripes painted on afterward do the character work that deep carving would otherwise demand, which keeps the wood shaping gentle and the mistakes cheap.
I’d pick a cat with a sleepy, slumped posture over an alert one. Soft, rounded cuts are easier to get right than sharp ears and a lifted tail.
3. Carved Moose
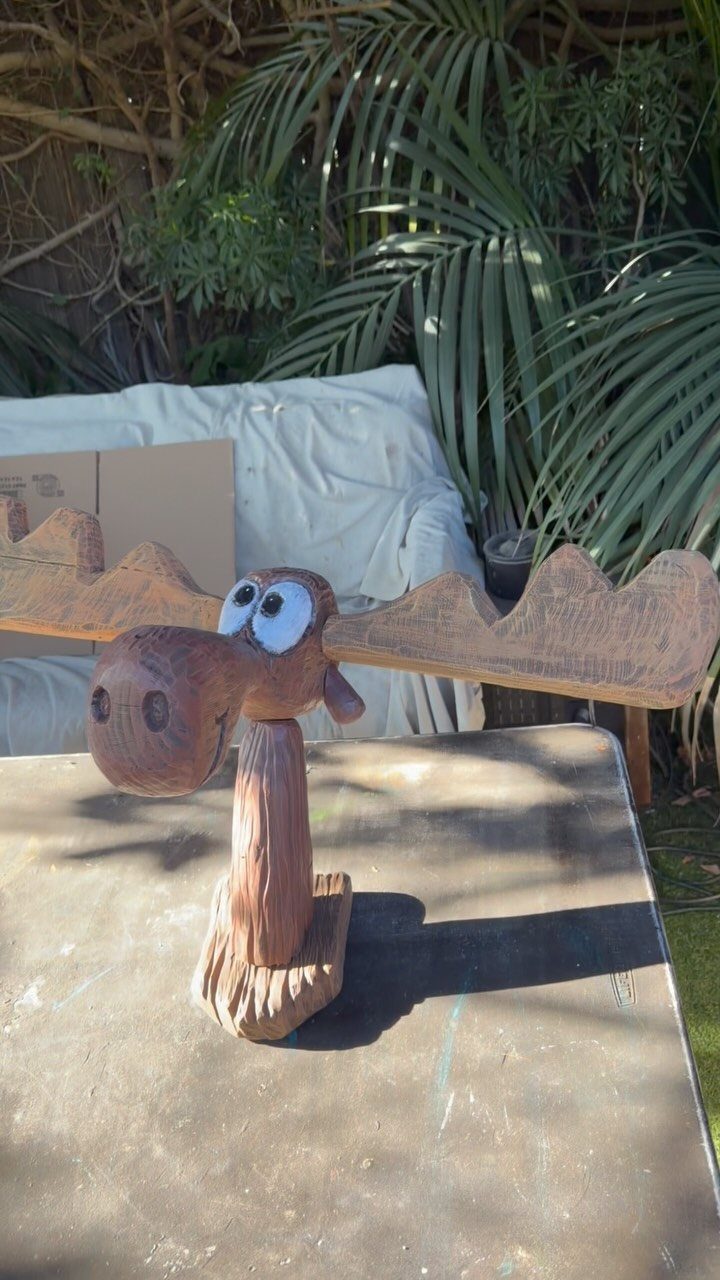
Antlers decide whether a moose reads as a moose, and they are also where carvings break.
Wide, flat antlers cut across the grain are fragile, so I’d plan them so the grain runs along their length, or carve them separately and glue them on.
Keep the body blocky and the legs thick.
Big eyes give the face a friendly, cartoonish look, and they are easier to paint than to carve. This one suits a carver ready for a little more planning than a basic block animal.
4. Big-mouth Frog
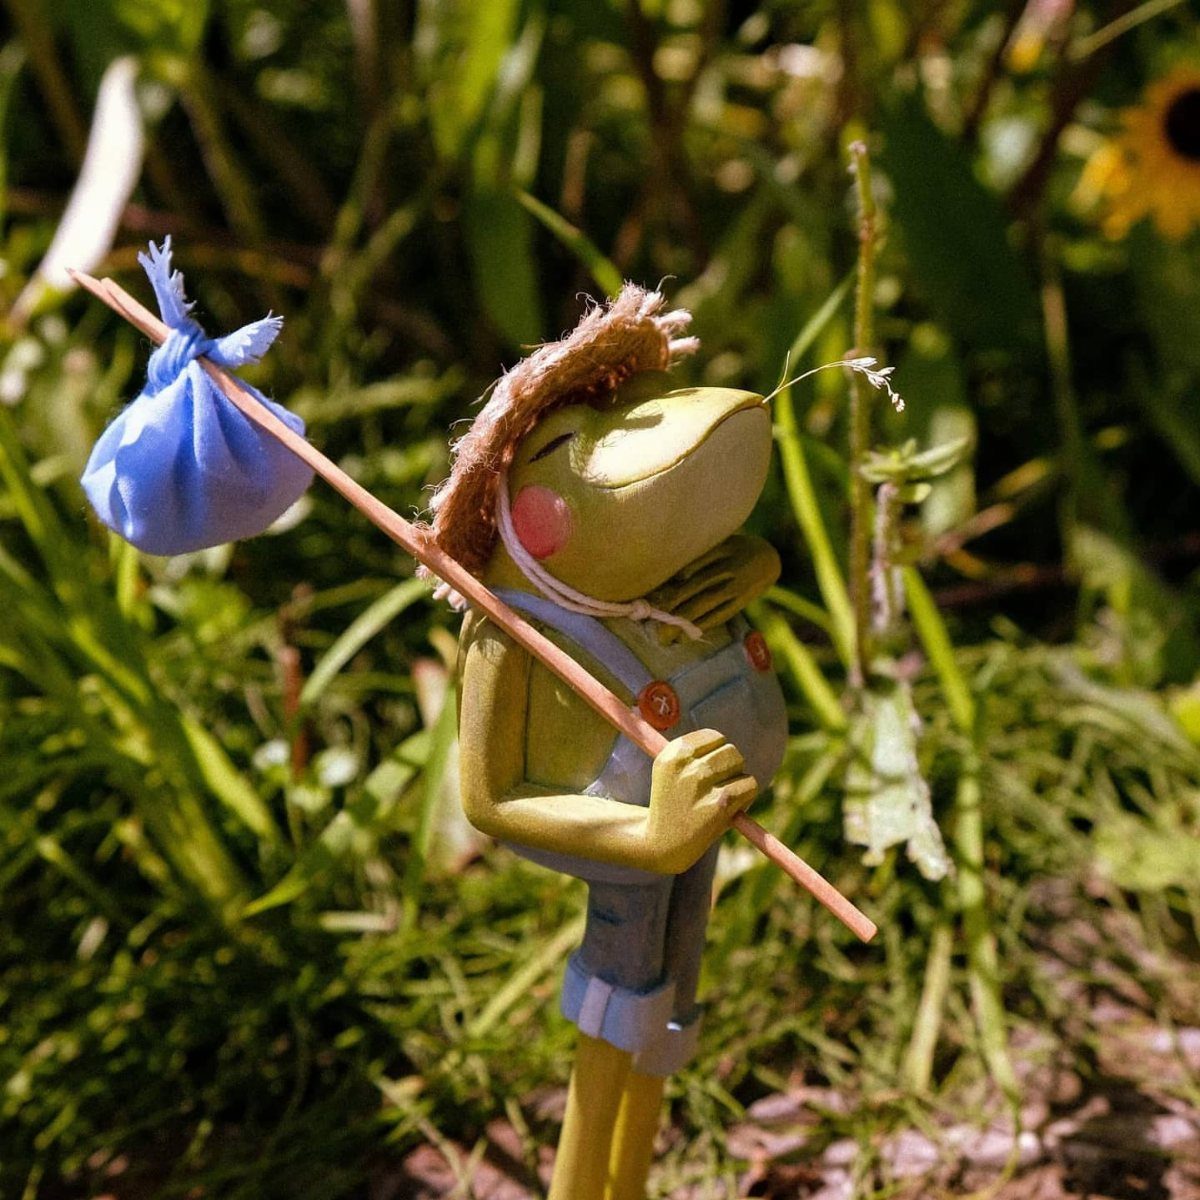
A wide, grinning mouth is one deep curved cut, which makes a frog one of the friendlier animals for beginners. Get that line right and the rest of the face falls into place.
A frog carved with a wide mouth and a simple body is easy to dress up, and small details like clothing or a carried prop give it personality.
Paint them rather than carving them in, since clothing is far easier to suggest with color than with knife work. A thin stick for the bindle can be a separate piece glued into the hand.
5. Big-eared Rabbit
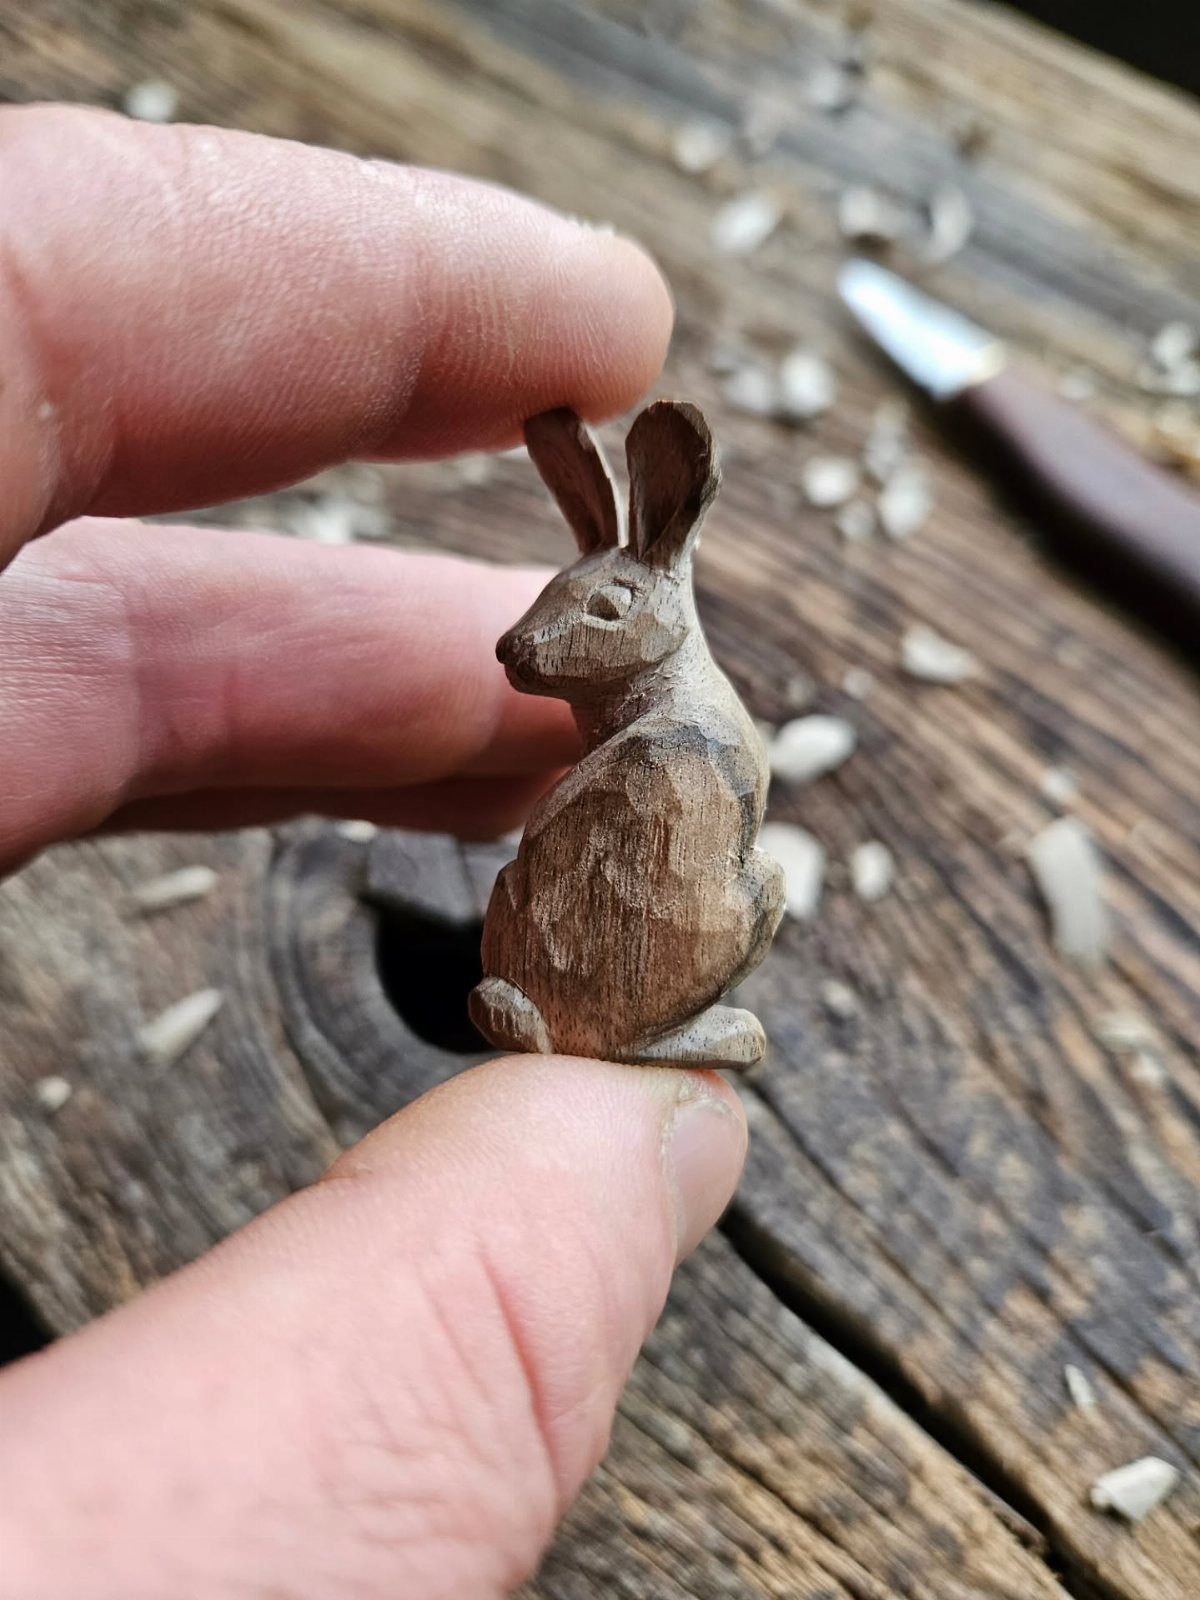
Long ears are the appeal and the risk. Thin ears carved from a small block snap easily, so I’d leave them thicker than looks right at first, then thin them slowly with light slicing cuts.
A rounded teardrop body with the legs pressed against its sides leaves less thin wood to snap, which suits a rabbit with tall ears.
A rabbit this size fits in the palm, so a basic carving knife and one afternoon cover the whole job. Sand lightly and stop there; bare wood suits a rabbit well.
6. Carved Sheep
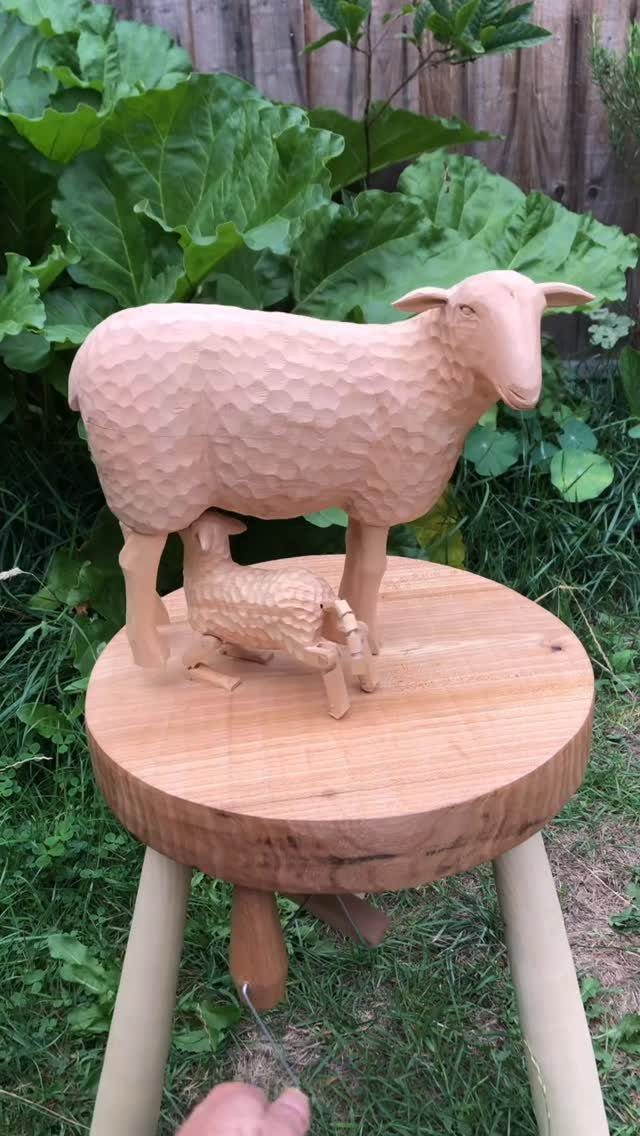
A sheep and lamb pair on a round base gives you two small figures that share one composition.
Keep both bodies rounded and nearly legless-looking, with the legs short and joined to the base, which adds strength and simplifies the carving.
The elegance comes from restraint.
Skip individual wool strands and let a few soft, shallow gouge marks suggest fleece. A round wooden pedestal also gives the figures a finished look, and it’s worth cutting one from the same wood so the grain and tone match.
7. Whittled Penguin Figurine
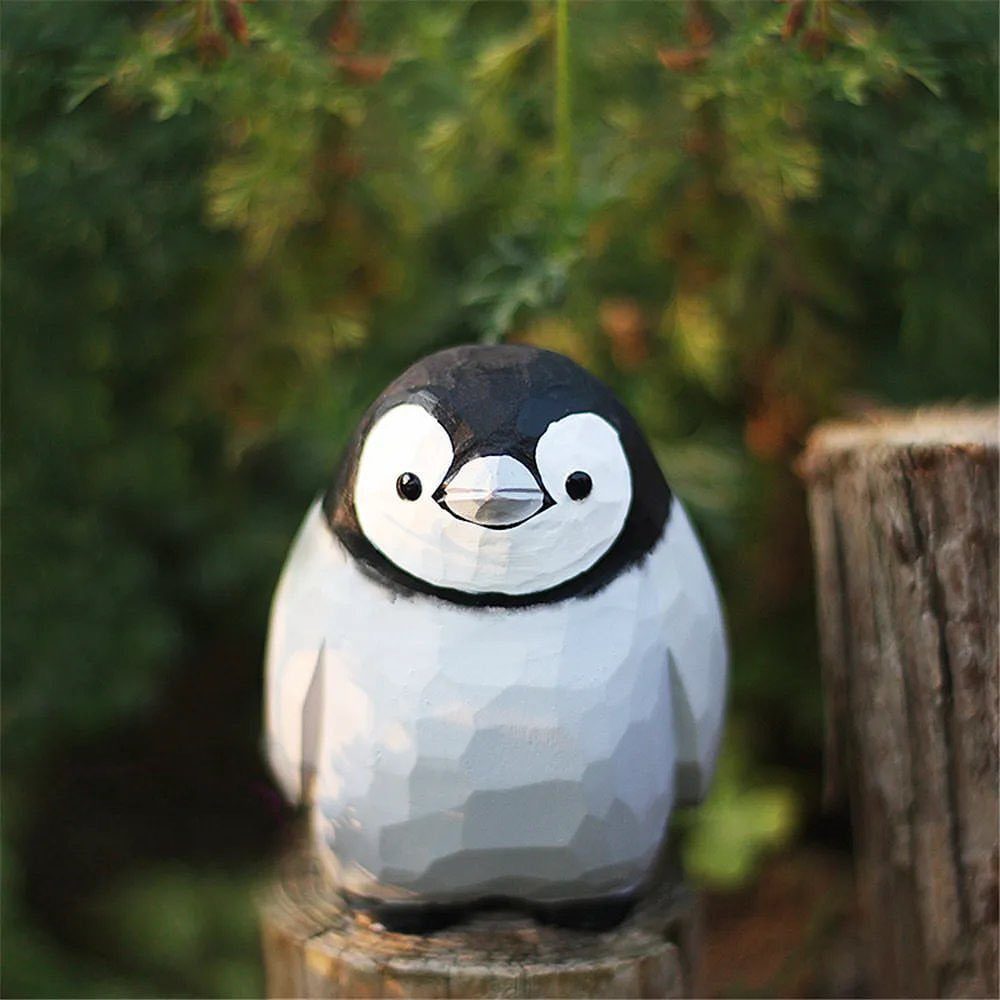
A penguin is one of the easiest animals to whittle because the whole figure is a tall, smooth teardrop with a small beak and stubby flippers.
Leave the flippers pressed close to the body so they stay thick and don’t snap off.
Paint does the rest of the work. Black on the back and head with a white belly makes the shape read at once, so the knife only needs to give a clean, rounded body.
I’d keep the carving simple and spend the extra time on a neat paint line between black and white.
8. Small Carved Songbird
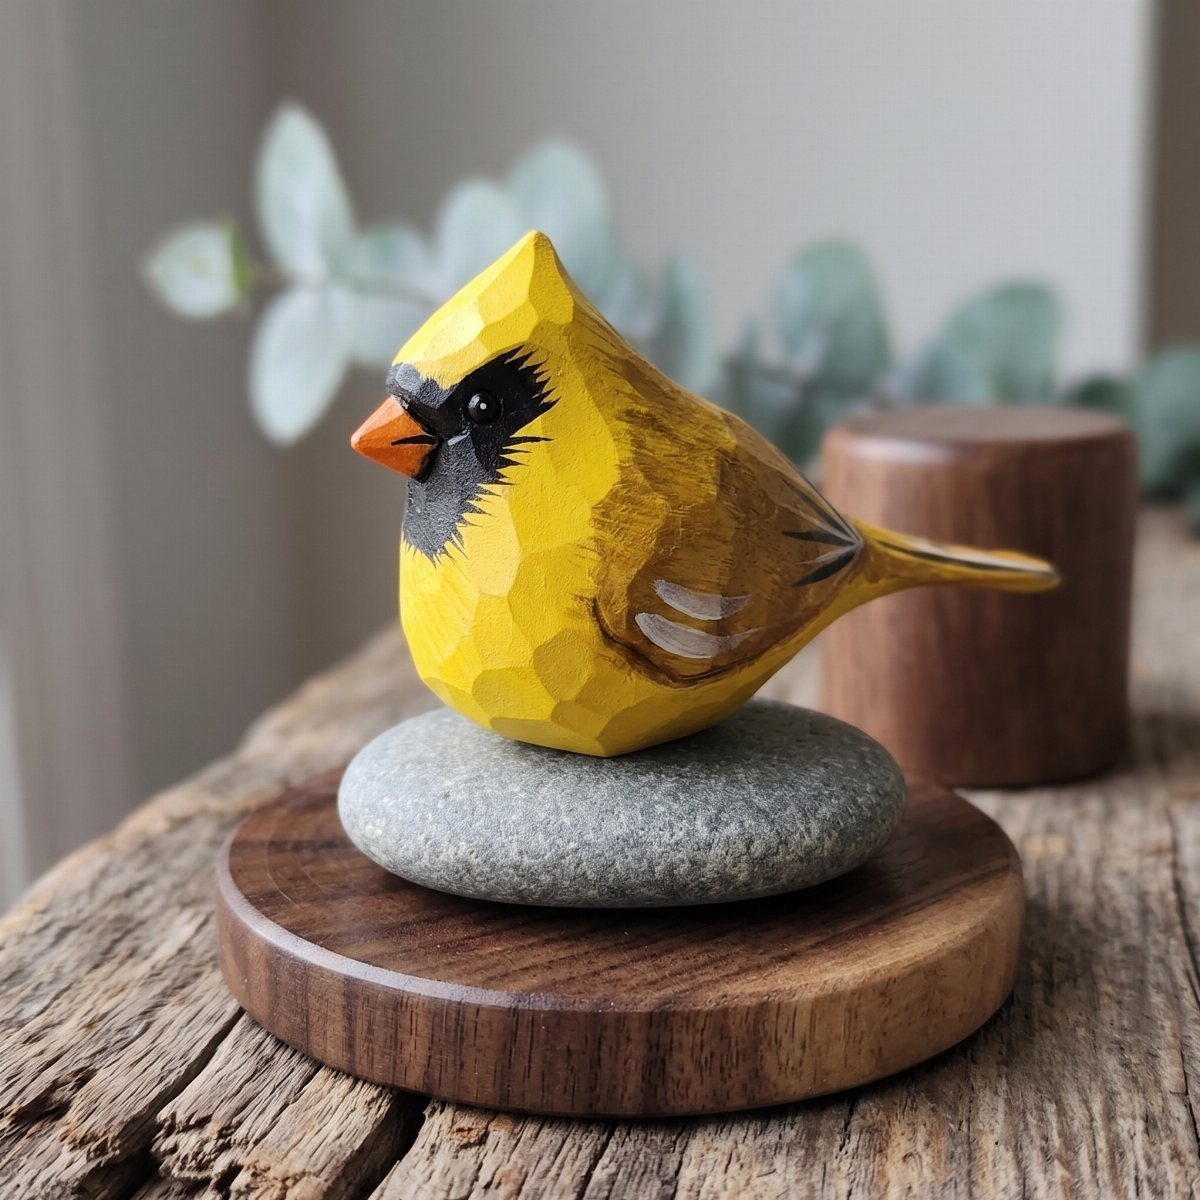
A songbird lives or dies on the beak and tail, the 2 thin parts that give it away.
Carve the body as a plump oval first, then add a short pointed beak last, while there is still plenty of wood to hold onto.
The perch is worth planning. A small stone-look base set on a wooden disc gives the bird a place to sit and hides the feet, which are the hardest part to carve.
Paint the body one bright color with a dark face and the details stay simple.
This is a step up from a block animal, so I’d try a rabbit first.
9. Carved Wooden Pig
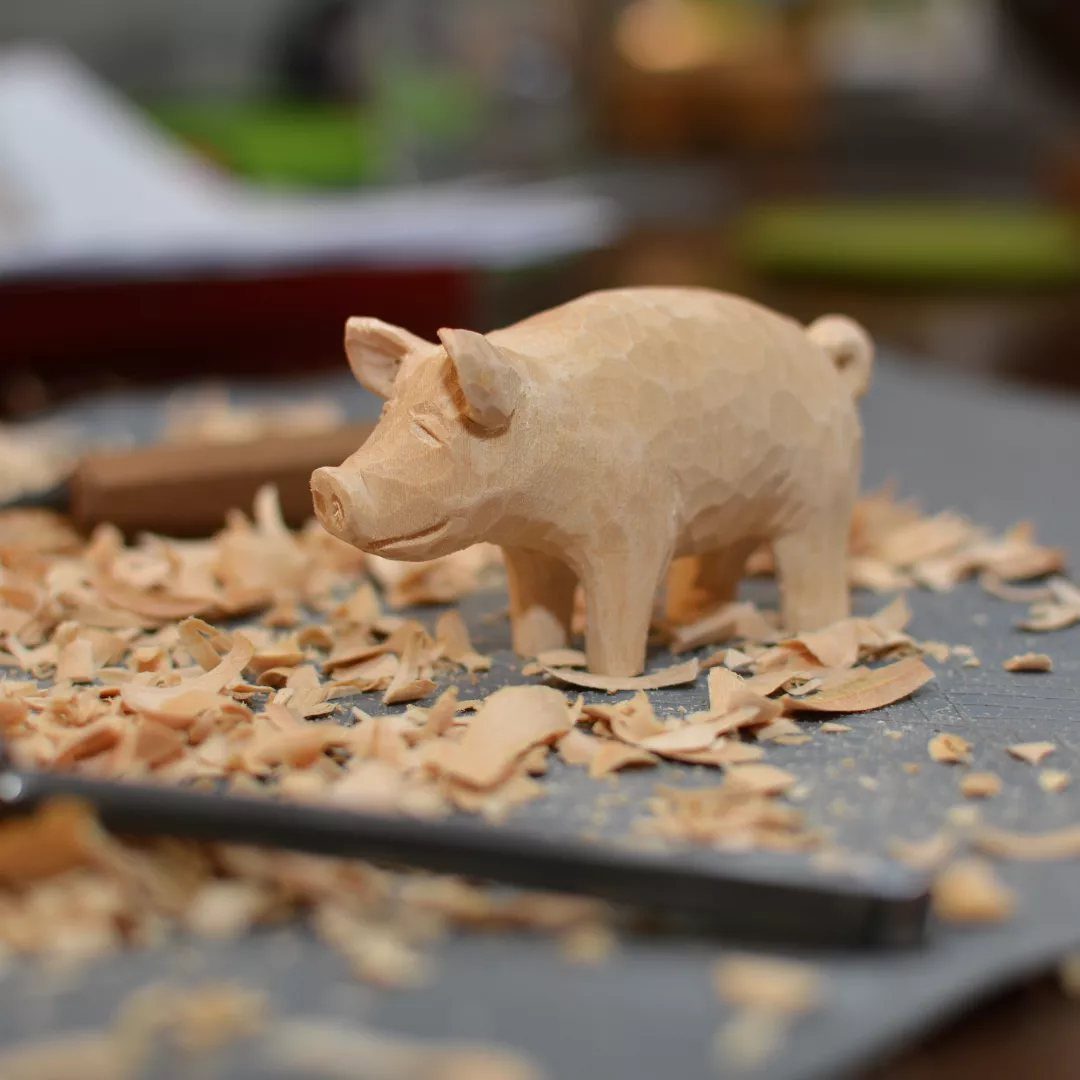
A pig is a friendly shape for a knife: a long rounded barrel, a flat snout, and short stubby legs that hold the whole body up.
Keep the legs thick and close together, since thin ones are the first thing to break.
Work on a carving mat so the shavings are easy to sweep up.
Take off the corners of the block first, then round the back and belly with small, light slices. The snout and ears can be a few shallow cuts.
I like a pig left in bare wood. The pale grain suits the shape, and it saves you the painting.
10. Small Wooden Mouse
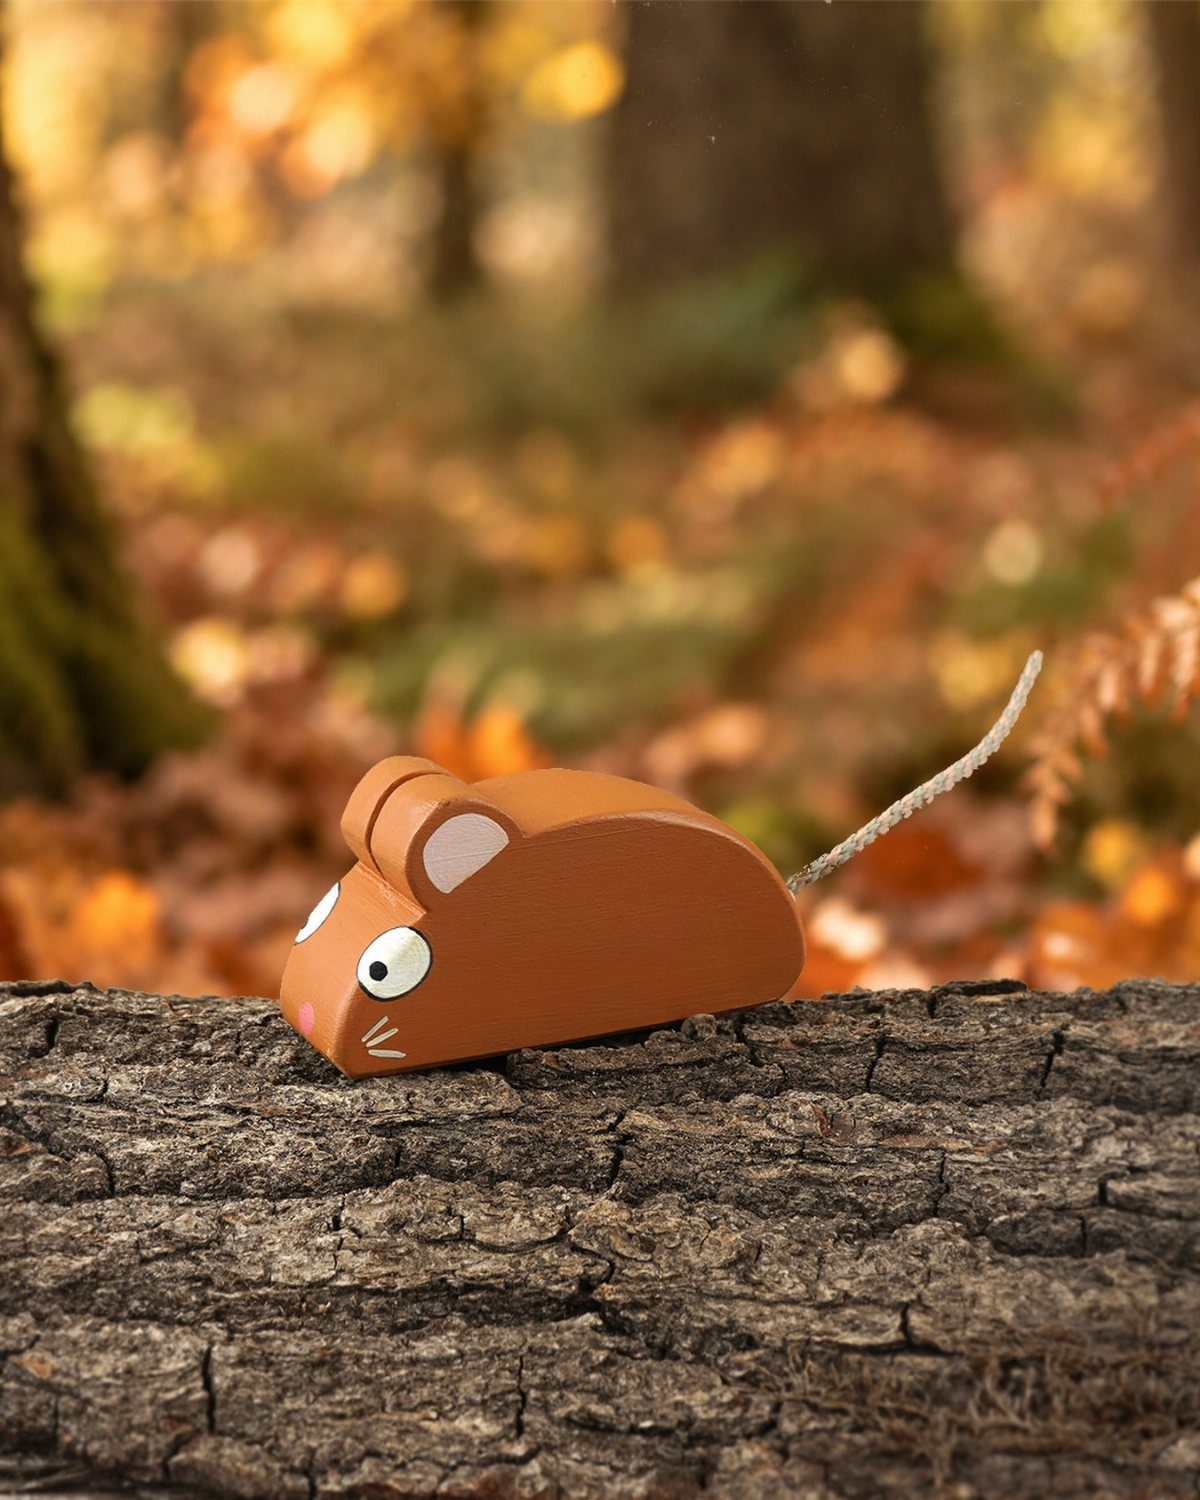
A mouse works well as a stylized carving: a rounded, pointed body with no need for realistic fur or feet.
Skip a carved tail and use a length of string, which can’t snap and takes seconds to add. Drill or cut a small hole at the back, then knot the string inside.
Bold color carries the look. A bright orange body with plain white eyes feels playful and hides small knife marks.
I’d choose this for a quick afternoon piece, and it sits nicely on a shelf or a log.
11. Carved Wooden Frog Traveler
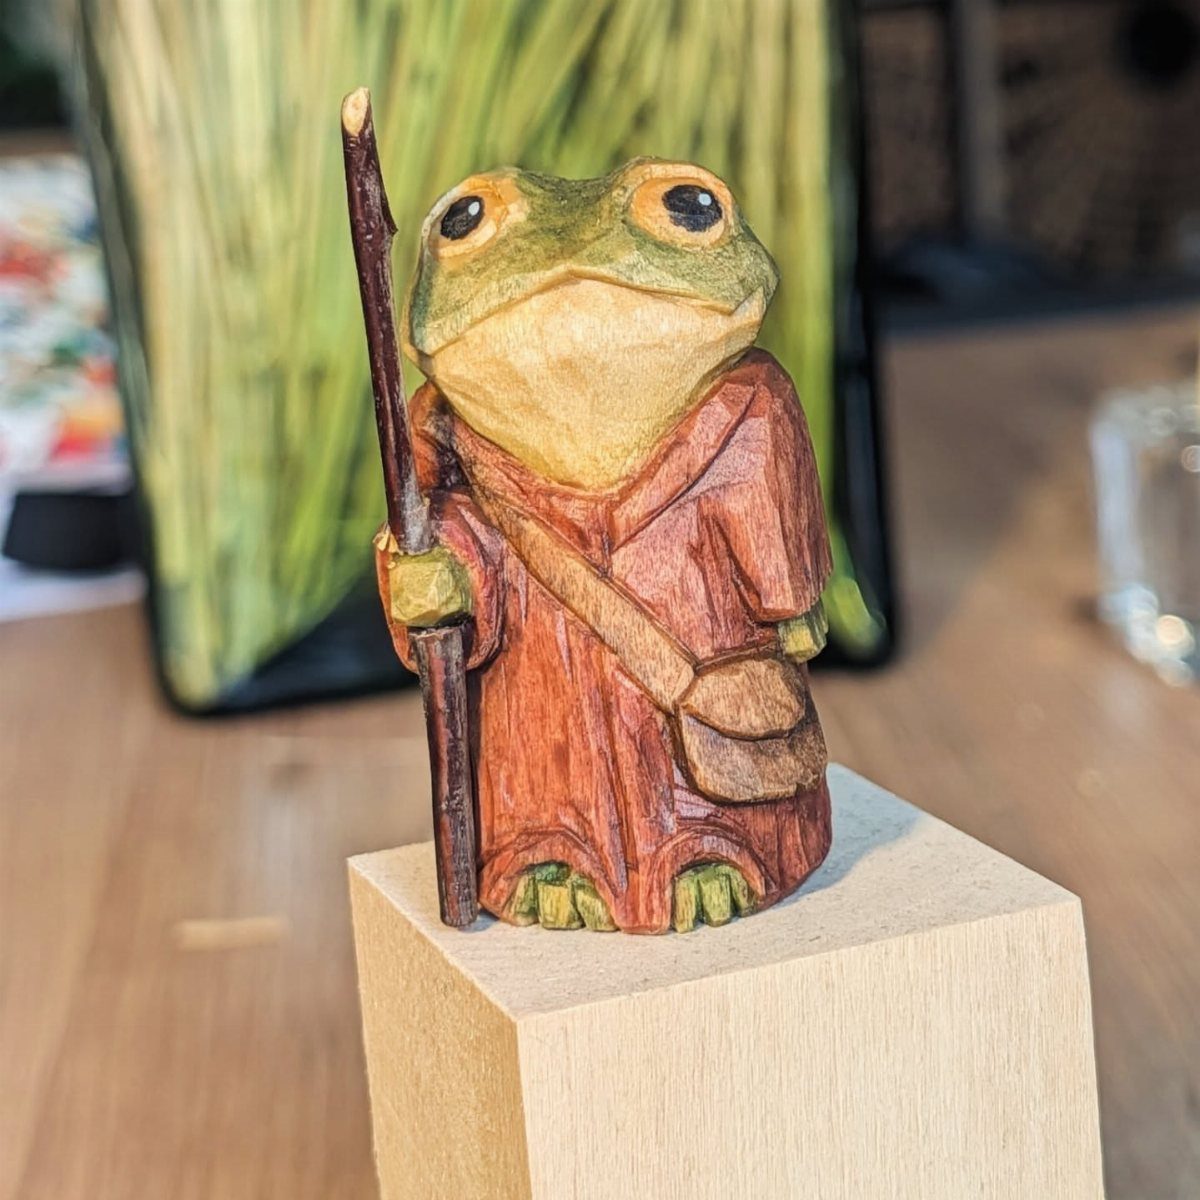
A frog in a traveler’s robe is mostly a cloaked cylinder, which hides the body shaping that gives many beginners trouble.
Carve a round head with wide eyes, then let a simple robe fall straight to the base in one smooth shape.
The staff is the part to treat carefully.
A thin stick carved in place will break, so I’d cut it separately from a dowel or twig and glue it into a small hole in the hand. Paint the robe brown and keep the face light.
A block base keeps the figure steady and finishes it.
12. Small Carved Wooden Hedgehogs
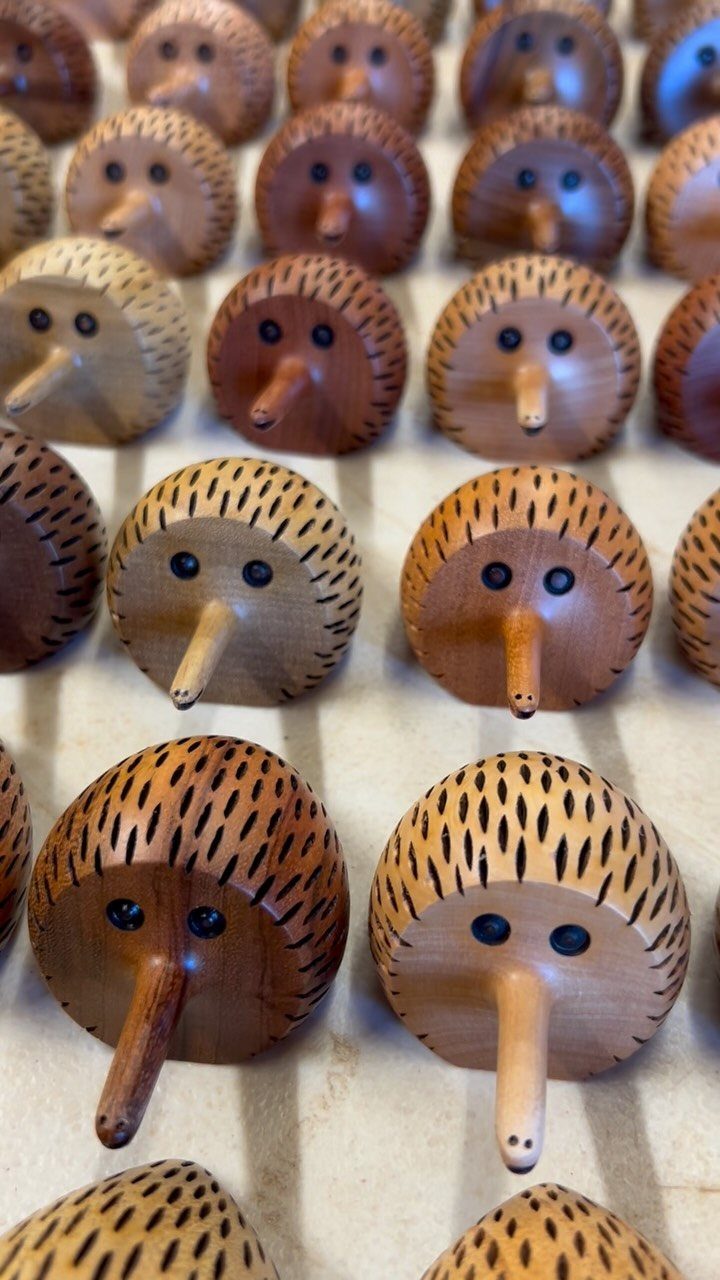
Hedgehogs repeat well. Each one is a round dome with a pointed snout, so once you have the shape, you can carve a whole row of them.
The maker of this group says there are up to 1110 in total now, which shows how addictive the shape is.
Cut a few identical blanks first, then round them in batches so the sizes match.
Dark dots for eyes and nose, added with paint or a marker, give each one a face. Skip carving the spines; shallow texture or paint is enough.
I’d start with three and see how you like them.
13. Carved Ram’s Head
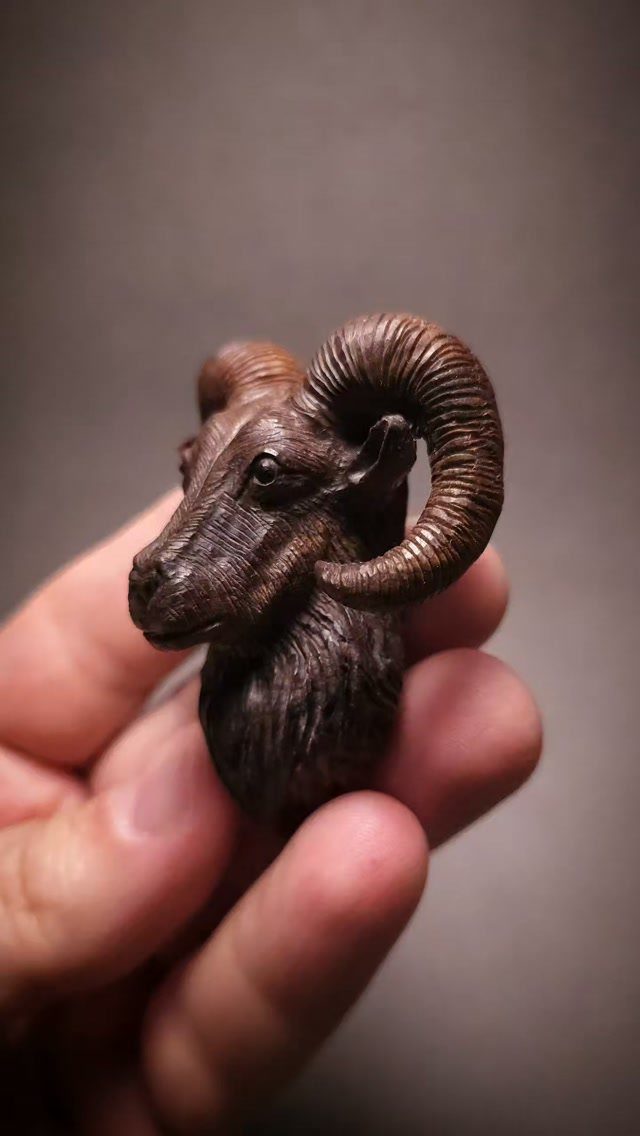
A ram’s head is mostly a study in 2 textures: tight, curling horns and a rougher fleece. Keep them different, with smooth horn surfaces against short, choppy cuts for the wool, and each reads clearly beside the other.
The horns are the weak point. Leave them thick where they leave the skull and thin them slowly, following the curve with light slicing cuts rather than prying at the wood.
A ram’s head asks for more planning than a simple knife project, since the curled horns need careful layout before the first cut, so give it more than one afternoon.
Dark wood hides tool marks well, and I’d skip paint and let the finish do the work.
14. Carved Seahorse Plank
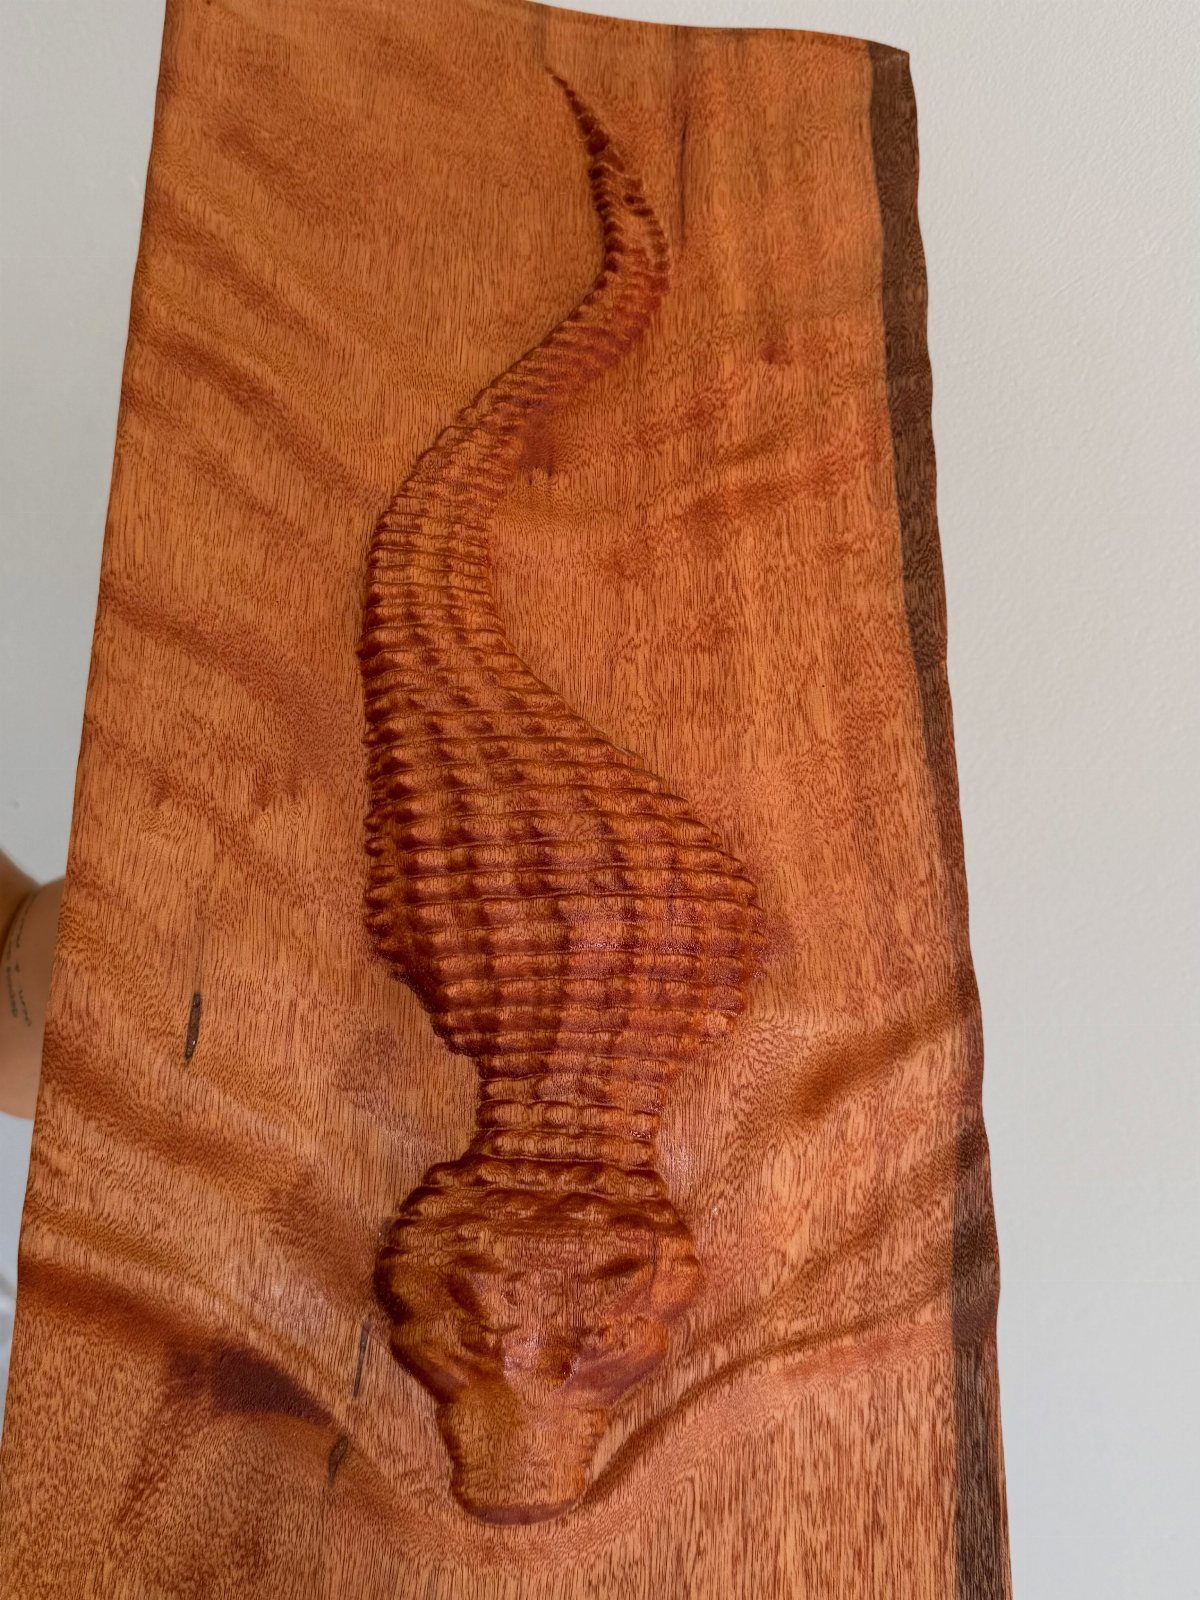
Relief carving a seahorse into a plank suits a reader who likes the seal idea but wants a taller, narrower shape.
The curled tail and arched neck follow the length of the board, so a vertical plank fits the animal naturally.
Choose a plank with calm, straight grain, since the lines of the wood will run through the figure. Cut a clean outline first, then lower the background around the seahorse so the body stands up from the surface.
I’d keep the finish clear. Reddish wood with visible grain looks warm on its own, and paint would hide the best part of the board.
Essential Tools for Carving
A sharp carving knife does most of the work on small animals, from the first rough cuts to the last light cleanup of details. If you only buy one tool, make it that one.
Chisels and gouges come next, and they differ in a simple way: a chisel has a flat edge, and a gouge has a curved one.
Use chisels to take off bigger sections and refine details, and gouges to shape and smooth the rounded areas.
A mallet goes with them. It supplies the force for chisel and gouge cuts, so you aren’t pushing with your hand and risking a slip.
Sandpaper finishes the kit. It removes tool marks and gets the wood ready for paint or a clear finish.
Selecting the Right Wood
Basswood is the wood I’d hand to a beginner. It’s soft, easy to cut, and its fine grain holds small details well.
Pine is also soft and easy to carve, but its grain is more pronounced. That makes fine details harder to get, so I’d save it for chunky, simple shapes.
Mahogany and walnut are harder and tougher on your tools and hands. In return you get beautiful grain from mahogany and a rich, dark color from walnut, so both suit decorative pieces better than first attempts.
Three things decide whether a block suits your animal: how hard it is, how the grain runs, and what color it will be once carved, so weigh all three before you pay for it.
Then look over the block itself and skip any piece with knots, cracks, or other defects, since they interfere with the cuts.
Safety Precautions
Wear eye protection every time you carve. Chips fly without warning, and your eyes are the one thing you can’t replace.
Keep your tools sharp. A dull blade needs more force, and more force means a higher chance of slipping into your hand.
The hand that holds the wood sits closest to the edge, so a cut-resistant glove or a leather thumb guard belongs on that hand every time you carve.
Clear your work area of clutter so nothing trips you or gets in the way of a cut. Skip tools that are too short too, because they slip easily.
Frequently Asked Questions
What is a wooden carving called?
Wood carved into a figure is usually called a wood carving or a wood sculpture, and a carved animal is an animal carving.
If you shape only one face of the wood and leave a flat background, that is relief carving, like a seal or seahorse on a plank. A figure shaped on all sides is carved in the round.
What are some ideas for small wood carving projects for beginners?
A pig, a penguin, a sleepy fat cat, a big-mouth frog, and a rabbit all work well, because each is a simple rounded shape that fits in your palm.
Relief carving, like a seal on a flat blue background, is also forgiving since you only shape one face. Paint can handle the details, such as tabby stripes or a penguin’s black and white, so the knife work stays light.
What is the best wood for carving animals?
For a first animal, basswood is my pick: it carves easily under a knife, and the tight, even grain keeps small details like ears and beaks crisp.
Pine cuts softly too, but its bold growth rings and uneven density can tear out fine detail, so I save it for chunky, rounded shapes.
Walnut and mahogany fight your tools and tire your hands faster, but the dark, richly figured wood looks great as a finished display piece.
How do you stay safe when carving wood?
Put on safety glasses before the first cut, since a chip can pop off in any direction with no warning.
A dull blade makes you push harder, and that extra force is what sends it skidding into your hand, so I strop mine often and sharpen at the first sign of tearing.
Put a cut-resistant glove or leather thumb guard on the hand holding the wood, and clear your workspace of clutter.






