Tools and free hours decide the project here: a wooden snowflake or a set of gift tags needs little more than a drill and a fine brush, while the wooden villages are built one piece at a time over several weeks.
A miter saw and a brad nailer make the frame builds go fast, like the scrap wood lanterns, the Christmas tree planter and the tree shelf.
With only a drill and sandpaper, start with the gift tags or the tree ornaments. Most of these projects use scrap wood, so lumber rarely sets the budget.
1. DIY Christmas Tree Ornaments

A round wood slice or cutout makes a small canvas, and a painted gnome in a striped hat proves how much character fits on one.
Acrylic paint and a fine brush are all the decorating takes, so the cost stays low.
Drill a small hole near the top before you paint, then thread a loop of string through it. Seal the finished face with a clear coat so the paint survives years of boxing up and unwrapping.
2. Wooden Serving Boards
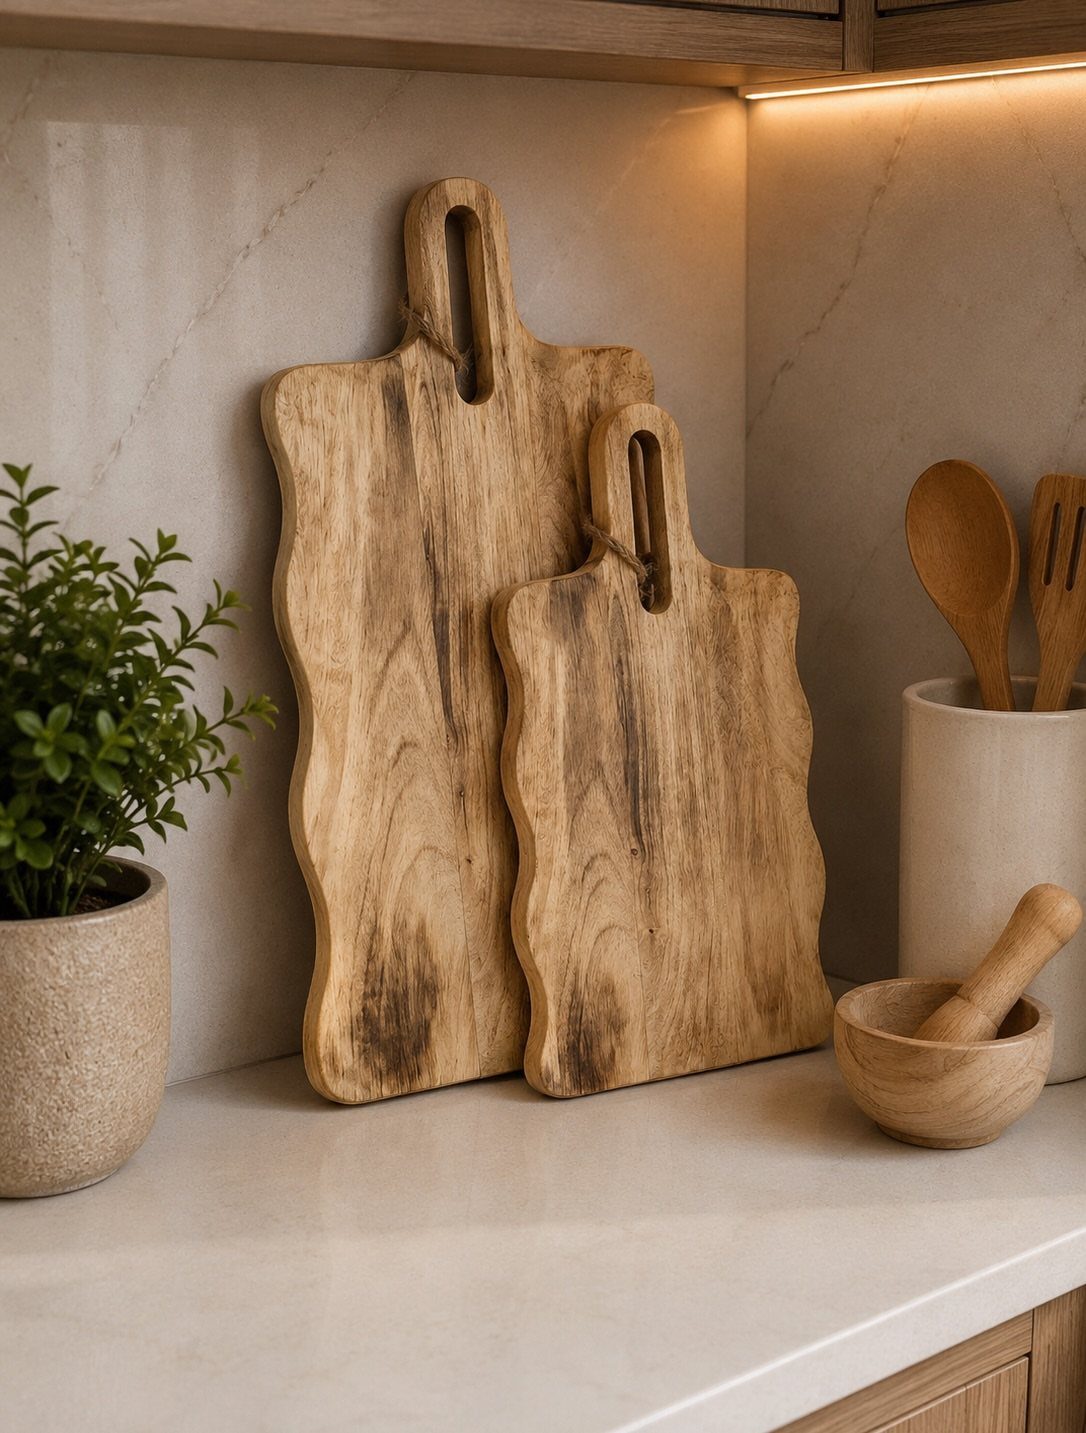
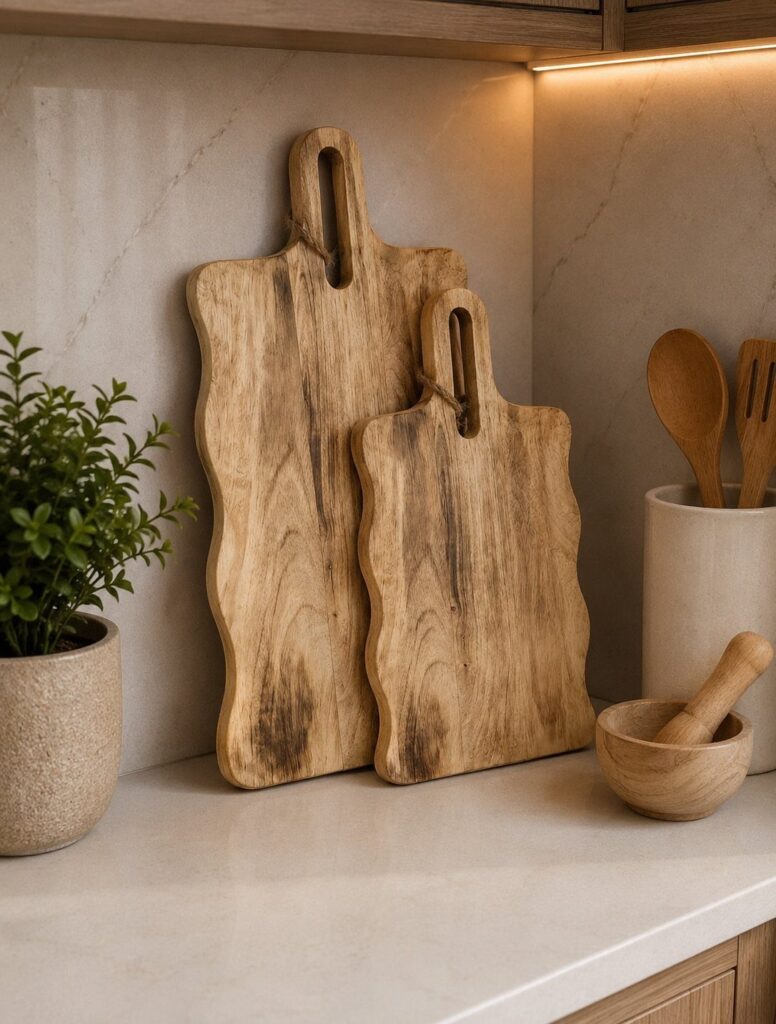
Handles turn a plain board into a piece people actually use, which is why I like this as a gift. A rustic board with a rope or twine loop can lean on a backsplash between meals and look like decor.
Keep the build simple: cut the board, shape a handle, sand every edge until nothing catches a palm, and drill a hole for the twine.
Since it will touch food, I would finish it with a food-safe oil rather than a stain.
3. Tabletop Wooden Christmas Trees
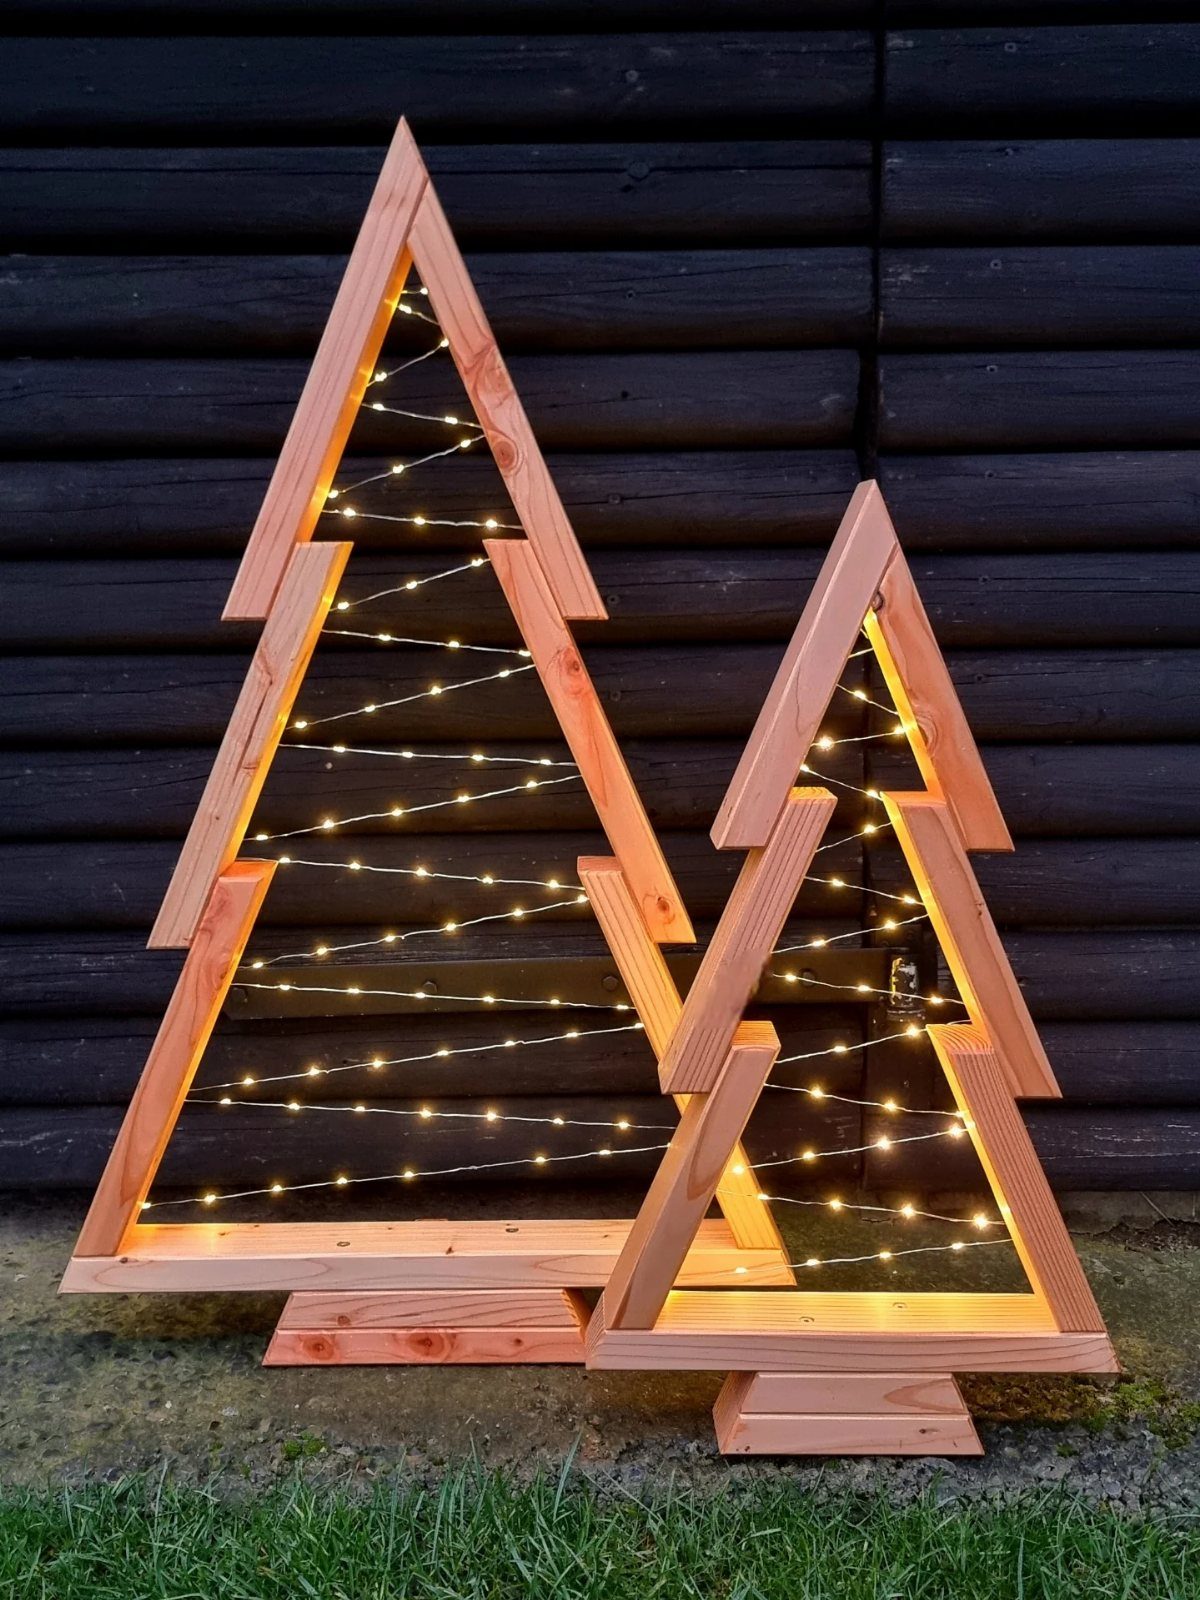
Cut 2x4s in graduated lengths and stack them, and a tree appears from the cheapest lumber in the store. Short offcuts work well, so this is a good use for leftovers.
Center each piece on the one below it so the tree stays balanced, and glue every layer. Fairy lights threaded through the gaps give a warm glow, and I prefer that to paint because the raw wood stays visible.
4. Wooden Candle Holders
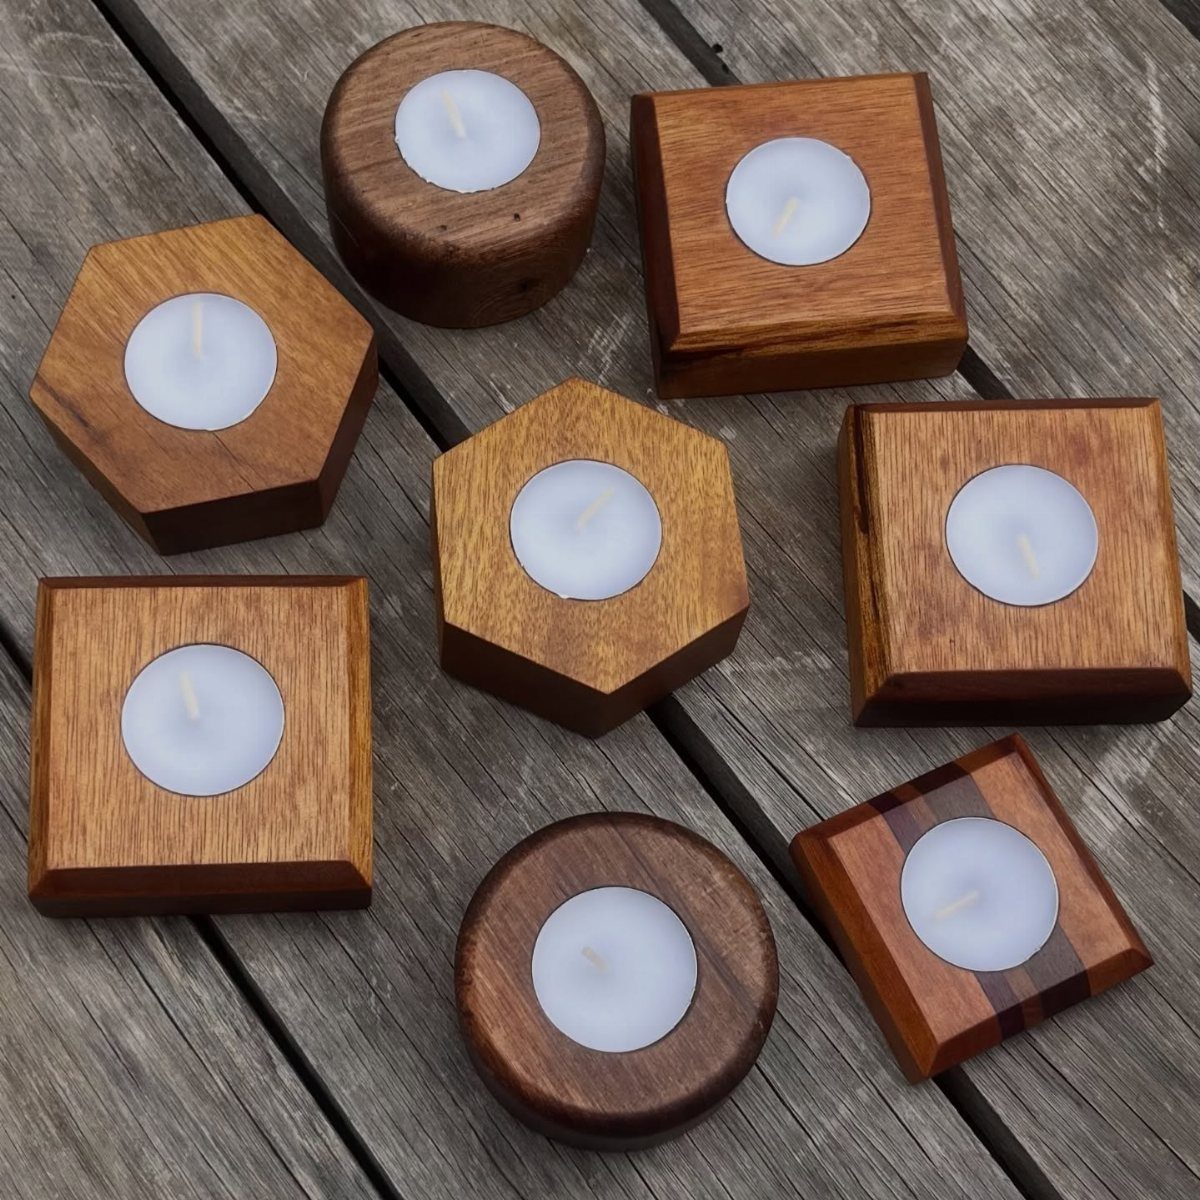
Tea lights make this an easy project, since each holder only needs a shallow recess sized to the candle. Circles, squares and hexagons all work, and a set of mixed shapes looks better than a row of matching ones.
A Forstner bit drills a clean flat-bottomed pocket, which is the tool I would reach for.
Sand the shapes smooth and leave the wood natural. Use real tea lights only with a wood-safe gap around the flame, or switch to LED ones.
5. Wooden Snowflakes
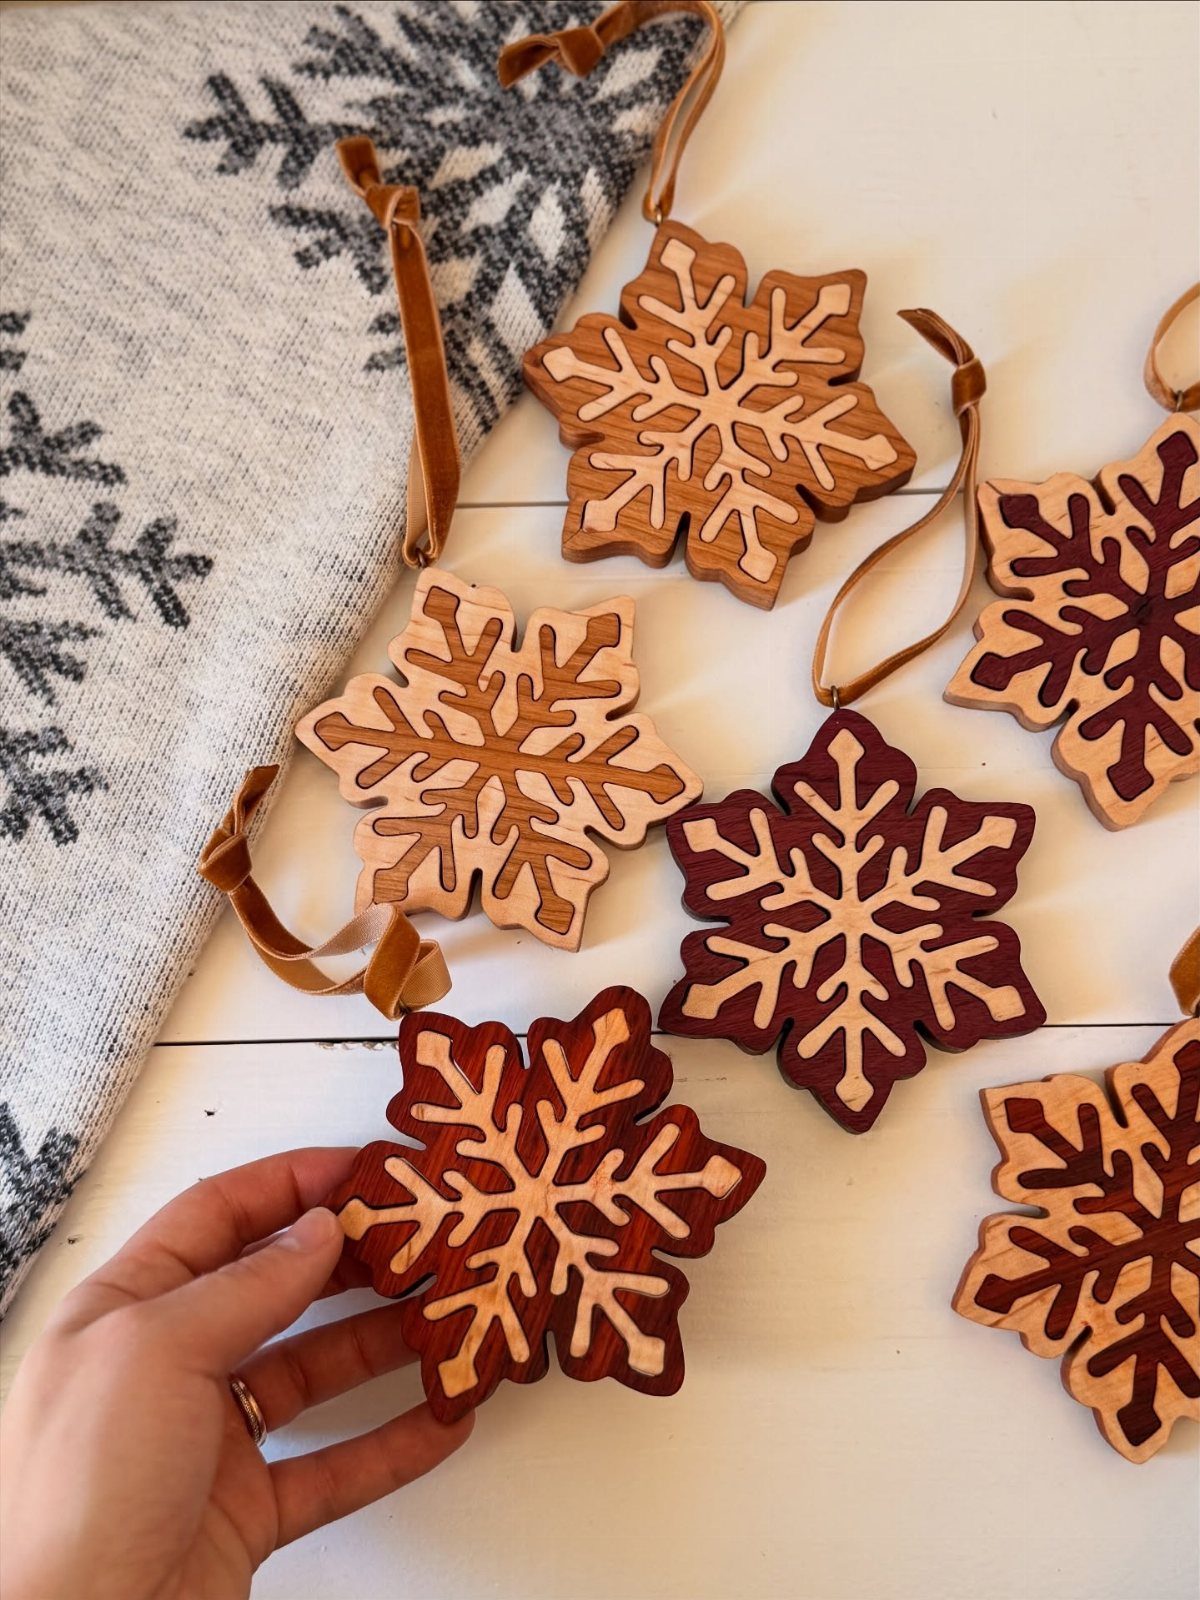
Stain does the work here. Instead of painting, stain a batch of identical snowflakes in a few different brown tones, add one in red, and the grain shows through each color.
Cut the shapes from thin stock with a scroll saw, then sand before staining so the color goes on evenly. A small leather loop makes a neat hanger and looks nicer than string.
Stain a test scrap first; wood takes color differently than you expect.
6. Wooden Christmas Tree Shelf
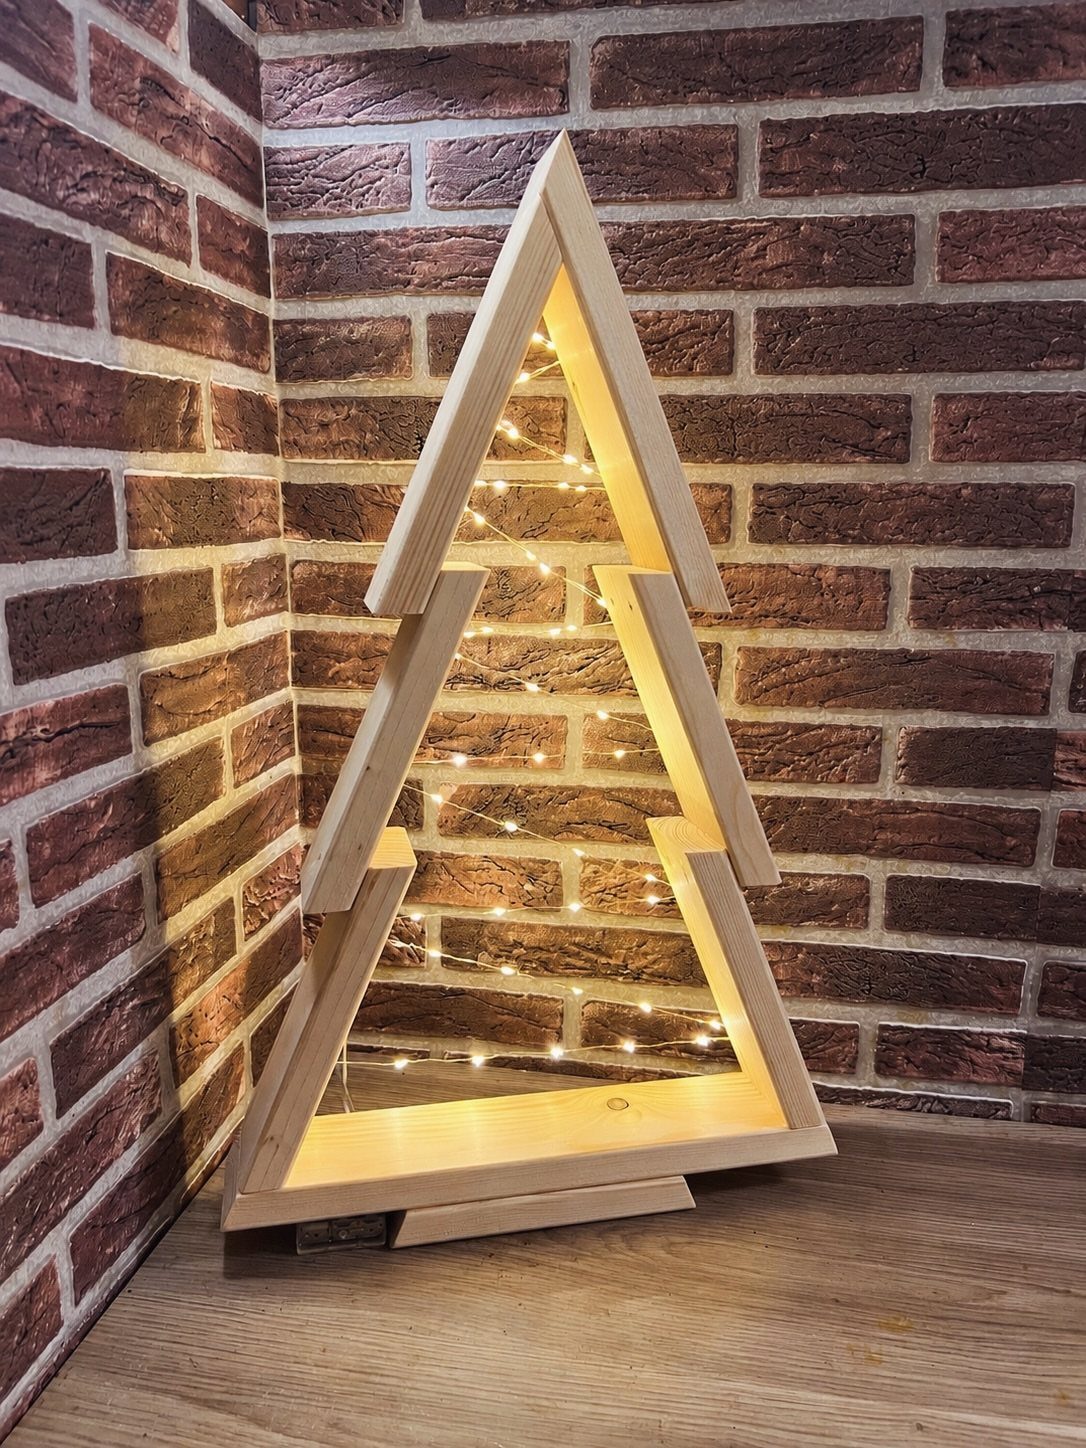
Build the shelf as a tree silhouette with stepped tiers, wide at the bottom and narrowing to the top, and the shelves hold small decorations while the frame does the tree part.
I would pick plywood or pine boards for budget reasons. Measure the tier widths before cutting, and mount the shelf to a wall or brace it, because a tall narrow shape tips easily.
7. Wooden Snowman Porch Leaners
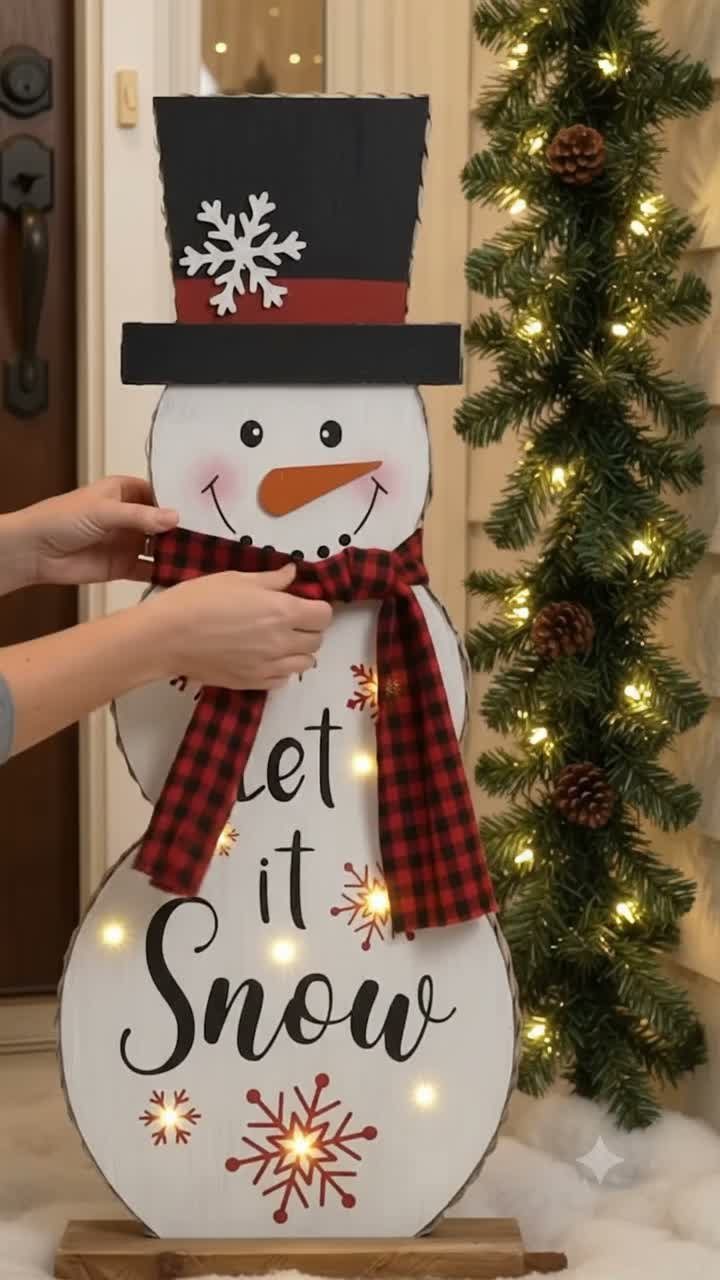
A snowman cutout with a "Let it Snow" message leans against a door or wall, so there are no stands to build. Cut the body from a wide board, then paint it white and add a black hat.
A plaid scarf tied around the neck adds color and costs almost nothing. Fabric scraps work fine.
Seal the paint with a clear coat if the snowman will stand on a porch.
8. Wooden Christmas Tree Planter
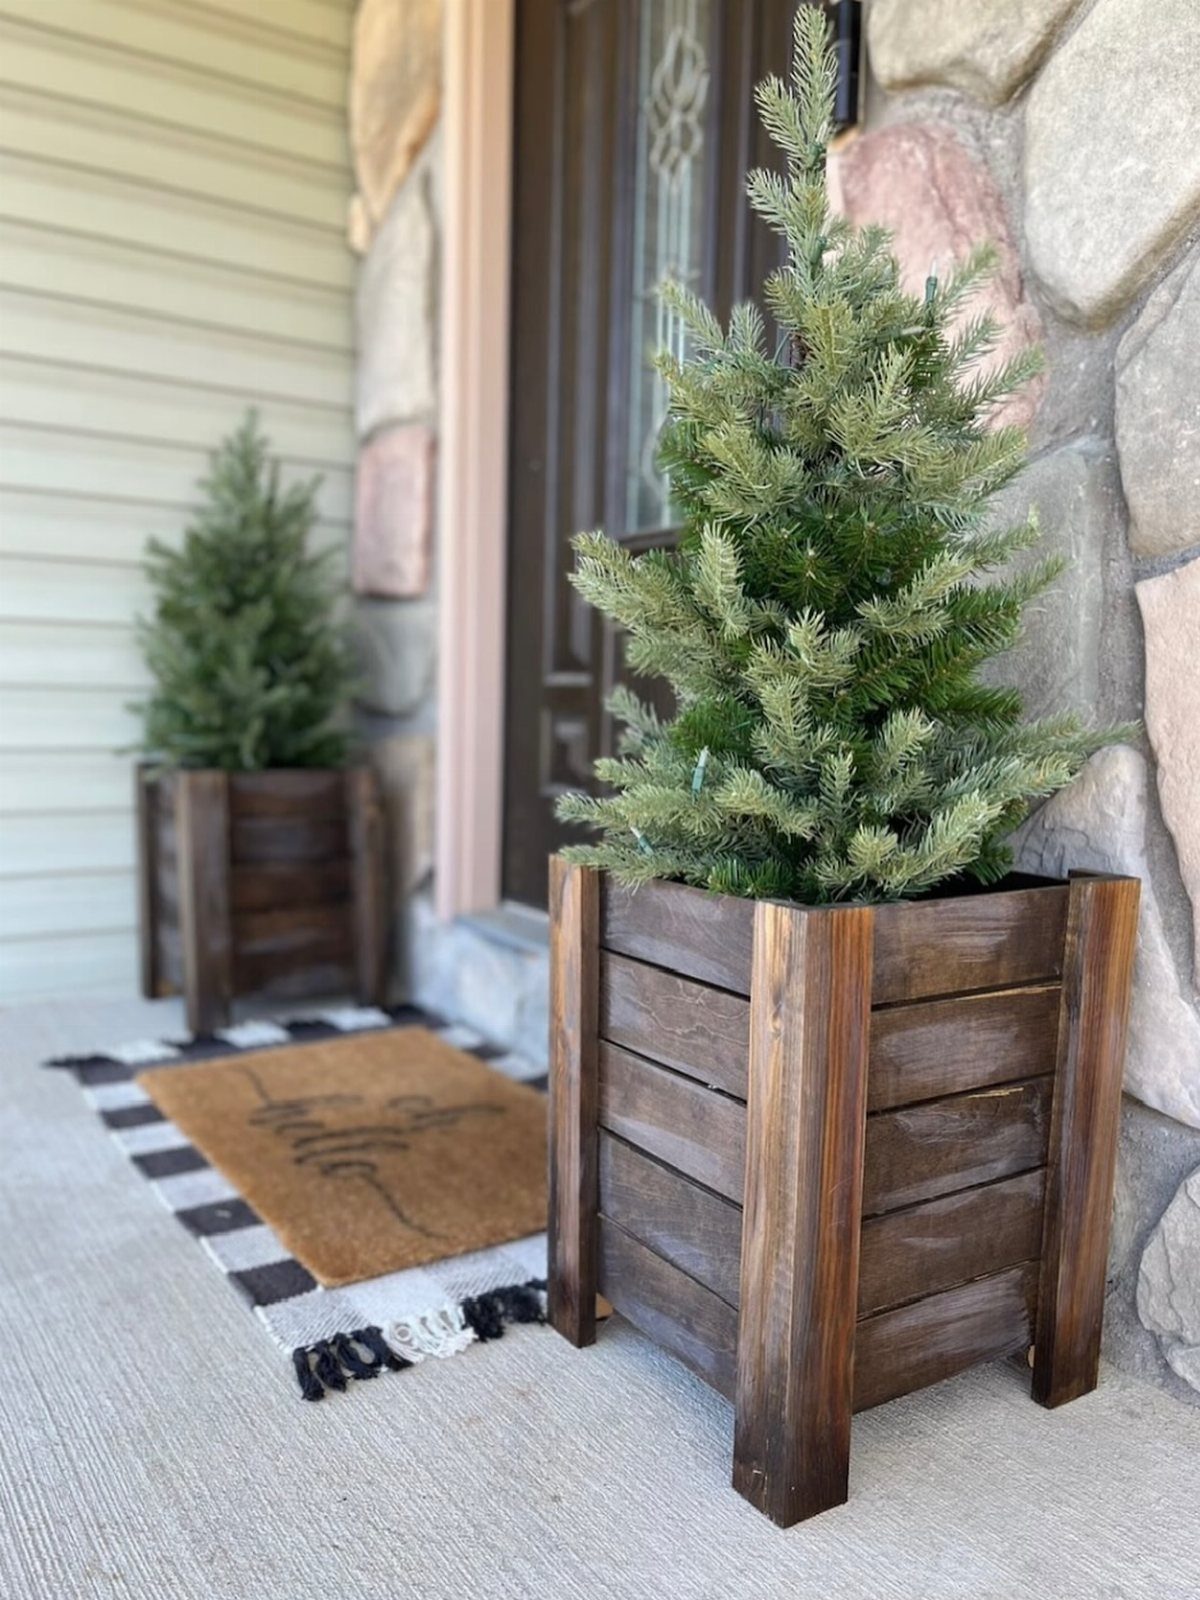
Slat crates in dark brown stain give a small evergreen a proper home on the porch, and a pair flanking a door looks planned. Build each as a simple open box with spaced slats.
Stain the wood before assembly so color reaches every edge. Pick a pot that fits inside the crate, and the tree stays easy to swap out after the holidays.
9. DIY Interchangeable Holiday Sign Post
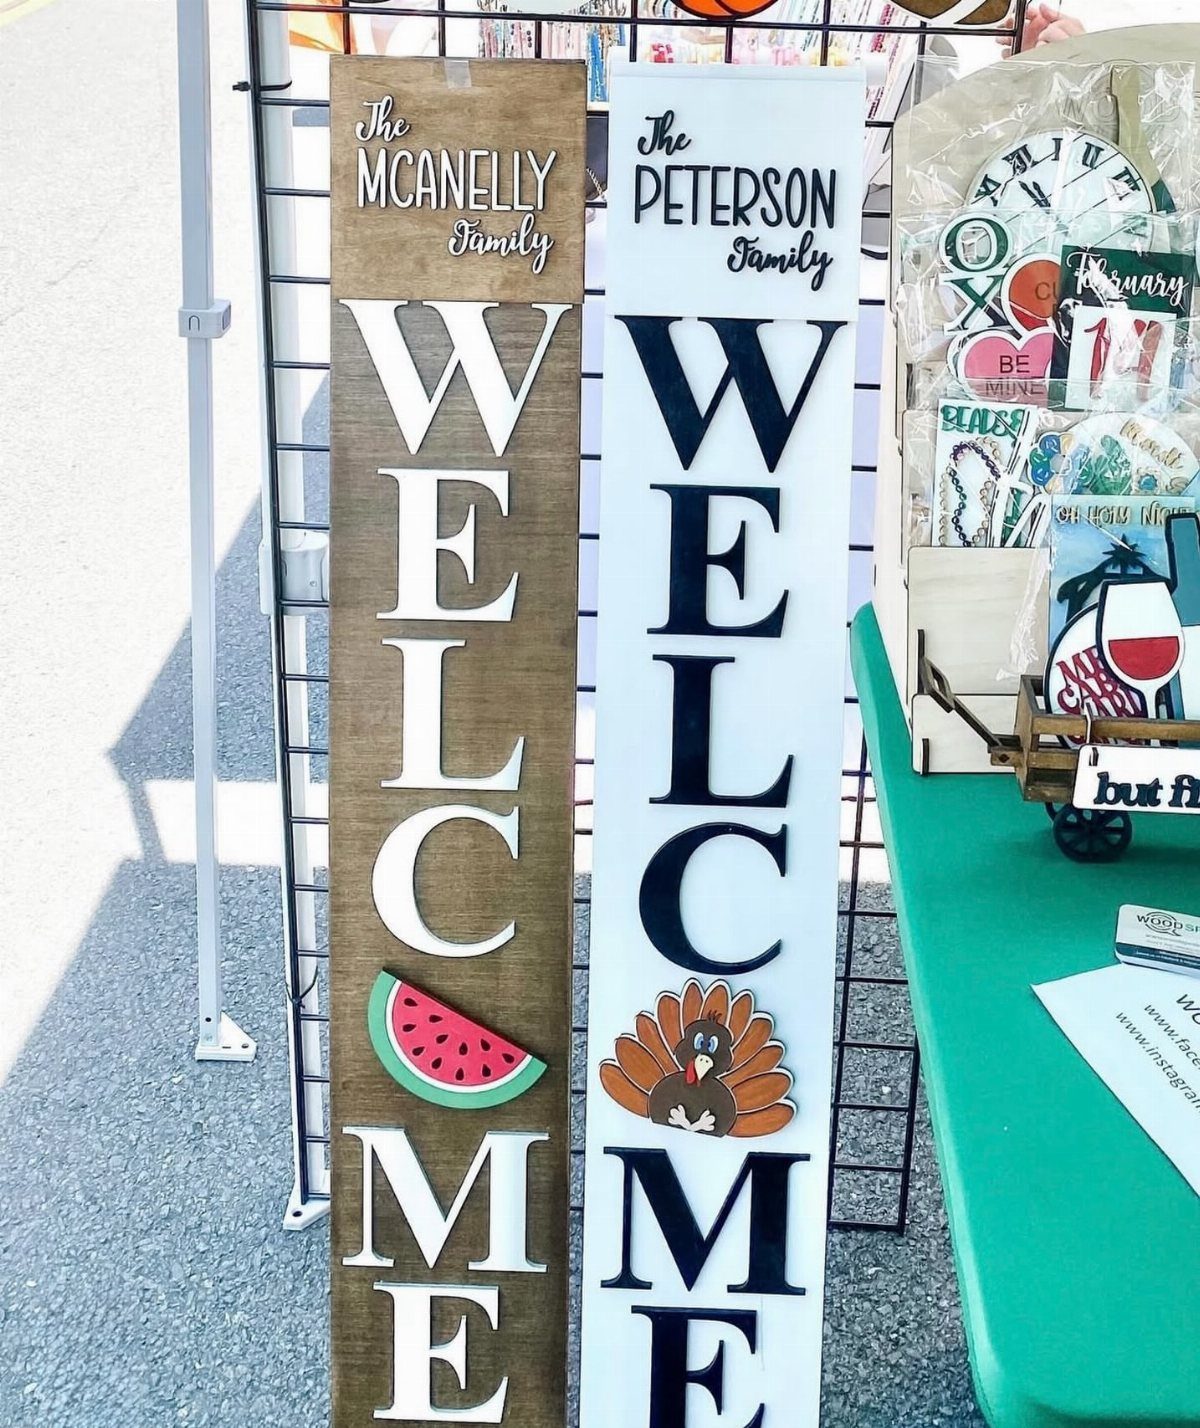
Swappable icons make one sign post work all year. A tall board lettered "WELCOME" holds a family name and a seasonal shape, so a turkey can give way to a snowman or a tree in December.
I would make the icons removable on screws or pegs rather than gluing them. Painting the lettering with a stencil keeps it neat, and a personalized name makes a good gift.
10. DIY Christmas Wood Block Characters

A block of wood can become a small bearded character with a carved face and painted coat. Orange and blue are good picks, and a flat block under the feet keeps each figure standing on its own.
Carving takes patience, so start with simple shapes. Paint in thin coats with acrylics.
Making a pair gives you a matched set for a shelf or a gift.
11. Scrap Wood Christmas Lanterns
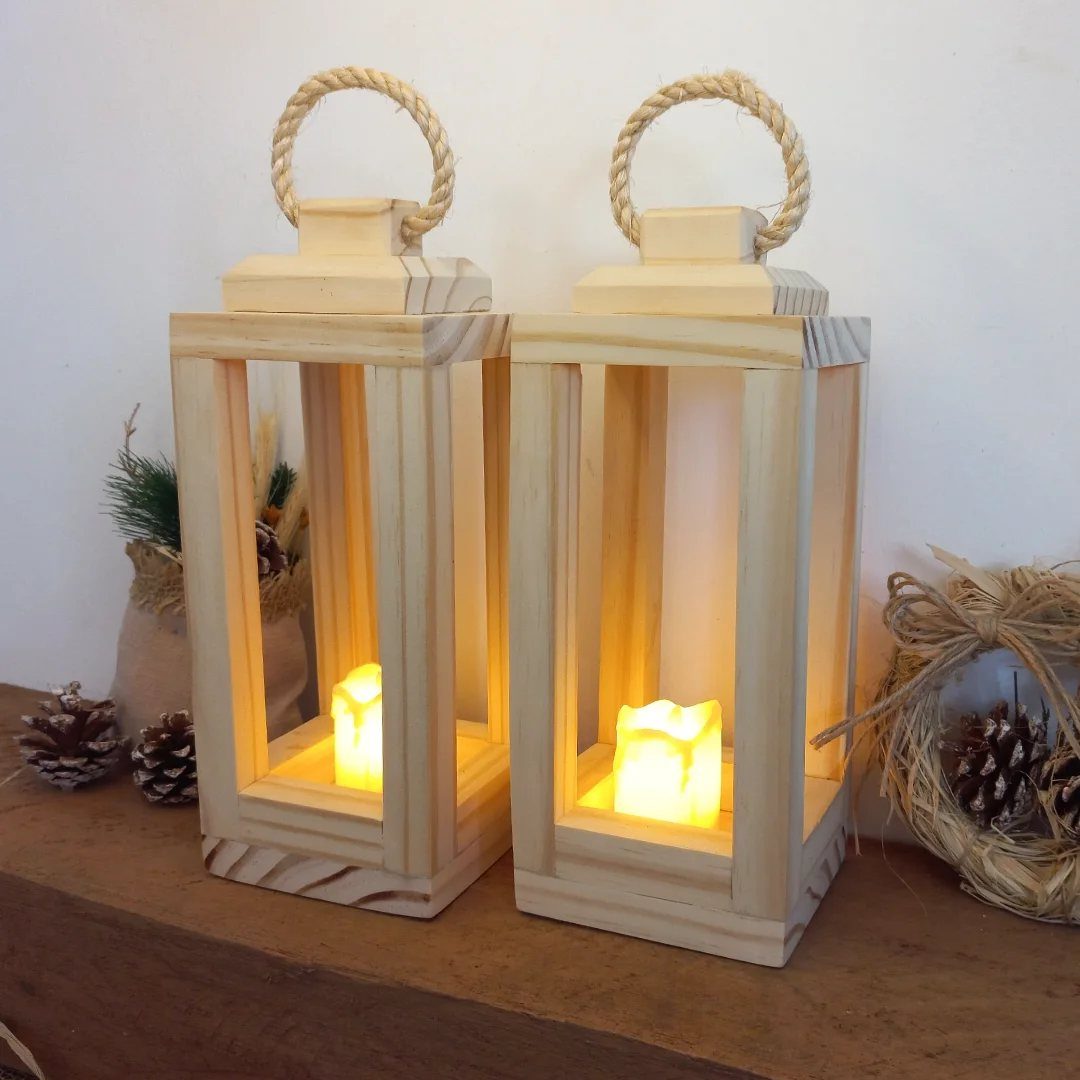
Scrap boards nailed into a box frame become a lantern in an afternoon, and a rope handle makes it look farmhouse. Skip the stain here; bare pine or poplar glows warmly once a candle or LED is lit inside.
I would use LED candles inside. Wood and open flame do not mix, and the glow looks the same through the gaps.
Set a pair on a shelf with pinecones around them.
12. Wooden Advent Calendars
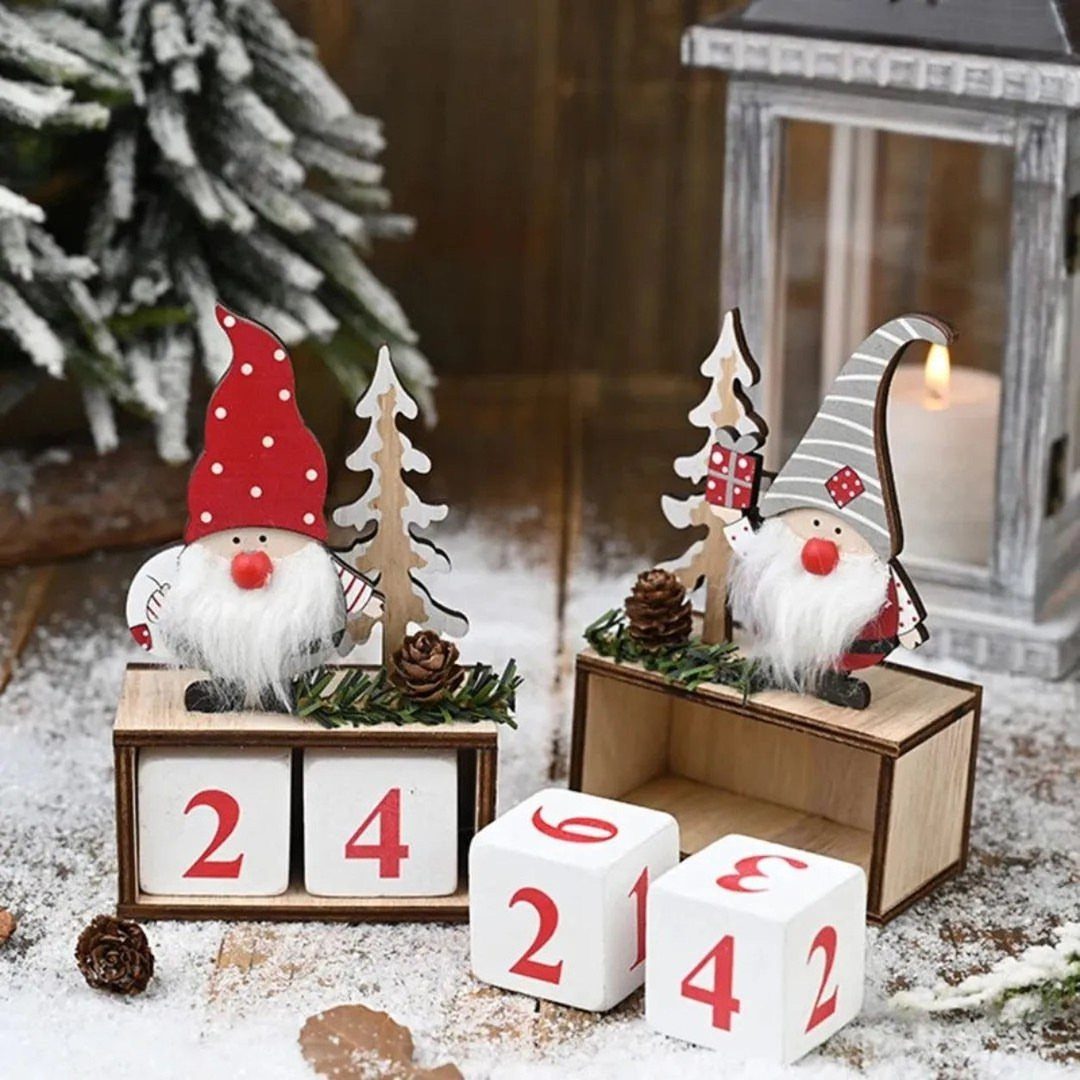
A small wooden box with rotating number blocks makes a reusable advent calendar, because the cubes simply turn each morning. 2 cubes give you the dates, and a gnome on top adds the Christmas touch.
Sand the cubes smooth so they spin freely, and paint the numbers in a color that contrasts with the wood. Keep it for next year and start over at the same place.
13. Wood Christmas Tree Collar
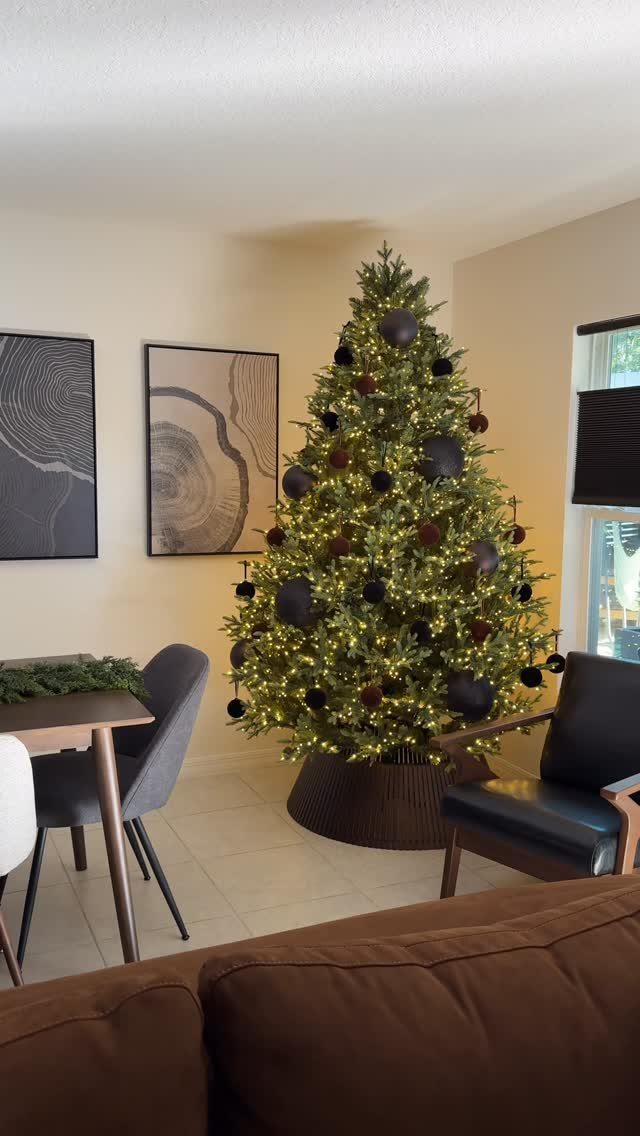
A ribbed wood collar hides the tree stand and gives the base a finished look, and dark brown stain suits a room with other wood tones.
Build it as a ring of vertical slats around a round frame, sized to cover your stand with room to spare.
Finish the stain on each slat while it’s still flat; once the collar is glued up, the inside edges and joints are nearly impossible to reach with a brush.
I would leave a seam or a hinge on one side so the collar can be lifted off after the holidays.
14. Wooden Gift Tags
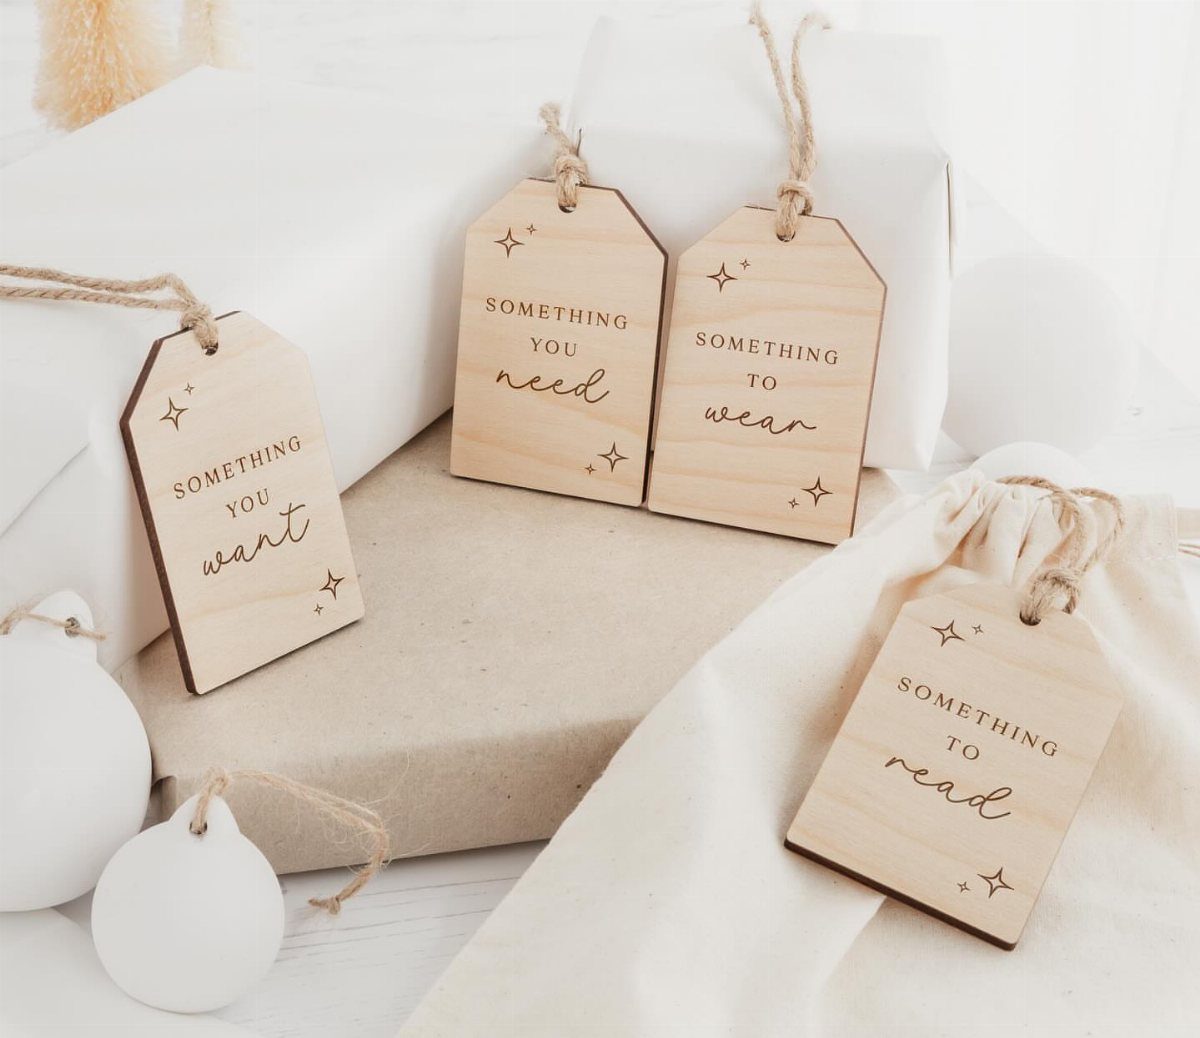
Short handwritten phrases like "Something you want" and "Something to read" turn a plain tag into a small clue about what’s inside. Cut thin wood rectangles, drill a hole at one end, and sand the faces smooth before lettering.
Twine ties them to wrapped packages, and the tags can double as keepsake ornaments later. Test your pen or burner on a scrap first, since grain changes how a line comes out.
15. Wooden Sled
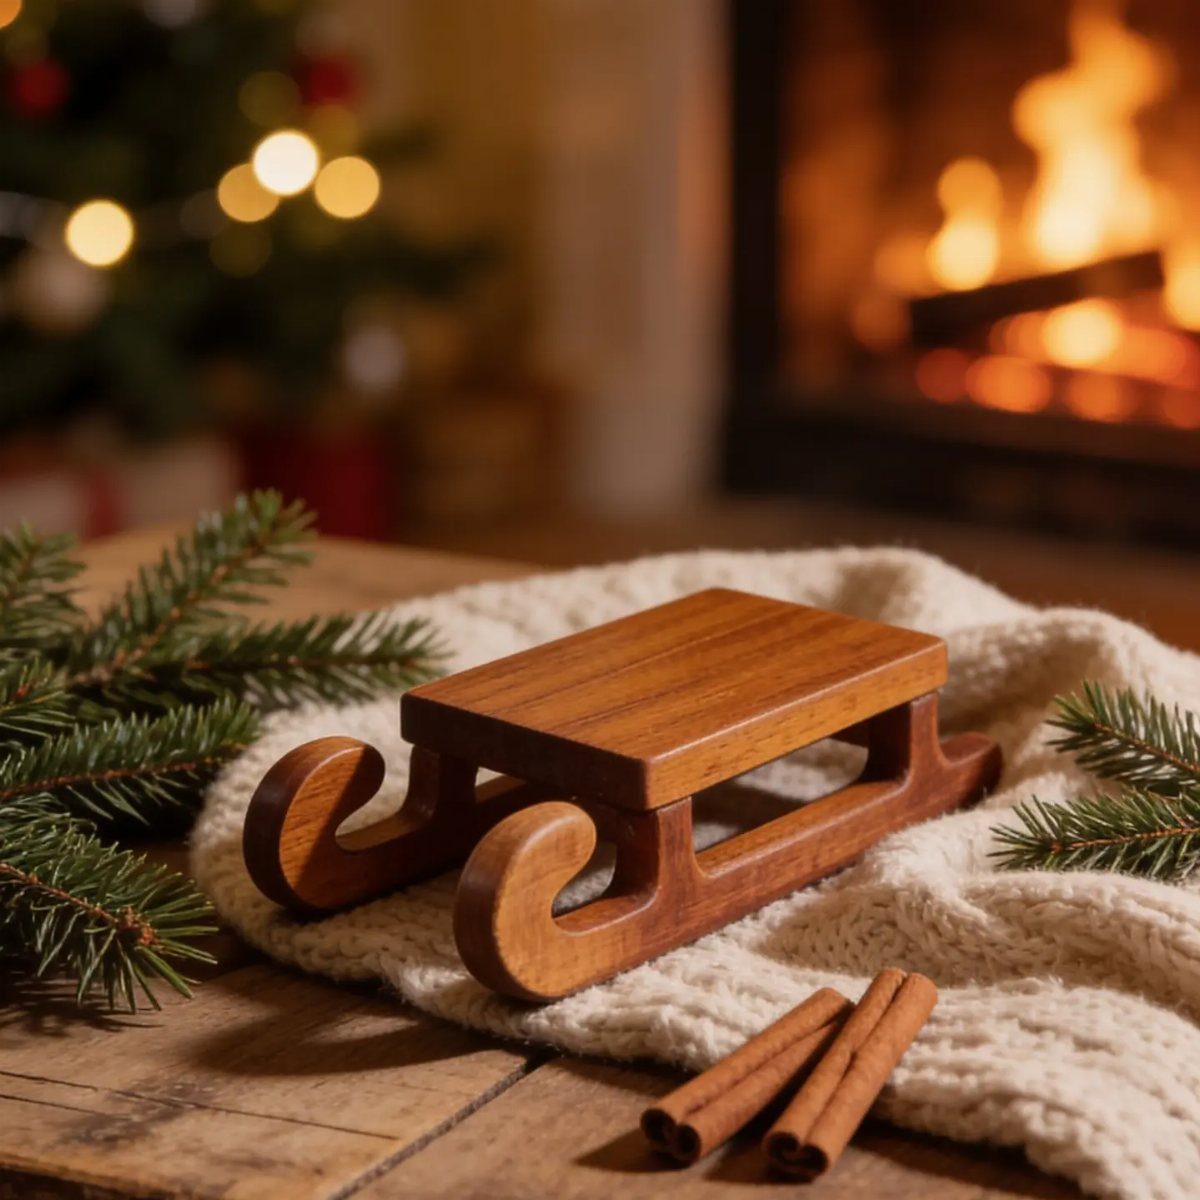
A small decorative sled sits happily on a mantel or table, propped on a knit blanket with cinnamon sticks and greenery. Build it from 2 curved runners joined by a few slats, and sand until the finish looks polished.
Pine is cheap and cuts easily with basic tools. I would use a clear finish so the grain stays visible, and glue plus small brads hold the slats firmly.
16. Wooden Reindeer
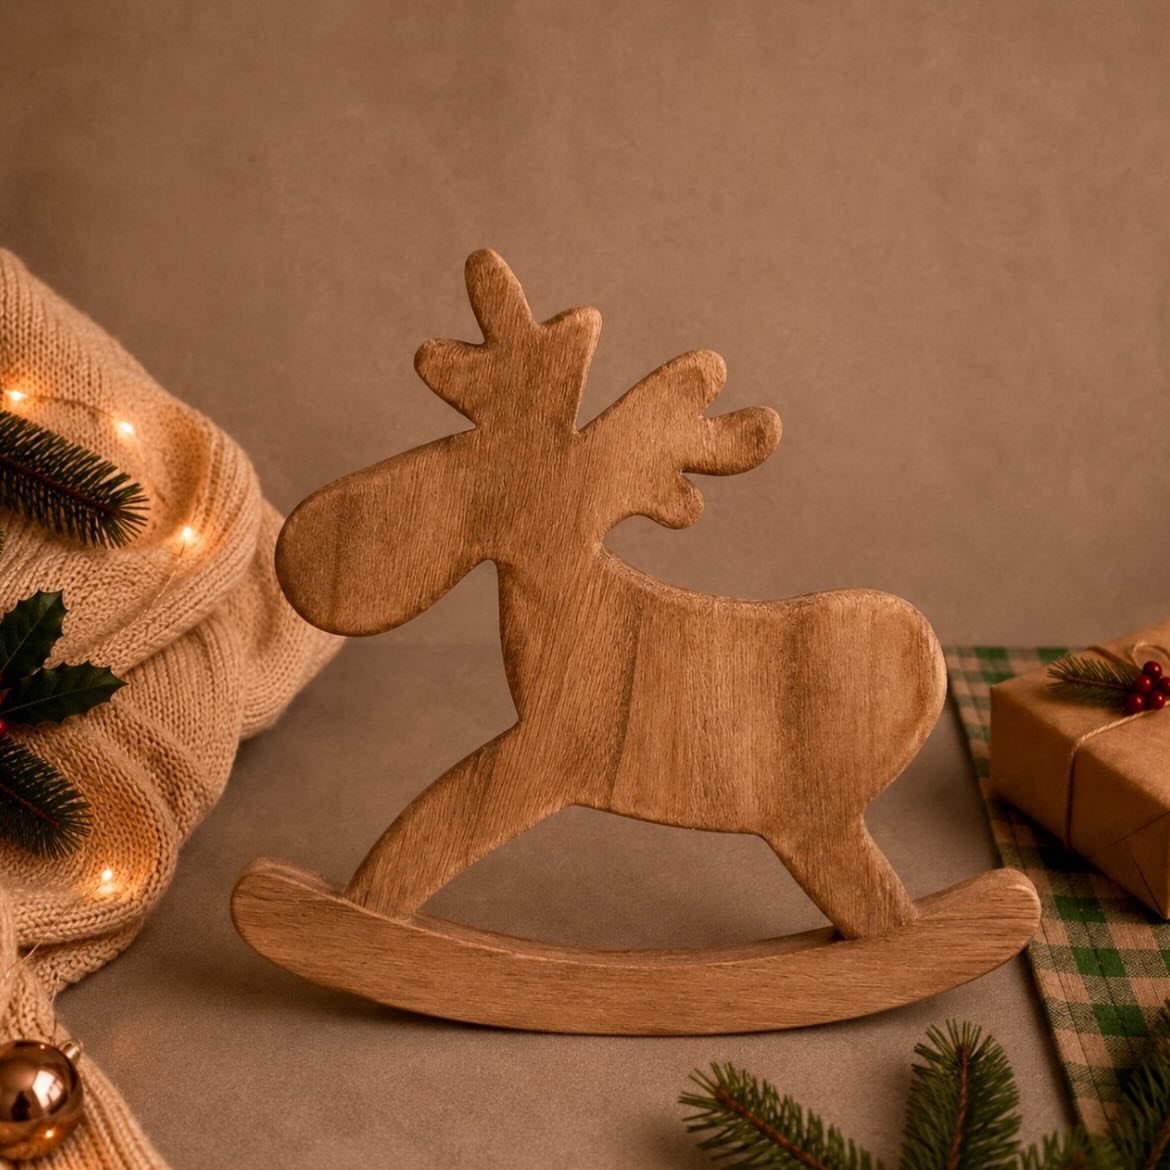
A reindeer cutout set on a rocking base reads as a toy and a decoration at once. Trace the profile on a board, cut it with a jigsaw, and shape a curved base so the figure tips gently.
Sand every edge round. Keep the legs simple, because thin legs snap during cutting.
17. Wood Nativity Scene
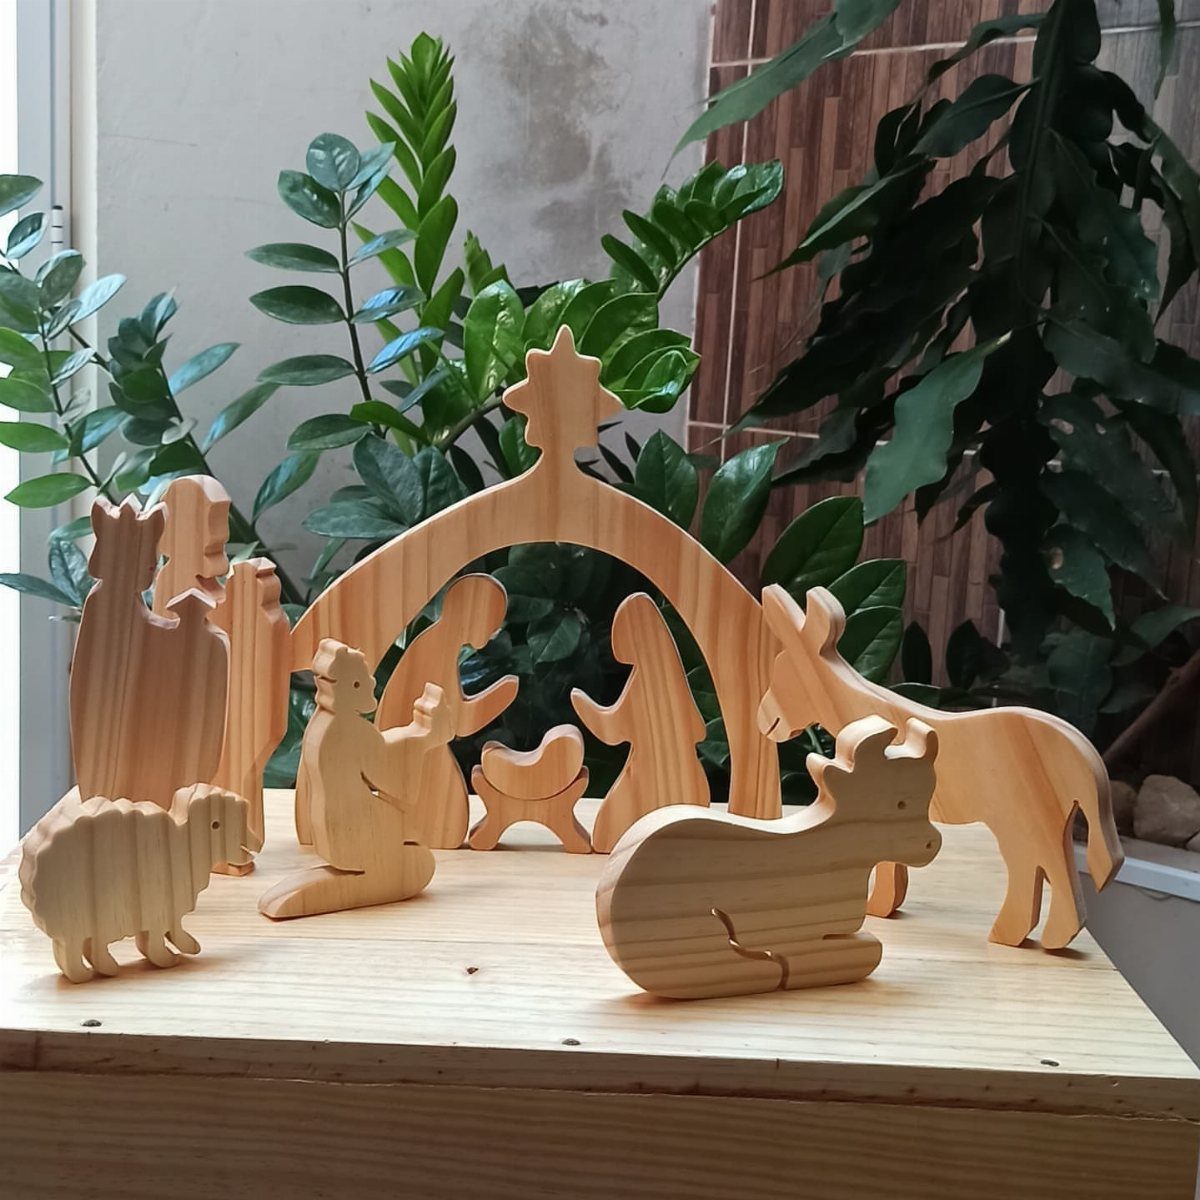
You can keep a nativity scene basic or push it as far as you like.
Simple flat cutouts work well here, since the silhouettes of the figures and a plain stable arch are enough to tell the story without carved detail.
Cut the arch and the 3 main figures first, then add the shepherds and animals over several afternoons so the set grows a little each year.
Leaving the wood natural keeps the cost low and looks calm on a light table. Cut small pieces from thicker stock so they stand on their own.
18. Stocking Holders
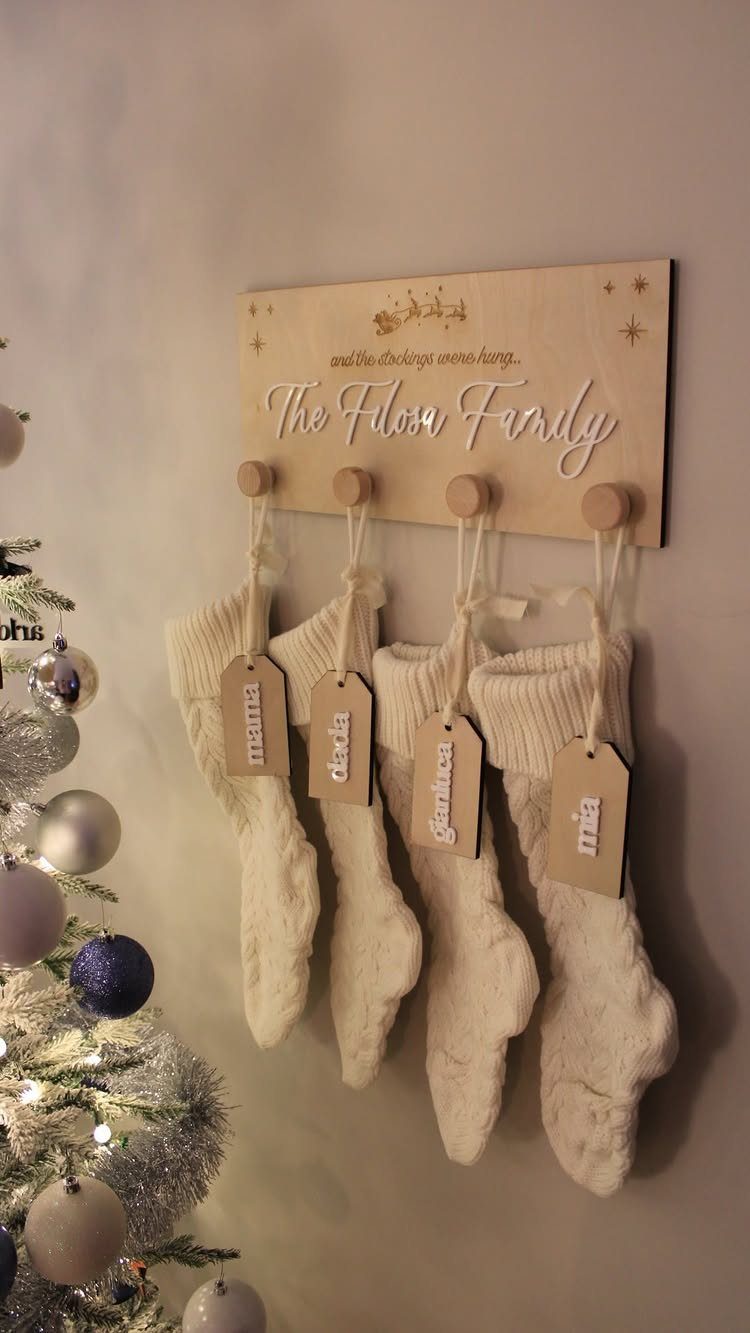
A board with 4 pegs hangs stockings on a wall, which solves the problem of having no mantel. Engrave or burn a line of verse and the family name along the board, and each stocking gets its own peg.
Sand the board, space the pegs evenly, and glue them into drilled holes.
I would screw the board into wall studs, since filled stockings weigh more than they look. Name tags on each stocking keep things sorted.
19. Wood Christmas Garland

Wood bead garland is a good way to dress a tree, and a white painted strand looks soft against flocked branches. Beads drape on a mantel or around a doorway just as easily, so one project covers three spots.
Drill each bead through the center, sand the holes smooth, and paint before stringing. Thread them on sturdy twine and knot between beads if you want them to stay evenly spaced.
Paint is the cheapest finish, and I would pick a matte white so the beads don’t glare.
20. Wooden Christmas Villages
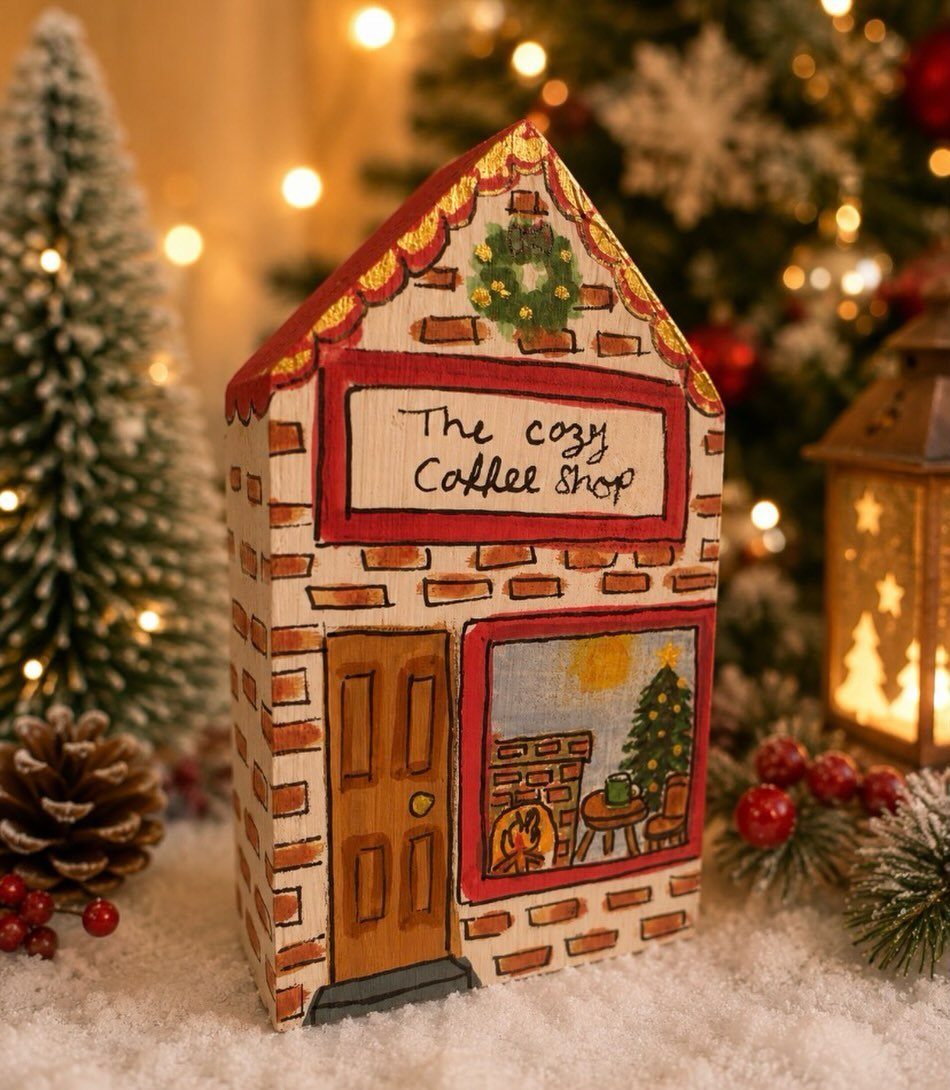
Each little building in a wooden village is a separate small project, so a coffee shop with a painted window scene can be finished in an afternoon and the street added to year after year.
Cut the house from scrap, give it a pitched roof, and paint the details with a fine brush.
Fake snow around the base ties the pieces together, and a small tree and lantern behind the shop make the scene feel full.
I would build every house at a similar scale so they sit together without looking mismatched.
21. Wooden Holiday Gift Crate

Crates hold a gift and become part of it. A small wooden crate filled with a gnome, pinecones and a red ornament is a present the recipient can display right away, with a card tucked beside it.
Build the crate as a simple open box from pine or scrap boards, and sand the corners so nothing snags. Leave the wood natural, since the filling supplies the color.
Choose contents that fit the opening without crowding. Edible treats work too, though I would line the crate with paper first.
Materials and Tools Needed
A miter saw earns its spot because it gives clean, square cuts, and square cuts make every joint close tight.
While the glue cures, a couple of clamps keep your joints from shifting, and a brad nailer gets the frame together in minutes instead of an hour.
For fasteners, I pick finish nails over brad nails. They hold stronger, and the marks they leave are still small enough to hide.
A hot glue gun is handy for decorative bits, since there is no waiting on adhesive to dry. Keep scrap wood, paint and a few simple hardware pieces on hand, and most of these builds need little else.
Tips for Selling Projects
Before you commit to a big run, build 2 or 3 holiday designs and see which ones people actually pick up. A small trial run shows what people actually pick up.
Know your costs before you set a price. Lumber prices and market fees shift with where you live and what wood you buy, so run the numbers for your own area.
Stick to 3 or 4 colors across the whole table, and a pile of separate pieces starts to read as one holiday display.
Custom names can pay off, but keep them manageable: put finished samples on the table and post a firm order cutoff date. Check local event rules and product requirements before you sell.
Project Planning Advice
Start in November. A big build begun in the middle of December leaves no time to enjoy it, and finished pieces don’t have to go on display right away.
Pick projects that match your tools, your materials and the hours you really have. A short list you finish beats a long one you abandon.
Carry the same few colors and finishes through every build, and the group looks like a set, whether it sits on a bazaar table or a mantel. Or personalize individual pieces for gifts that mean more.
Frequently Asked Questions
How to decorate a small flat for Christmas?
Stick to small handmade pieces that fit on a shelf or table. Tabletop trees stacked from graduated 2×4 offcuts, tea light holders with a shallow recess, and wood slice ornaments all take up very little space.
Repeating one tight palette, say walnut stain, white paint and a little brass, ties a shelf of small pieces together so it looks planned instead of scattered.
What are some good small woodworking projects?
Ornaments, candle holders, serving boards and gift tags are good picks. A tea light holder, for example, only needs a shallow recess drilled with a Forstner bit, which leaves a clean flat-bottomed pocket.
What are some Christmas crafts?
Wooden trees, snowmen and advent calendars are all easy to make.
A tabletop tree comes from stacked 2×4 pieces, a snowman leaner is a painted cutout with a plaid scarf, and an advent calendar can be a small box with two rotating number cubes.
Sanding the cubes smooth lets them spin freely each morning.
How to decorate with mini Christmas trees?
Give them a spot where they look planned, like a pair flanking a porch door.
For a living tree, I’d stain a slat crate dark brown and set the nursery pot inside it; lifting the pot out in January takes about 10 seconds.
Set a stacked wooden tree on a side table and weave a string of warm white fairy lights through the gaps between the layers, and it lights up from the inside.






