Drawers, cabinets and wall space decide which of these builds fits your kitchen, so measure the spot before choosing between the drawer organizer, the mug rack or the floating shelves.
A drawer insert built to the box’s inside dimensions will fit better than any standard size, and a wall-mounted rack depends on where the studs are.
1. DIY Drawer Organizer
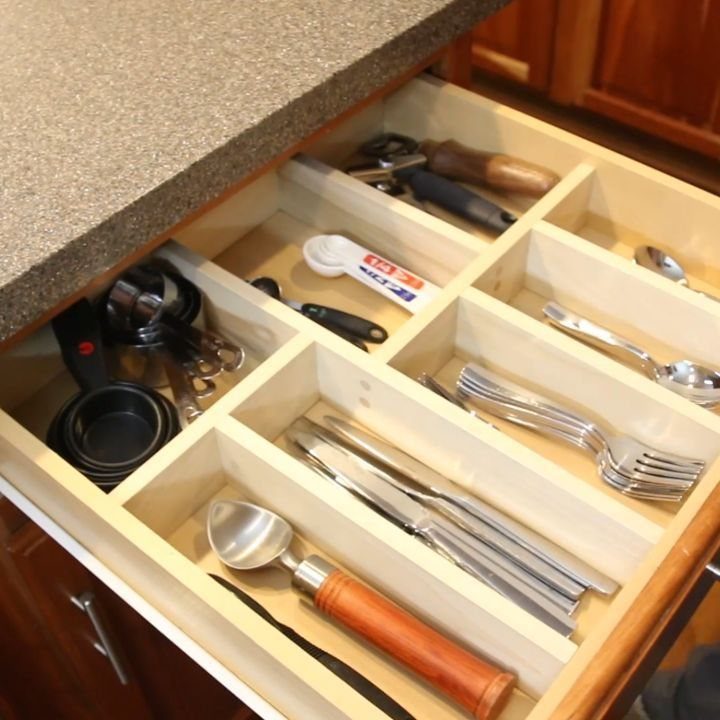
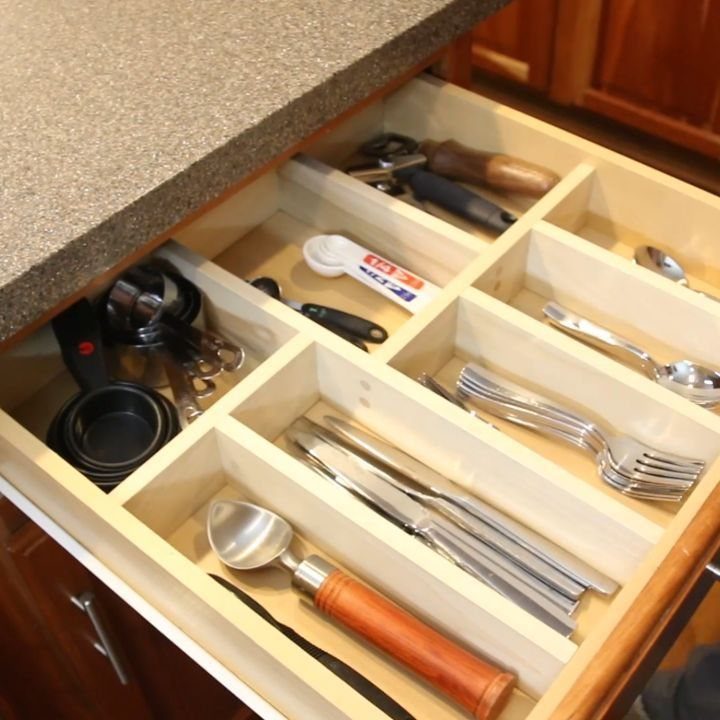
Measure the drawer’s inside width, length and depth before you cut anything, then build the dividers to fit that box, not a standard size.
Utensils, measuring cups and a scoop all need different-sized slots, so lay your own tools out on the drawer floor and sketch the compartments around them.
Thin wood strips keep the dividers from eating space. Leave them loose rather than glued in, so you can rearrange when the gear changes.
2. DIY Wooden Serving Tray
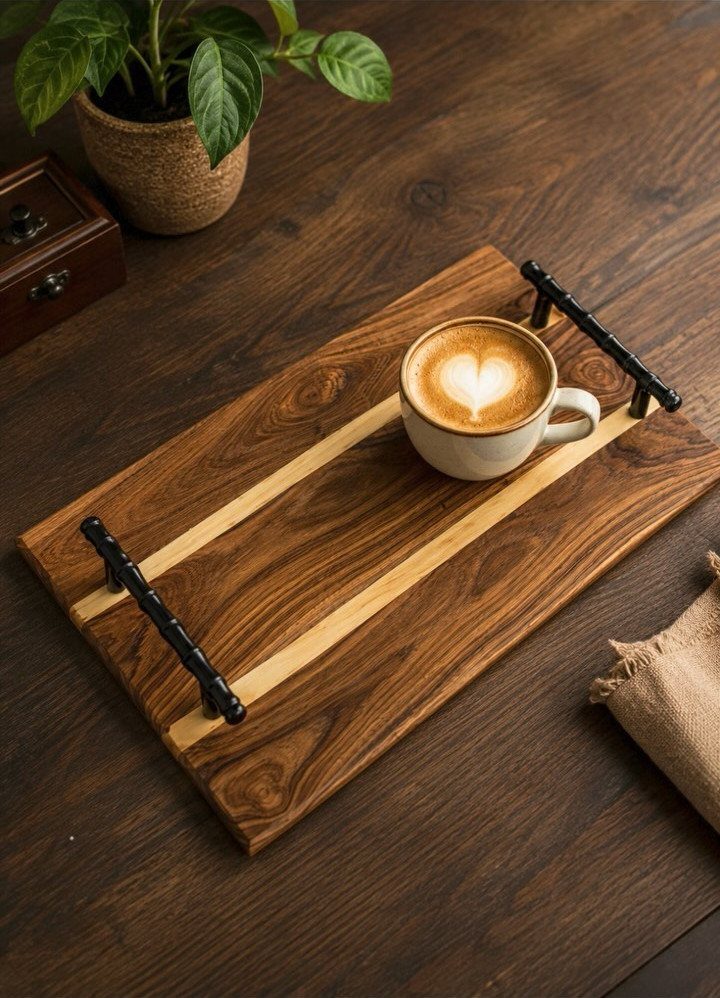
A serving tray is a good afternoon project because the parts are few: a flat panel, a frame and 2 handles.
Black handles make a strong contrast against pale wood.
I would sand the panel smooth and finish it before attaching them, since reaching around hardware is slow. Keep the tray’s size to what fits your table and a cup or two.
3. DIY Mug Rack
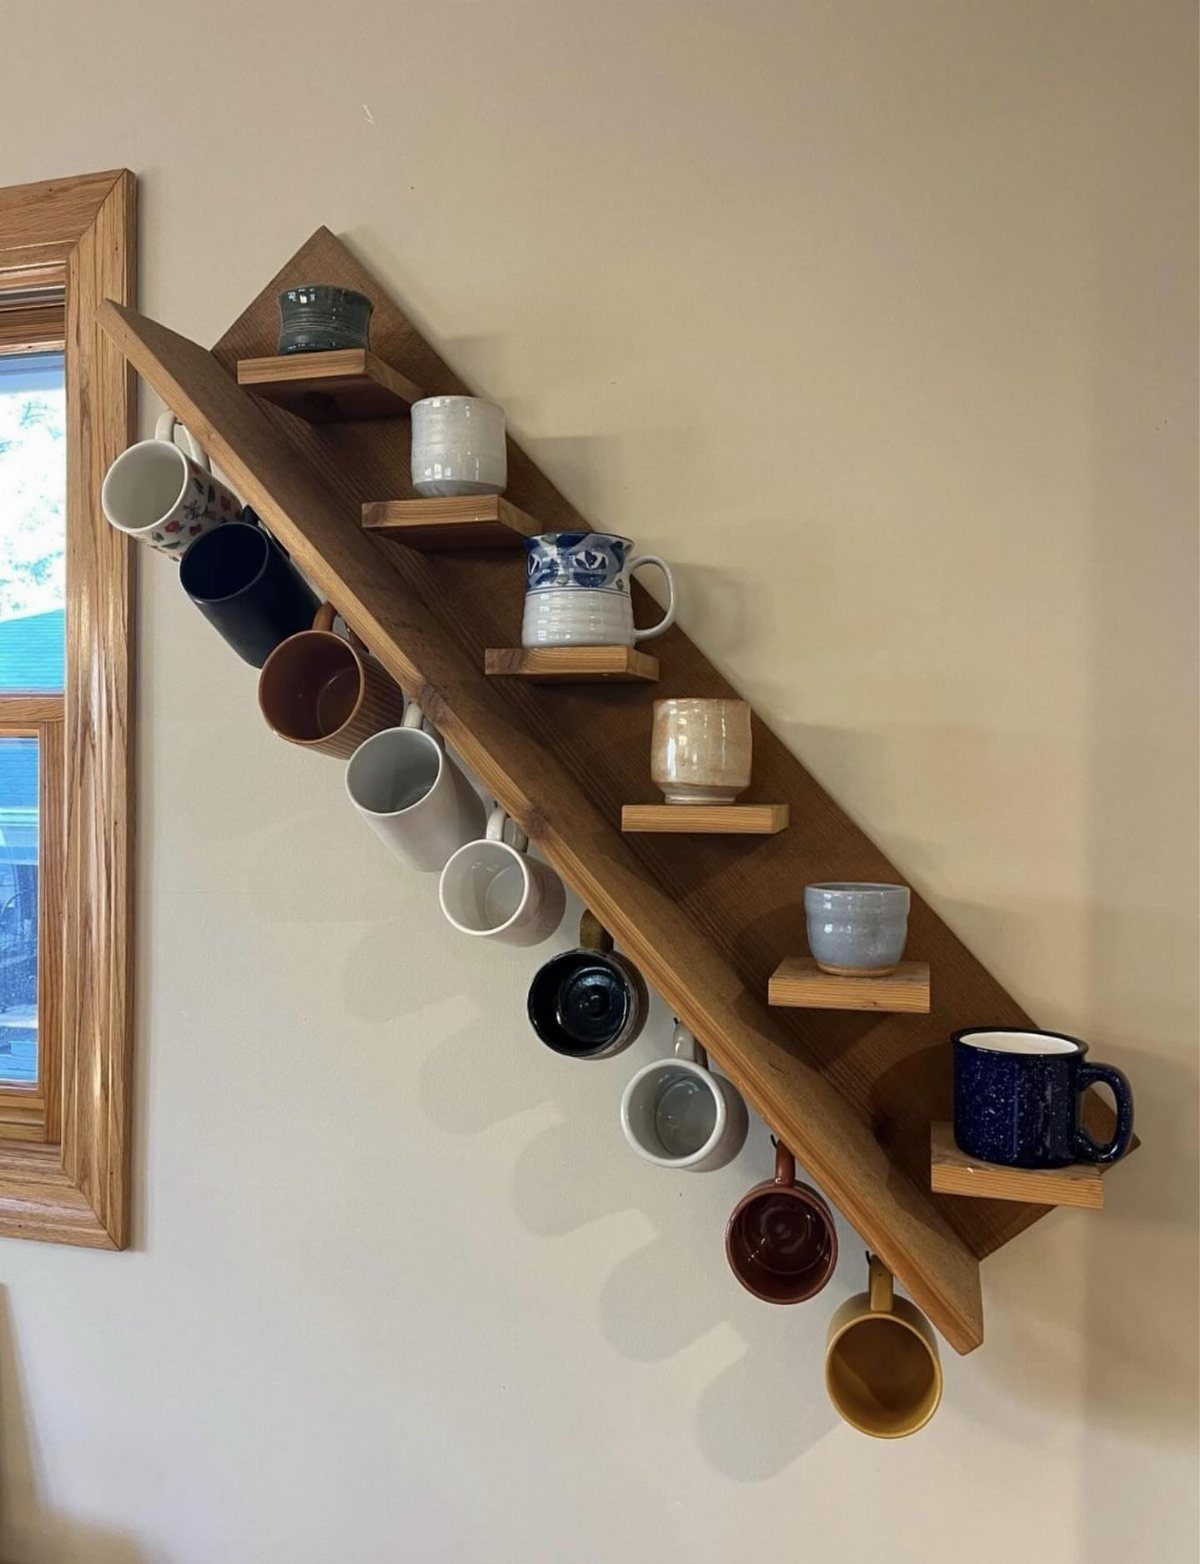
Mugs hanging on a wall free up cabinet shelves, and a triangular frame makes the rack part of the decor instead of just storage. Space the hooks or pegs wide enough that handles don’t collide.
Screw the rack into studs when you can, since a full set of ceramic mugs adds up in weight. Pick a stain that matches your window trim and the rack will look built in.
4. DIY Rotating Spice Rack
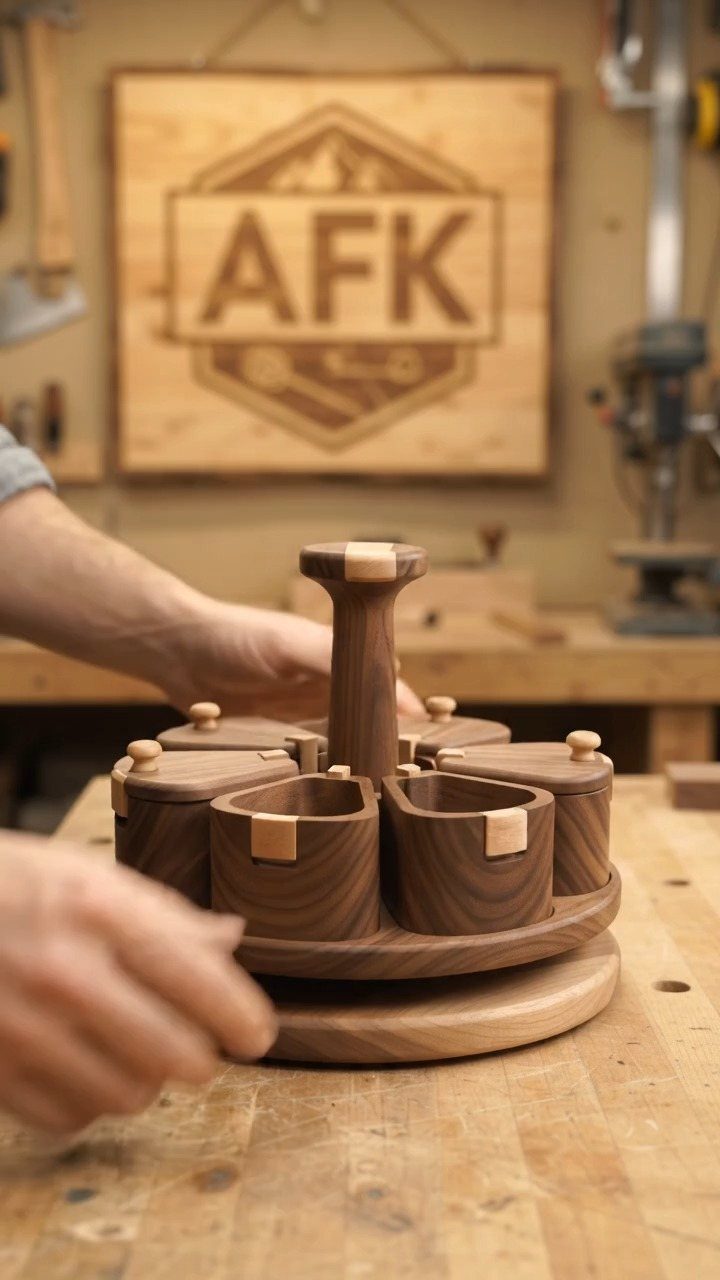
A rotating rack puts every jar one quarter turn from your hand, which beats digging through a cabinet. Build the turntable first and test its spin before adding the tiers.
Size the openings to the containers you already own, and cut one test hole in scrap. A drill press keeps those holes square and even, though a hand drill with a guide block will work if you go slowly.
5. Floating Shelves
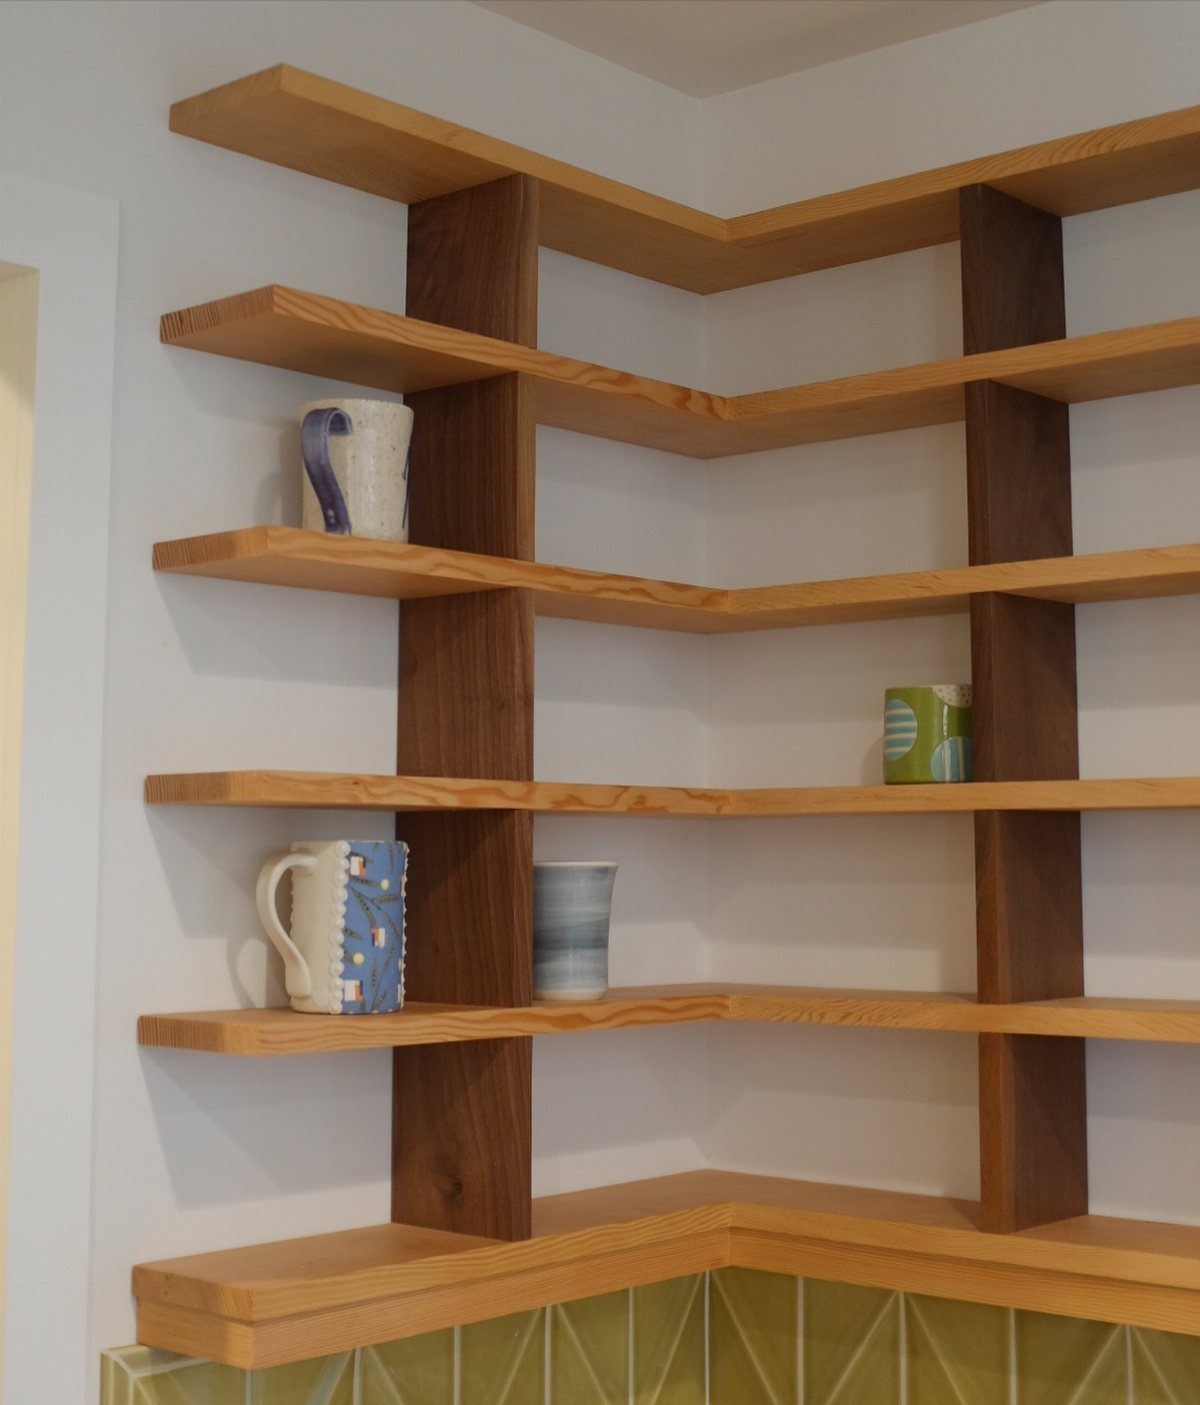
Floating shelves in the kitchen are a style choice that has stayed put, and they suit a corner like this one where upper cabinets would feel heavy. Dark supports against lighter boards give the look a crisp edge.
Keep the load modest: mugs and pitchers are about right, not stacks of dinner plates. Hidden brackets anchored into studs hold best, and a level is your most important tool here.
6. DIY Kitchen Island
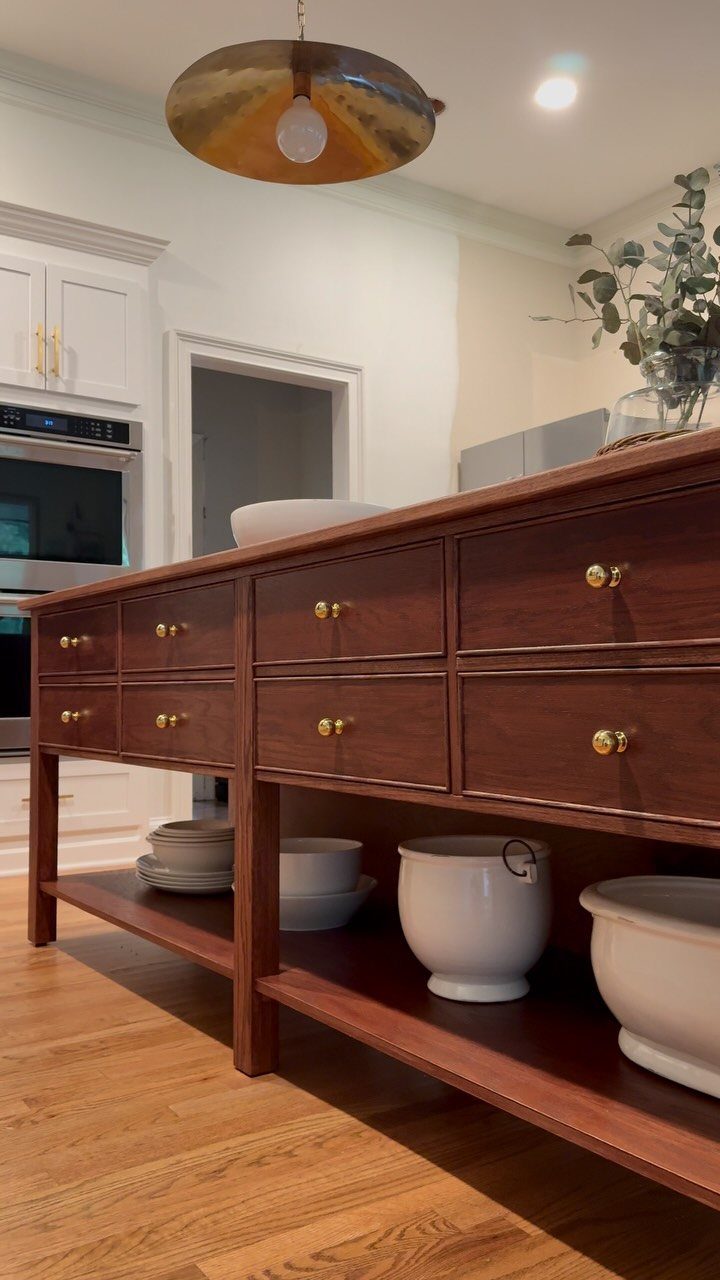
An island with drawers on one side and open shelves on the other gives you prep space and storage in a single piece. Open shelving is handy for everyday bowls you reach for constantly.
This is the biggest build on the list, so plan more than one afternoon, or build the base first and add the top later. Measure your walkways before choosing dimensions, because an island that crowds the cabinets gets annoying fast.
7. DIY K-Cup Drawer Organizer
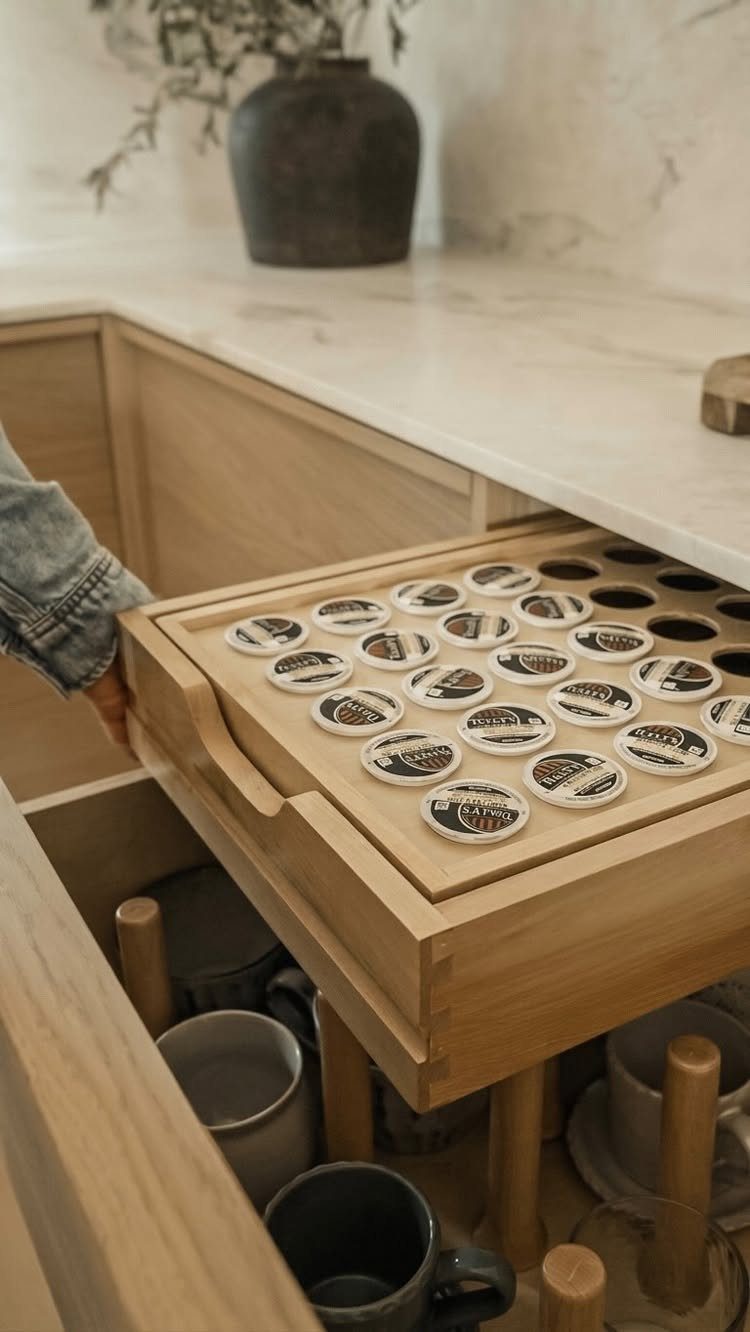
Circular cutouts sized to a K-Cup keep each pod standing upright in its own slot, so you can read the flavors at a glance.
Drill the holes with a Forstner bit, and test one in scrap first so the pod drops in without wobbling.
A light wood like the one in the drawer keeps things bright. Build the insert to the drawer’s inside dimensions, and sand every hole edge so the foil lids don’t snag.
8. DIY Pullout Cabinet Drawers
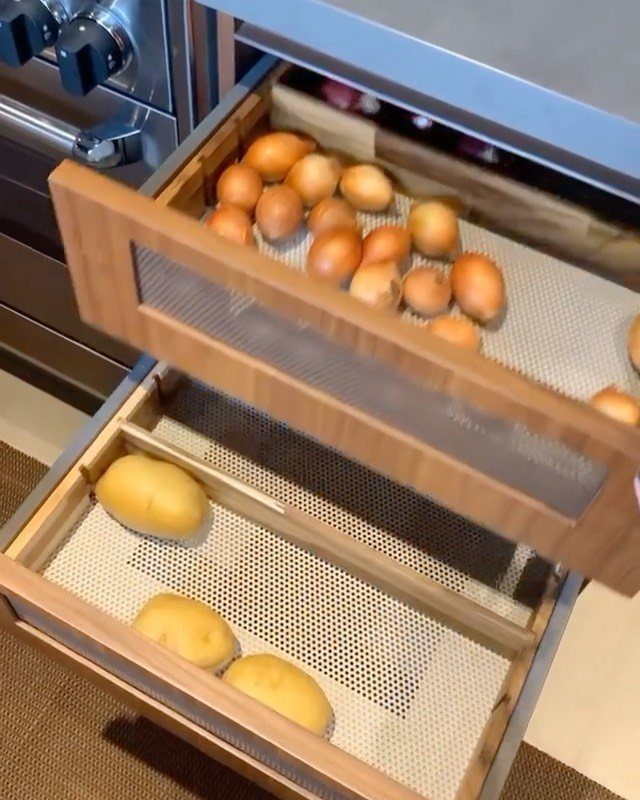
Pullout drawers turn a deep base cabinet into something you can see all the way into, no kneeling to reach the back. Perforated bottoms let air move around potatoes, which makes this a smart fit for root vegetables.
Full-extension slides are worth the money here, because a loaded drawer needs to open completely. Measure the cabinet opening carefully, then subtract the slide clearance on each side before cutting the box.
9. DIY Vegetable Storage Bin with Dividers
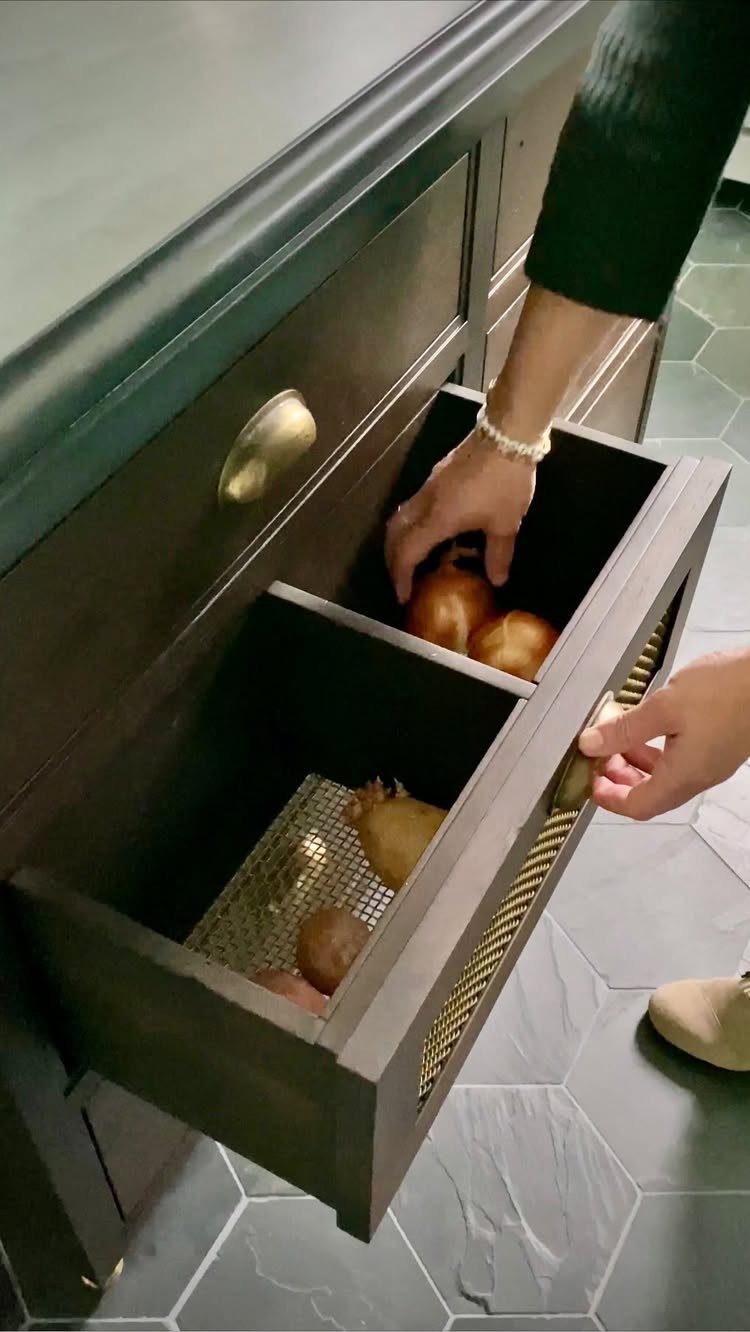
Dividers keep onions from rolling into potatoes, and mesh sides let the bin breathe. Build it as a pullout inside a cabinet so the produce stays out of the light.
Size each compartment to a typical bag or a few handfuls, not the whole cabinet. A dark stain hides the dust and dirt that root vegetables leave behind.
Screw the dividers in place instead of gluing them; a shifted layout is easy to fix later.
10. DIY Utensil Rack
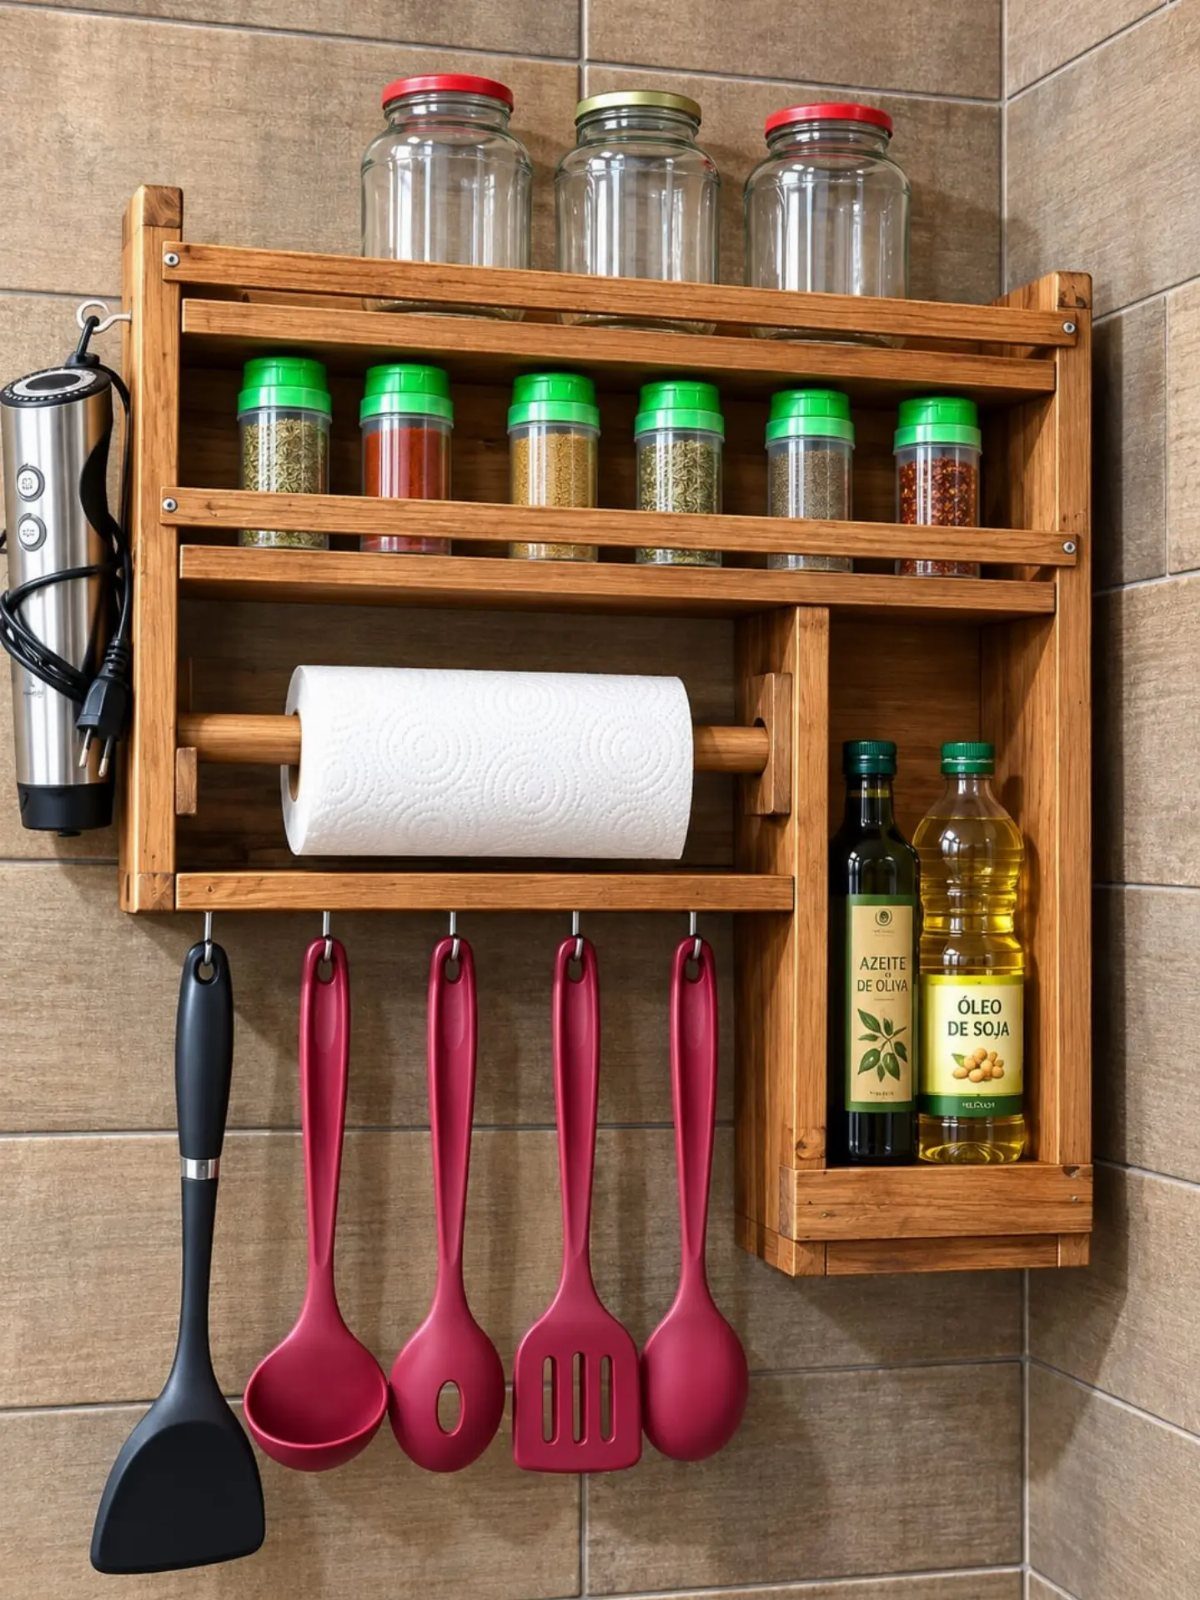
Plan the layout around what you actually own: set the bottles and jars on a shelf, and use a rail with hooks for the tools.
Screw the rack into studs, or use heavy anchors in tile after drilling with a masonry bit.
Silicone utensils weigh little, but full oil bottles add up, so size the shelf and the wall anchors for the heaviest thing it will carry.
11. DIY Cutting Board with Mixed Wood
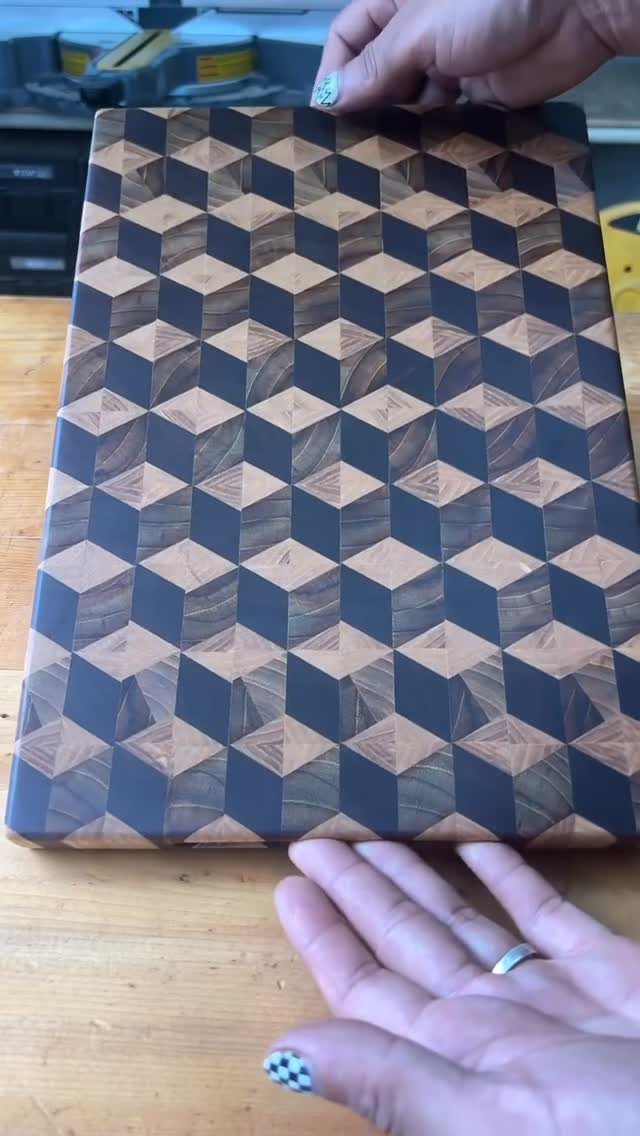
The cube pattern comes from gluing up strips of light and dark wood, cutting that panel into angled slices, then regluing the slices offset from one another.
It takes patience, and I would call it a weekend project, not an afternoon one.
Pick species with strong contrast, like maple against walnut, so the cubes read clearly. Sand through the grits slowly, since any glue squeeze-out will show.
Finish with food-safe mineral oil.
12. DIY Produce Stand
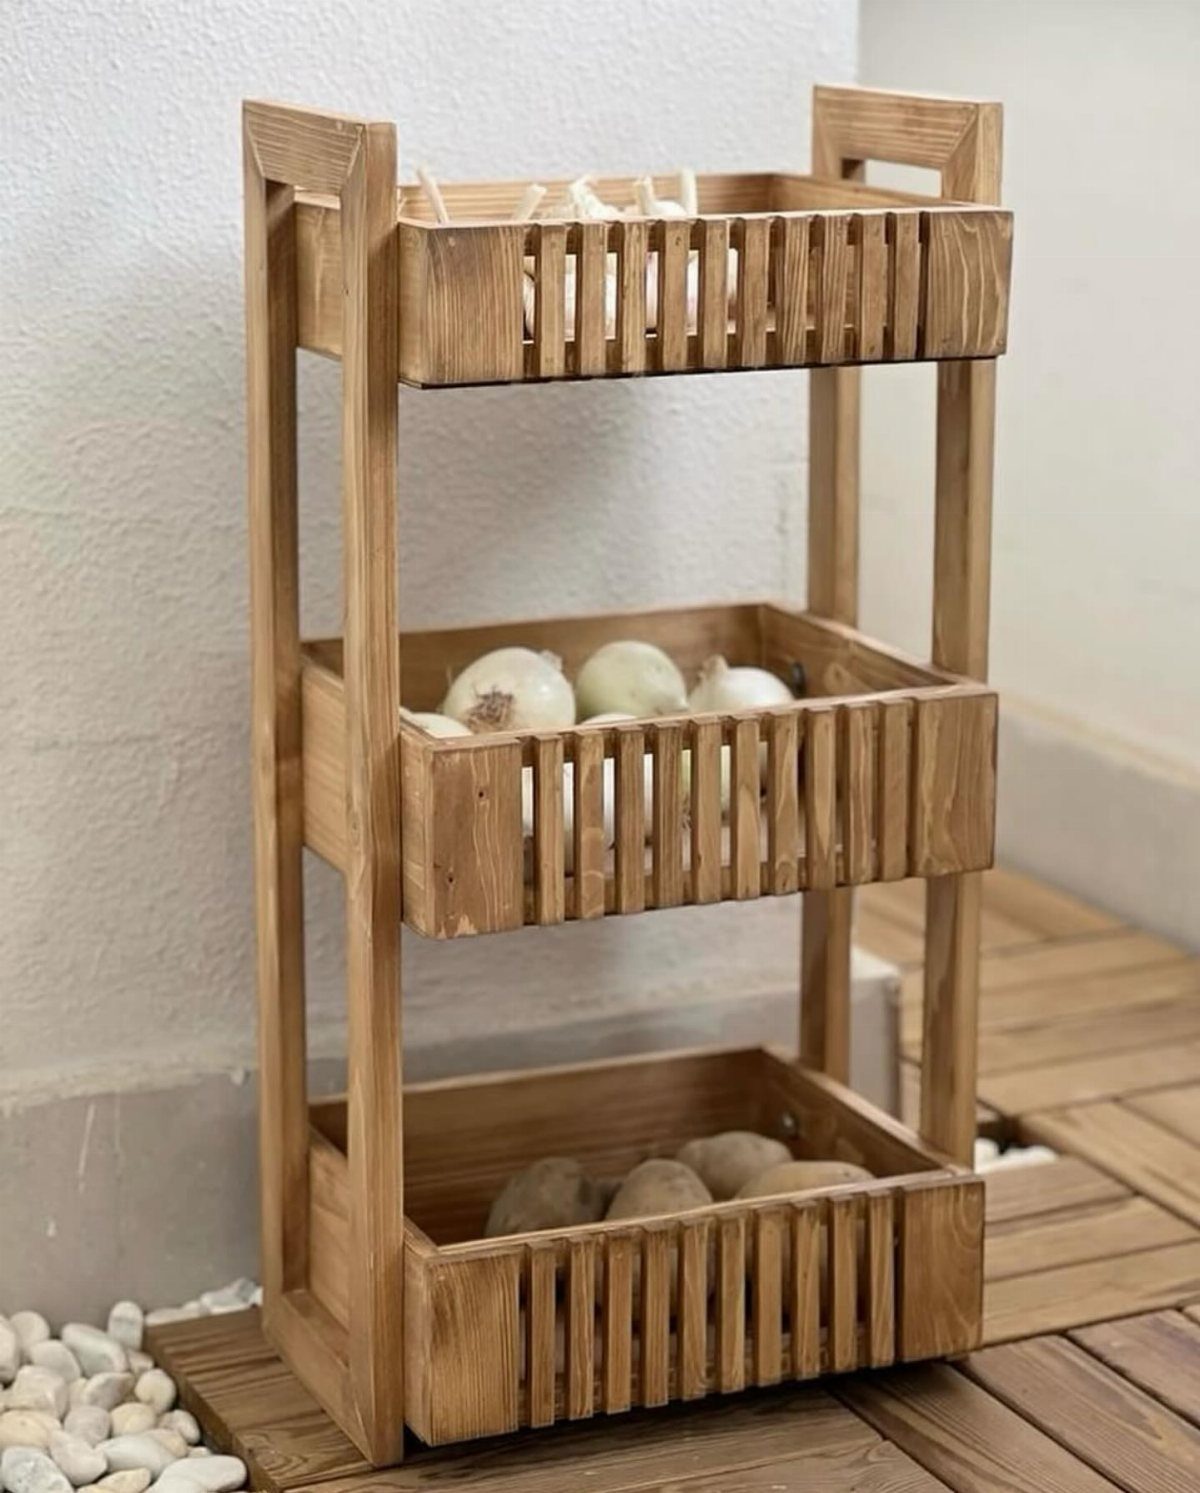
A tiered stand lets garlic, onions and potatoes sit apart in open air, and it works anywhere you have a few square feet of floor or counter. Slatted or spaced shelves allow airflow around the produce.
Make the bottom tier the deepest, since potatoes are the heaviest, and step the upper ones back so you can reach each. A coat of water-based finish is easy to wipe clean when dirt falls off the vegetables.
13. DIY Magnetic Chalkboard
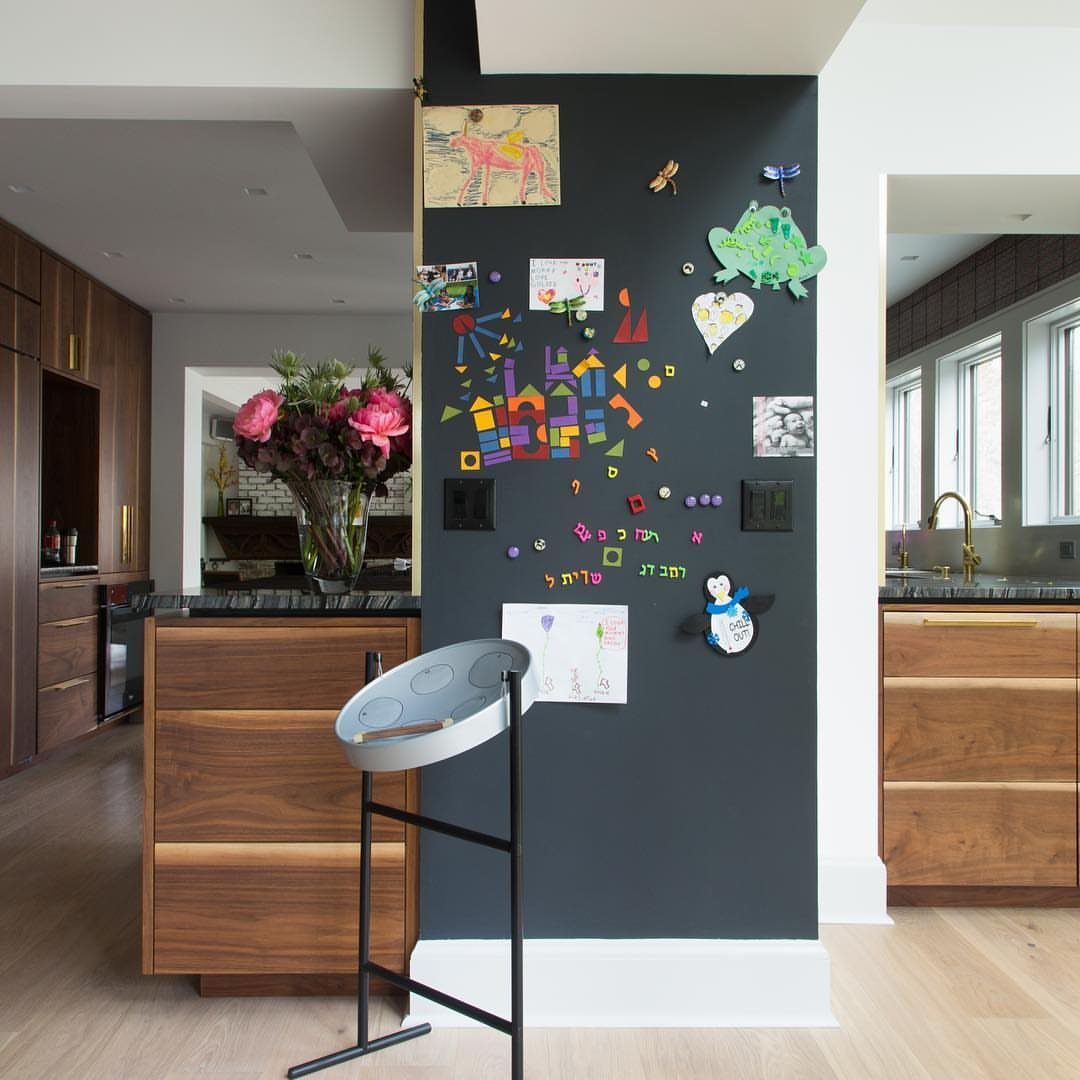
A magnetic chalkboard wall gives the kitchen a grocery list, a message board and a gallery for kid art in one surface.
A dark grey paint, like a charcoal or slate chalkboard finish, keeps the board calm and lets chalk drawings and bright magnets stand out.
Build it on a smooth panel you can mount flat, then finish it with magnetic chalkboard paint.
Sand the panel first so the coats go on evenly. Keep the wall at a height small hands can reach.
14. DIY Wooden Knife Block
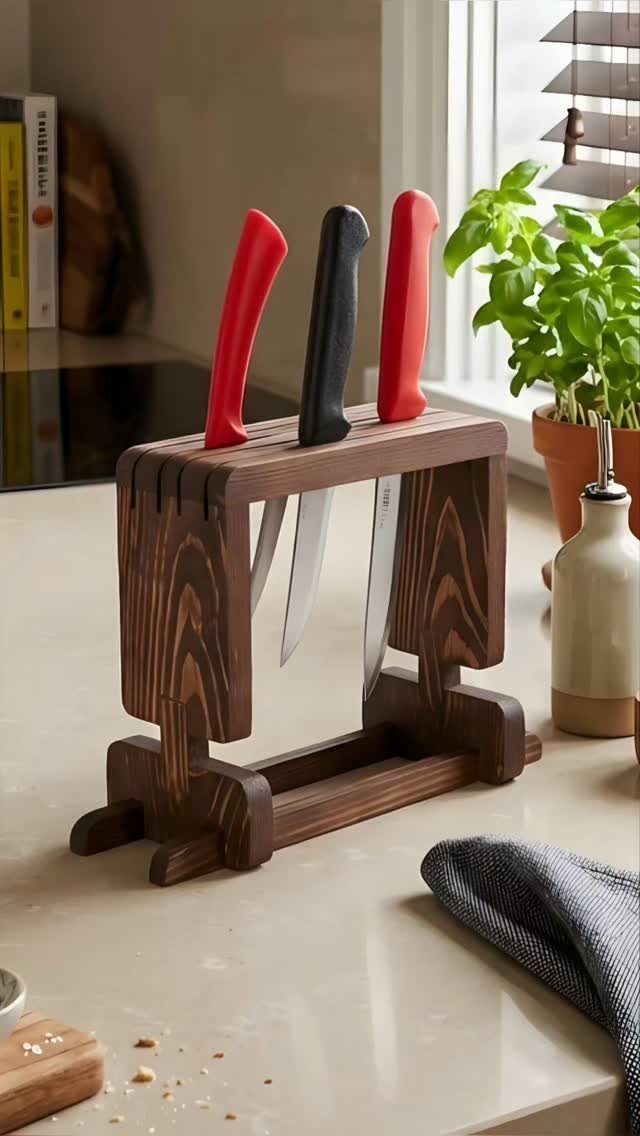
A countertop knife block in rich dark brown wood keeps blades off the drawer floor and handles within reach.
Cut each slot to the width of the blades you own, and test the fit in scrap before touching the final piece.
Angling the slots slightly makes the knives easier to grab. Sand the slot edges so they don’t scuff the steel.
15. DIY Resin River Cutting Board
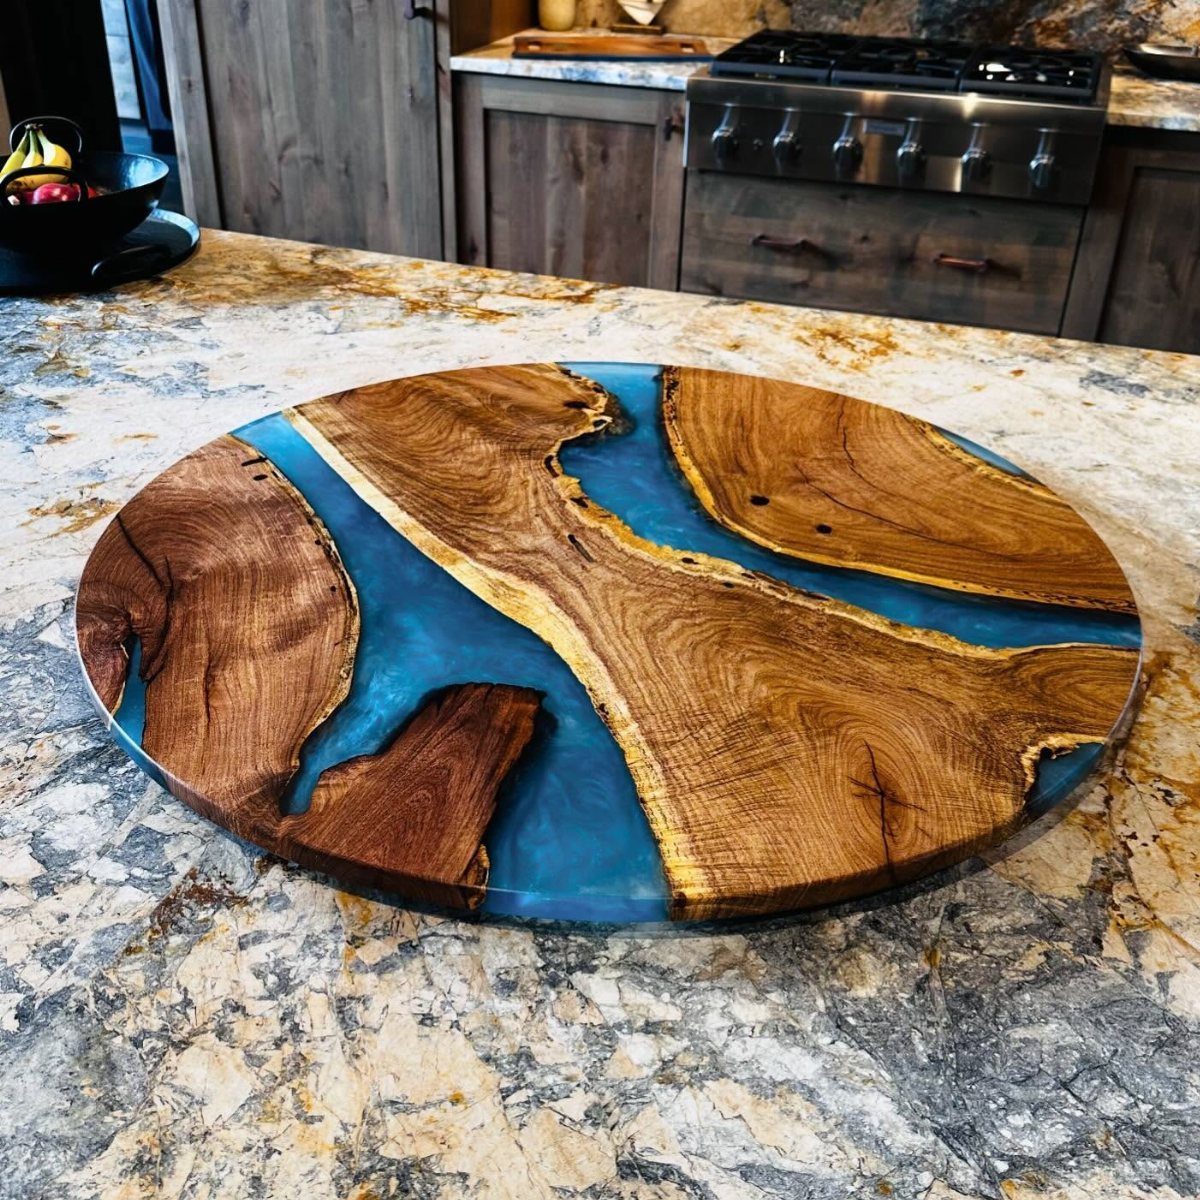
A round board with a blue resin river is more of a showpiece than a daily chopping surface. Pour slowly, and seal any gaps in the mold first so the resin stays where you put it.
Let it cure fully before sanding, and work through the grits patiently, since the resin shows every scratch. I would choose a color that suits your countertop; blue reads boldly against granite.
Resin costs more and takes longer than anything else here, because each pour needs time to cure, so this one won’t fit in a single afternoon.
16. DIY Log Utensil Holder
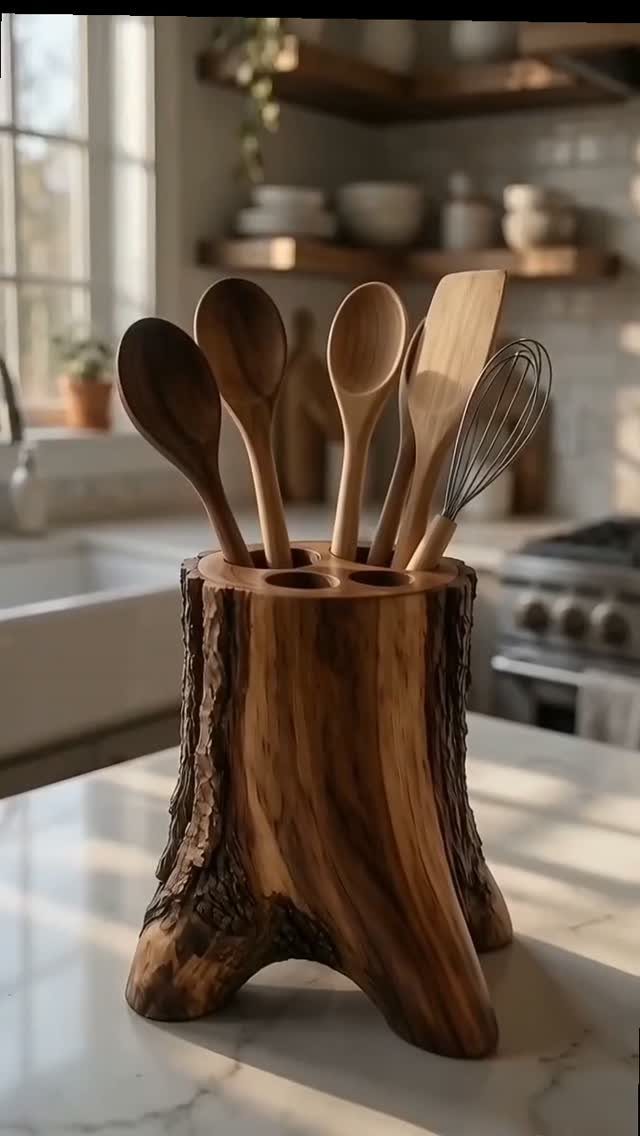
Leaving the bark on a log section gives a utensil holder its rustic character, and it looks right beside spoons and a whisk. Hollow the center with a large Forstner bit, drilling in stages and clearing chips as you go.
Pick a log that is dry, because green wood can crack as it dries. Level the bottom with a sander so the holder sits steady on a smooth counter like marble.
17. DIY Wooden Bottle Openers
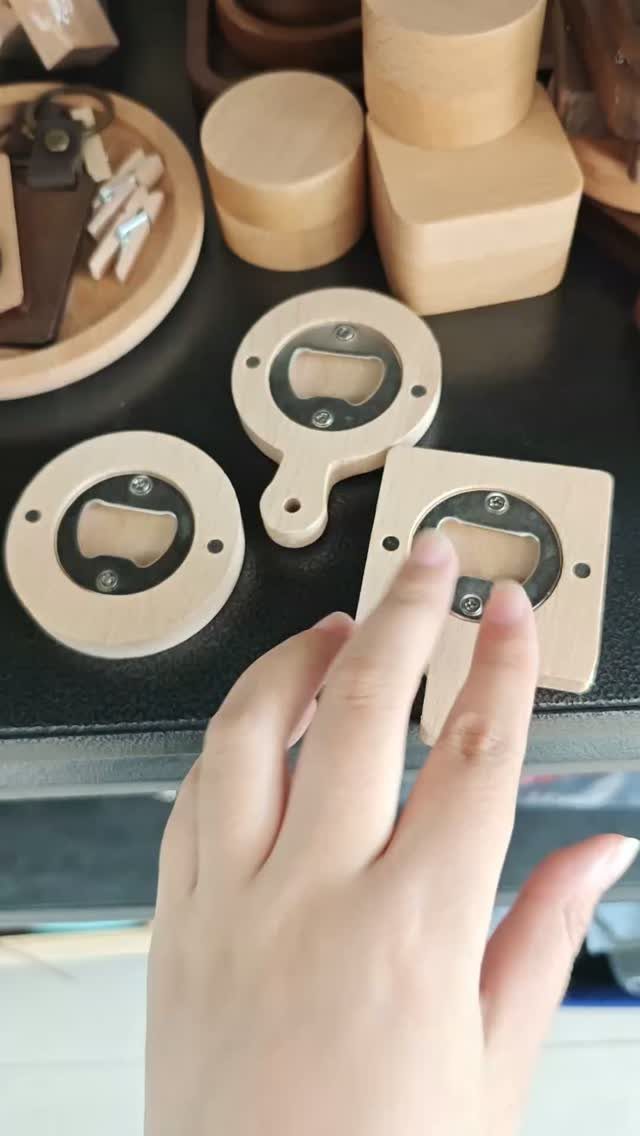
Bottle openers are small enough to finish in an hour or two, which makes them a good use for leftover blocks. Square, round or shaped, each is a short piece of wood with a metal opener set into it.
Mark and drill the mounting holes carefully before shaping the outside.
Sand the edges soft so the opener feels good in the hand. A batch makes an easy gift, and scrap hardwood works fine.
18. DIY Wall-Mounted Spice Shelf
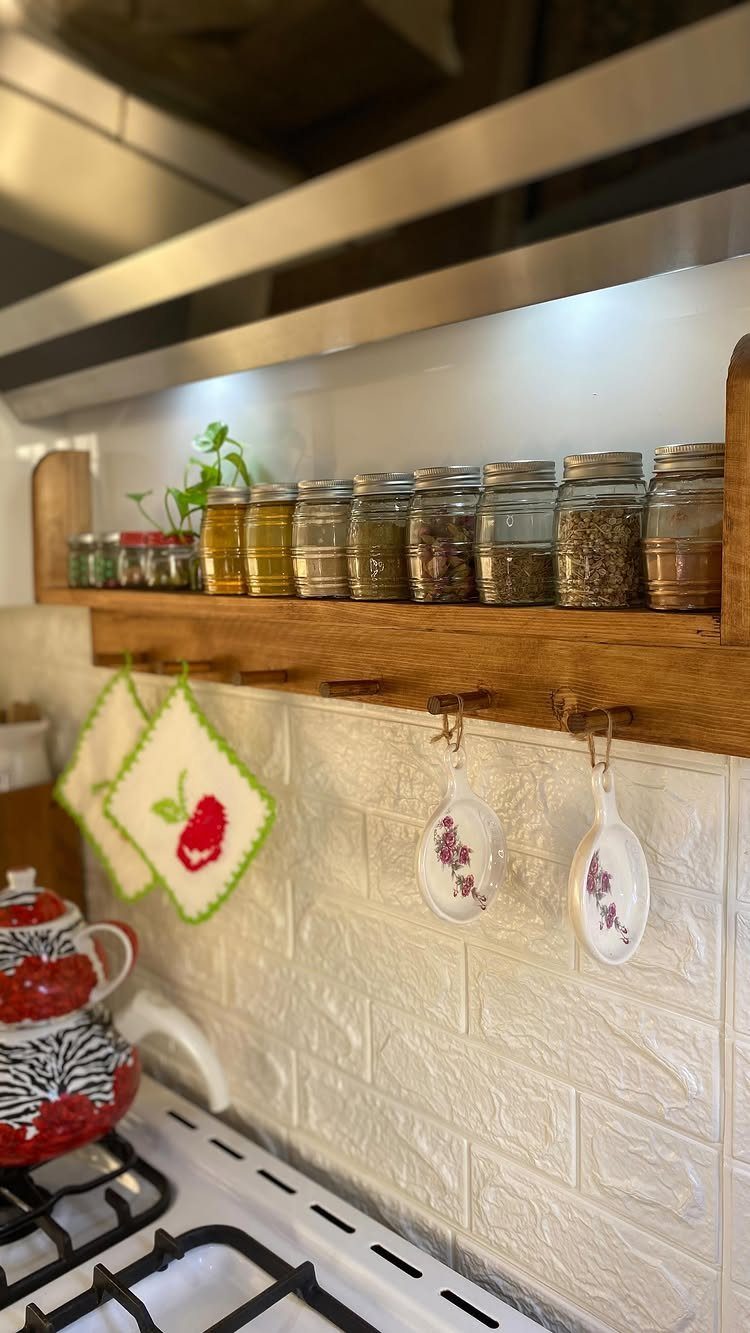
A shelf with a rail below it puts jars on top and ladles within reach, all in the strip of wall above the stove. Add S-hooks to the rail so the tools hang separately.
Keep jars to a single row and size the shelf depth to match them.
Mounting over a stove means heat and grease, so I would pick a finish that wipes clean. Screw into studs, since glass jars and metal ladles add up.
Beginner-Friendly Projects
Beginner-friendly builds share a few traits: straight cuts, few parts, and joints that screws or glue can handle.
A basic tool kit covers most of them, and a short list of core tools goes a long way when you’re starting out.
Pick the project with the fewest pieces first. Finishing one small thing teaches more than stalling on a big plan, and it shows you which tool you’ll want next.
Read the whole plan before you cut. Lay out your pieces, check that you have enough lumber, and make a cut list so you don’t waste boards on a wrong measurement.
Woodworking Techniques
4 techniques come up again and again in kitchen builds: edge gluing, tapering, turning and shaping.
Edge gluing joins narrow boards into a wide panel. Check that the mating edges are straight and tight before you spread glue, then clamp with even pressure and wipe the squeeze-out.
Tapering narrows a piece along its length, such as a leg or a handle. Mark both ends first and cut to the line, or use a jig on the table saw.
Turning shapes spinning wood on a lathe, and pen turning is a common way to learn it on small stock.
Shaping covers rounding edges, easing corners and carving curves with a rasp, a router or sandpaper. Go slowly, since you can always remove more wood but never put it back.
Gift Ideas
Handmade pieces suit holidays, weddings and housewarmings because you can tailor them to the person. A housewarming gift can match the new kitchen’s colors, while a wedding gift can carry the couple’s initials or wedding date.
Choose something small enough to finish well. A clean, simple piece beats an ambitious one with rough edges.
Add a short care note on a card, such as how to clean the piece and when to re-oil it. Wrap it plainly, and the wood will do the talking.
Frequently Asked Questions
What are the top woodworking projects that sell the most?
Cutting boards, furniture and home decor items are the popular sellers. A mixed-wood cube cutting board is a good example: light and dark strips like maple and walnut are glued up, sliced at angles and reglued offset.
It takes closer to a weekend than an afternoon, but the contrast makes it stand out.
What are some easy DIY woodworking projects for beginners?
Good first builds use plain square cuts, a short parts list, and joinery that a few screws or a bead of wood glue can hold together. A wooden bottle opener, a mug rack or a utensil rack fits that description.
A cutting board or a small spice rack will teach you more than a half-built hutch ever will, so choose the plan with the lowest piece count and finish it.
What are some good DIY kitchen items?
Organizers, cutting boards and storage pieces are the best fits. A drawer organizer sized to your own tools, a pullout cabinet drawer with full-extension slides, and a wall-mounted spice shelf with a hanging rail all earn their space.
Measure the drawer or cabinet first so each piece fits the box it goes into.






