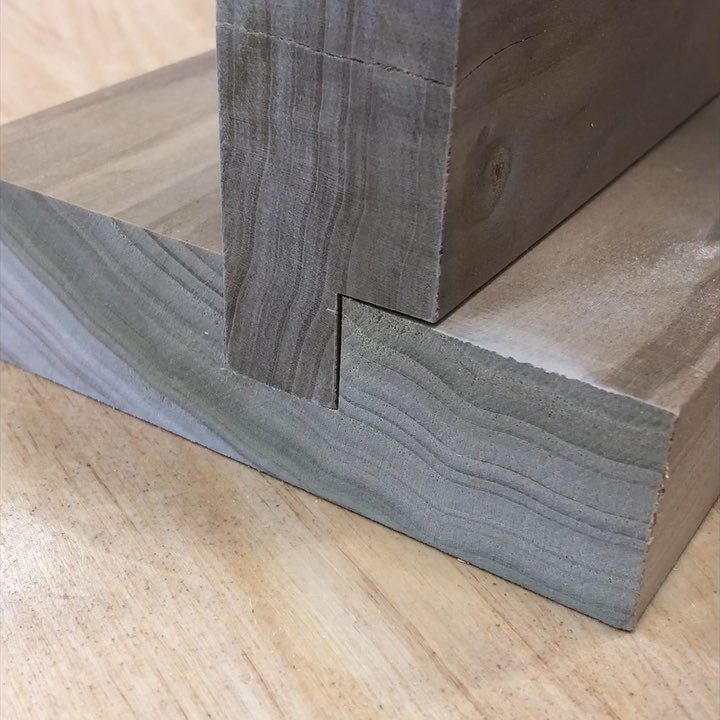
The joints here run from a dado, a groove cut across one board so a shelf can sit inside it, to butterfly keys, where a bow-tie of dark wood locks a cracked plank together.
Before anything else, look at the corner itself: how much stress it will carry, and whether the saw and clamps you already own can cut it cleanly.
Clean cuts matter more than clever joinery, so pick the joint your saw can handle well, then worry about how it looks.
1. Dado Joint
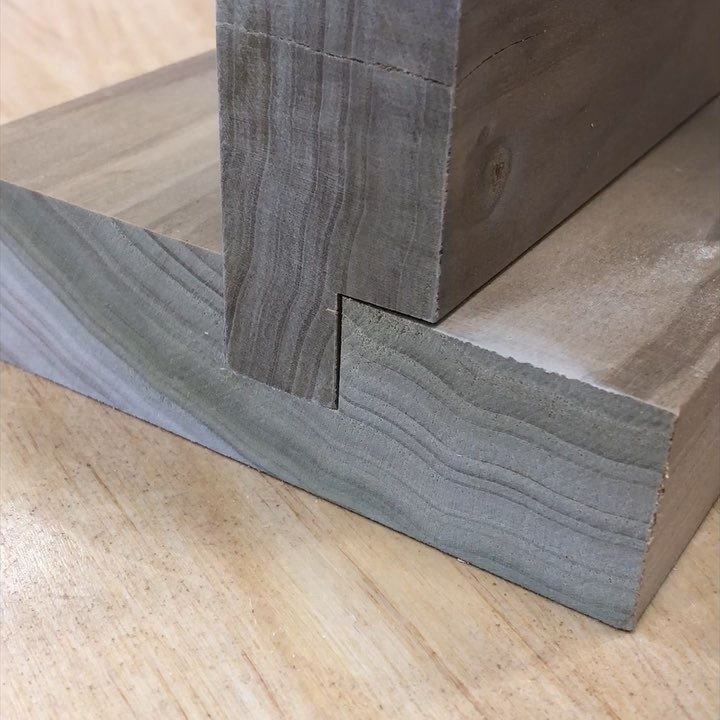
A dado is a groove cut across the grain of one board so a second board can sit inside it.
That slot does the work glue alone can’t: the shelf or divider can’t slide or tip, and the glue has long faces to grip.
I like it for bookcases and cabinet shelves because it’s forgiving for basic tools.
Size the groove to the thickness of the board that fits in it, and test on scrap first. A snug fit with glue is what you want.
2. Butterfly Key Joint
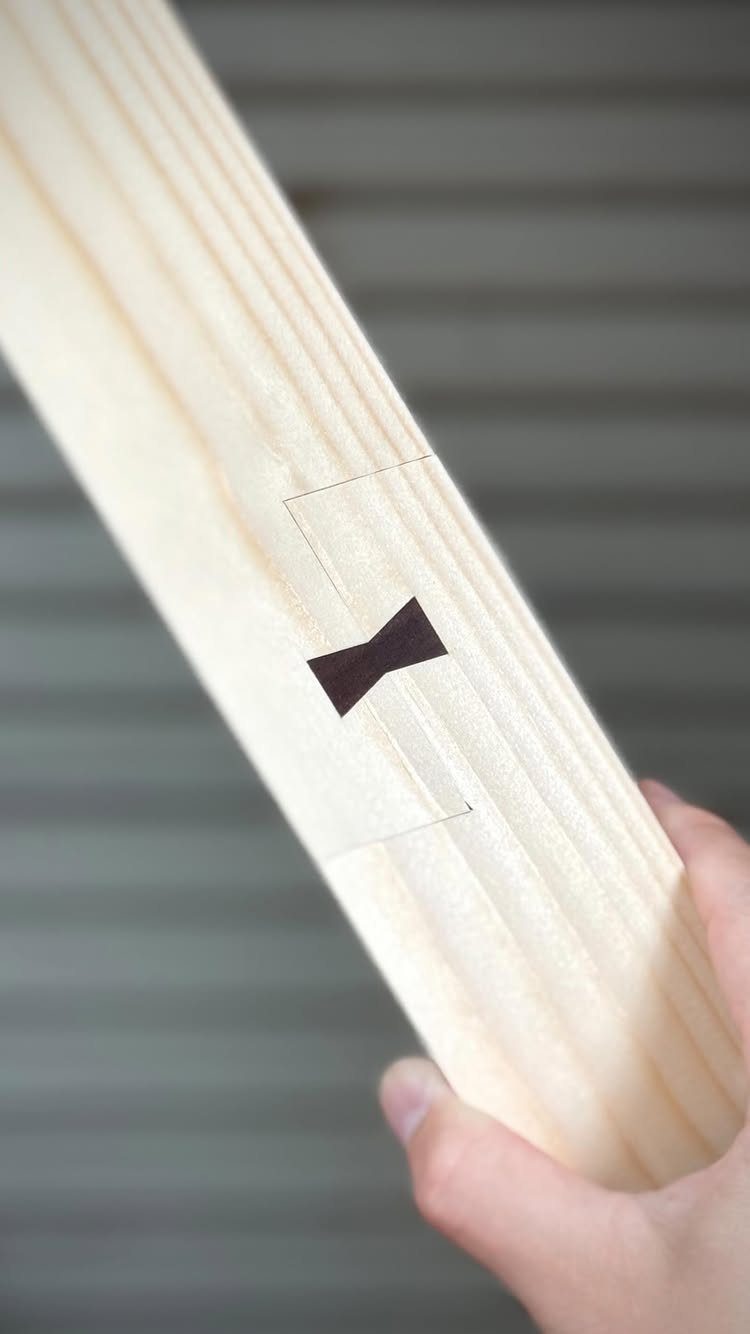
Butterfly keys are the one joint here that I’d call half repair, half decoration.
A bow-tie shaped piece of dark wood sits in a matching recess across a crack, and its angled sides lock the 2 halves so the split can’t spread.
Trace the key onto the plank, cut the pocket right on the line (a hair outside is better than inside), and glue the key in. Contrasting wood makes it a feature rather than a patch.
Walnut against a pale plank is my pick.
3. Box Joint
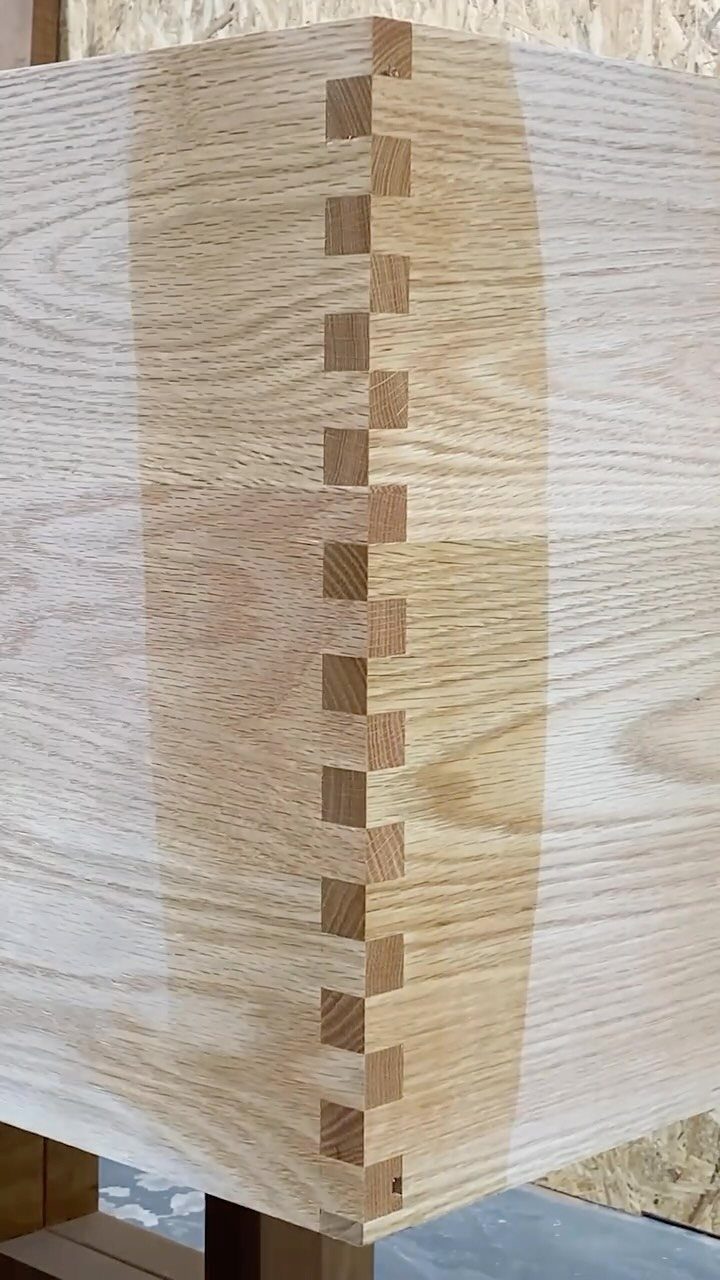
Interlocking rectangular fingers give a box joint its look, and the many glue surfaces make a clean 90-degree corner. Boxes, drawers and small chests are where it earns its place.
Cut fingers the same width as the gaps between them so the 2 boards mesh evenly. A test joint in scrap tells you more than any measurement.
Light wood with visible grain shows the pattern well, so I’d skip stain until you’ve seen how the fingers look bare.
4. Miter Joint
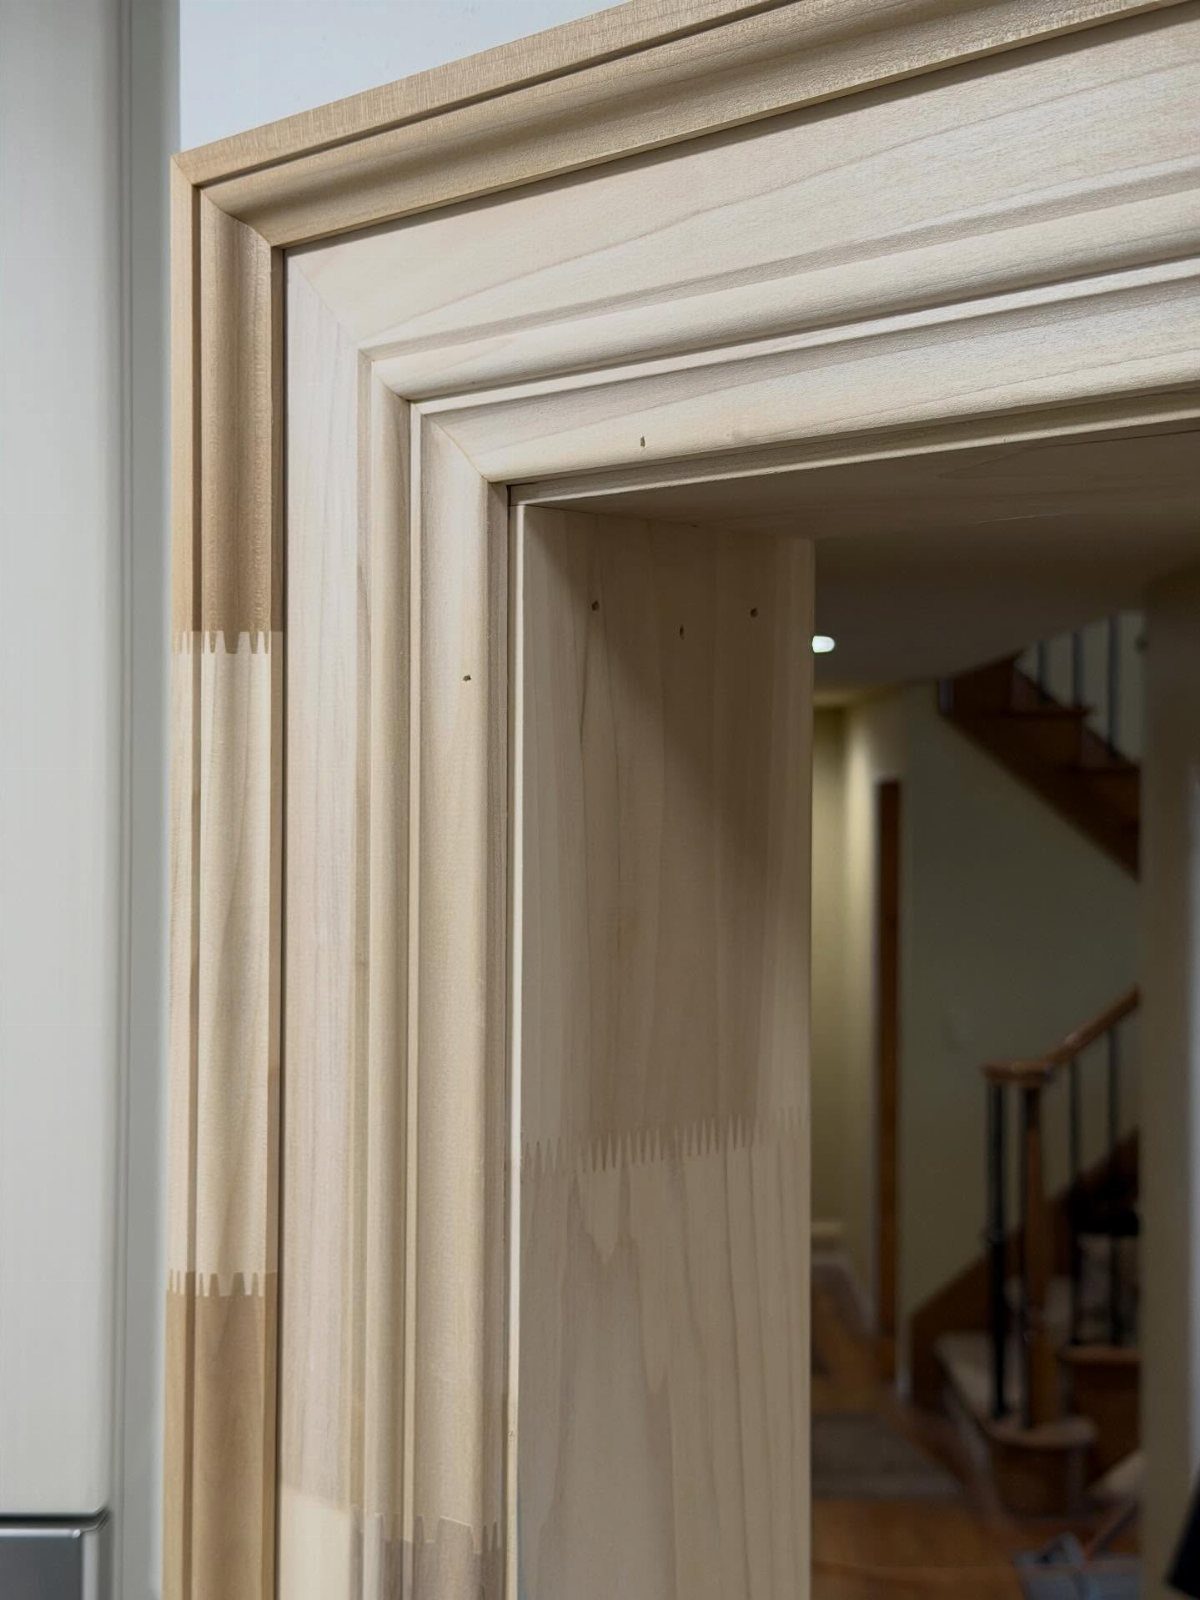
Picture frames, door casing and baseboard corners all depend on miters.
Each piece is cut at 45 degrees so the two meet in a square corner with no end grain showing, which matters on molded trim where the profile has to run around the corner unbroken.
Cut each piece with a miter saw, check the corner with a square, and glue it.
I’d cut a spare piece first. The downside is that miters are weak on their own, so the corner benefits from reinforcement.
Choosing the Right Joint
3 questions settle most joint choices: how much stress will the corner carry, how will the joint look, and how easy is it to assemble with the tools you own.
Corners take the most stress in any piece, so strength comes first for anything that holds weight or gets handled daily.
A joint can also be decoration, and added detail often adds strength too, since more cut surfaces give the glue more to hold.
For a project you want done in an afternoon, favor the joint you can cut cleanly with the tools already in your shop. A simple joint made well beats an ambitious one that comes out gappy.
Reinforcing Joints
A butt joint is 2 boards joined at a right angle, usually with nails or screws, and on its own it has no structural strength.
Rough, rustic builds and quick jobs are where it still earns its spot, since speed counts for more there than a clean face.
Match the fastener to the job. A metal corner bracket adds strength where screws alone won’t be enough.
For a neater look, drill countersunk holes for the screws or nails, then glue wood plugs into them and sand the plugs flush. Plugs cut from the same board blend in best, and sanding them flush leaves a clean face.
Common Mistakes
Gaps, misalignment, and joints that fail are the 3 problems that show up most. Nearly all of them trace back to cuts that were slightly off before glue ever went on.
On miters, a gap comes from two causes: opposing sides that aren’t the same length, or angles that aren’t exactly 45 degrees.
A combination square tells the truth where the saw’s printed scale doesn’t, so check each cut against it before you move on.
If you plane miters on a shooting board, press the work firmly against the 45-degree ramp the whole stroke.
Even with a perfect setup, heavy or uneven planing will round over an edge or tilt a face, and the angle drifts off square.
A strap clamp holds miters evenly during glue-up.
Rolling a screwdriver shaft along the point can close a gappy miter a little, but it rarely looks right on fine work. Recutting is the better fix.
Frequently Asked Questions
What are the different types of woodworking joints?
Common ones include butt, dovetail, mortise and tenon, rabbet, box, dado, miter, bridle, lap, finger, pocket hole, biscuit, and scarf joints. For a quick afternoon project, a dado, box joint or miter covers a lot of ground with basic tools.
A dado is a groove across one board that holds a shelf, a box joint uses interlocking square fingers, and a miter joins two 45-degree cuts into a square corner.
What is a mortise and tenon joint?
It’s a joint where a projecting piece on the end of one board, the tenon, fits into a matching recess, the mortise, cut in the other board.
Long grain meets long grain on the tenon’s cheeks, so glue has a wide surface to grip, and that is why chairs, tables and door frames rely on this joint.
Cutting it cleanly takes practice, since a sloppy fit won’t hold. A snug tenon, good glue, and a wedge or peg through the joint will make it last for decades.
What is the strongest joint in woodwork?
Dovetails are generally named as one of the strongest, since the interlocking shape resists being pulled apart.
Mortise and tenon joints are also very strong for cabinet frames, and a locking rabbet is another solid option, though it’s more involved to cut.
Miters and butt joints sit at the weak end on their own, because end grain takes glue poorly.






