The list runs from projects with no carving at all, like the air plant holder and the wreath, to knife work such as the whales, the lighthouse and the elephant head, so your pick depends on how much cutting you want to do.
With only a knife and a free afternoon, the ornaments are where I’d start, since a small piece of driftwood is all they ask for.
Whatever you pick, the wood has to be clean and fully dry first, which is why the cleaning and preparing section is worth reading before you cut anything.
1. Driftwood Sculpture
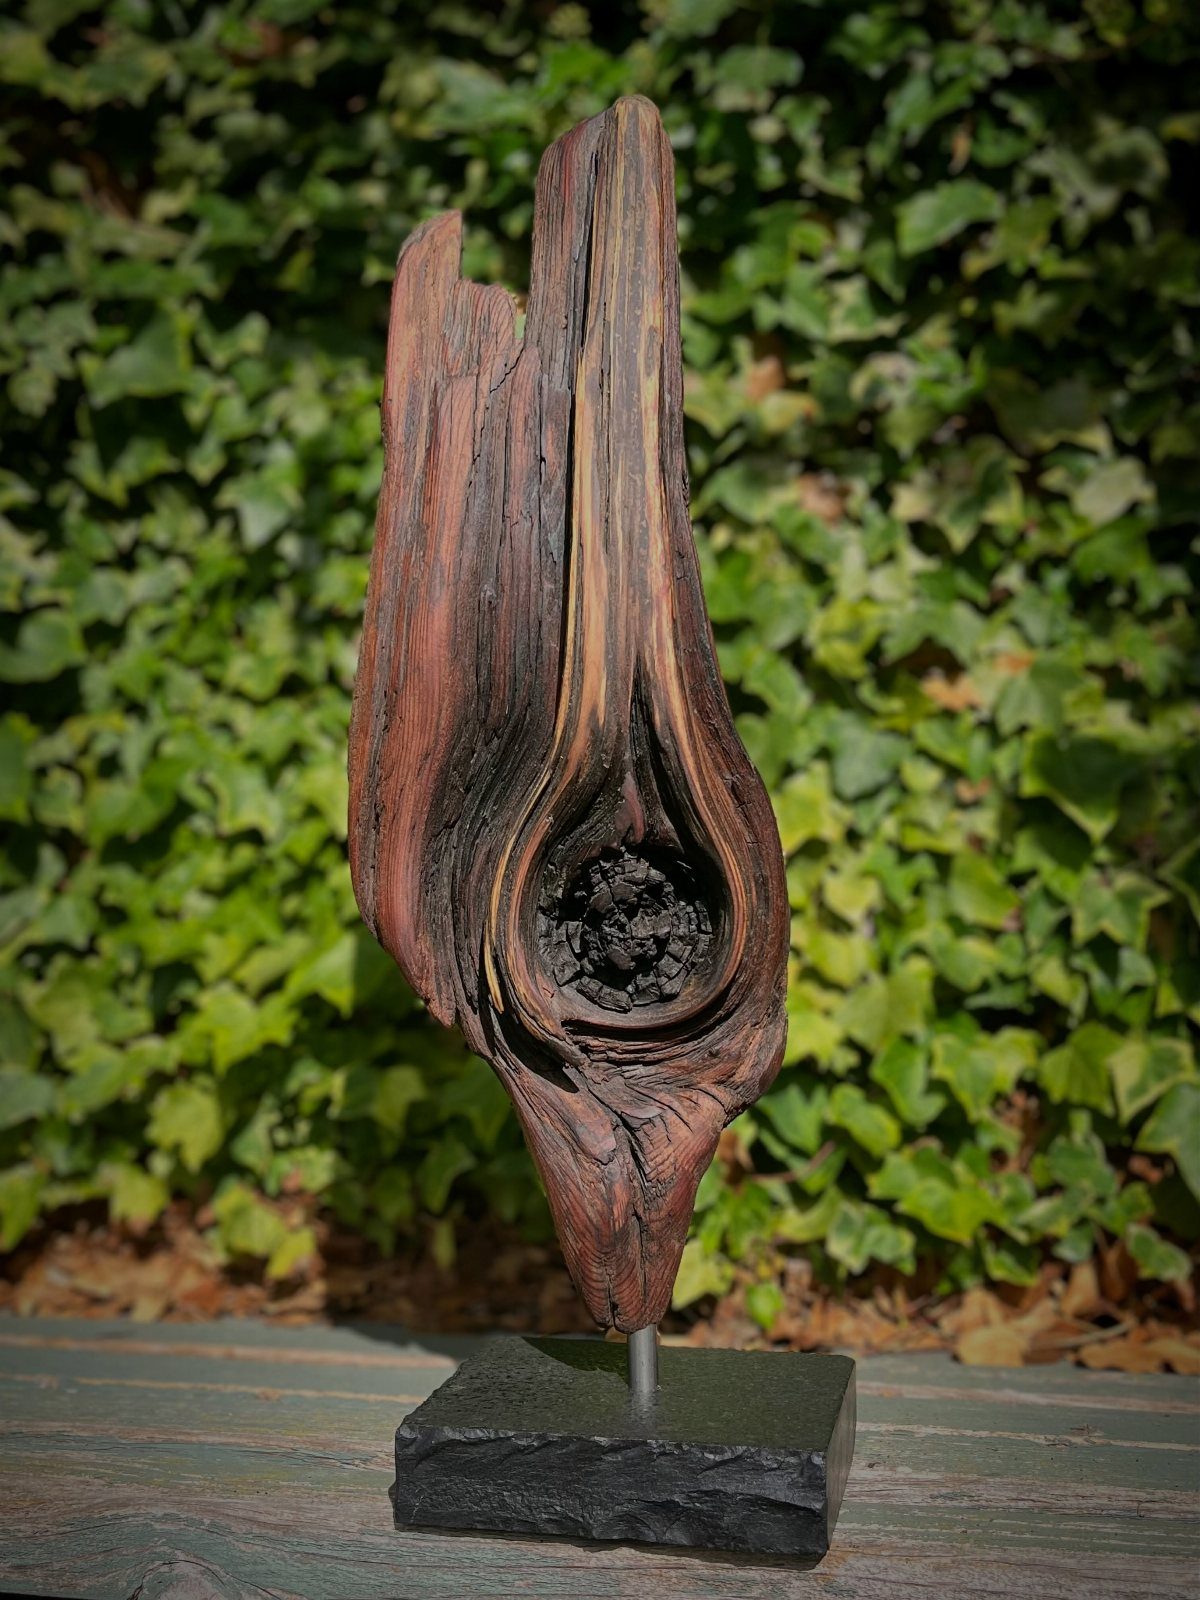
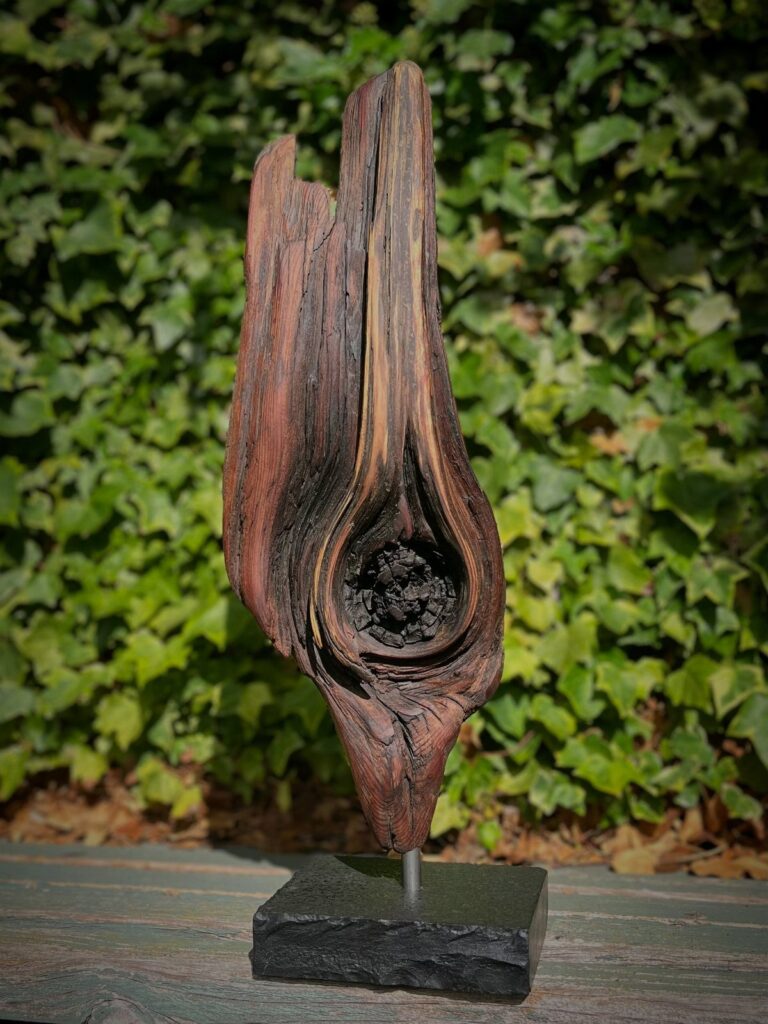
A knot makes a good focal point, and this piece lets it do the work. Tall, weathered driftwood on a heavy black base reads as a sculpture instead of a stray branch.
Pick a piece whose shape already stands upright, then fix it to a base with enough weight to balance it.
Leave the grain and the knot alone. Carving less usually looks better than carving more.
2. Driftwood Air Plant Holder
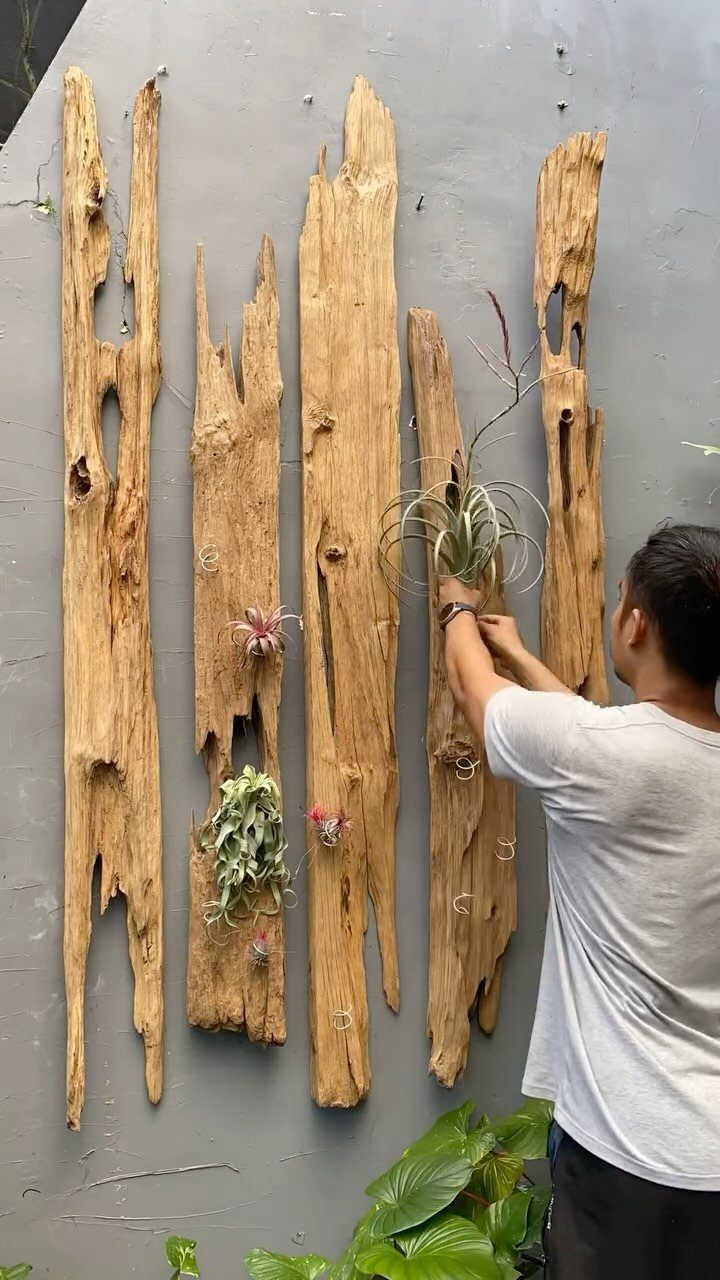
Air plants need no soil, so a slab of driftwood is all the pot they ask for. Mount several vertical planks on a wall and each plant gets its own perch.
I like a staggered arrangement better than a straight row, since uneven heights look more natural against a plain wall.
Nestle each plant into a crevice or knothole so it sits without much fuss. Choose pieces with texture, because smooth ones give the plants little to grip.
3. Driftwood Blanket Ladder
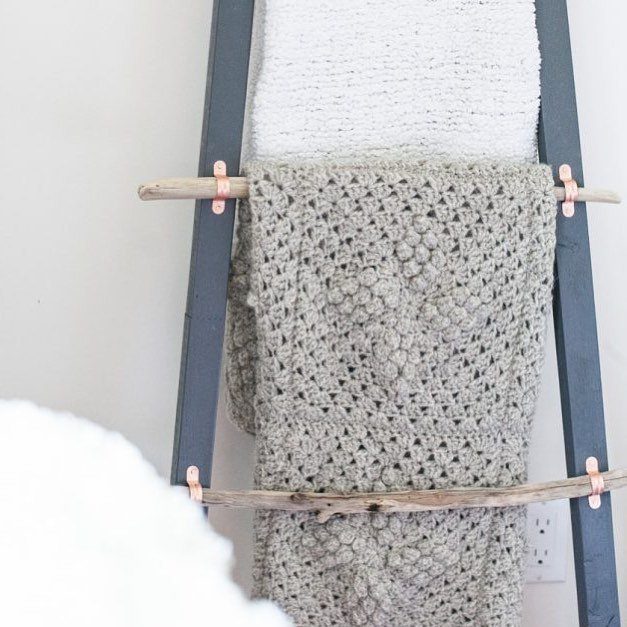
Rungs are where driftwood earns its place on a blanket ladder. Each branch has its own bend and thickness, so the ladder looks handmade in a way store-bought dowels never do.
A dark frame, whether stained walnut or black paint, makes pale driftwood rungs stand out.
Pick rungs of similar diameter so blankets drape evenly. Lean the ladder against a wall and let throws hang from the rungs.
4. Driftwood Mirror
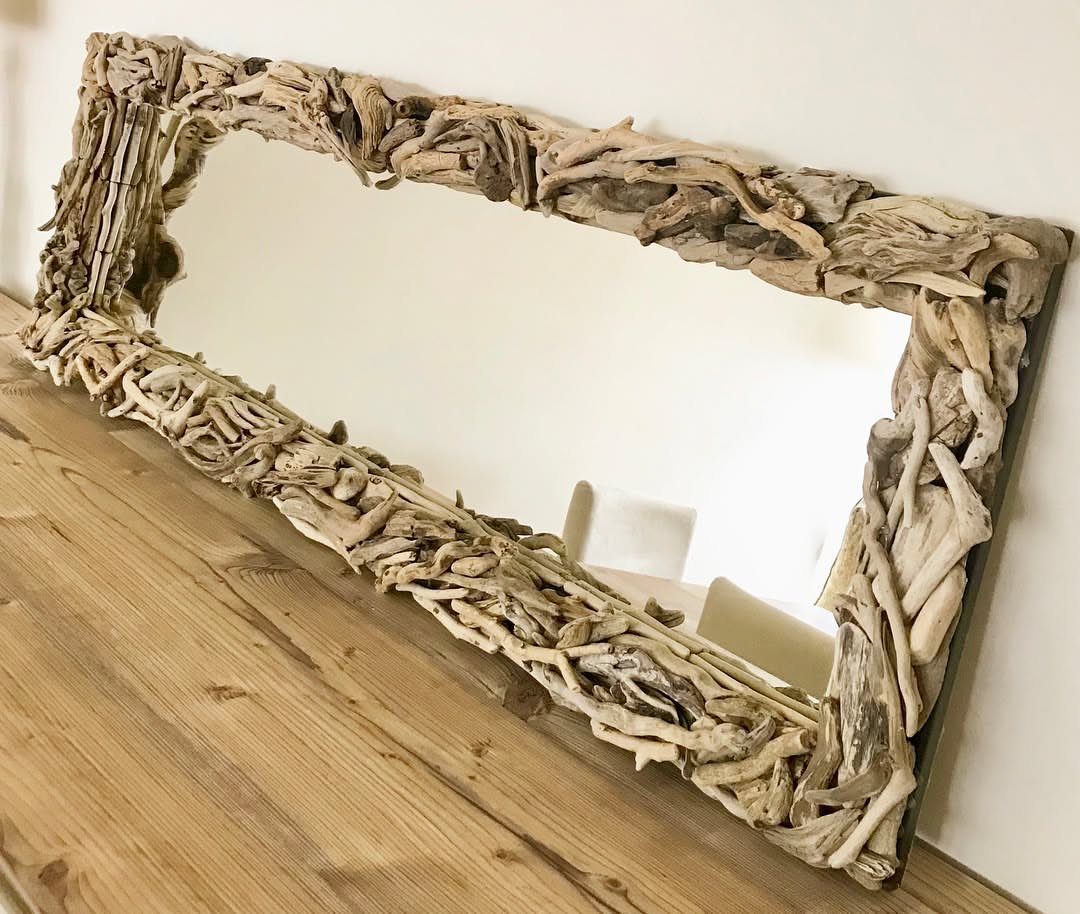
A frame built from mismatched driftwood pieces gives a plain rectangular mirror a chunky, beachy border. Light, weathered wood keeps it airy rather than heavy.
Lay the pieces around the mirror before gluing anything, and swap them until the gaps close up.
Thicker pieces make a bolder frame, though they add weight to hang. Resting it on a tabletop against the wall skips the hanging problem altogether.
5. Driftwood Wreath
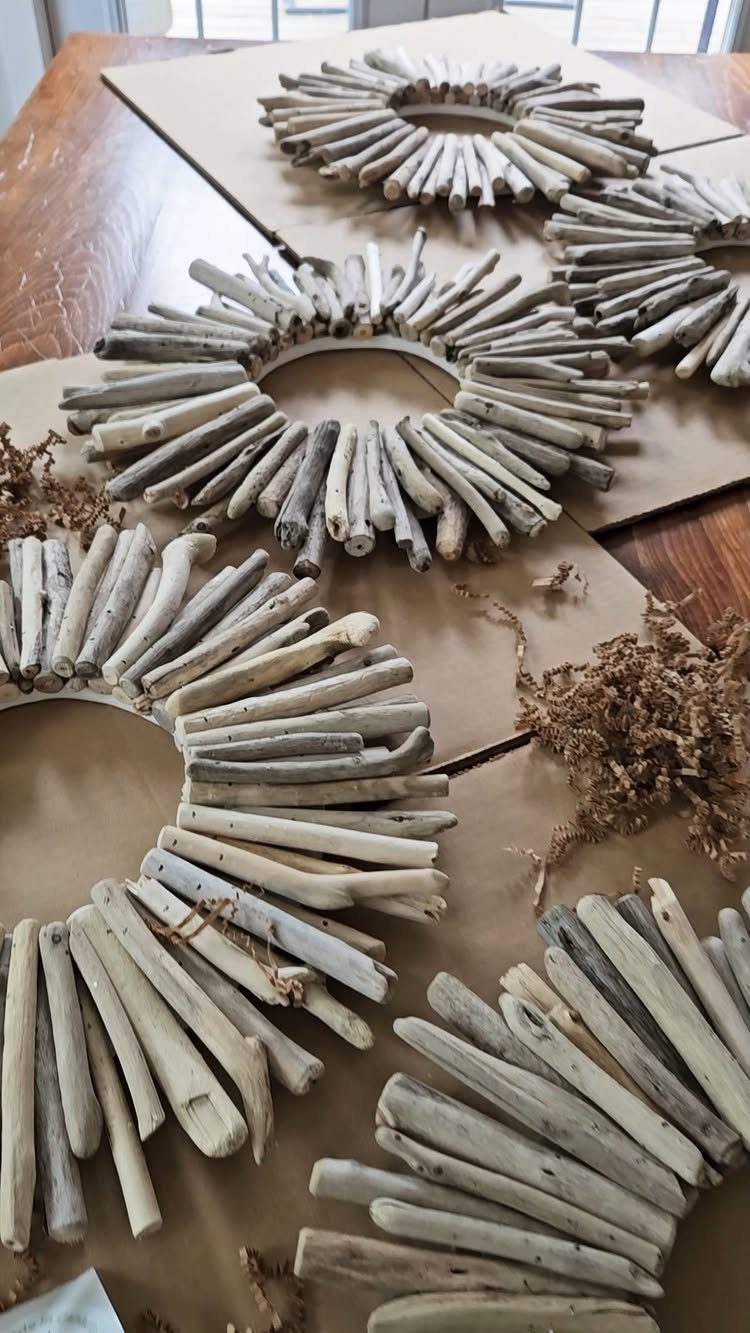
Small driftwood scraps are enough for a wreath, which makes this one of the cheapest projects on the list. Short, weathered pieces overlapped in a circle build up a rough, textured ring.
Work on a flat surface, and lay out the full circle dry first.
Slide a sheet of cardboard under the wreath while you work, because hot glue and wood glue will both bond to a table. Make several at once, since the second one always goes faster than the first.
6. Driftwood Lamp
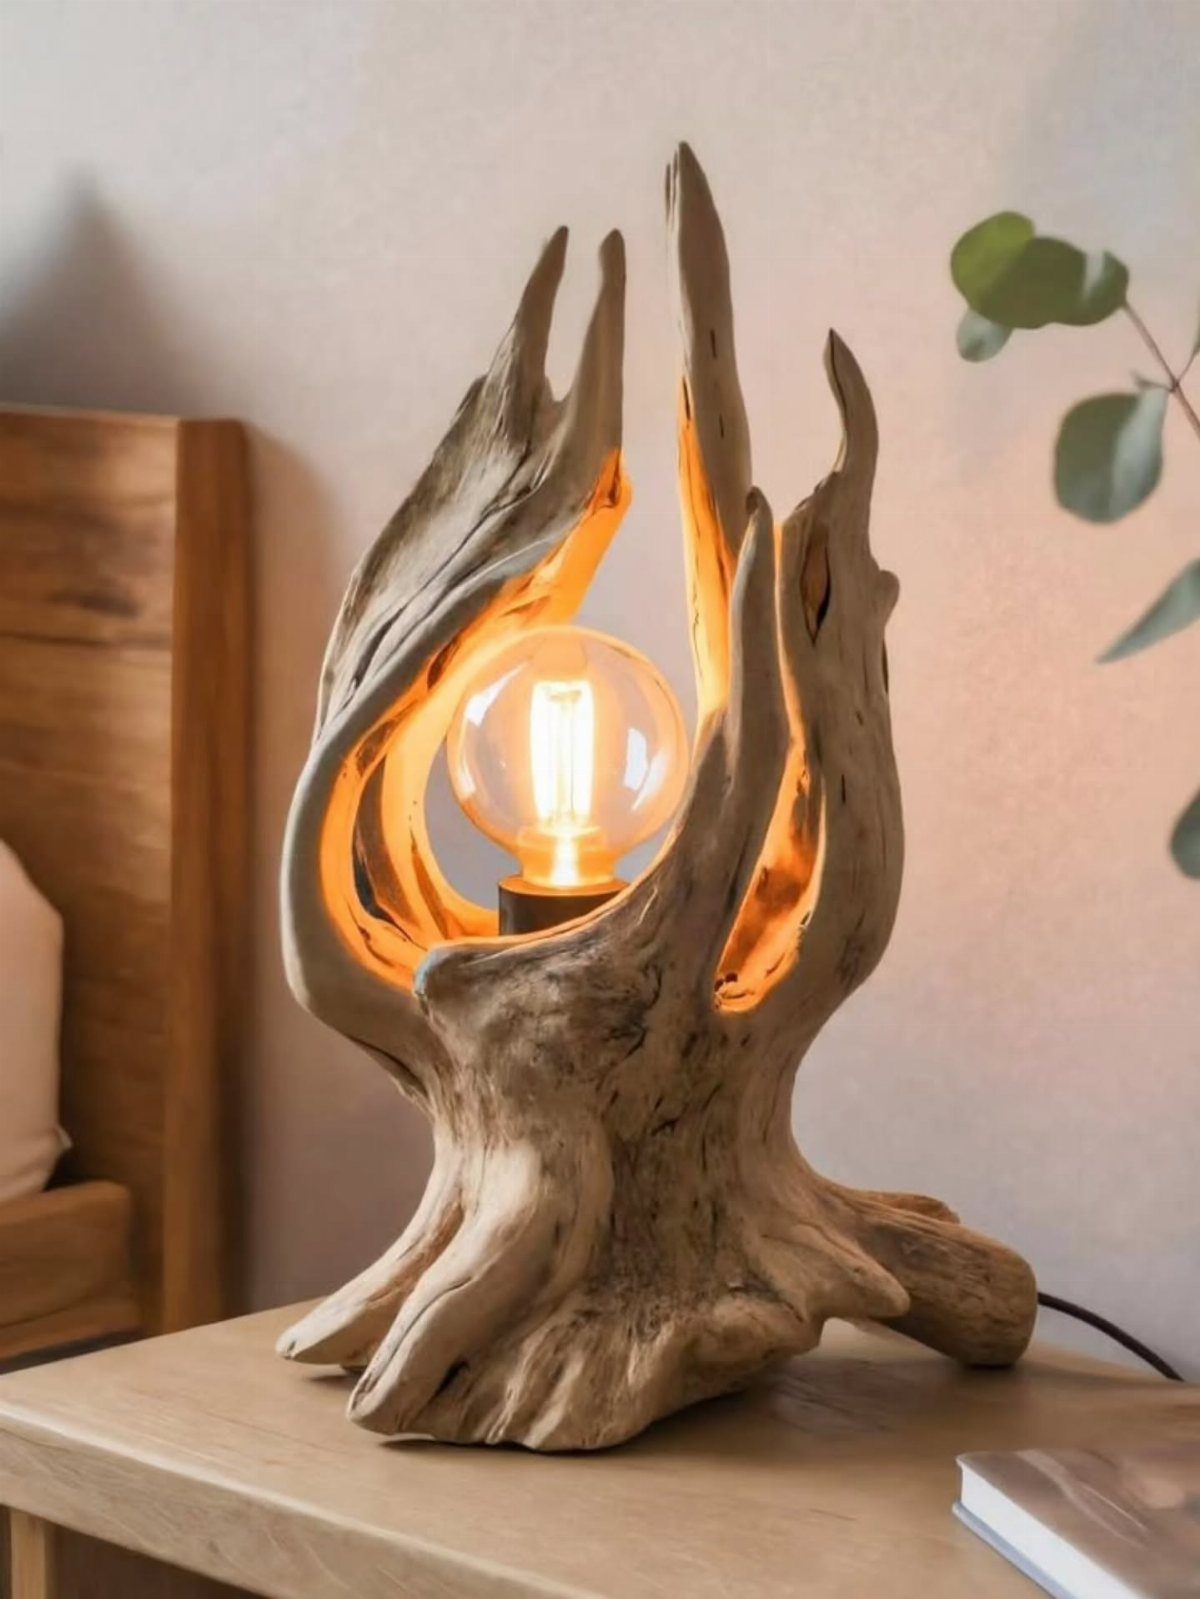
Driftwood makes a lamp base with a coastal feel, and a round bulb on top gives a soft glow that suits a bedside table. The wood does the decorating, so the shade or bulb can stay simple.
Pick a piece that stands steady on its own. The wiring is the part I would not guess at, so use a ready-made lamp kit and follow its instructions.
7. Driftwood Heart
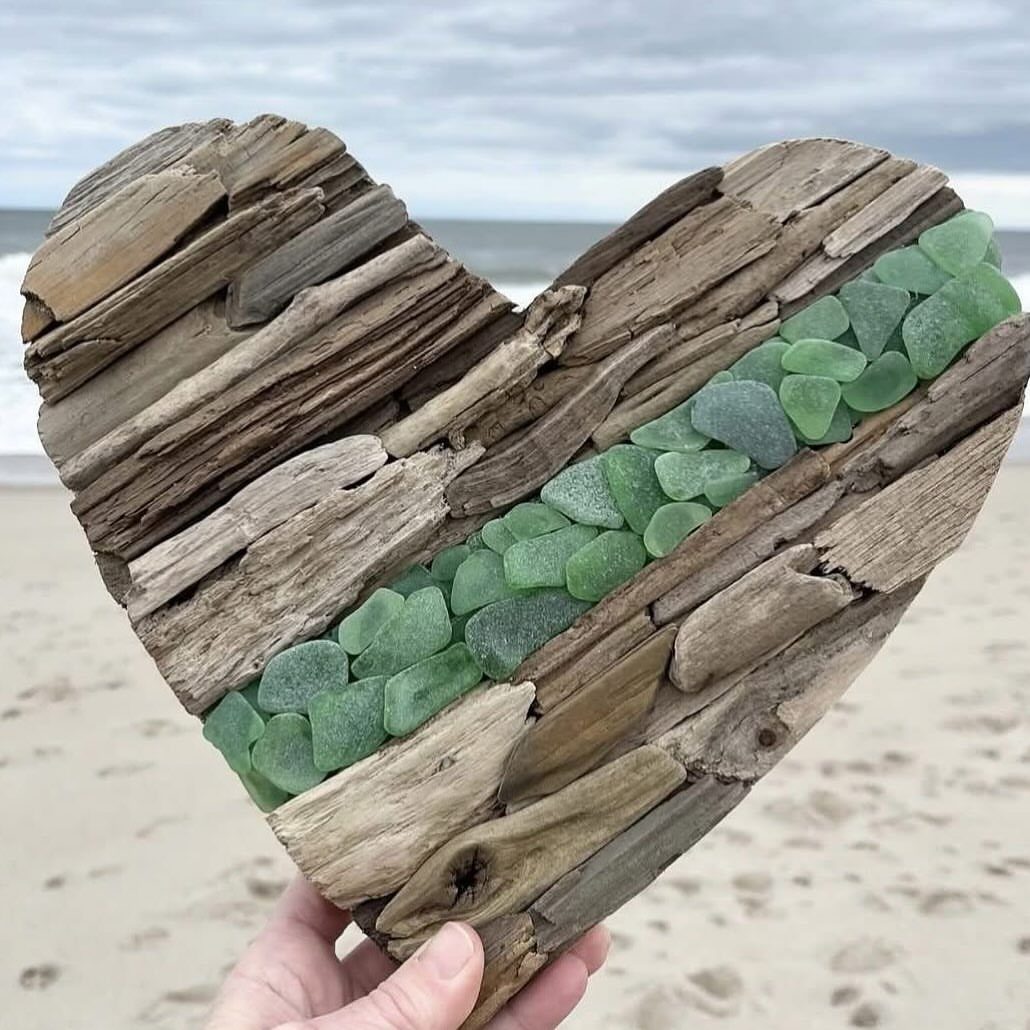
A line of sea glass pressed into a shallow groove across a driftwood heart adds a single pop of color, and green looks best against silvery gray wood.
The wood stays pale and plain, so the glass gets all the attention.
Choose a piece of driftwood with a natural curve, or cut one into a heart shape, then glue the glass along a single line instead of scattering it.
Holding the glass in place for a minute before the glue sets keeps pieces from sliding. A small heart like this sits well on a shelf or in a window.
8. Driftwood Candle Holder
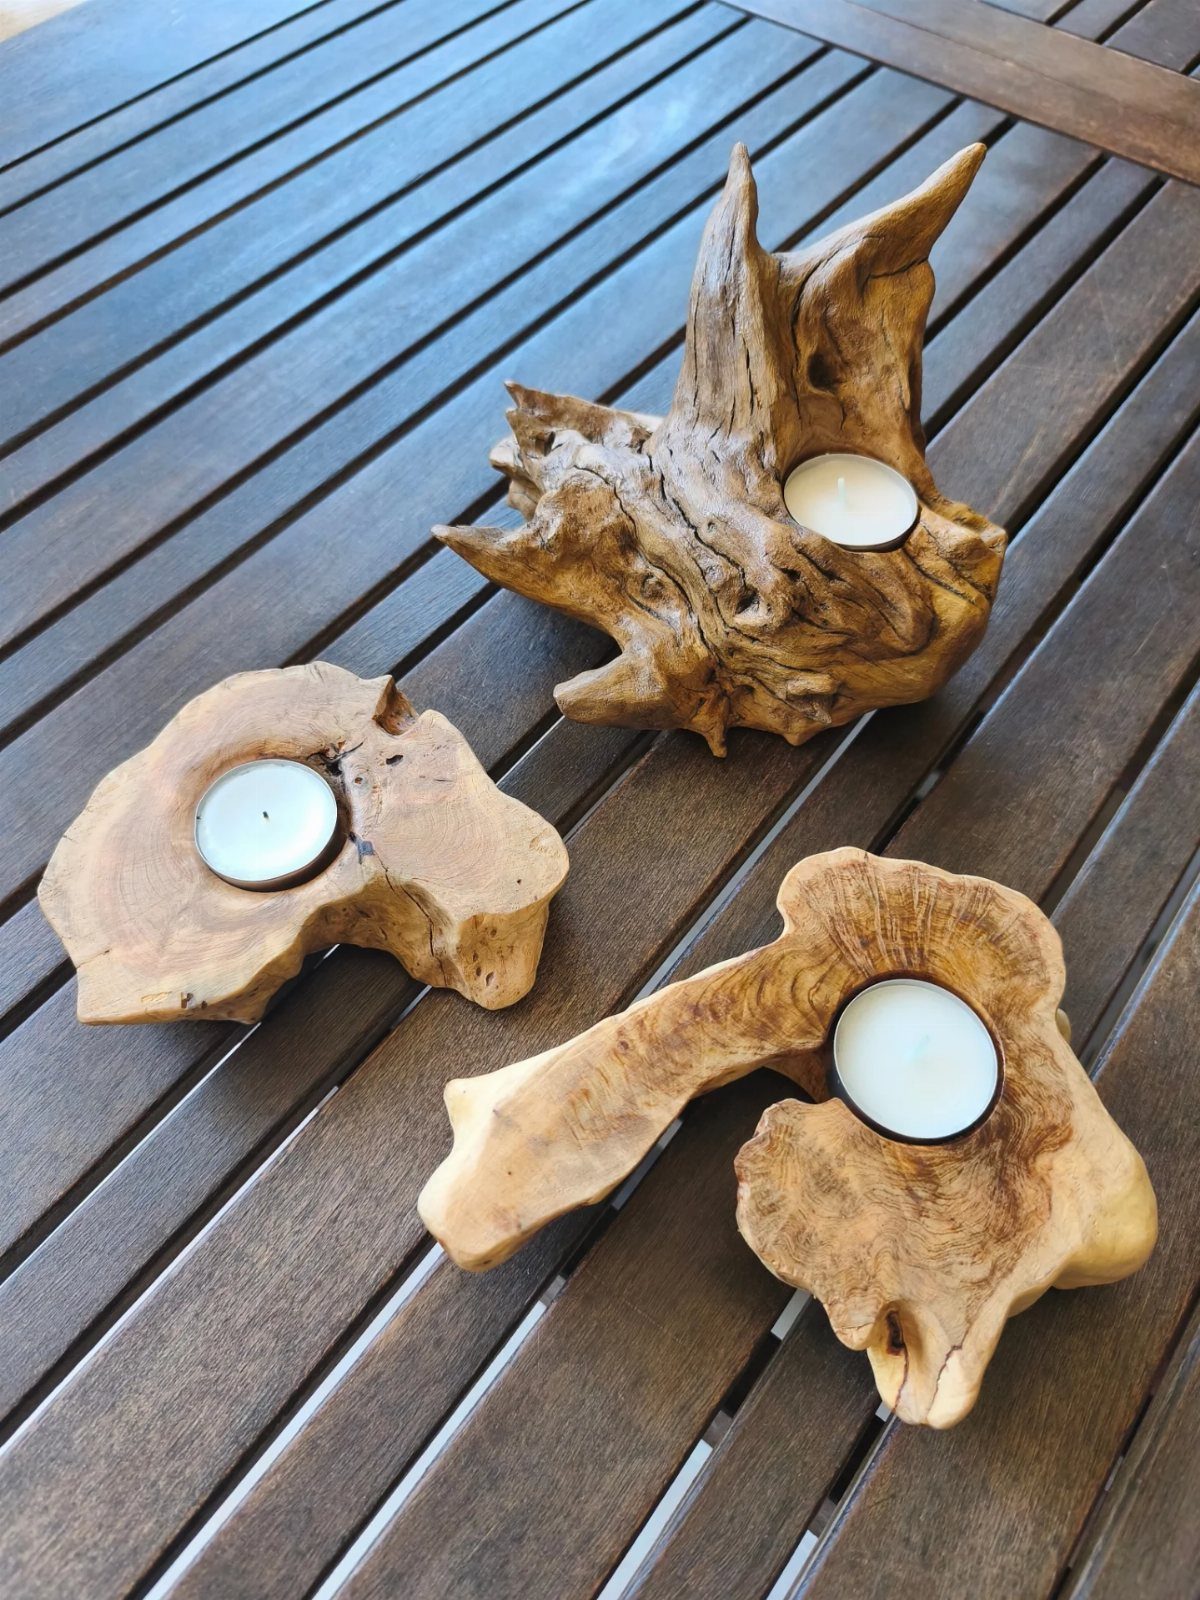
Tea lights sit inside hollows in the wood, so a driftwood candle holder needs almost no decoration. A set of three in different sizes looks better to me than three matching ones.
Pick pieces thick enough to hold a tea light in a carved dip, and make sure each one rests flat on the table.
Use flameless tea lights if you can’t get the wood well clear of the flame. Dark tables make the pale grain stand out.
9. Driftwood Fish
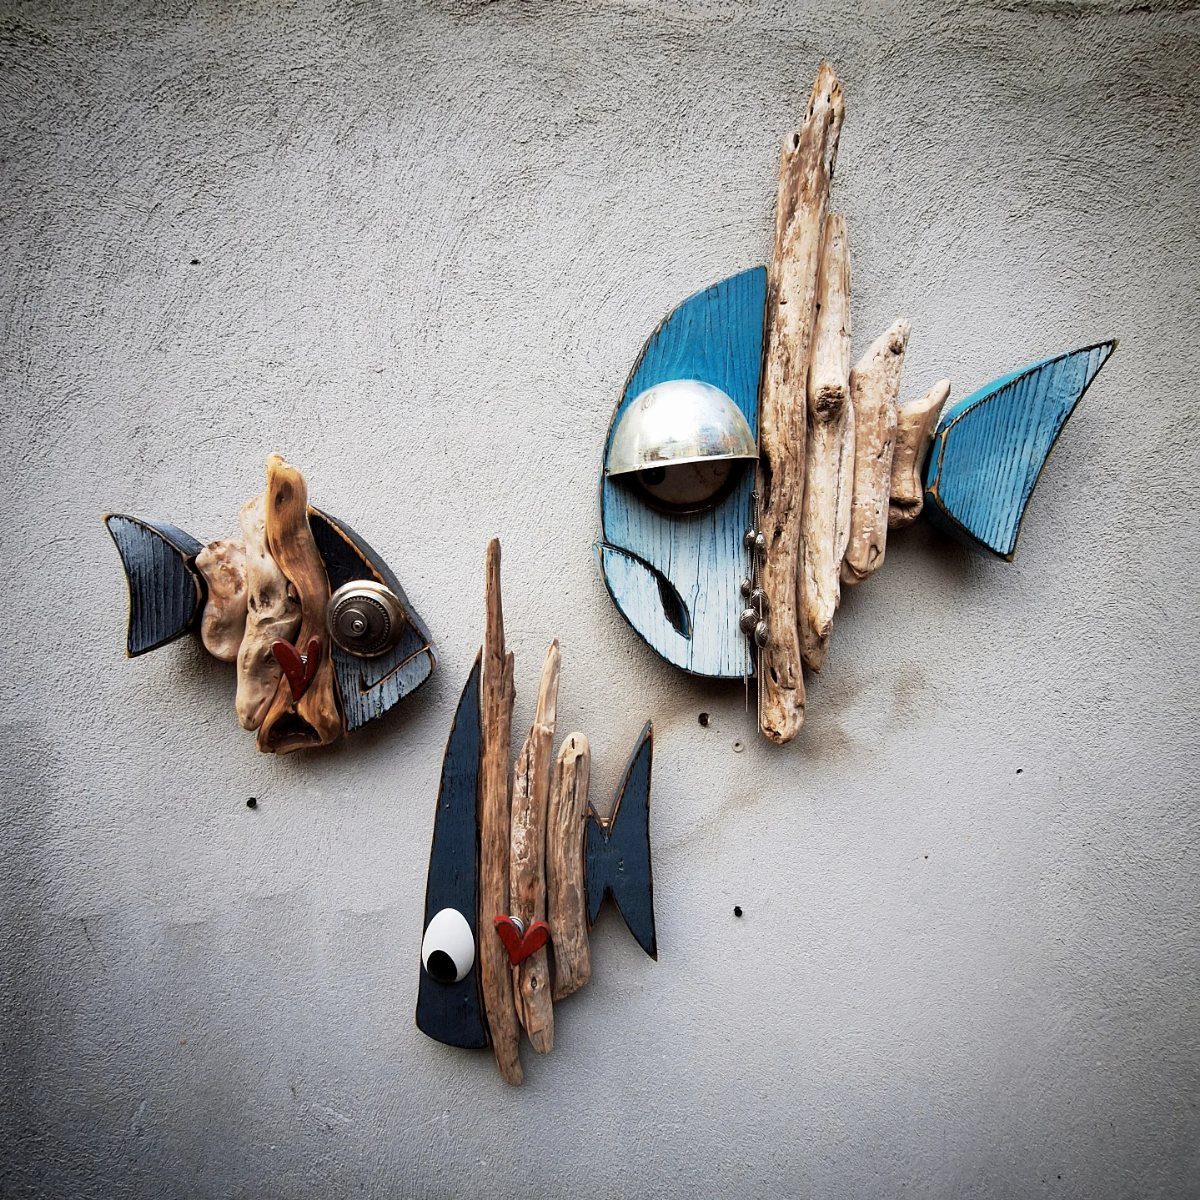
Blue and black paint on wood turns driftwood scraps into fish that hang together as a small school. Mounted on a textured wall, the 3 shapes read as a single piece of wall art.
Let the driftwood supply the body or tail, and paint the other parts in 2 shades so the grain still shows through.
Odd numbers hang better than pairs, and slightly different sizes feel more natural. Cheap craft paint and leftover pieces keep this one low cost.
10. Driftwood Clock
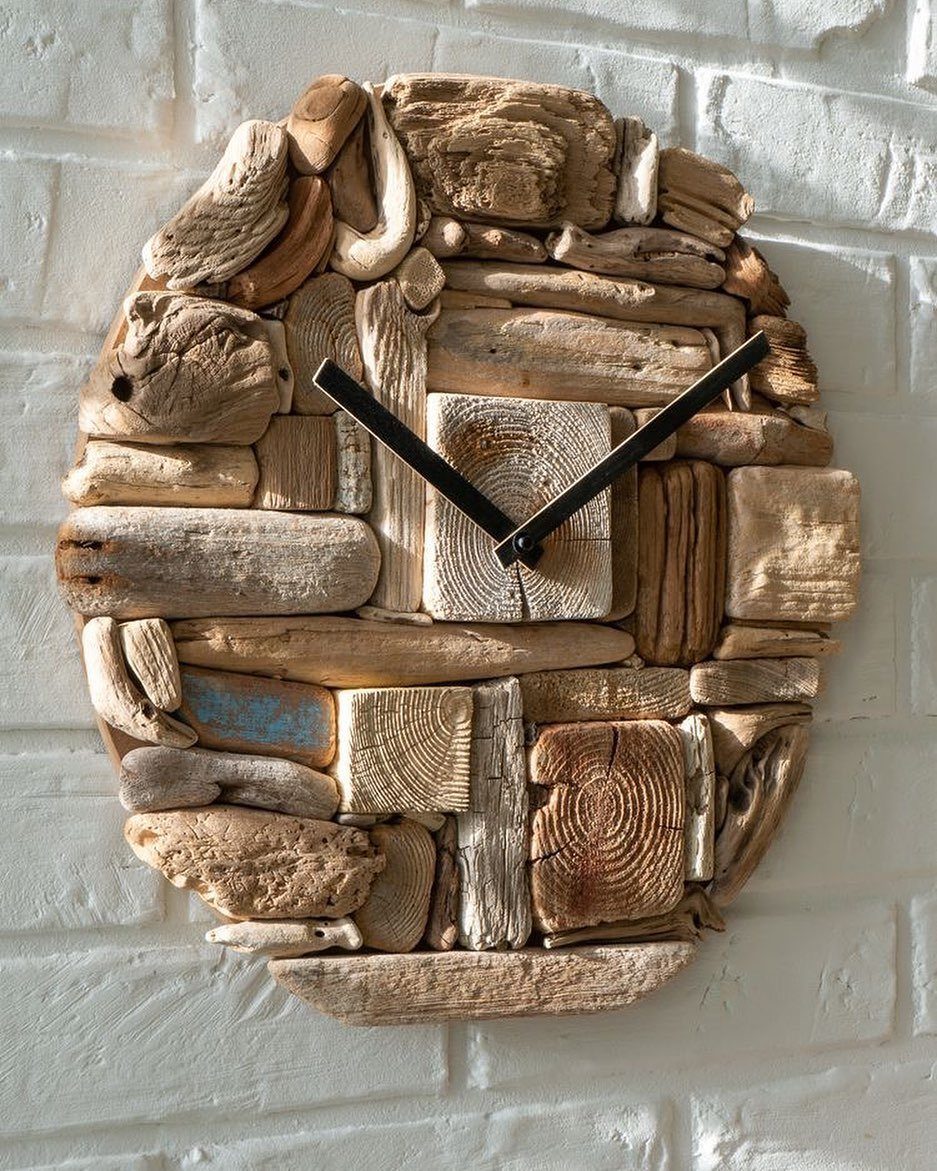
Driftwood pieces fitted together make a clock face with an uneven, handmade outline. Black hands stand out against the pale wood, so you can read the time at a glance.
Assemble the wood first, then add a clock movement kit at the center.
Hands need clearance from the wood, so sand or trim any piece that sticks out. Skip numbers if the shape is rough, because the black hands already give enough guidance.
11. Driftwood Centerpiece
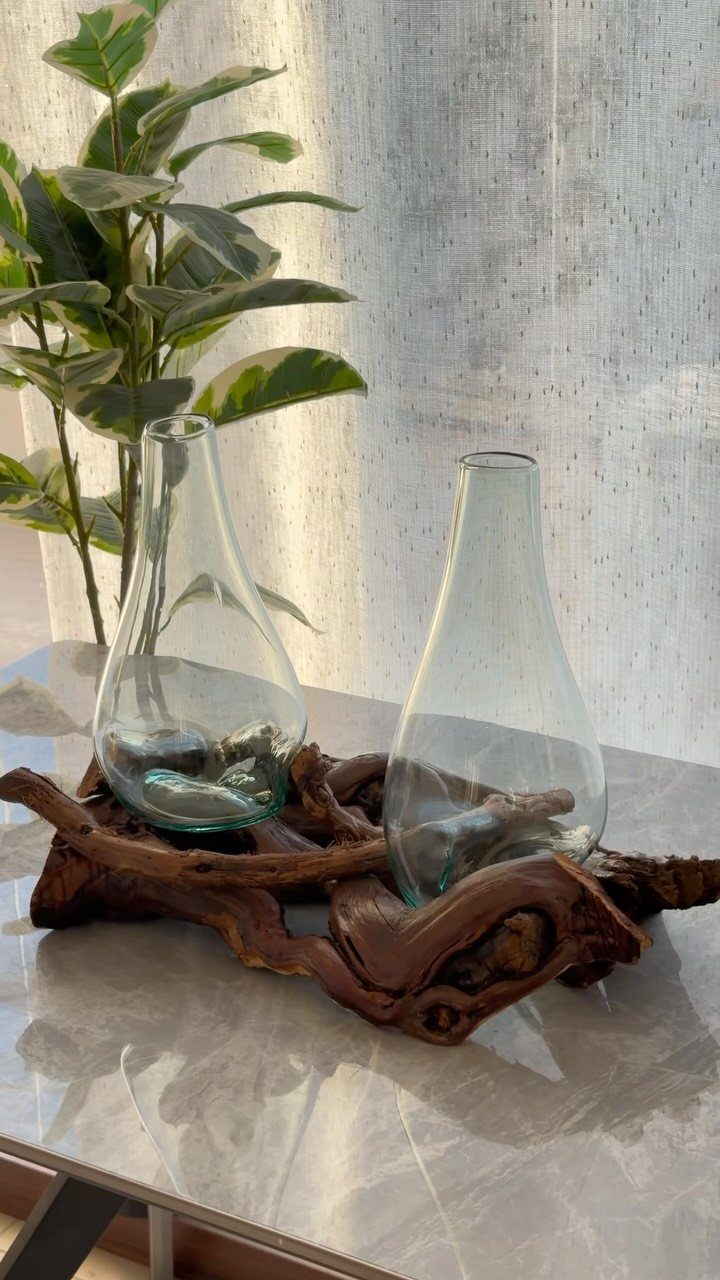
A twisted length of driftwood makes a centerpiece that already has its own sculpture. Glass vases resting in its curves give you places for flowers or greenery without building a thing.
Set the wood on the table and test where the vases sit level before adding water.
Clear glass is the best match, since it lets the wood stay the main attraction. Keep the whole arrangement low enough that guests can see across the table.
12. Driftwood Christmas Tree
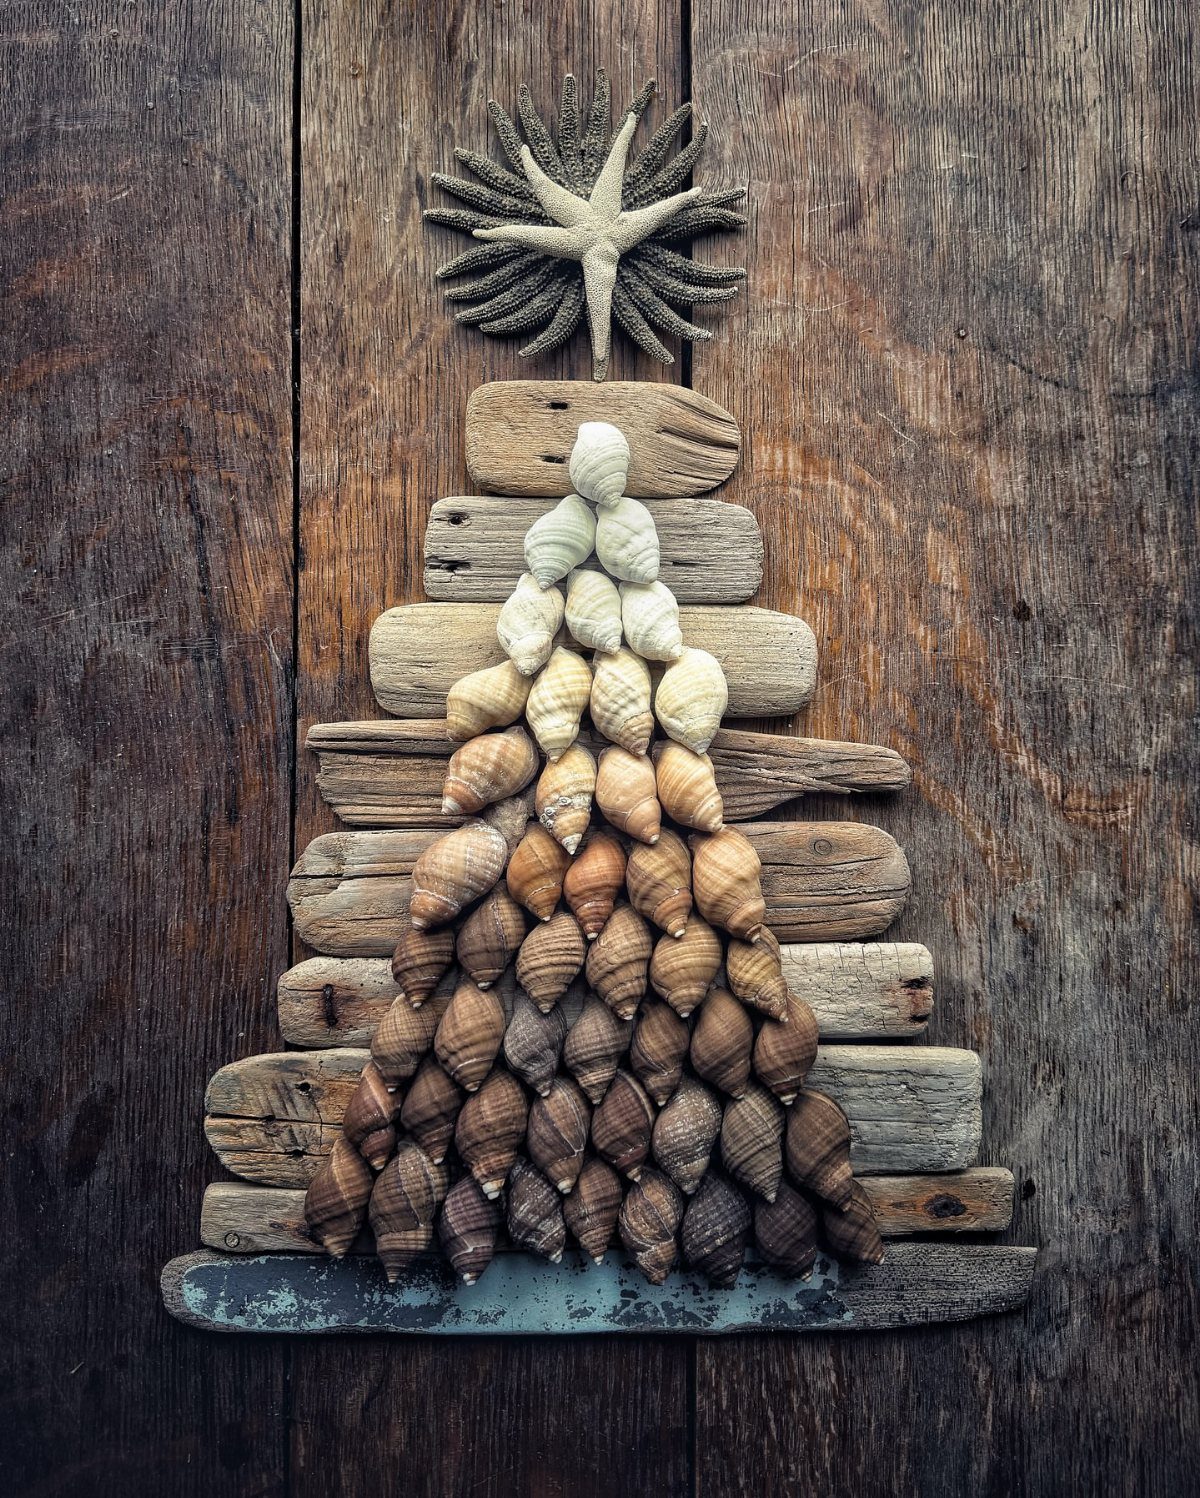
Flat driftwood planks cut to different lengths and stacked into a triangle make a Christmas tree that never drops a needle. Seashells fill the branches, and a starfish tops it off.
Start with the longest plank at the bottom and shorten each row as you go up.
Glue the shells on after the tree is mounted, so you can place them to fill the gaps. A dark wooden backing makes the pale wood look sharper.
13. Driftwood Bird
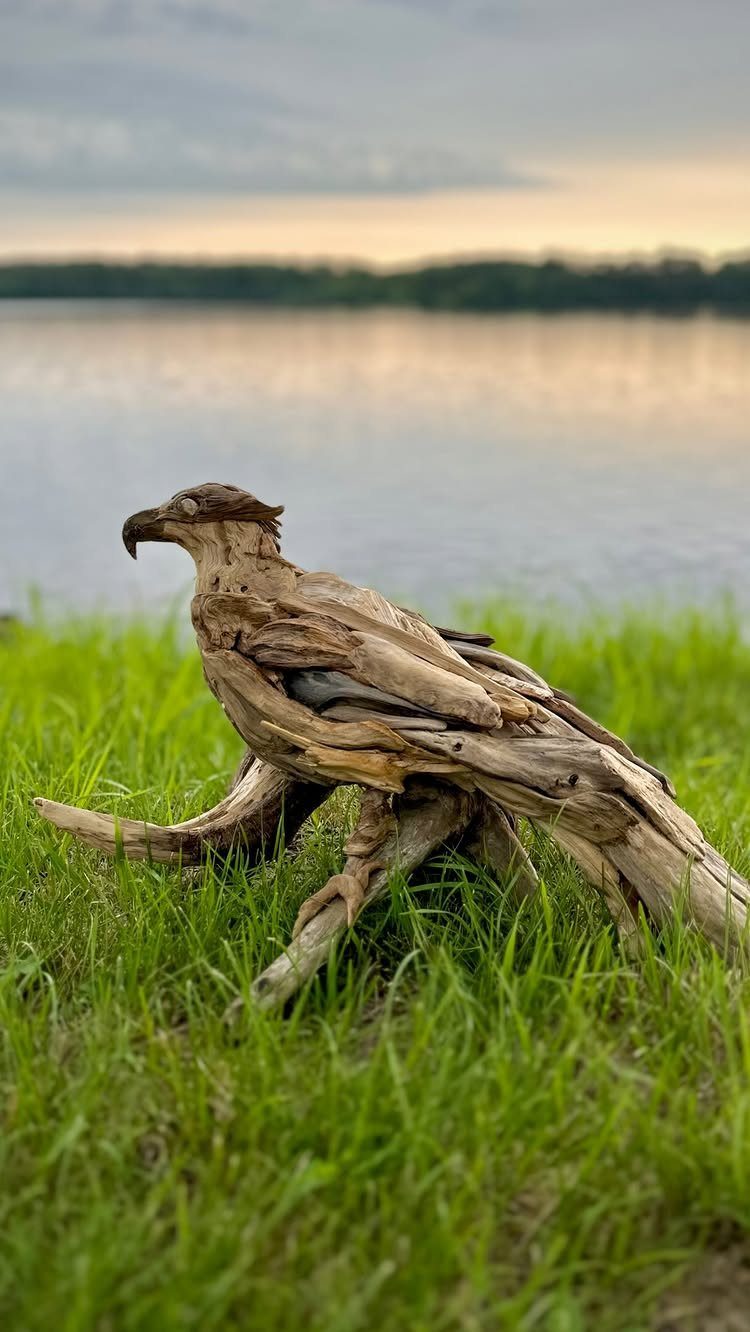
A bird built from driftwood pieces needs no paint, because the wood already has the right colors for feathers. Curved, weathered scraps do the work of a body, a neck and a tail.
Sort your pile by shape before gluing anything. A long curve makes a good neck, and a chunky piece makes a better body.
Test the balance on a flat surface, then glue. Sitting on grass or a patio, it looks best outdoors.
14. Driftwood Ornaments
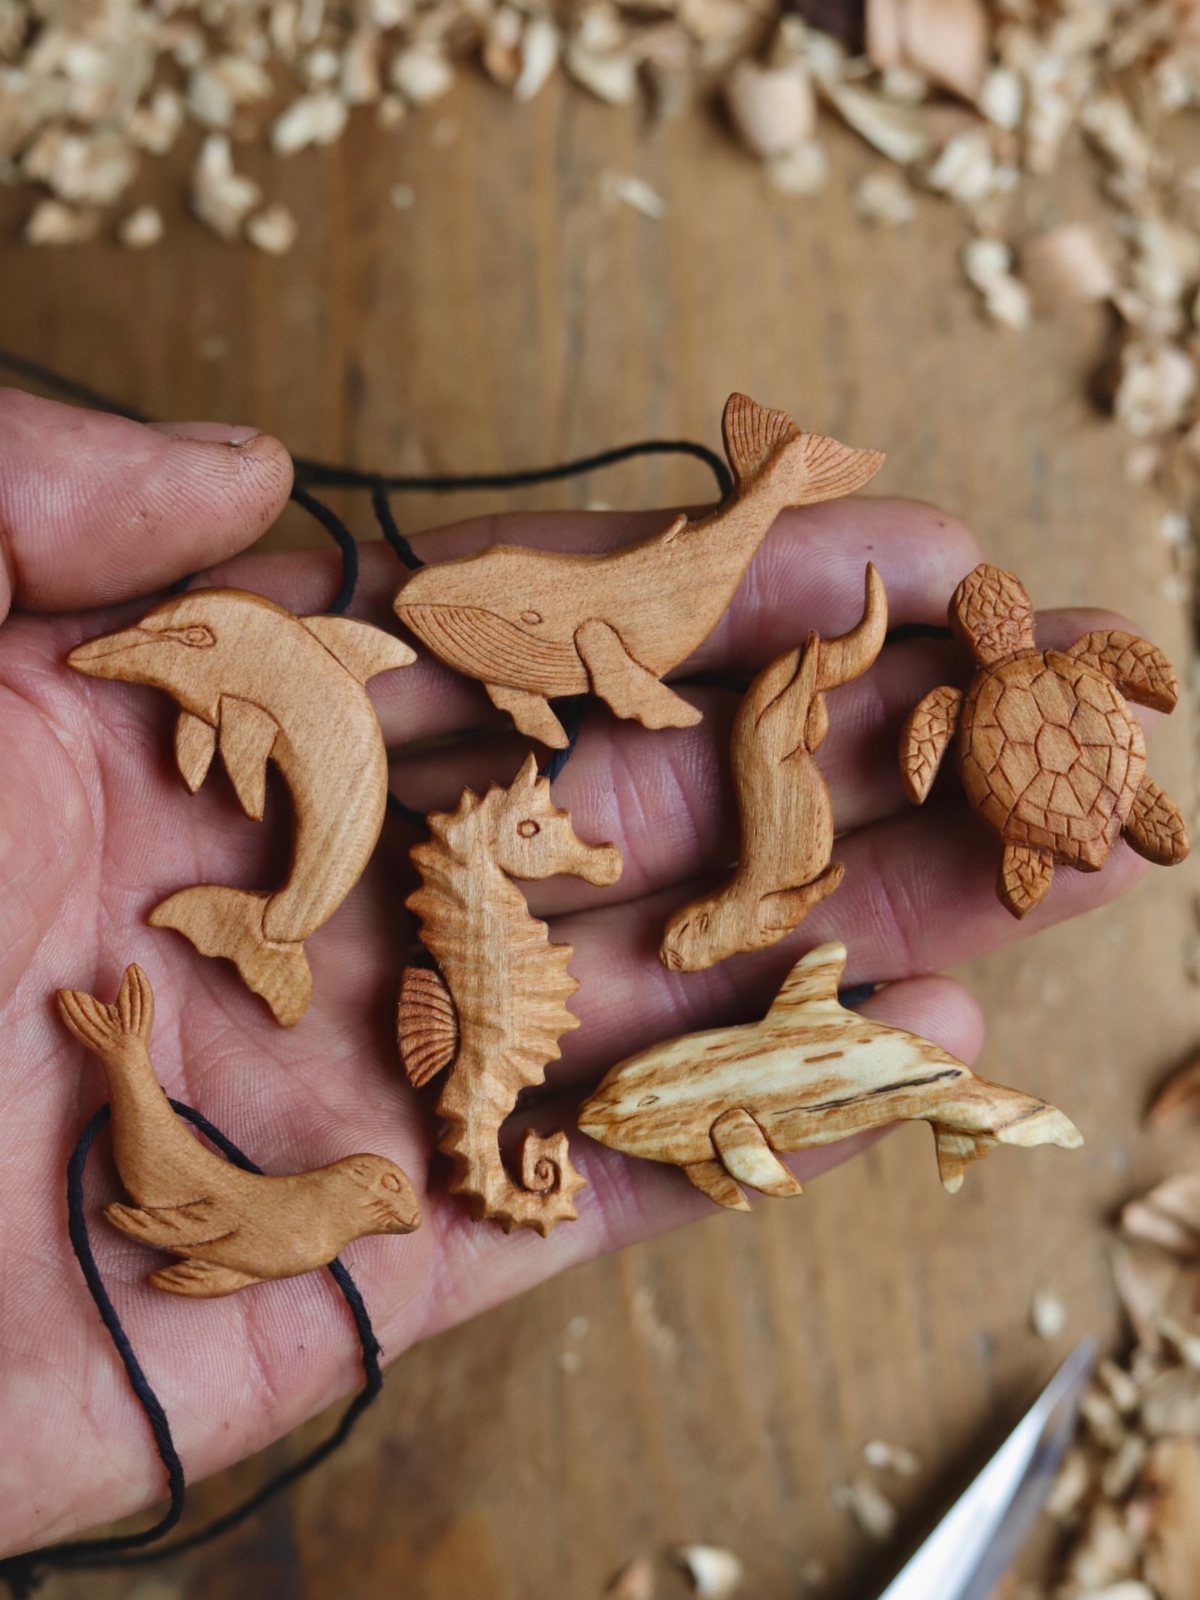
Palm-sized sea creatures carved from driftwood make easy ornaments, since each one needs only a small piece of wood.
Choose a small, solid piece with no cracks, and carve slowly with a sharp knife. Wood shavings pile up fast, so work over a tray.
Drill a tiny hole at the top and tie a loop of string through it. A mixed set looks better to me than a single animal repeated.
15. Driftwood Display Stand
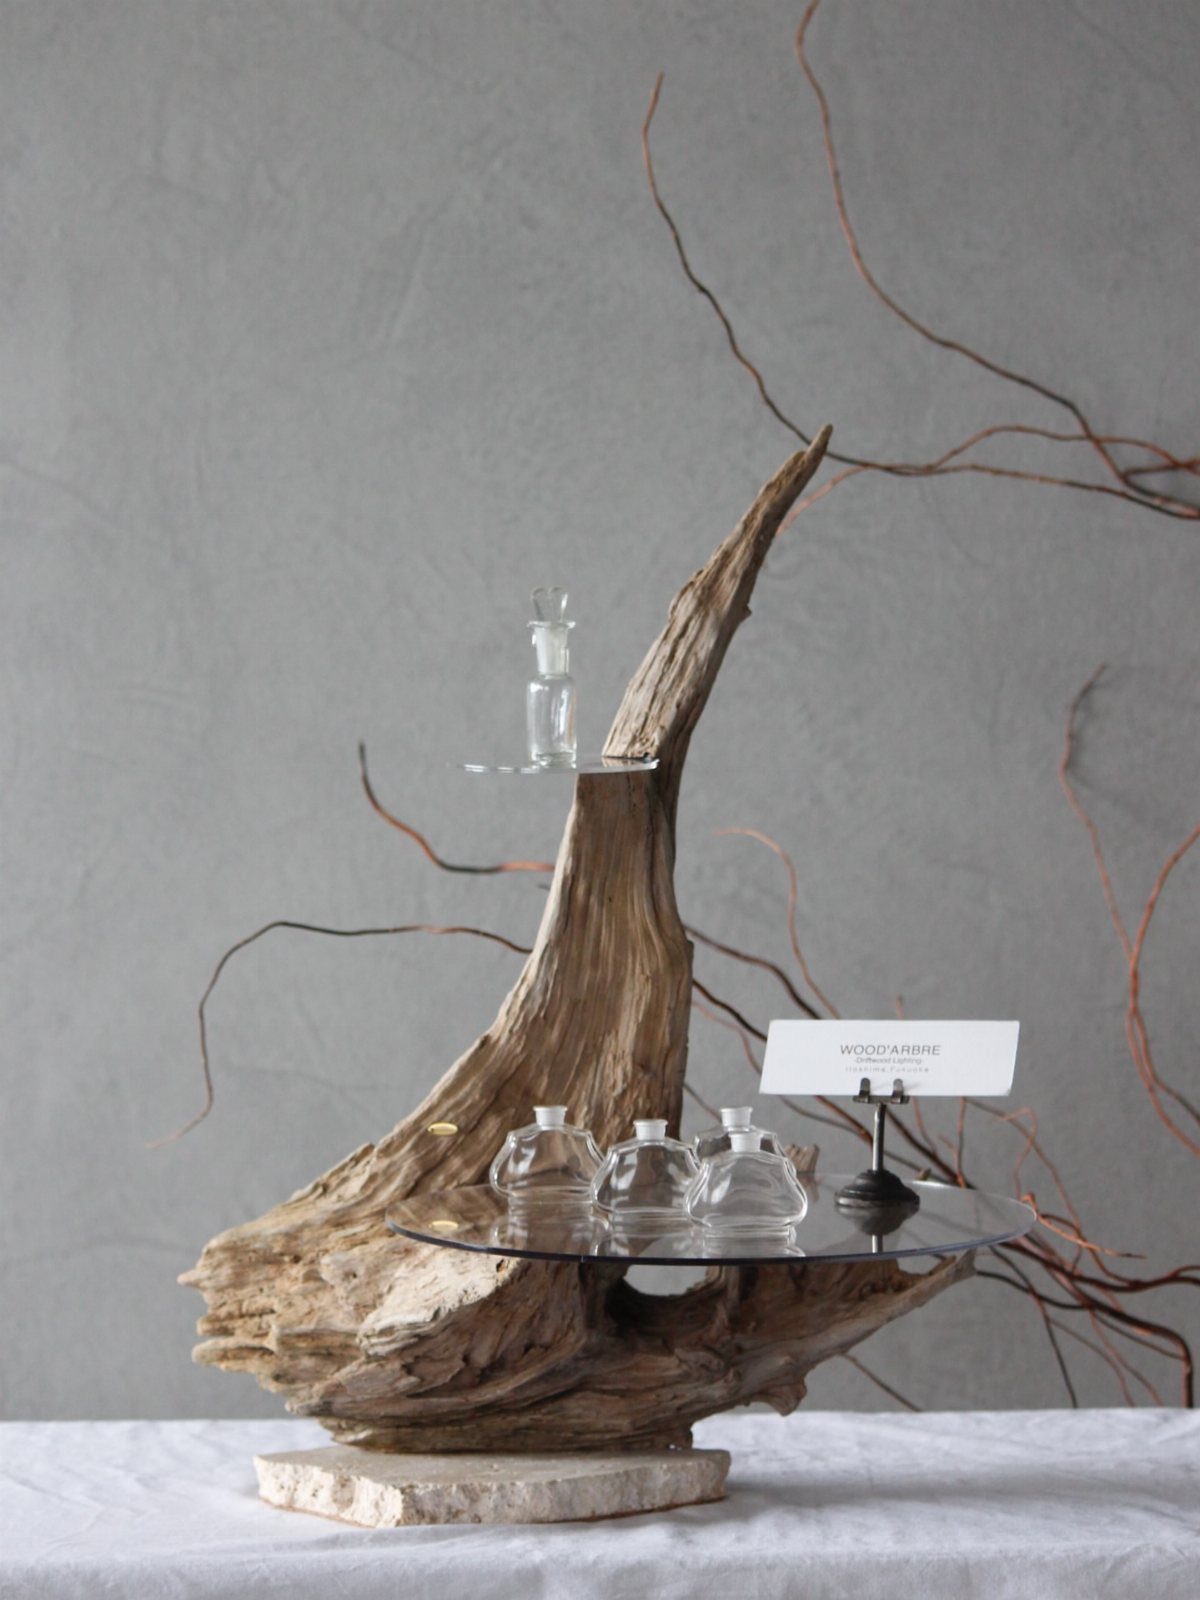
The twisted wood becomes the frame, and clear glass lets it stay the main feature.
Pick a piece with a steady base, because shelves and bottles add weight at the top.
Set the shelves at different heights before you fix them in place. A plain gray wall behind it keeps attention on the wood and the glass.
16. Carved Driftwood Whales
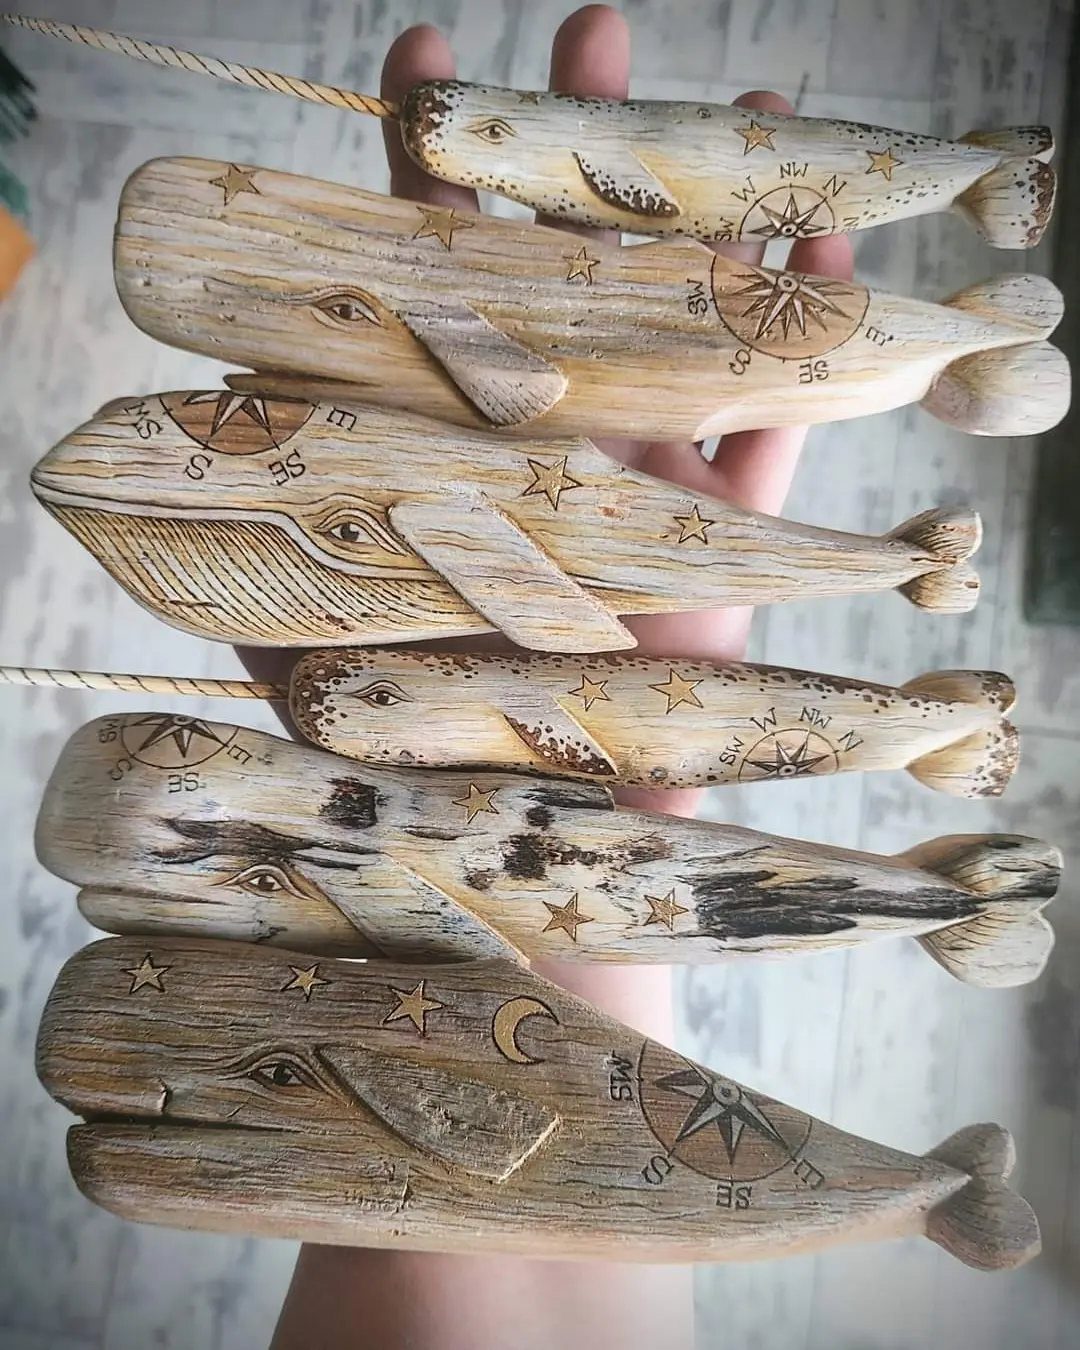
Etched stars, a moon and a compass turn a small carved whale into a nautical charm. Six of them together read as a pod.
Smooth the wood first, since etching shows best on a clean surface. Sketch each motif in pencil before cutting, and make the lines shallow.
Vary the designs so no 2 whales match. Pale, fine-grained wood holds detail better than rough, cracked pieces.
17. Carved Driftwood Lighthouse
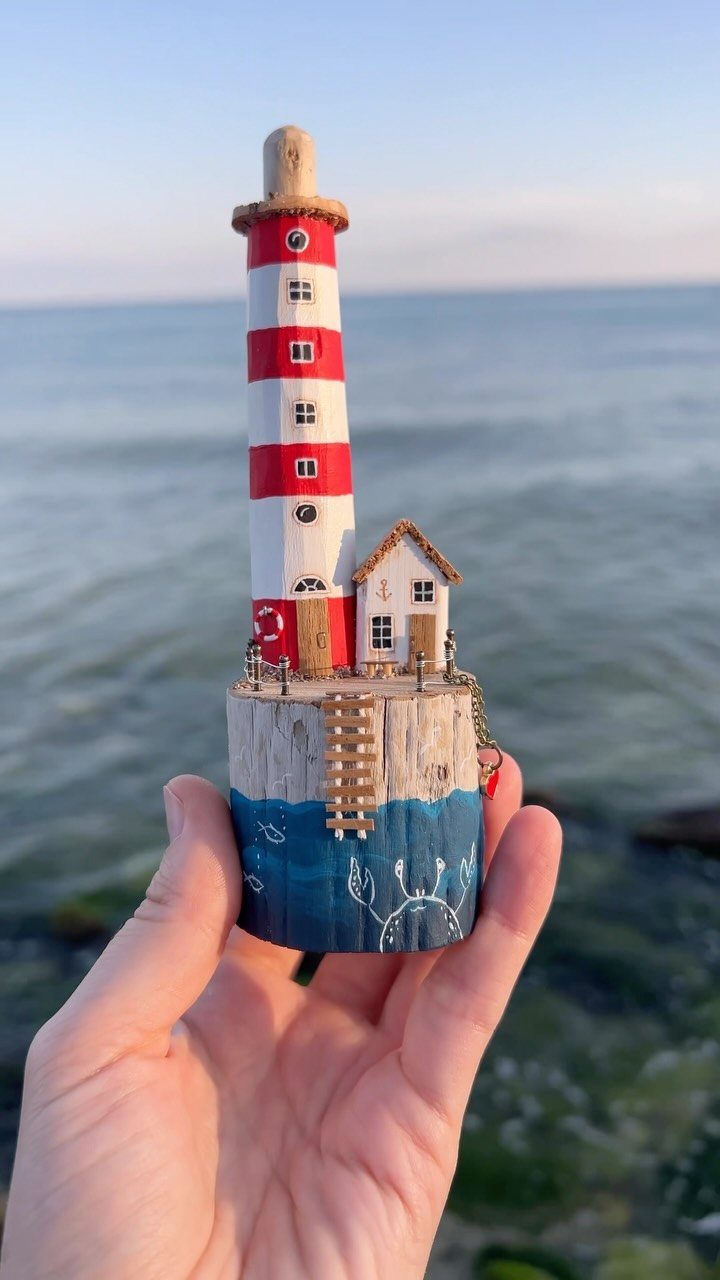
Red and white stripes make a lighthouse unmistakable, even when it is only a few inches tall. A small cottage carved beside it gives the scene a story.
Carve the tower with a slight taper, then paint the stripes by hand with a fine brush. Mask the edges with tape if your lines wobble.
Paint the cottage in a quieter color so the lighthouse stays the focus. A coat of sealer protects the paint.
18. Driftwood Sailboat Decor
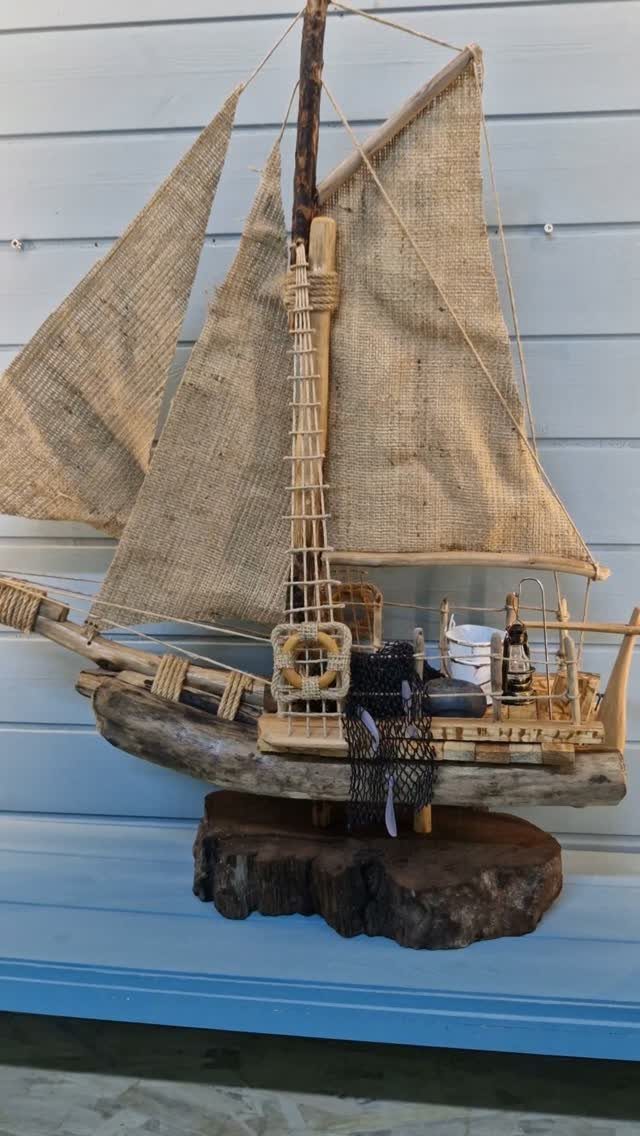
Burlap sails and twine rigging give a driftwood sailboat a rustic, model-ship look. The hull comes from carved driftwood, and the whole boat sits on a wooden base.
Cut the burlap a little smaller than you think you need, because the fabric frays.
Thread twine from mast to hull to make the rigging, and knot it tightly. A driftwood sailboat makes a good shelf piece, and the cost stays low.
19. Carved Driftwood Face
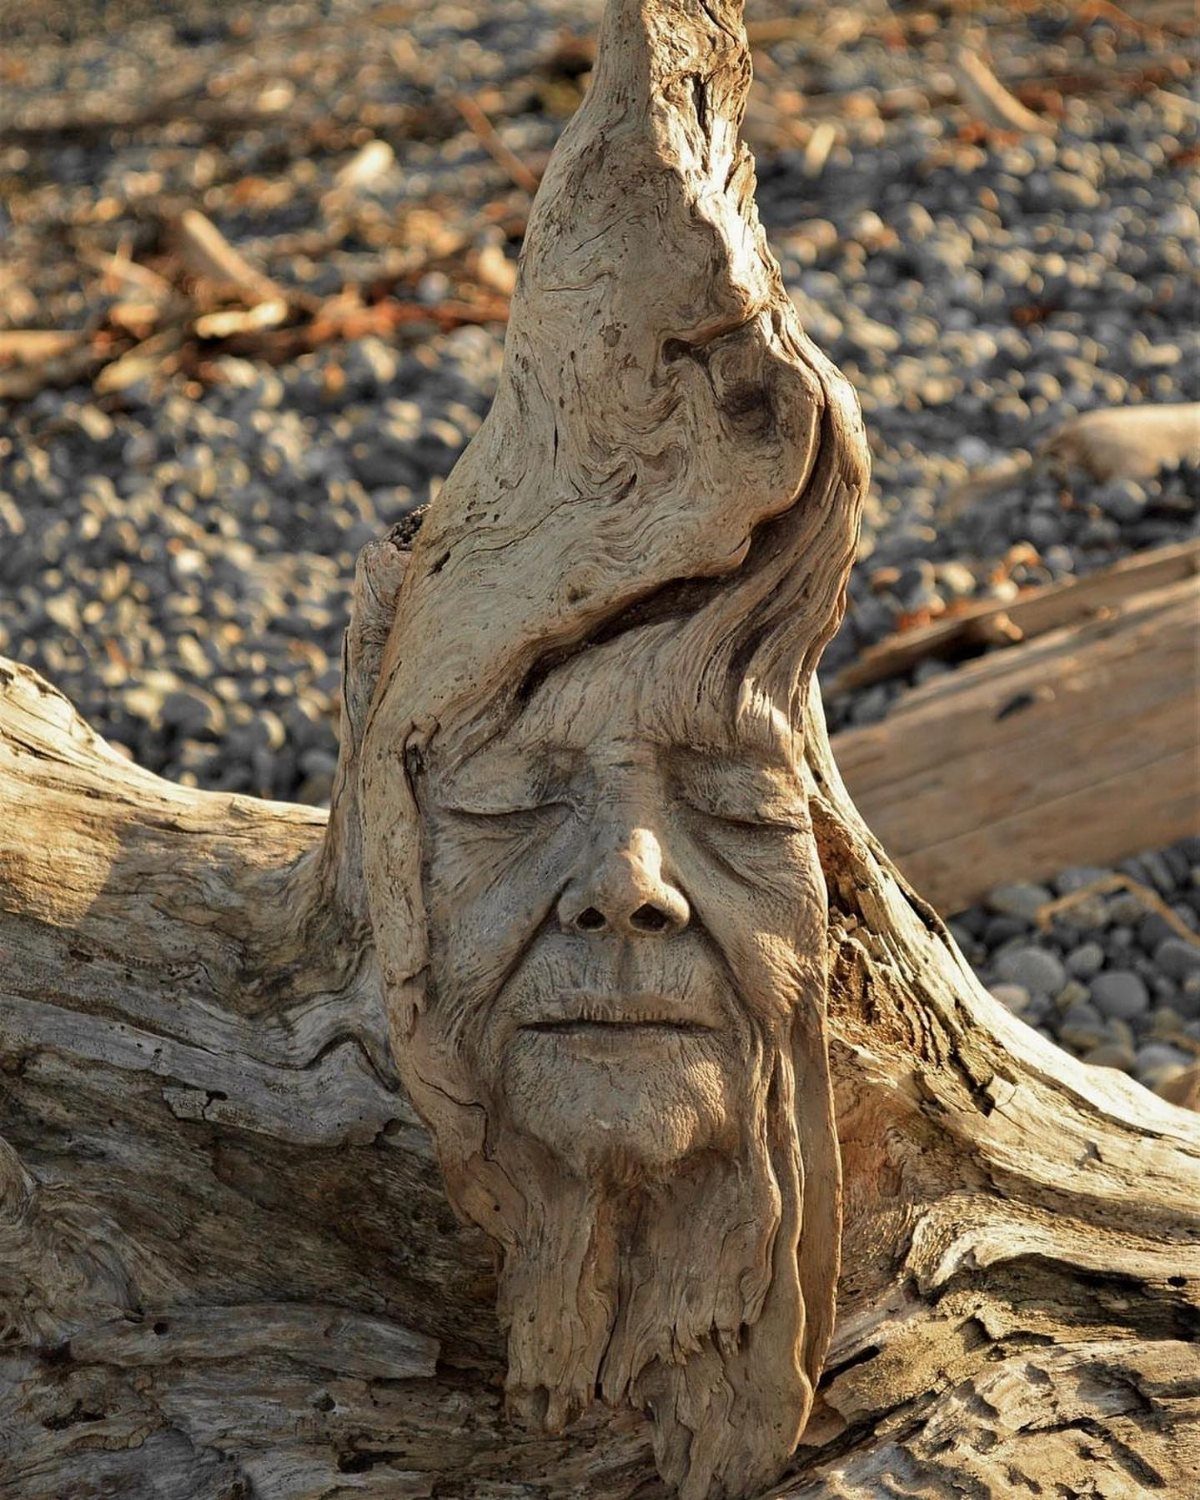
A closed-eyed old man’s face works well in driftwood because the weathered grain already looks like wrinkles. Closed eyes are also simpler to carve than open ones, since you only need a curved lid and a shallow brow.
Choose a thick, solid piece with no cracks, and let the natural ridges become the forehead and cheeks.
Carve slowly with a sharp knife, and cut less than you think you need. A pebble beach or garden bed suits it.
20. Miniature Village Driftwood Carving
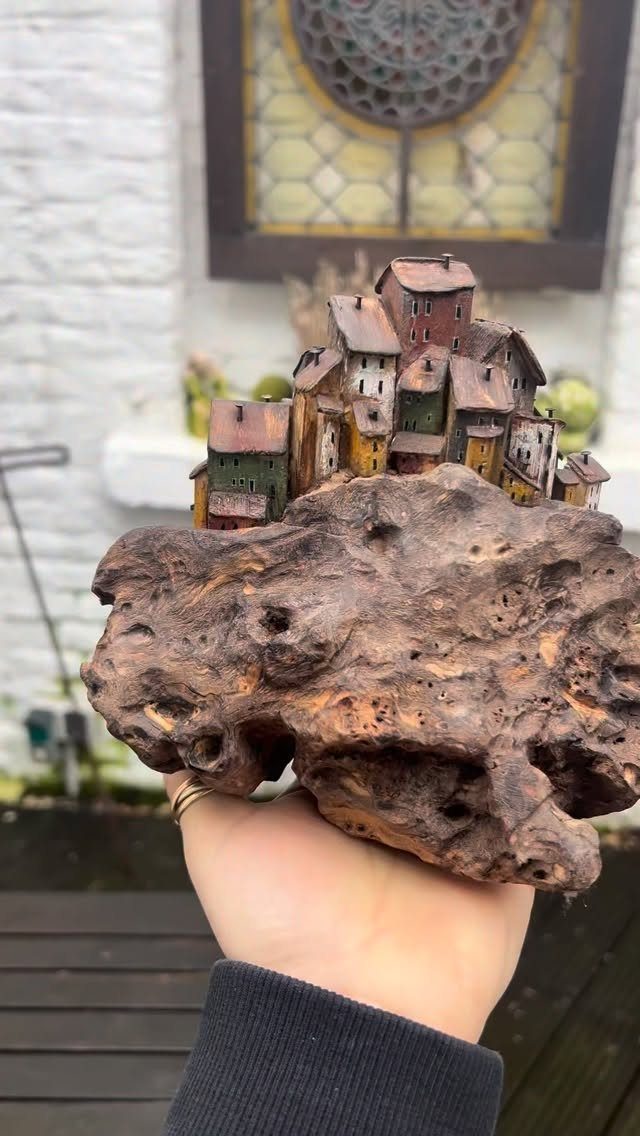
Tiny houses along the top edge of a textured piece of driftwood turn one branch into a whole hillside village. The rough wood stands in for the ground, so the buildings need very little detail.
Cut simple block houses first, then paint each in a different color so the row reads as separate homes. Craft paint and a fine brush are enough.
Keep the roofs plain, because small shapes get muddy fast. A clear coat of matte sealer over the paint keeps the colors from chipping as the wood shifts.
21. Carved Driftwood Elephant Head
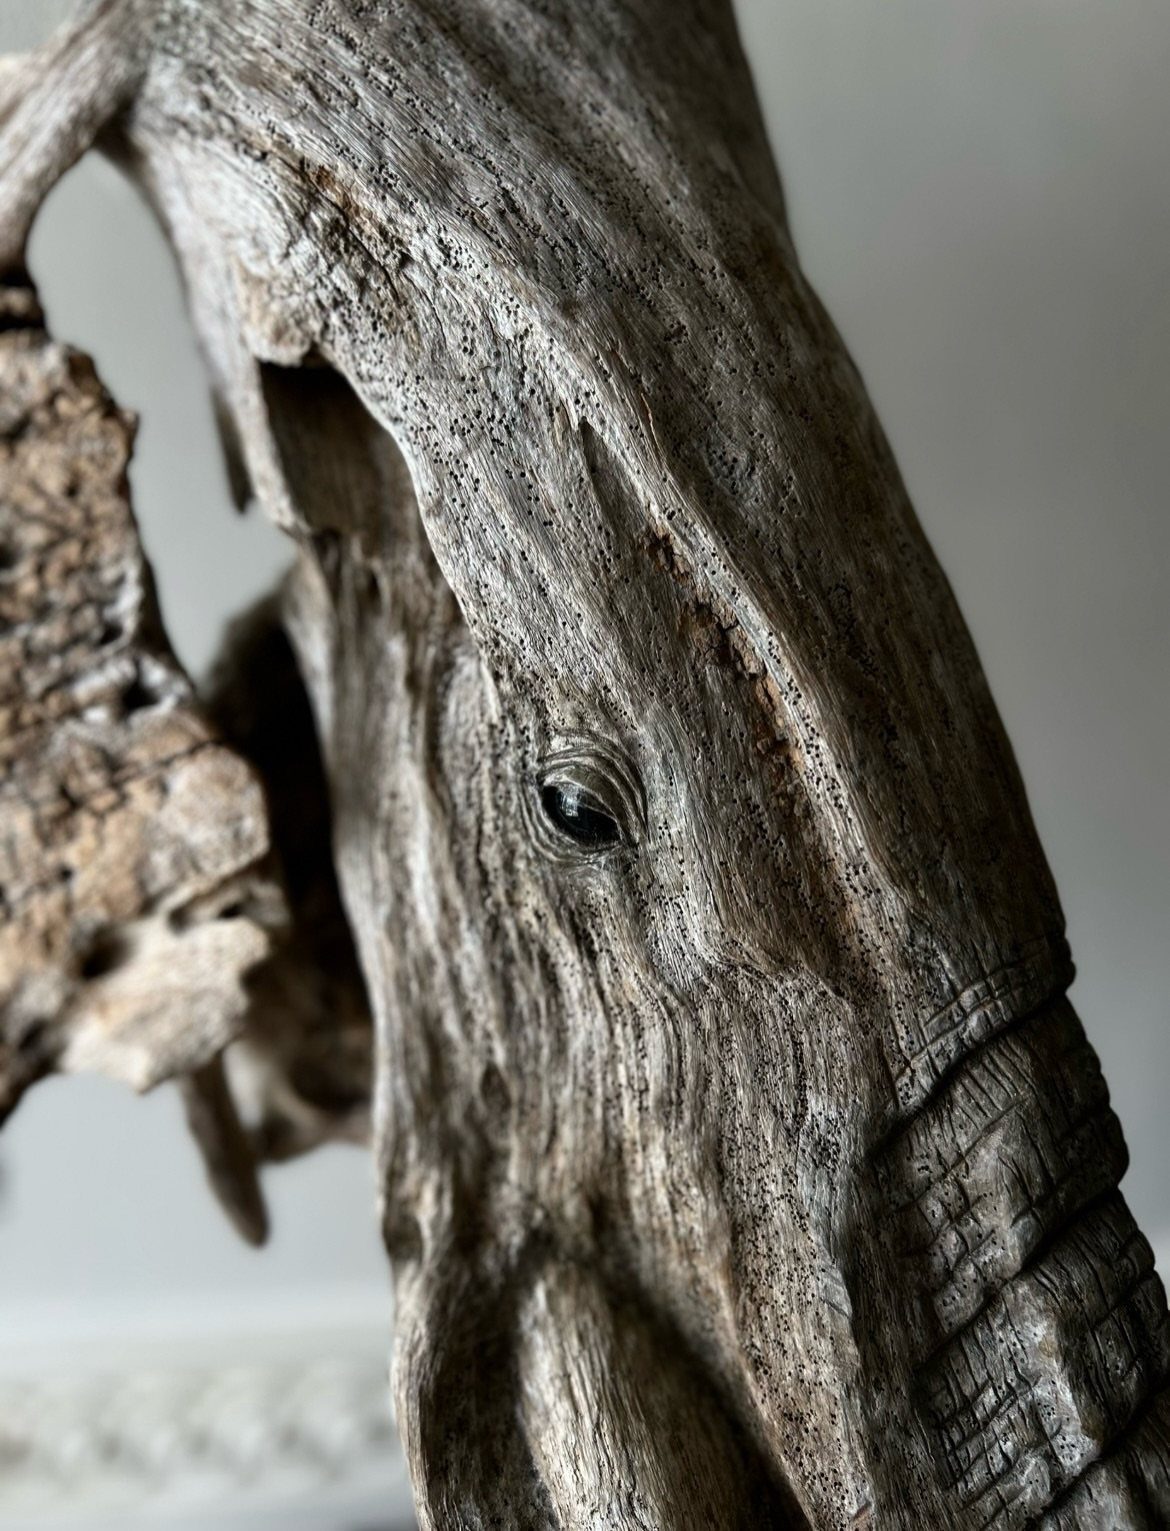
An elephant head carved in grey-brown driftwood needs very little invention, because the wood’s cracks and ridges already look like wrinkled skin. The eye is where I would spend my time.
Pick a thick piece with a long, curving side that can become the trunk. Rough out the head shape first, then carve the eye last, with small, careful cuts.
Leave the surrounding grain untouched so the texture stays natural. A plain background keeps the eye in focus.
Cleaning and Preparing Driftwood
Sand and salt dull carving tools fast, so the first job is getting them off. Scrub the piece with a stiff brush and rinse it well, then check the crevices, where grit hides longest.
Drying matters just as much.
A piece that still holds water can warp or crack after you carve it, which undoes the work. Let it dry completely in a spot with good airflow, and give thick pieces extra time.
Once it’s dry, the order of work stays simple: transfer your outline to the wood, cut the main shape, sand, then seal. Cleaning first means every later step goes on a stable surface.
Advantages and Challenges of Driftwood
Driftwood’s biggest draw is the weathered texture you can’t fake. Each piece has its own structure, and since it’s reclaimed, it’s an eco-friendly material.
The same history causes trouble. Hidden cracks and soft spots of rot can sit inside a piece that looks sound, and trapped moisture can warp it later.
Look over every piece before you commit.
Press along it with your thumb to find soft areas, and look for cracks that run deep. A piece that fails that check is better saved for display than for carving.
Odd shapes also make planning harder, so study the wood before you pick up a knife. Let its curves suggest the design rather than forcing a drawing onto it.
Frequently Asked Questions
What are some creative ideas for making driftwood pieces?
A few of my favorites are a tall sculpture on a heavy base, an air plant holder with vertical planks, and a mirror frame made from mismatched pieces.
Wreaths, lamps, candle holders with tea light hollows, and carved whales or a lighthouse all work too. Driftwood already has texture and character, so the best ideas let the wood’s shape do most of the decorating.
What is the best finish to put on driftwood?
For most driftwood pieces I reach for a clear wipe-on finish, like tung oil or a satin polyurethane, because it locks in the surface and deepens the grain without hiding it.
Painted pieces need a topcoat too, and a matte spray sealer works well because it grips the paint so it won’t flake when the wood moves. Polyurethane spray is another option for a finished carving.
Is driftwood hard to carve?
It can be, because every piece is unpredictable, with hidden cracks, soft spots, and odd shapes.
Many pieces are softer than other woods, though, which can make carving more forgiving. Go slowly with a sharp knife, take small cuts, and press along the wood with your thumb first to find rot before you commit.






