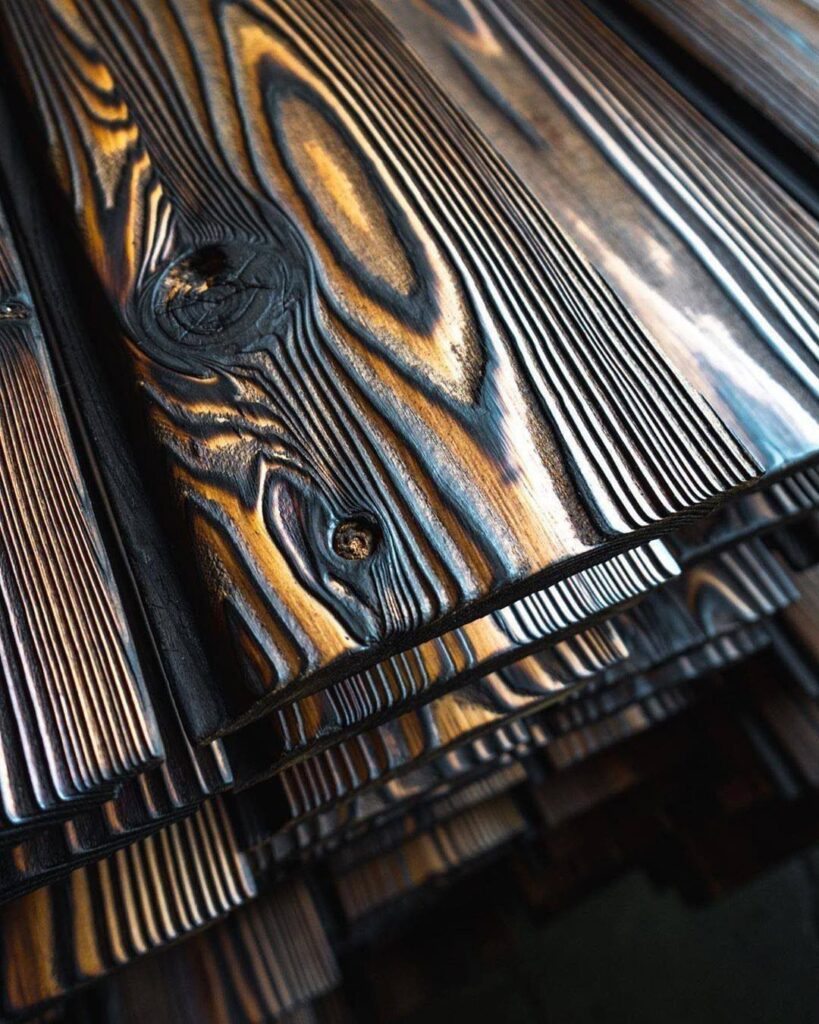
Where the piece will live decides which finish fits: the deep, cracked Textured Alligator Skin look makes a bold statement, while a light Surface Hit with a Propane Torch keeps the grain visible and the look quieter.
The ideas range from a single board and a propane torch to a full Charred Wood Bench, and from the rough ridges of alligator skin to the cleaner black face of Shou Sugi Ban.
Any of them can be finished in an afternoon, as long as the wood is dry and you work outdoors.
1. Textured Alligator Skin Charred Wood Finish
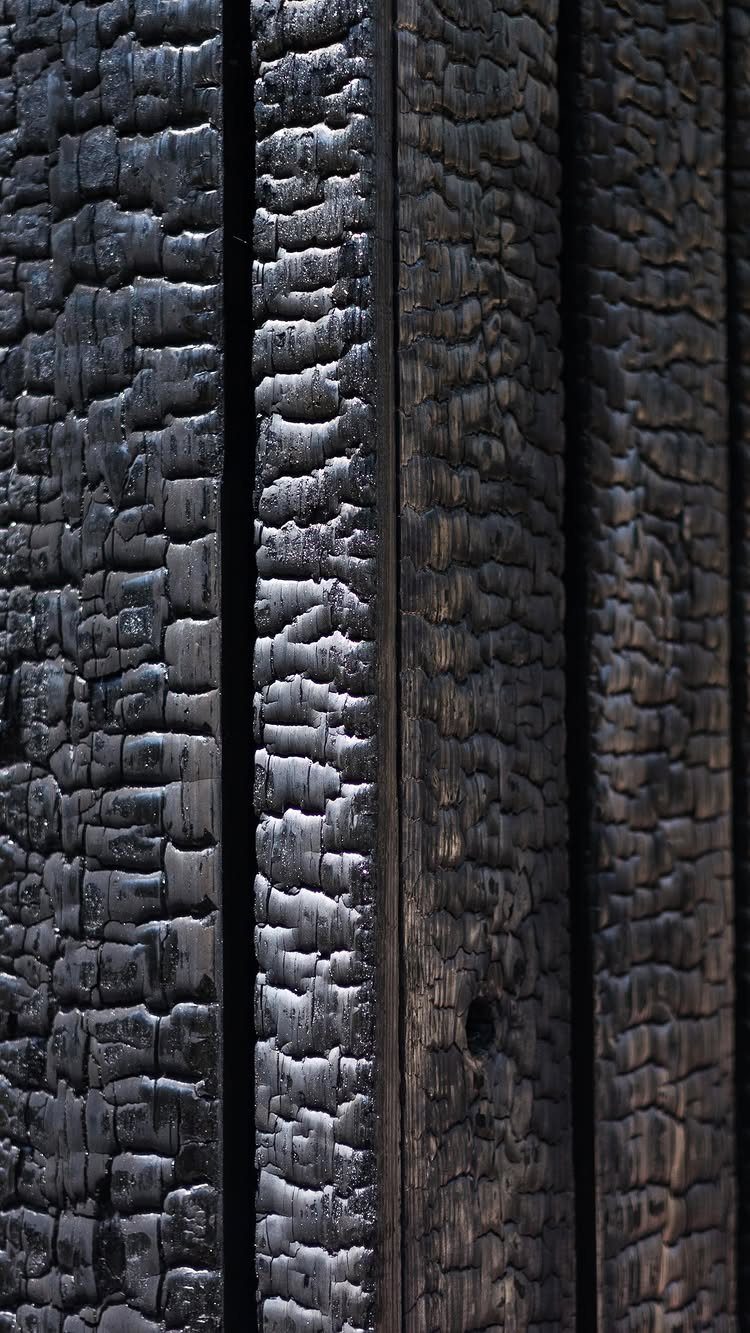
Deep, scaly cracks like these come from letting the char run long, until the surface breaks into blocky ridges that catch light along their edges.
Plain wood planks are enough to start with, and the texture does the decorating for you.
I like this finish best on an accent wall or a fence panel, where the roughness gets seen from a few feet away.
Expect it to shed black dust at first, so wipe or brush it down before it goes anywhere near a light-colored sofa.
2. Surface Hit with a Propane Torch
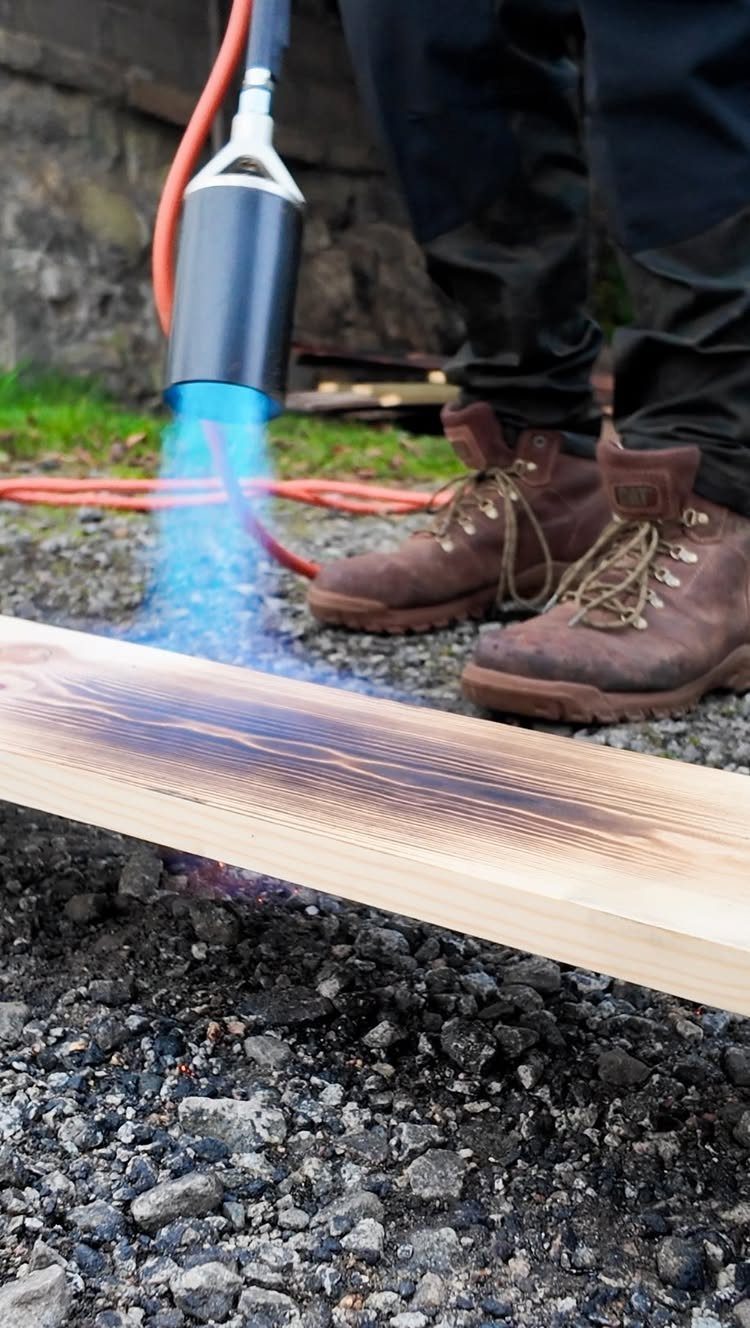
Planed, clean boards are the starting point, because dirt and mill glaze burn unevenly. After that, a propane torch is all the equipment this method asks for, and most people with basic tools already own one.
Work outdoors on gravel or bare ground, and keep the blue flame moving along the grain so no single spot scorches deeper than the rest. Wear closed boots and long pants.
For an afternoon project, this is the method I’d pick: one plank at a time, no special setup, and you see results within minutes.
3. Shou Sugi Ban
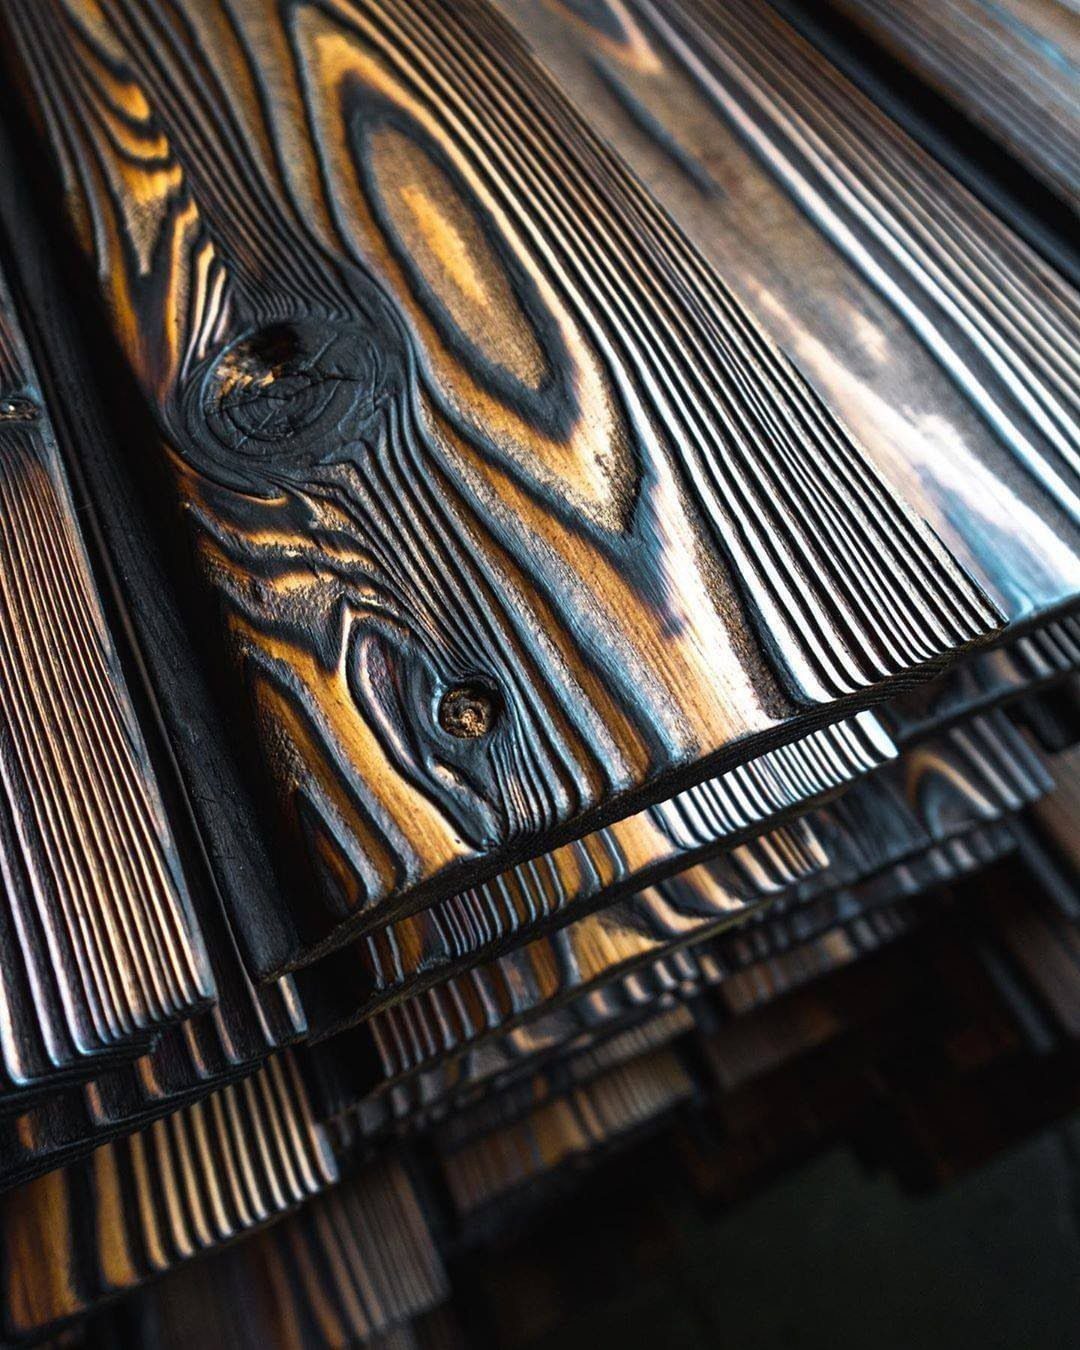
Shou sugi ban is the traditional Japanese way of preserving wood with fire, and it is the reason charred boards became a style at all.
The burn leaves a black face while the grain underneath still reads as golden in the cleaner spots.
For a good result, I’d char evenly and stop before the surface turns deeply cracked, if you want the grain to show. Stack finished boards flat while they cool.
The look is quieter than the cracked version, so it suits cladding, trim, or a feature wall.
4. Charred Wood Wall Art
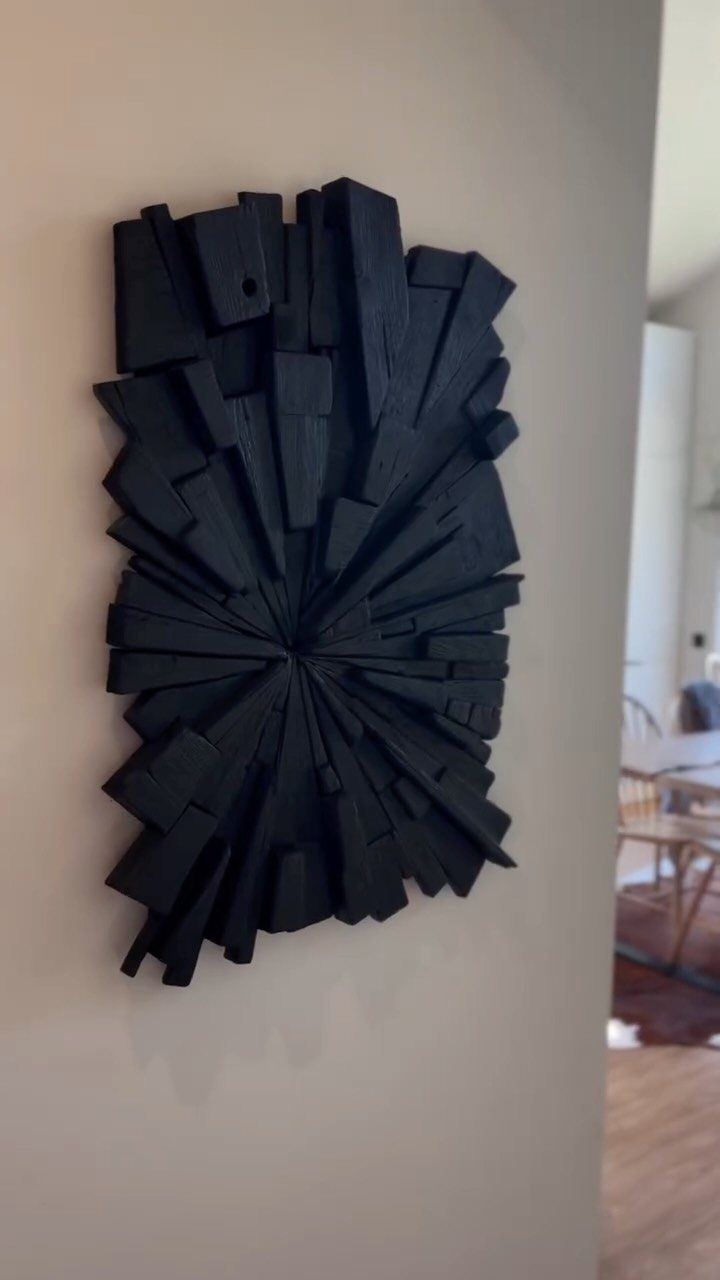
Radiating blocks make this one a sculpture rather than a panel: short lengths of wood fan out from a center point and cast small shadows on the wall behind them.
Cut the blocks first, then char them, so every face is black.
A plain, light wall gives the geometry room, and a small piece can come together in an afternoon with a saw and a torch. Dry-fit the whole arrangement on the floor before you mount anything.
5. Charred Wood Stump Side Table
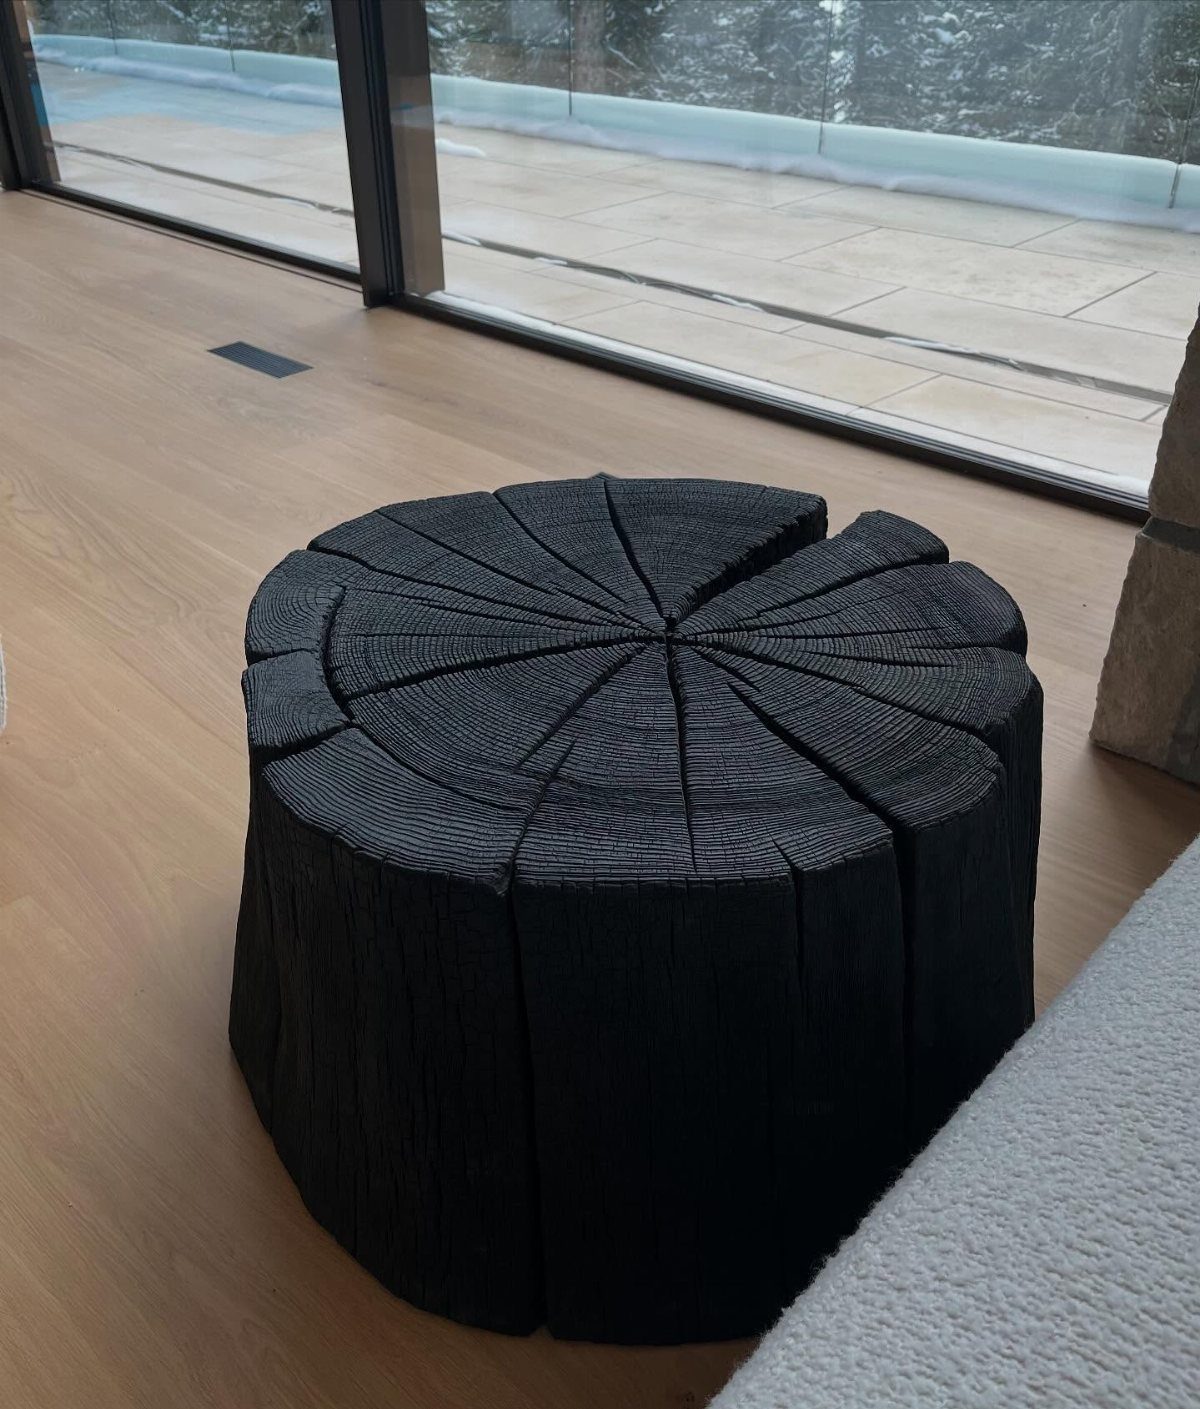
A cylindrical stump table with a segmented top turns one solid chunk of wood into furniture that looks carved from a single piece. Charring the whole thing black makes the radial cuts read like a graphic pattern.
Char after all the cutting and sanding are done, so no raw wood is left showing. Brush off the loose soot before the table goes anywhere near a light wood floor, because charcoal dust smears and stains pale finishes fast.
Setting it by a window or glass door suits the dark, heavy shape well.
6. Charred Wood Turned Bowl
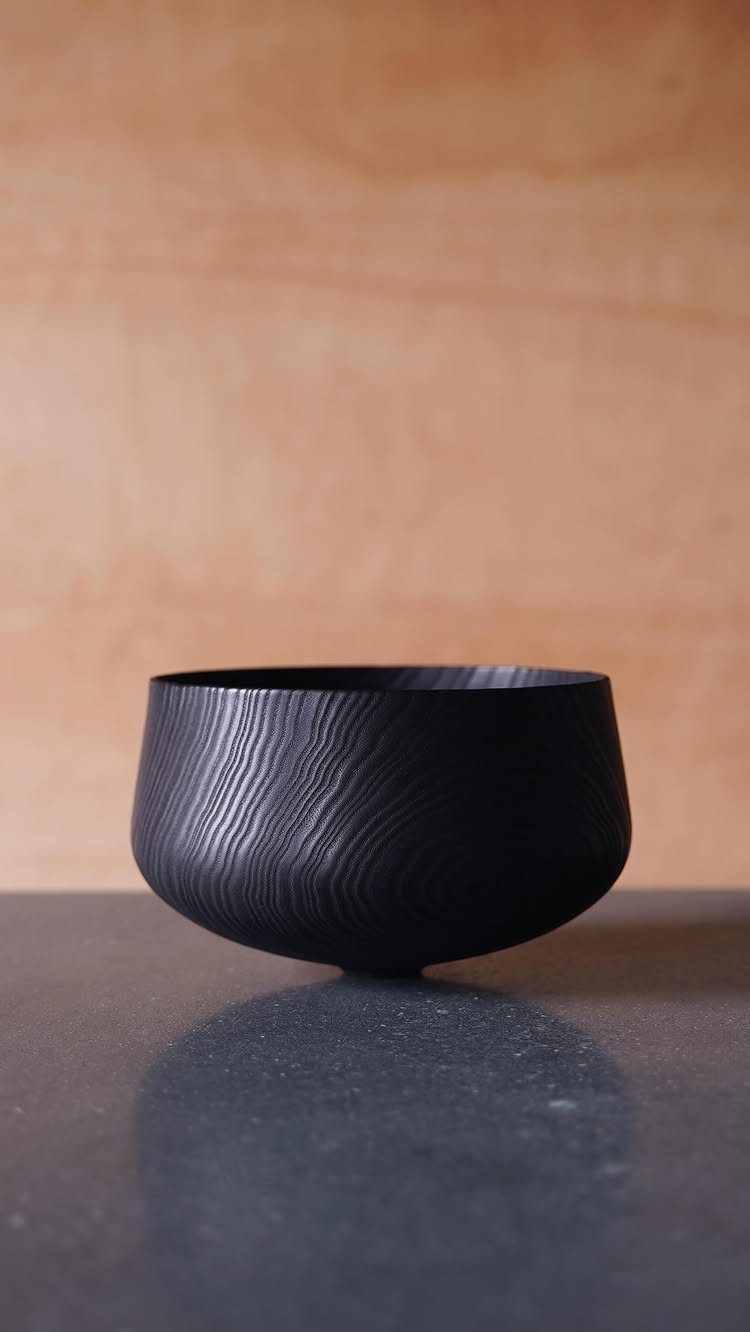
A turned bowl gets its texture straight from the burn.
Fire consumes the soft earlywood faster than the dense latewood, so the rings stand up as ridges your fingertips can follow. Turn and sand the bowl smooth first, then char it.
Go slowly and rotate the bowl so the heat spreads evenly. The rough surface looks best as a display piece, and I’d keep it for dry objects like keys or decor rather than food.
7. Charred Wood Drinking Cup
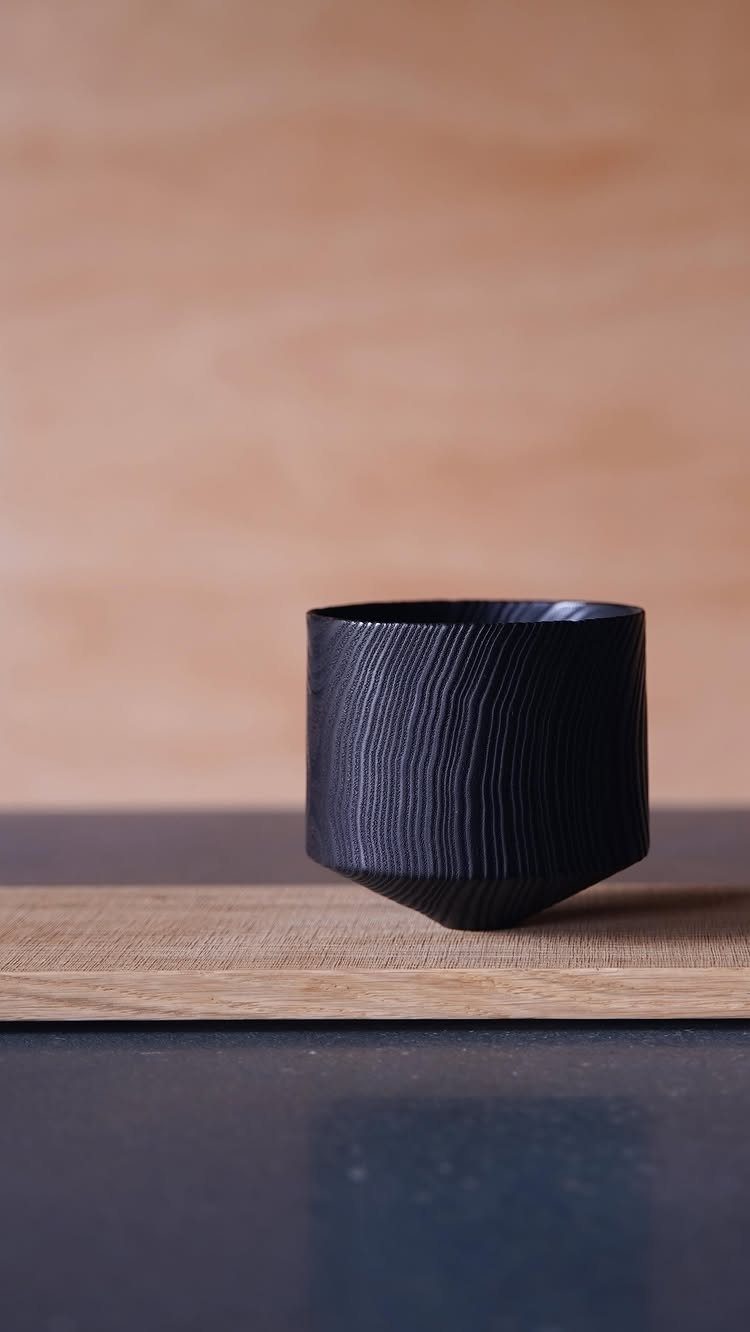
A small cup with a black, textured face keeps the grain readable, since the char settles into the soft and hard bands differently. It’s a compact project, and one cup is easy to finish in an afternoon.
Char the outside after the shaping and sanding are done, then brush off the loose soot.
I’d treat it as a display piece or a holder for pens and dried stems, and skip drinks until you’ve sorted out a food-safe lining.
8. Charred Wood Bench
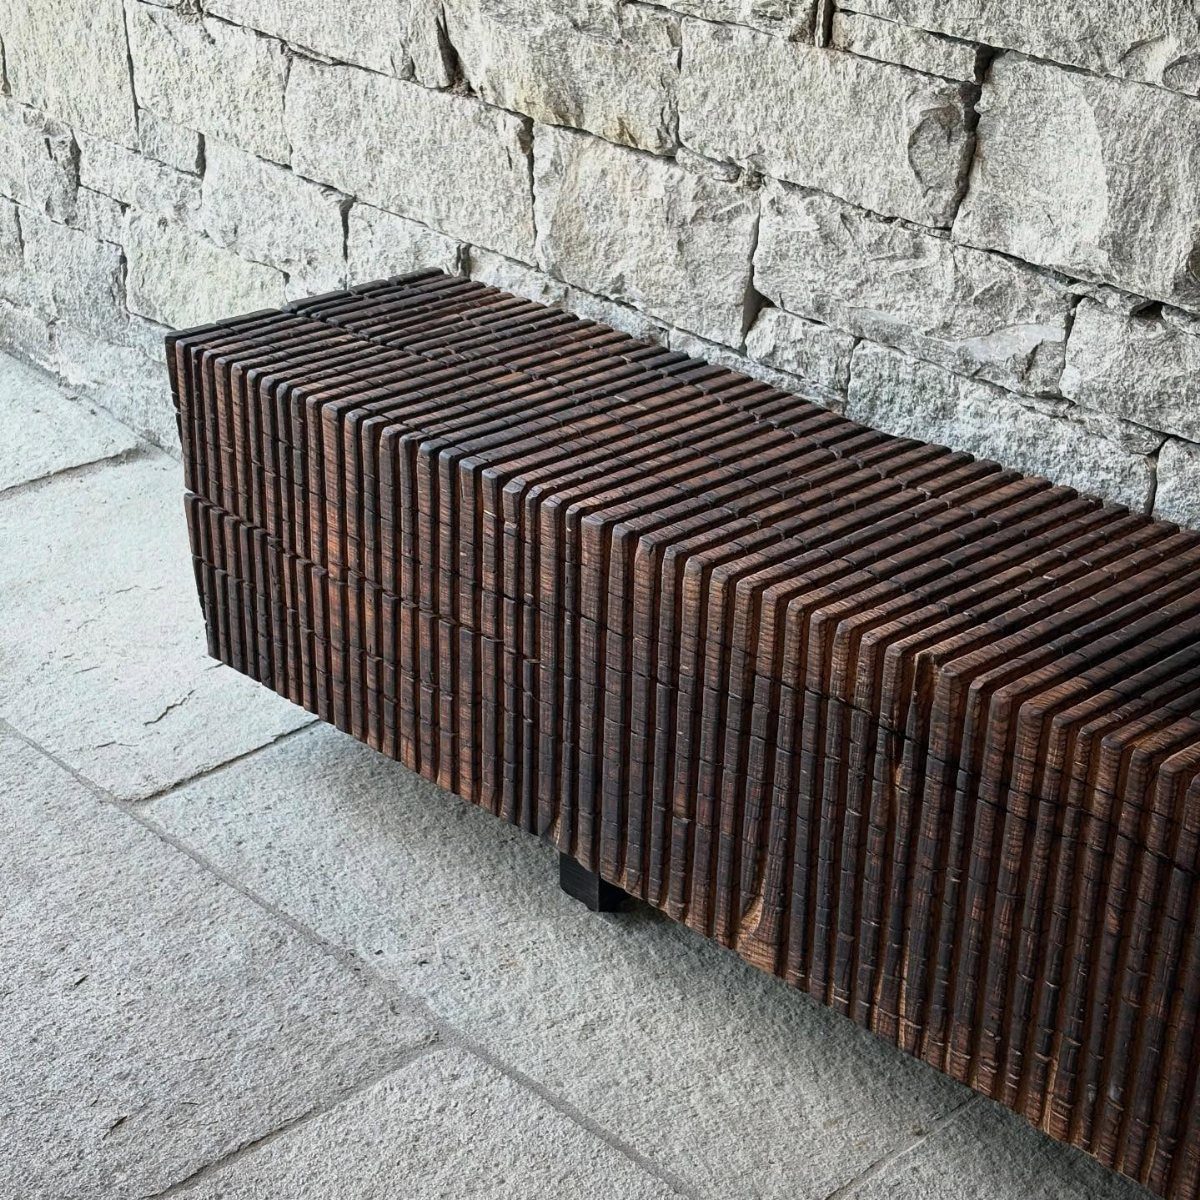
Ribbed, blackened boards give a long bench real presence, and the grooves hold shadow so the seat looks deeper than it is. Against pale stone, the dark color reads as a clean, strong line.
Build the bench first, then char every surface so no raw wood shows at the joints. Work outdoors and move the flame along the grain.
Brush the seat down well before anyone sits on it, because soot rubs off on clothes. A stiff brush does the job.
9. Charred Live Edge Board
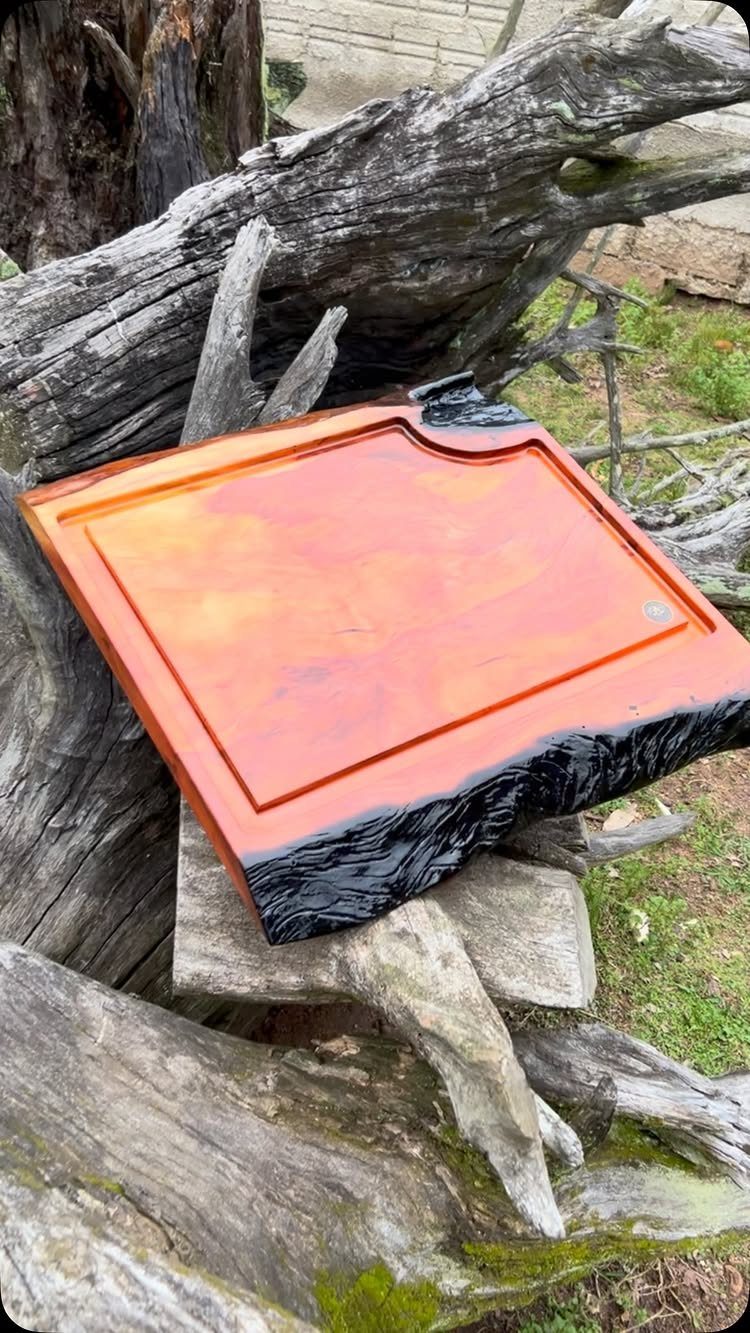
A live edge board with a thick black rim and a warm, smooth top is a contrast I’d pick over a fully black slab. Only the edge burns, so the face keeps its orange tone.
Hold the torch along the edge and keep it moving so the char stays even, and don’t let the flame drift onto the top. Sand the face before you start, since sanding after charring smears soot across it.
Brush the edge lightly when it cools. It makes a good shelf or a display board.
Charred Wood Aesthetics
Brushed charred boards are the better pick indoors. A good wire-brush pass pulls off the loose char, so the surface sheds less soot and won’t flake onto anything you brush past, which matters for a wall in your living room.
Paneling inside the house also gives you room to experiment with patterns. A chevron layout gives a charred surface visual texture that plain boards can’t match.
For a whole-room look, set dark paneling against wide natural-toned flooring. The lighter floor grounds the space, and the black stays a feature instead of swallowing the room.
Pine takes a char well, and the finished boards suit indoor or outdoor use, from tabletops and wall paneling to small decor pieces.
Oil or wax over the finish, such as linseed or tung oil, deepens the color and brings out the grain.
Environmental Benefits
Charring changes the wood itself. Fire leaves the lignin that gives wood its strength mostly alone, but it breaks down the cellulose, the sugary part that insects, bacteria, and fungi eat.
That is why heat-treated boards can outlast untreated ones, and why you may not need a chemical preservative.
Charring also improves dimensional stability and flame resistance, according to the heat-treatment explanation I trust most.
Start with dry wood. Torching is meant for seasoned boards, and wood with leftover moisture may behave unpredictably as it finishes drying.
Species matters too.
A naturally rot-resistant wood like white oak already holds up well, so with a wood like that, charring is more about looks than protection. Softwoods gain more from the burn.
Safety Precautions
Gather your gear before the torch is lit. You need a propane torch, a wire brush for cleaning the surface, and sandpaper to smooth the wood first.
Wear gloves and goggles every time. Park a fire extinguisher right beside you while you burn; one stored across the yard is too far to help.
Set up in a clear, controlled spot with nothing flammable nearby, and keep the board steady so it can’t shift while it burns. Finish by making sure every ember is fully out before you walk away.
Use the torch to char the wood evenly, constantly moving so you don’t burn away too much material in one spot.
Frequently Asked Questions
Does charred wood need to be sealed?
Yes, sealing protects the charred surface and keeps its look. A coat of linseed or tung oil darkens the char slightly and makes the grain easier to see.
On a floor or any surface that gets stepped on, pick a deck or traffic-rated top coat from a paint shop, since a standard sealer will scuff through fast.
How to finish charred wood?
Let the board cool, then brush off the loose char and soot with a stiff or wire brush. Indoors, brush the surface thoroughly before sealing, because loose soot rubs off on clothes and furniture and a good brushing stops that.
Can you do shou sugi ban on any wood?
You can char many woods, but results vary.
Japanese cedar is the traditional choice and gives the best results, and pine takes a char well too. Start with dry, seasoned boards, since leftover moisture can make the wood behave unpredictably.
Softwoods like cedar and pine gain the most from the burn; white oak resists rot on its own, so charring it is mainly a choice about looks.






