The projects range from the Minimalist Owl, which has no thin parts to snap off, to the Whittled Wooden Spiral, where each turn has to match the one before it, so a steady hand matters more as you go down the list.
If your cuts still wander, start with a compact, rounded shape like the owl or the whale, where soft curves hide small slips.
Once your cuts run clean, the long edge of the Carved Wooden Knife and the evenly spaced grooves of the Whittled Wooden Spiral will show you right away where your control still slips.
1. Minimalist Owl
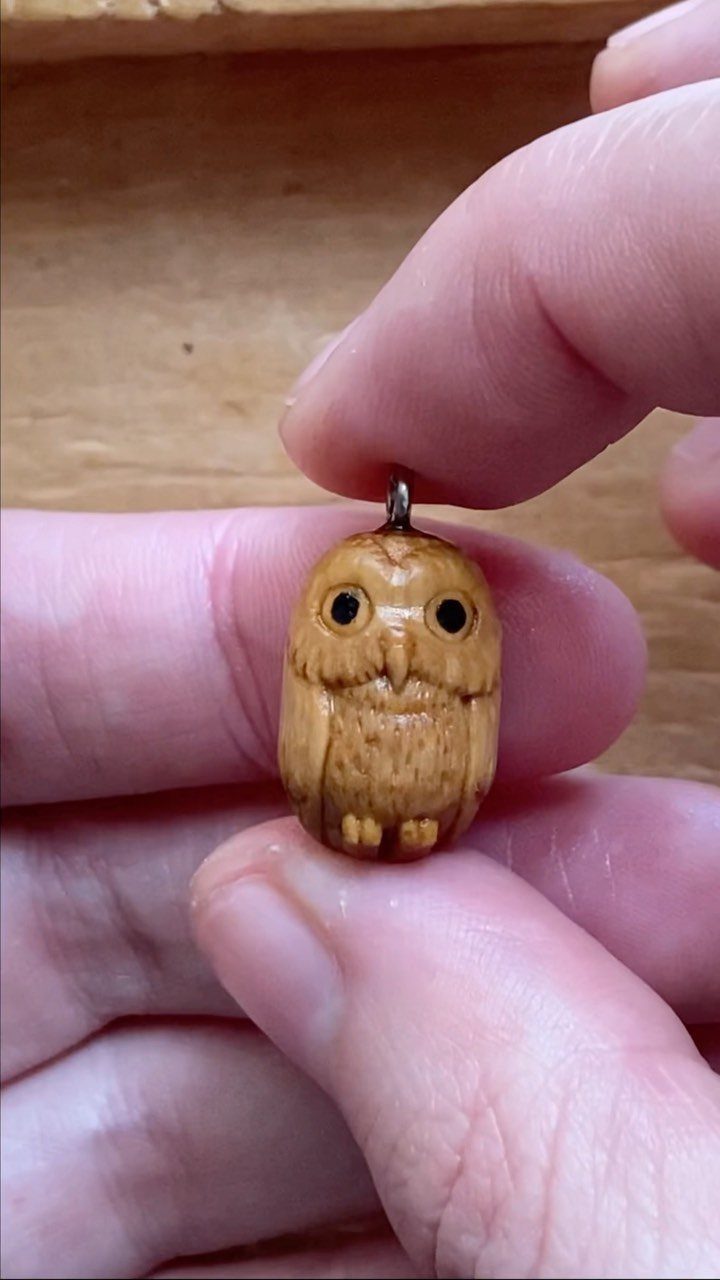
A pendant owl is about as forgiving as whittling gets. Its body is one compact shape with no thin parts to snap, so a first-timer can focus on clean, shallow cuts instead of fragile details.
Keep the face minimal: 2 eye notches and a small beak are enough.
Drill or screw in a metal loop at the top once the carving is done, and the owl becomes something you can wear or hang from a bag.
2. Simple Bird
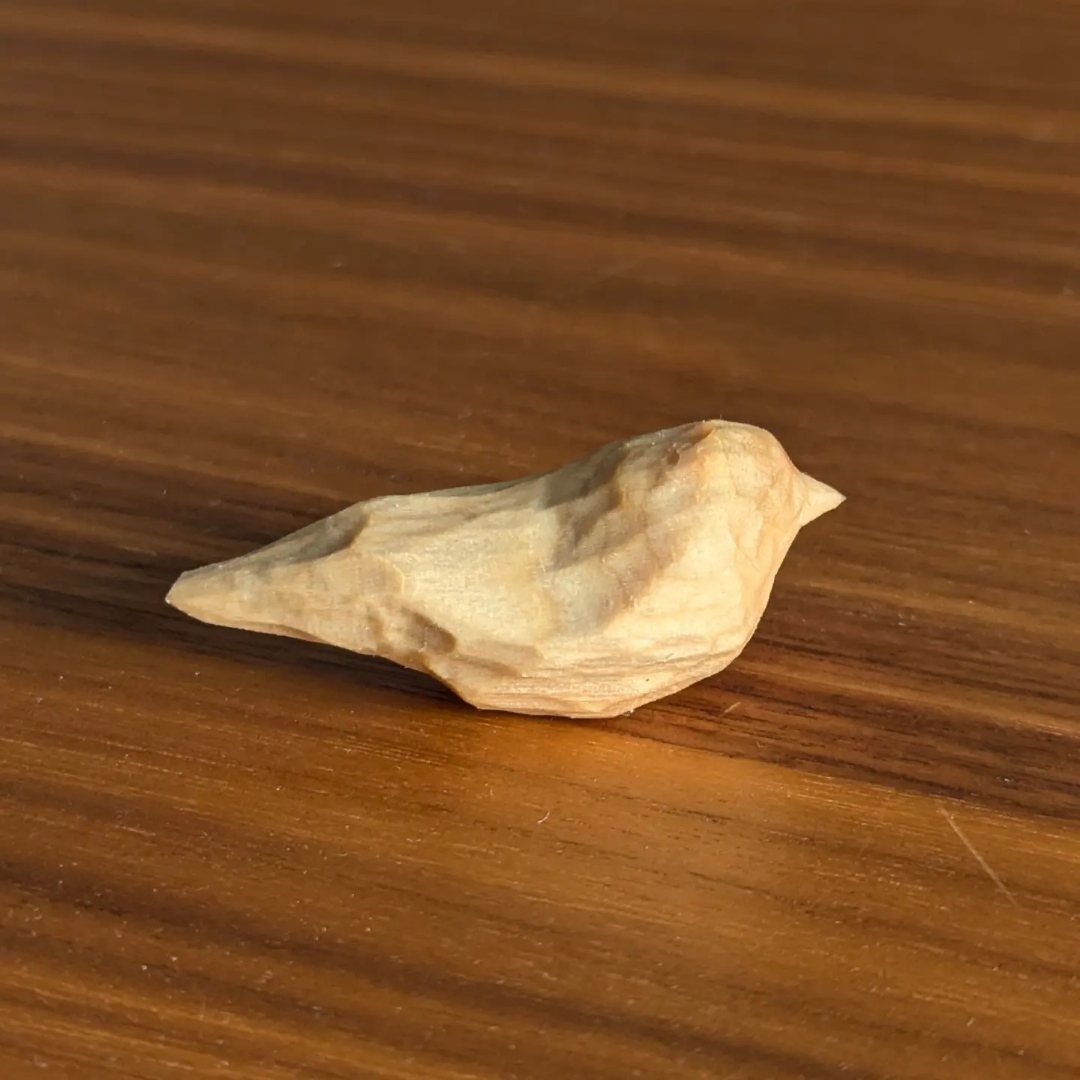
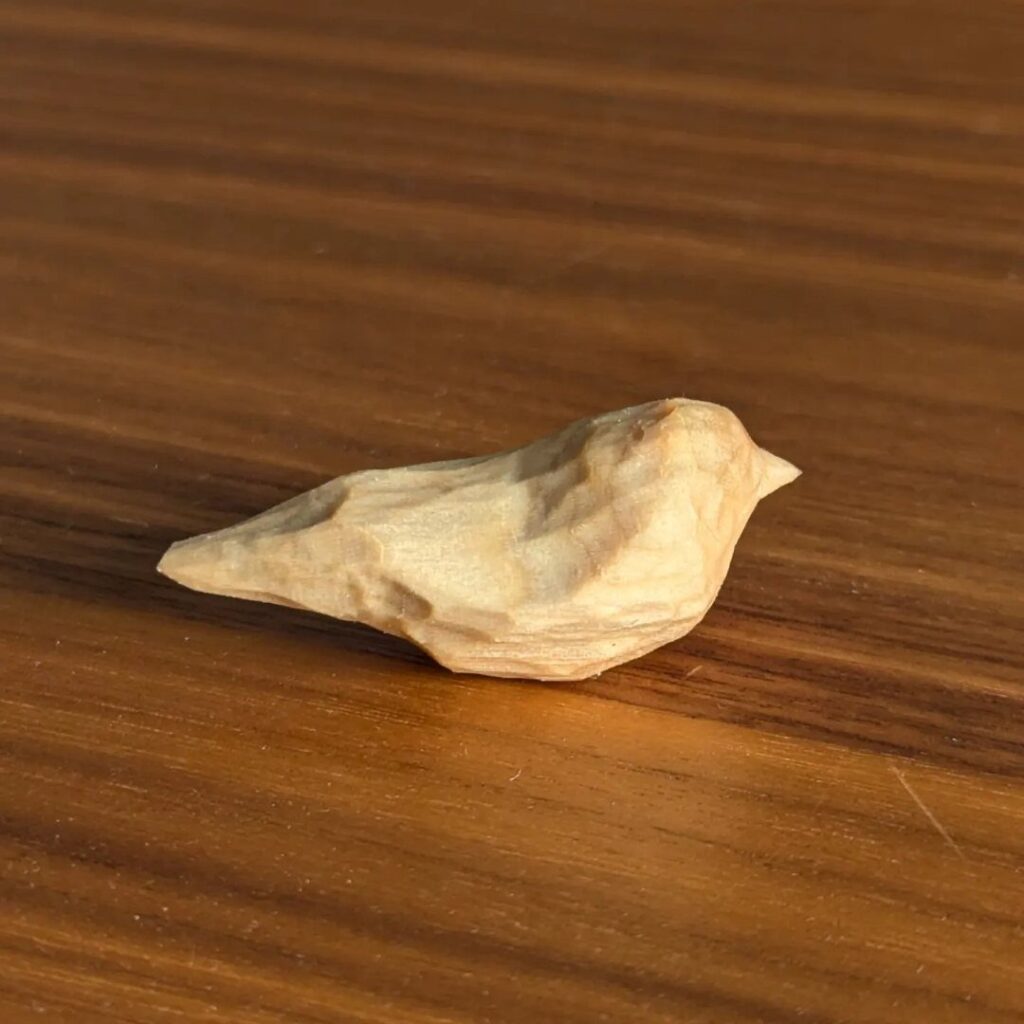
Birds reward a loose hand. A plump body, a rounded head and a short tail make the best first bird, since soft curves hide small slips that a detailed carving would show right away.
Take off corners first, then round the shape little by little.
Stop before the neck gets thin. A thick neck holds up better as you carve around it.
3. Simple Fox
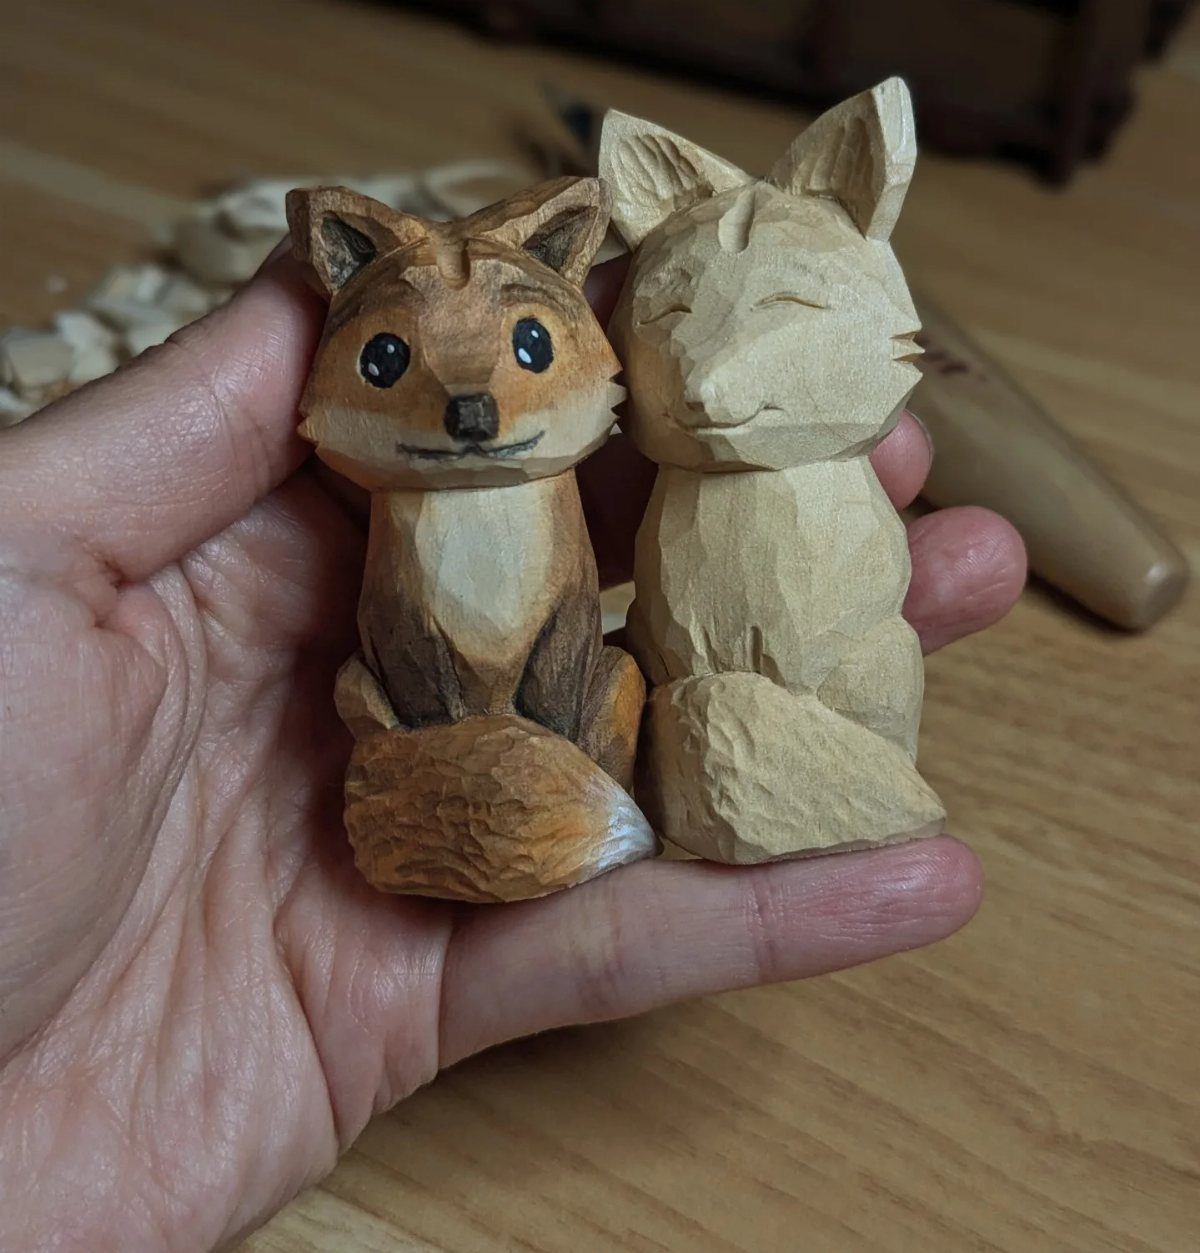
Foxes come in 2 finishes, and you can pick either. Painted in orange and brown, the fox reads right away, while the natural wood version shows off your knife marks and the grain.
For a first try, I would carve a pair and paint only one.
That gives you a side-by-side look at what finish does for a small carving. Keep wood chips off the table as you work, since they hide your cut lines.
4. Tiny Gnome
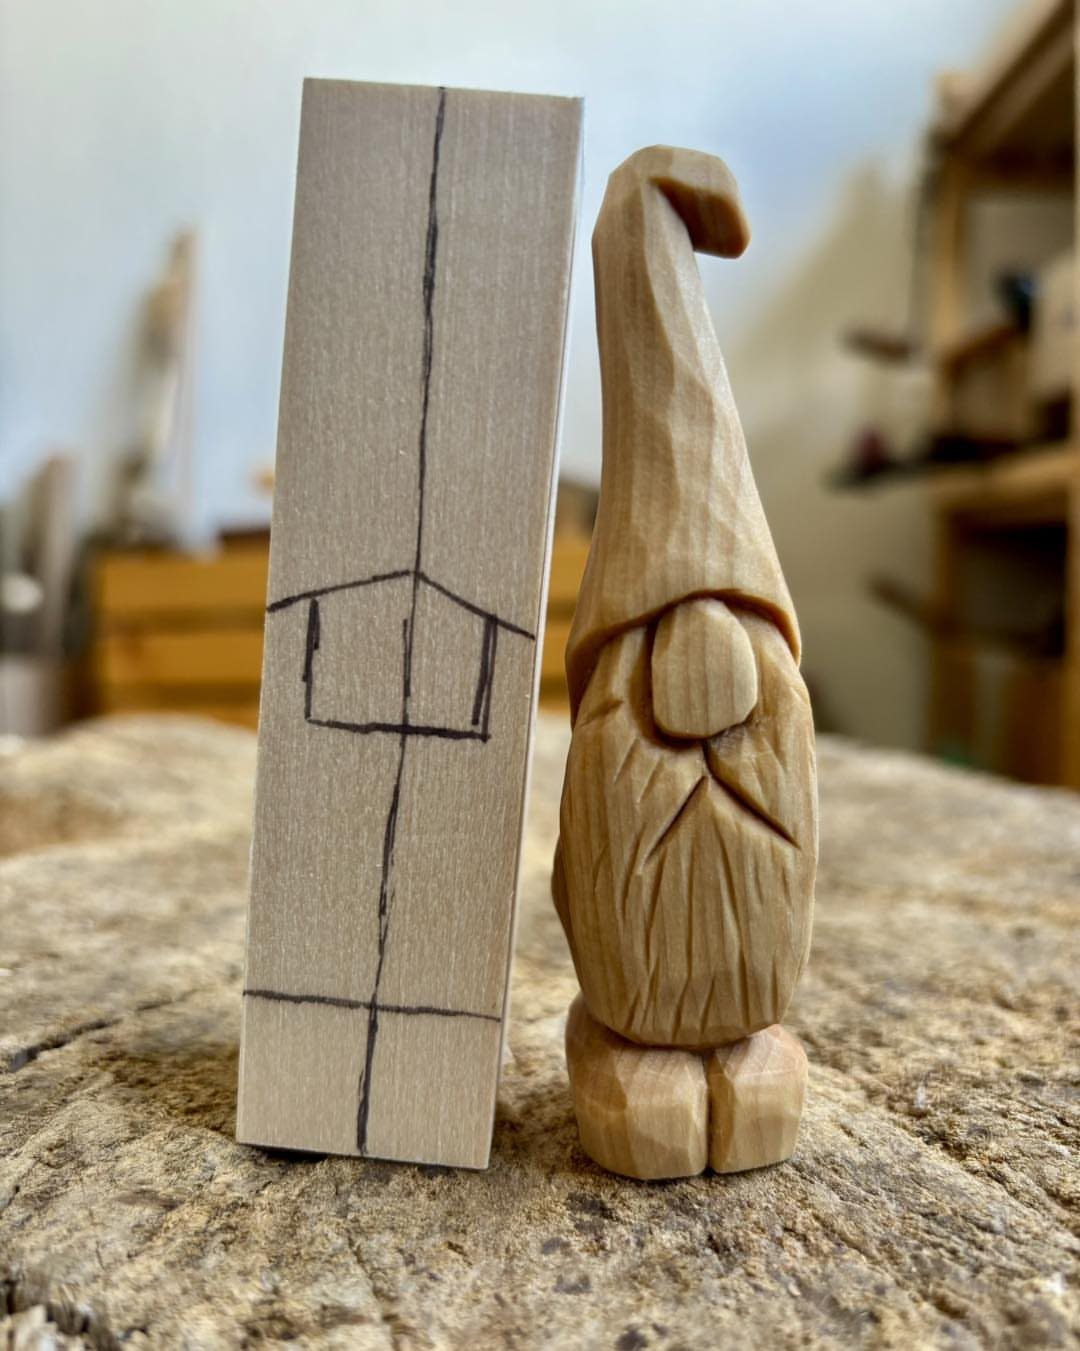
Drawing the gnome onto the wood block before you cut is the smartest move here. Sketch the front and side outlines, then remove the waste wood up to those lines.
A gnome is mostly a hat, a nose and a beard, so the shape stays simple even though the result looks charming.
Cut the hat first and leave the face for last. Whittling a small figure rewards patience more than skill.
5. Whittled Wooden Whale
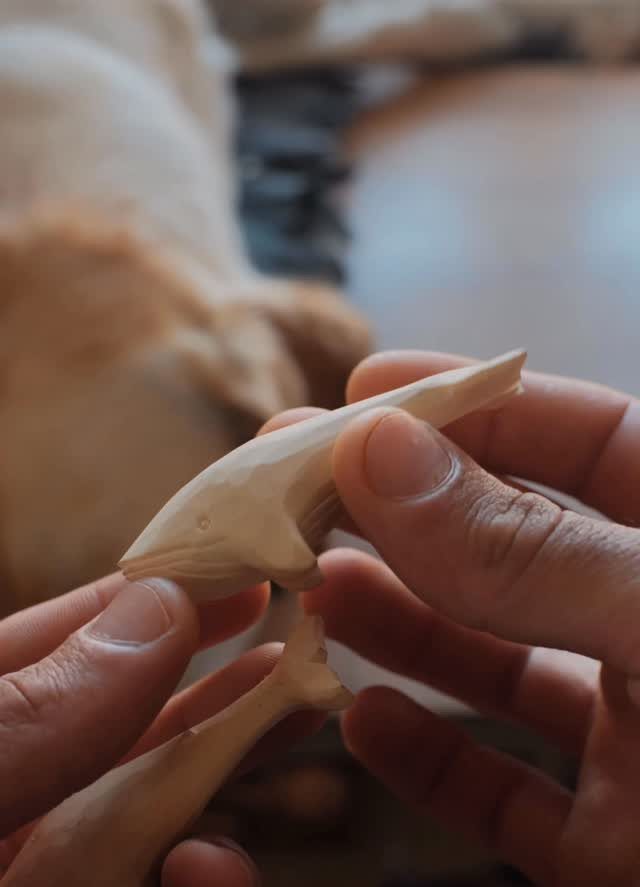
Whales suit a beginner because the body is one smooth, curved mass. There are no legs or ears to worry about, only a tail and a rounded head to shape.
Carve two at once if you can.
The second one always comes out better, since you have already learned where the grain fights you. Small ones sit easily in the palm and make good gifts.
6. Carved Wooden Knife
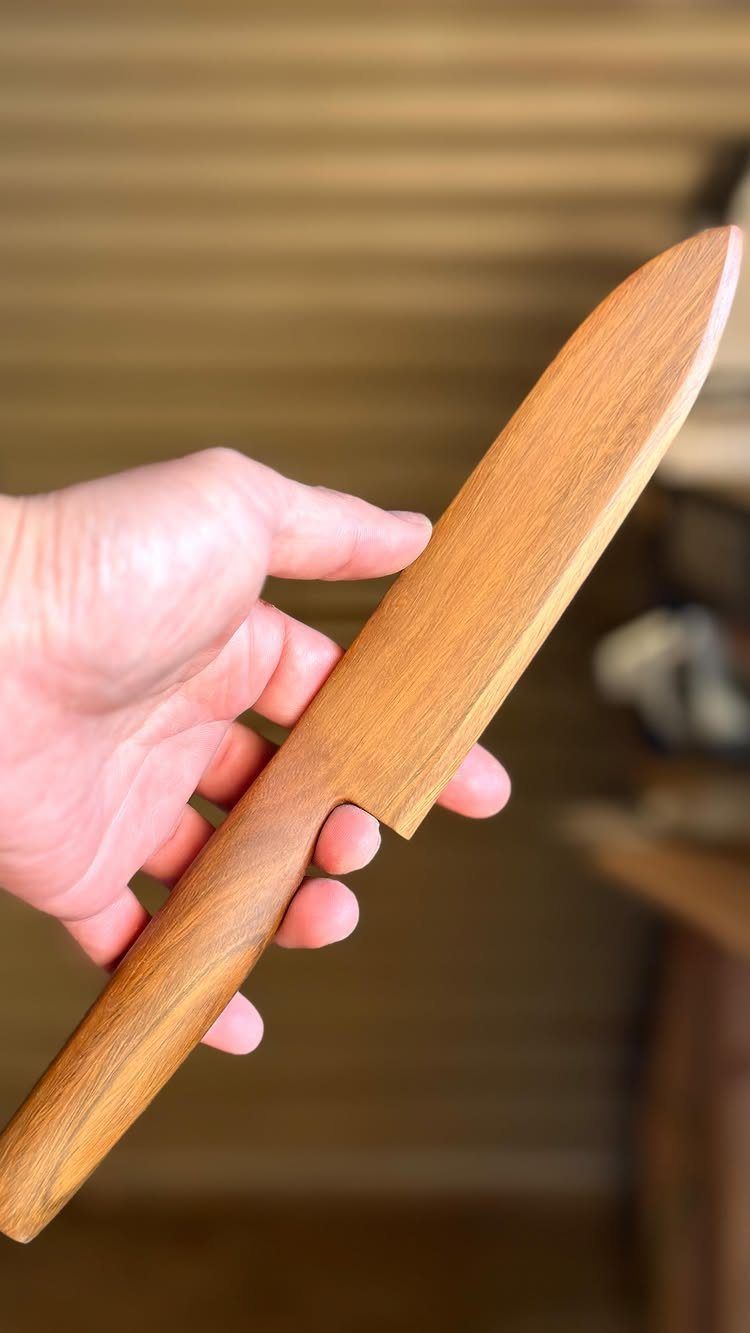
Carving a wooden play knife teaches you to pull the blade along a straight, even edge, and that one skill carries into almost every project after it. The long blade shows every wobble, and that feedback helps you improve quickly.
Light, straight-grained wood like basswood or pine keeps the blade from splitting along the grain, so choose a pale, clear piece with no knots. Keep the point rounded off a little if kids will use it.
7. Whittled Wooden Spiral
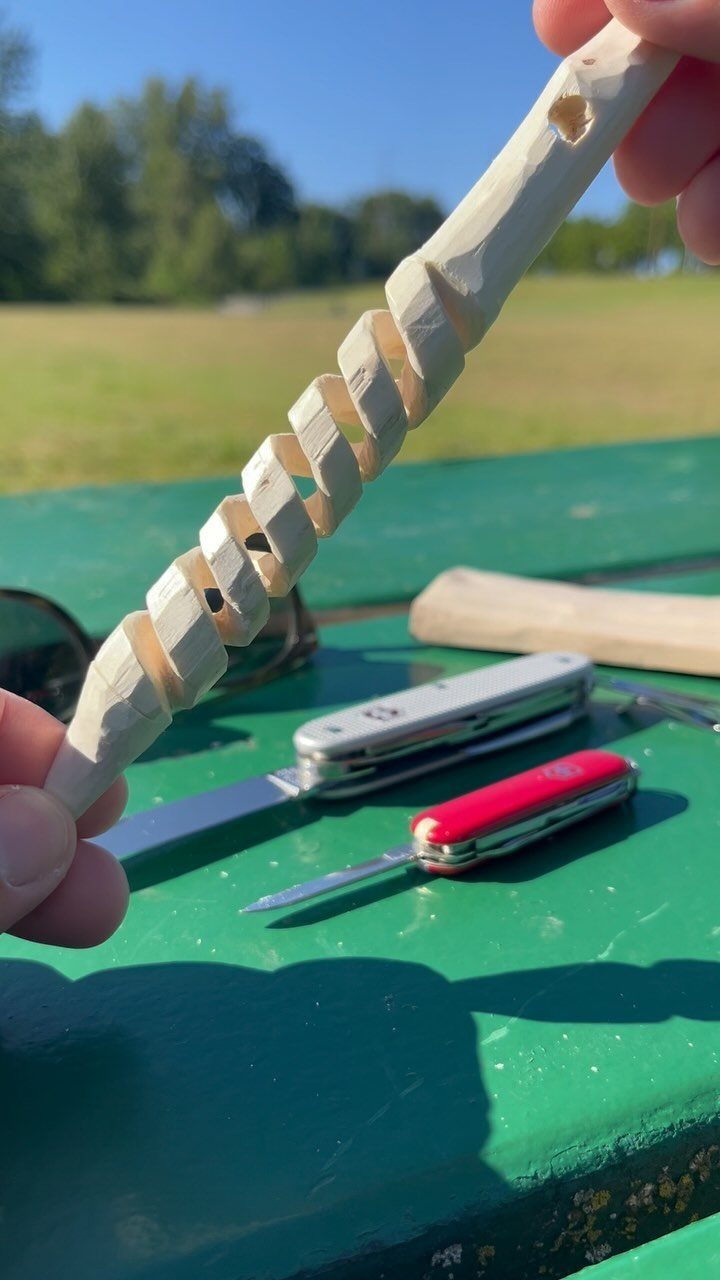
A spiral is a lesson in patience, because every turn has to match the one before it. Mark the wood first with evenly spaced pencil lines, then cut along them rather than guessing by eye.
Start with a shallow groove and deepen it a little on each pass. Rushing a deep cut is how a spiral cracks or goes lopsided.
Uncarved wood like the piece beside the knives is cheap, and mistakes cost you almost nothing. Plan on a few practice rounds before one comes out right.
8. Whittled Wooden Campfire
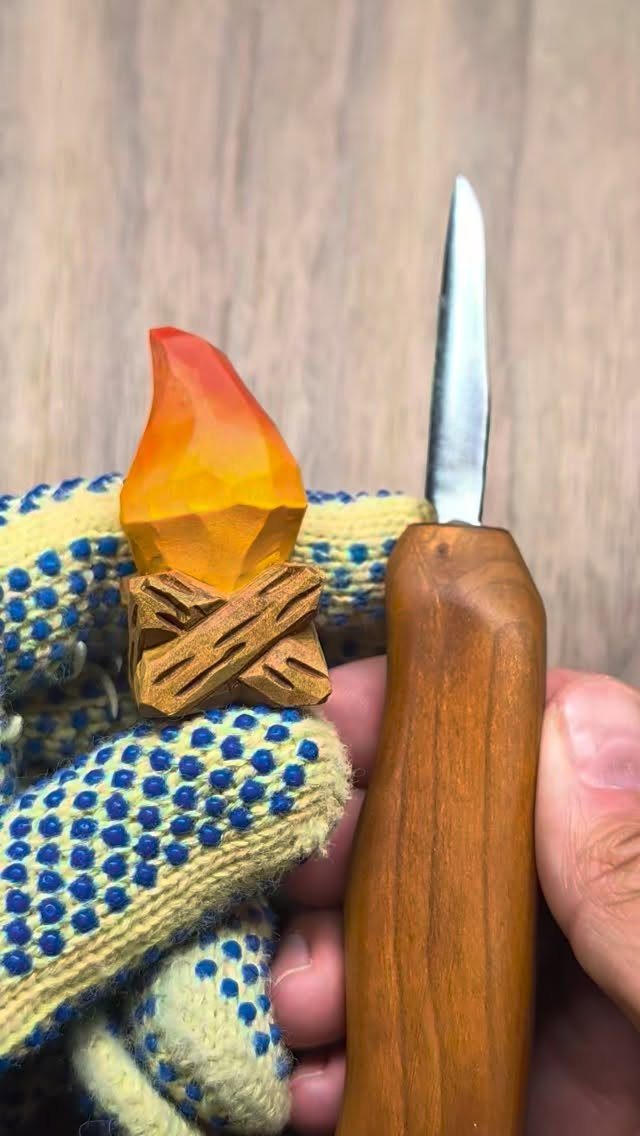
A tiny campfire packs a whole scene into something that fits in one hand, and it needs only simple cuts. Carve a few short logs, then shape the flames as pointed, tapered tongues rising from the middle.
Paint is what sells it. Orange and red flames against bare wood look warm and clear, so keep the logs natural and color only the fire.
Wear a cut-resistant glove on the hand that holds the wood. Small pieces slip, and the blade follows.
9. Mini Wooden Tiki Figures
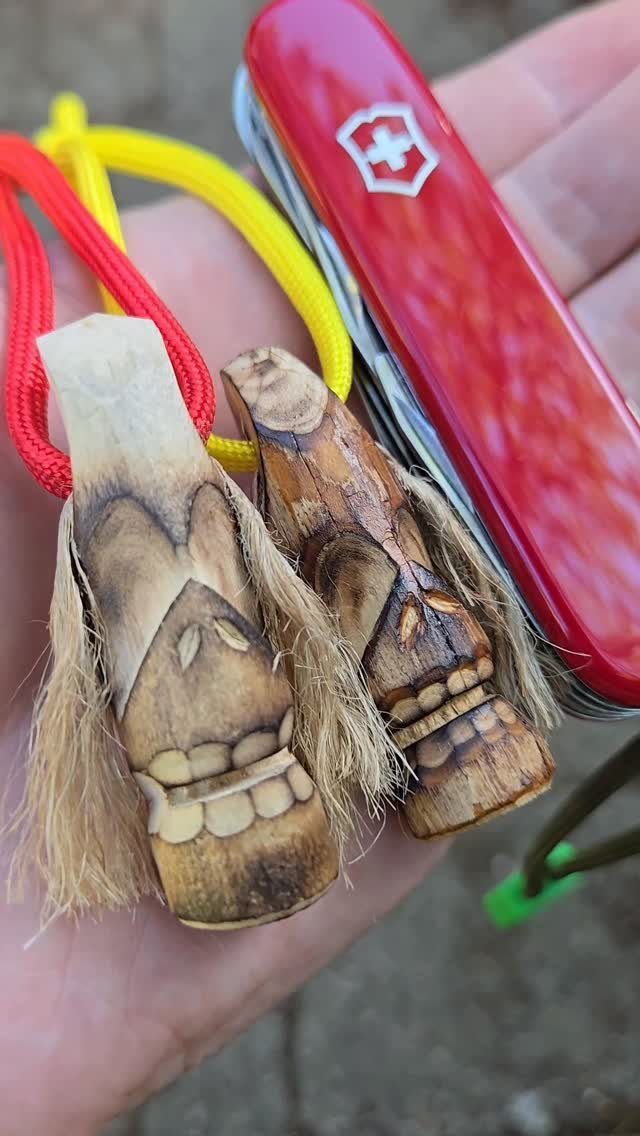
Tiki figures suit a pocket knife well, since a basic folding blade can handle a blocky face. Carve brows, nose and mouth as bold, deep notches rather than fine lines, because small details vanish on a piece this size.
Cord makes good hair: glue or tuck strands into the top instead of carving them, which saves a hard step.
Make two in one sitting. A pair gives you a second try at the face, and the second usually looks better.
Knife Maintenance
Push harder because the blade has lost its bite, and you’ve set up the exact moment a knife jumps off the wood. Sharp steel cuts with light pressure, so you stay in control of where it goes.
For upkeep, a leather strop handles nearly all of it. Give the edge a few passes across the leather every 20–30 minutes of carving, and the blade keeps cutting cleanly.
Once the blade has a razor edge, the strop alone can usually keep it there. Stones or sandpaper only come back into play if you damage the blade, since the cutting edge rarely needs to be reshaped otherwise.
Stop and strop when you notice the knife tearing the wood instead of slicing it. That tearing is the clearest sign the edge has faded.
Whittling Techniques
Grain direction decides whether a cut goes cleanly or takes a chunk you wanted to keep.
Push the blade the wrong way and the wood can split, removing a whole section. Glue can repair it, but the repair slows you down.
Begin with one bold, blocky cut to rough out the basic shape. Pull the knife in long, flowing strokes that follow the grain, shaving off thin curls instead of chunks until the figure shows itself.
For detail, switch to the pull stroke.
Hold the wood, turn the blade to face you, and draw the knife toward you in short, controlled strokes. Keep the thumb of your holding hand out of the blade’s path, and keep every stroke small.
Whittling is the simple act of carving shapes with a single tool.
Finding Inspiration
Beginner whittling books tend to open with quick projects, often 20 minutes or less. Wizards, gnomes and little animals are common starters, so a book is a good way to find your first few.
A real object makes a handy model.
A pretzel from a snack bag works, and so do seasonal shapes like a snowman or a pine tree. A comfort bird is another good pick, since it sits easily in your palm and feels calming to hold.
Start with a block of wood 1 inch by 1 inch.
A band saw or jigsaw can cut the rough outline before you pick up the knife, which saves a lot of time. Then trace the design in pencil on the block so you know where each cut goes.
Frequently Asked Questions
What is the easiest thing to whittle for a beginner?
A pendant owl or a plump little bird is about as easy as it gets. Neither shape has a thin part to break off, which leaves your attention free for shallow, controlled cuts.
What is the rule of three in wood carving?
I don’t have a settled answer for that phrase, since it isn’t a rule I can back up from the whittling basics I cover.
What I can say is that 3 cuts matter most to a beginner: the push cut, the pull cut and the stop cut straight into the wood. Learn those and most small projects open up.






