Where a piece will live decides which of these summer wood projects is yours: anything headed outdoors, like the garden bench or the solar light stand, needs a weather-tough wood and an exterior finish, while a charcuterie board or wine caddy only needs food-safe oil.
The list runs from scrap-wood builds that cost close to nothing to bigger pieces like the pallet pool surround, and many of them sell for $15–$60.
1. Wooden Plant Stands
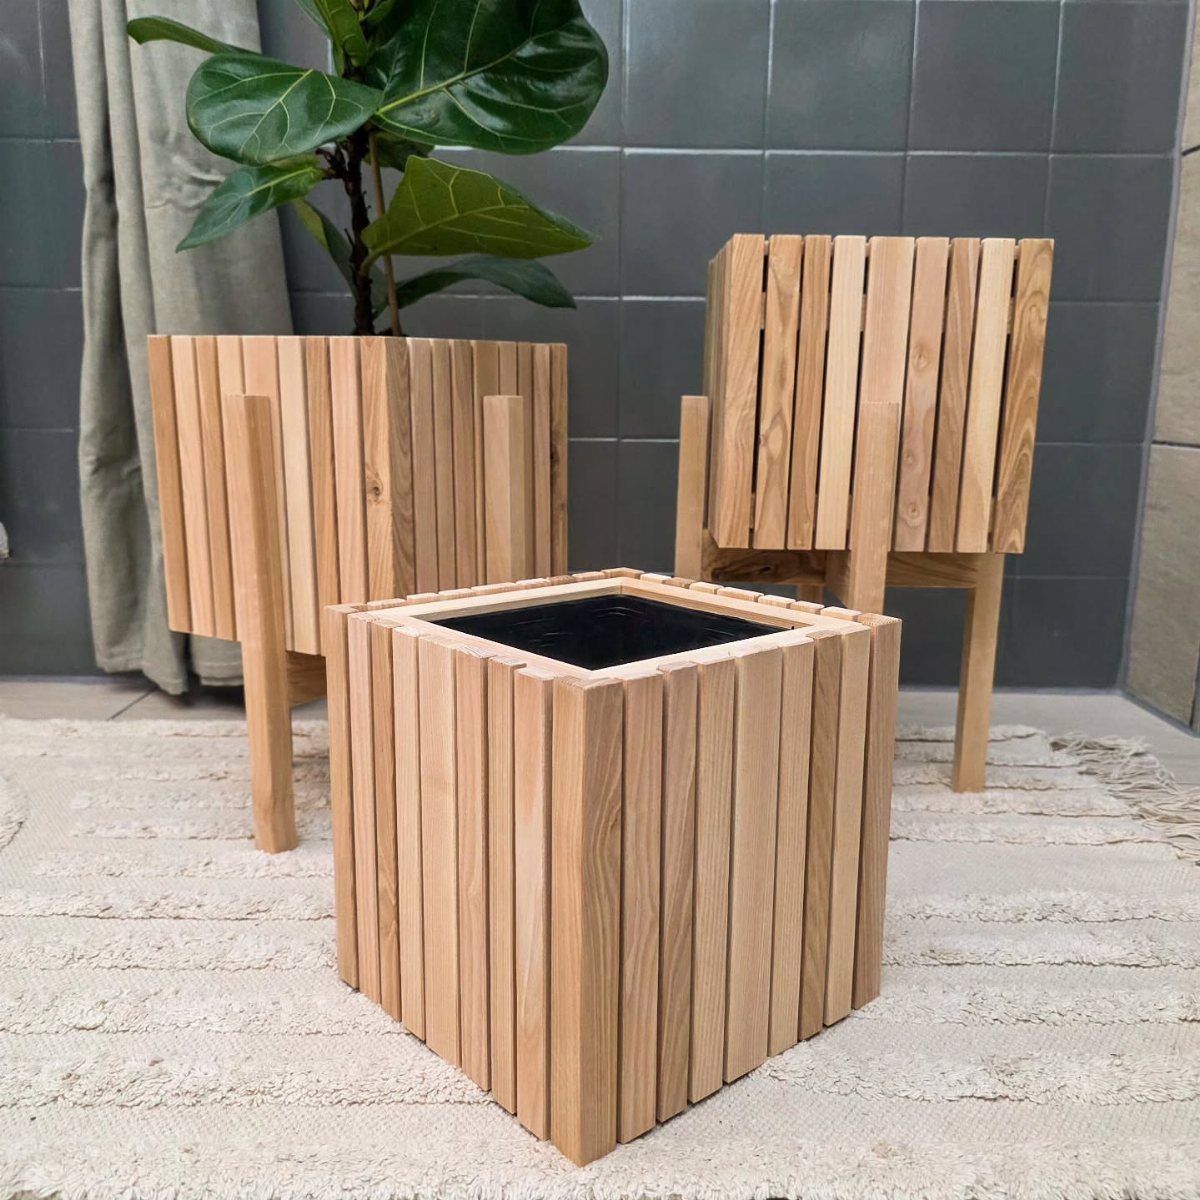
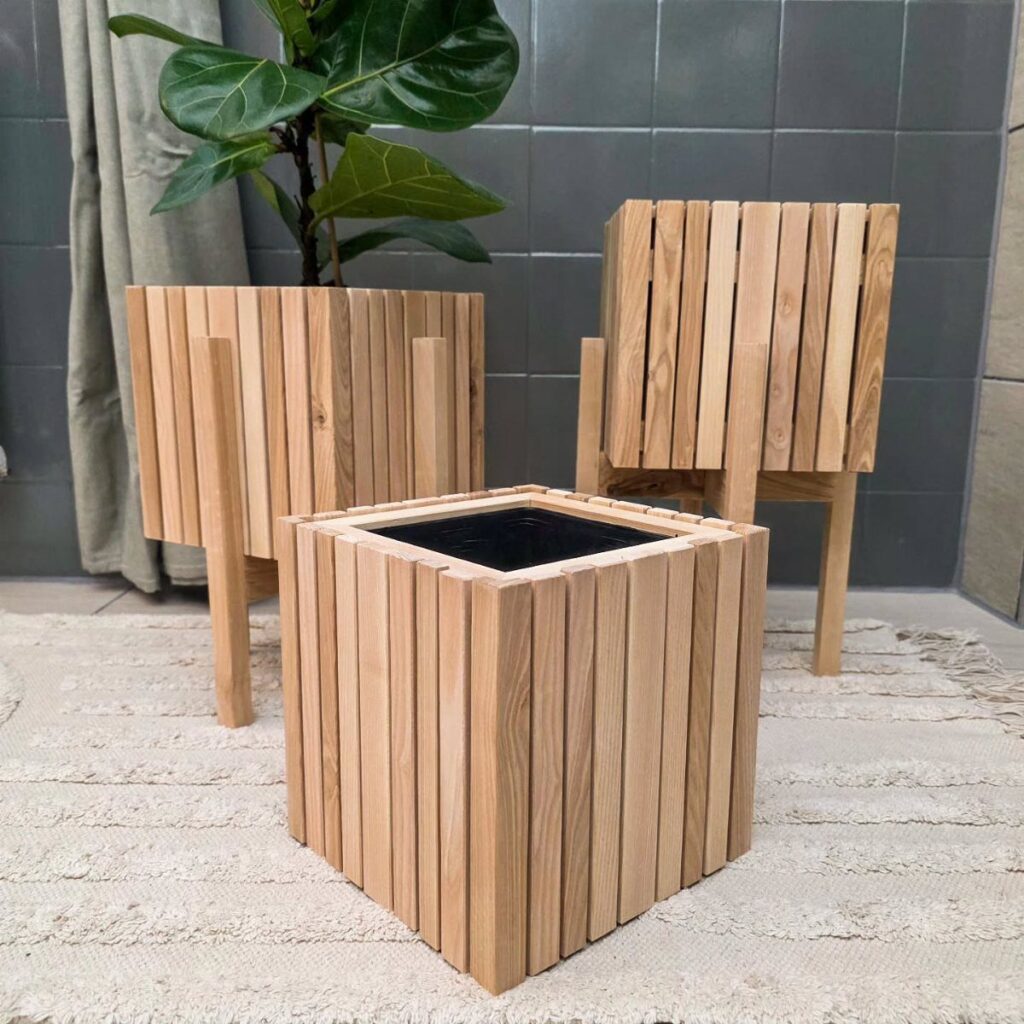
Slatted stands in three different heights make a better display than three matching ones, because the plants stagger instead of lining up.
Making a trio from one board’s worth of slats keeps the cost low, and light wood looks clean indoors against a plain wall.
Finish choice decides where they can live. A stand headed outdoors needs a sealer, while a bare one is fine inside.
2. Wooden Toy Cars
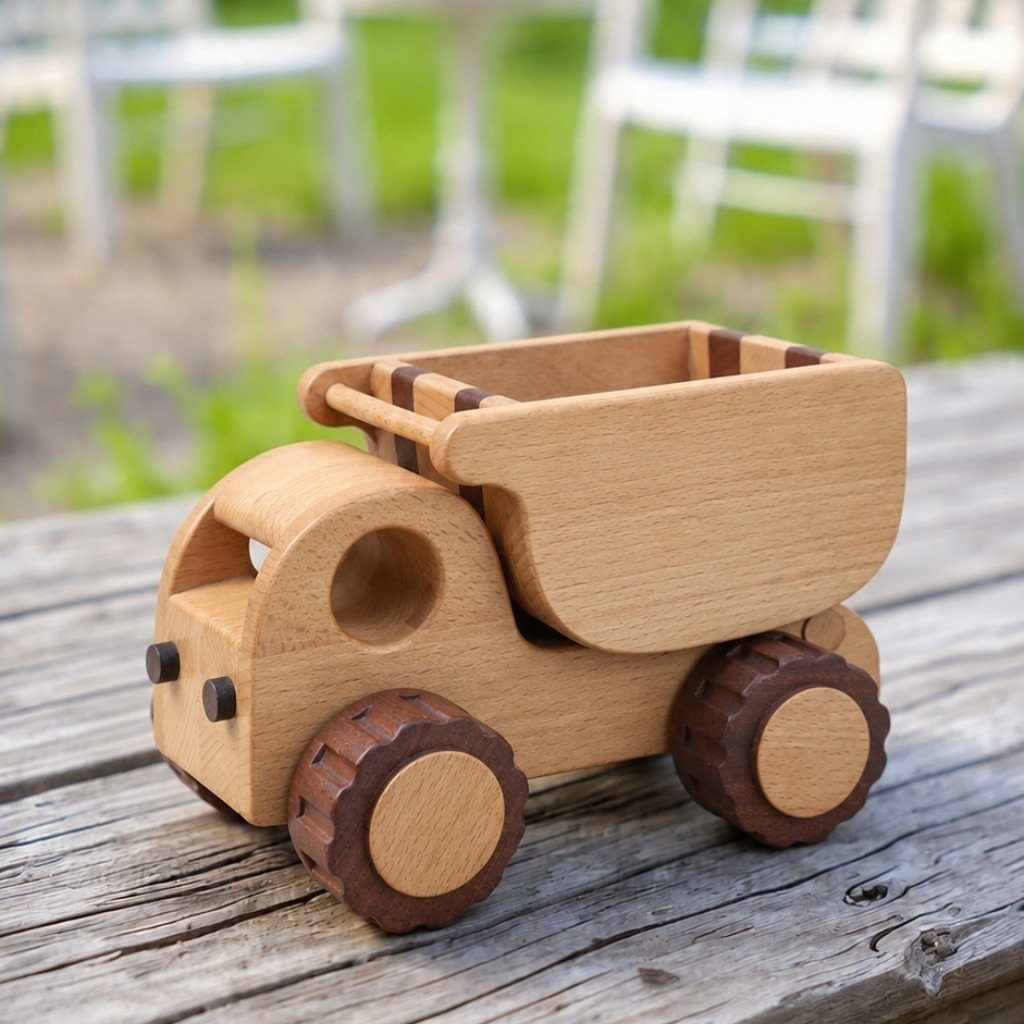
Two wood tones, one dark and one light, can give a toy truck plenty of contrast without any paint: try walnut for the bed and maple for the cab.
Pairing a light species with a darker one gives the contrast for free, and it keeps the toy looking like wood.
Sand every edge round, since small hands will be the testers. Skip stain and paint if the toy is for a child who chews on things; plain wood is the simplest finish.
3. Charcuterie Boards
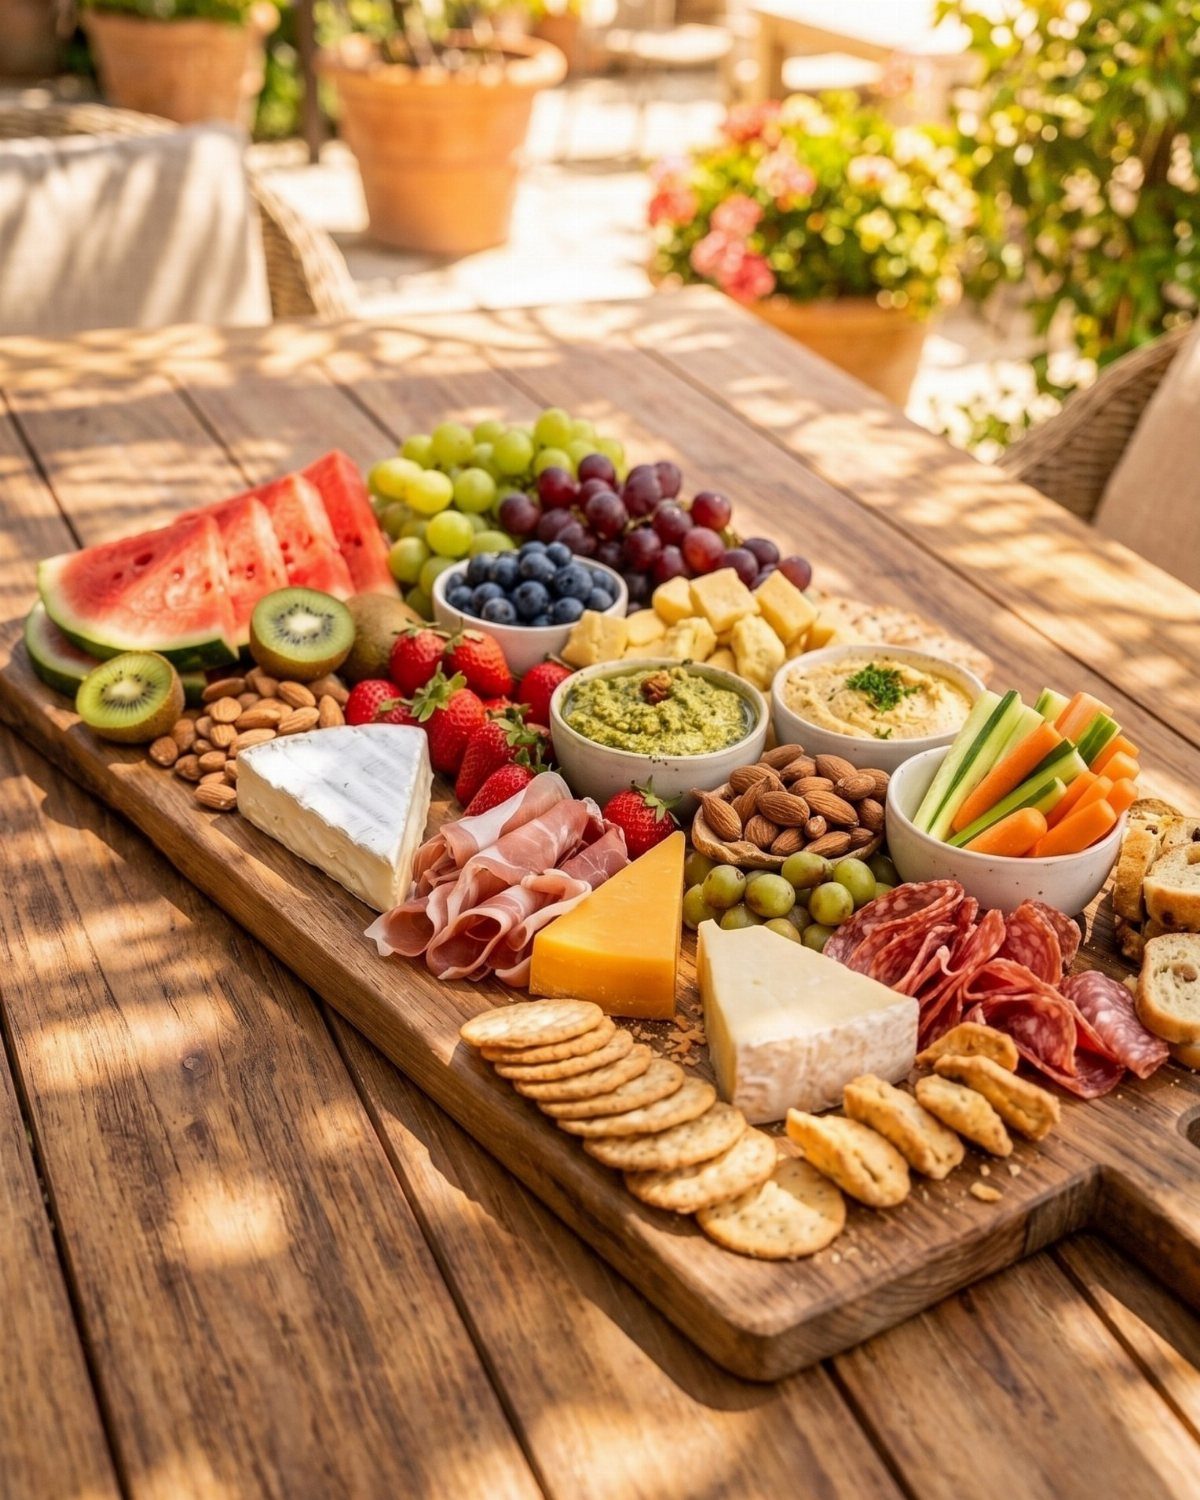
For a charcuterie board, I’d pick one solid piece of wood over glued strips, since fewer seams means fewer places for the board to fail.
A charcuterie board comes together in an afternoon, and summer gatherings make it an easy one to sell or give away.
Round the corners, sand the surface smooth, and finish it with a food-safe oil. Make a few sizes, since a small board for a couple of guests appeals to a different buyer than a big party platter.
4. Scrap Wood Candle Holders
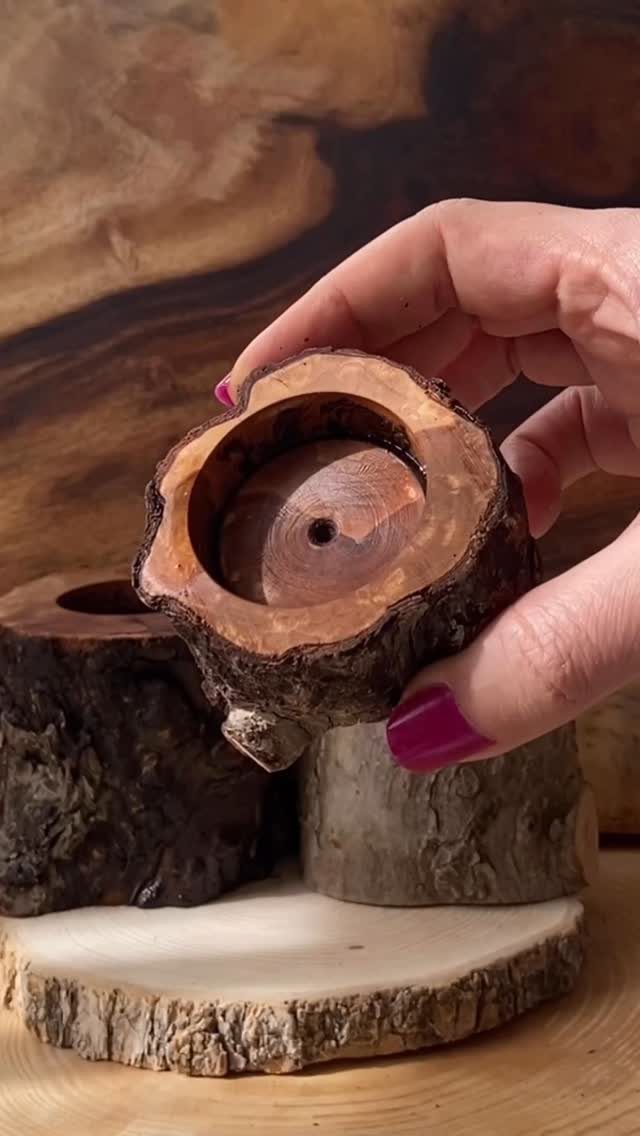
Hollow out a log slice, drop in a candle, and you have a centerpiece from wood most people would burn or toss. Pieces of different heights grouped together look best on a table.
A drill with a large bit handles the hollowing. Keep the opening only as wide as the candle, and never leave a flame burning unattended near bare bark.
5. Garden Benches

Clean, simple lines are what make a garden bench look right beside a flowering vine; ornate carving would compete with the blooms.
Beginners will have an easier time with a simple bench design, since there are fewer joints to get wrong.
Pair the bench with a small matching stool and the corner feels finished. Because it will sit outside, choose an exterior finish over indoor stain, and expect to reapply it as the seasons pass.
6. Welcome Porch Signs
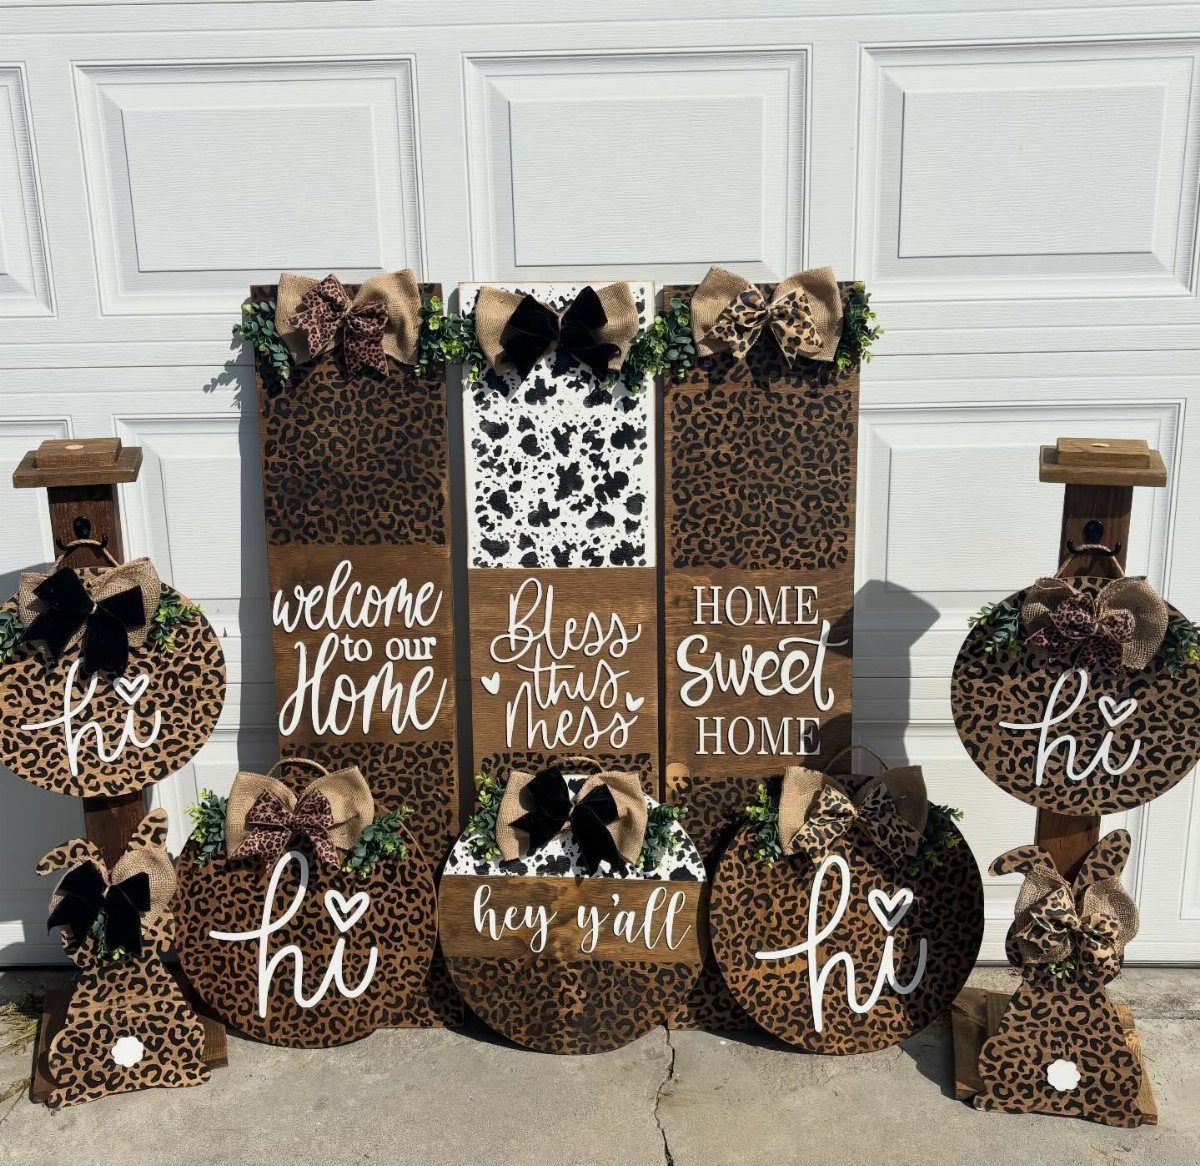
Personalization is what lets a porch sign sell: a name, a phrase, or a pattern a buyer picked themselves. Short sayings like "hi" or "hey y’all" are quick to cut and lettered easily.
Paint patterns such as leopard or cow print give plain boards a bolder look, and a fabric bow adds a finishing touch. Make a few seasonal swaps ahead of time so the stock turns over through the year.
7. Herb Garden Planter Boxes
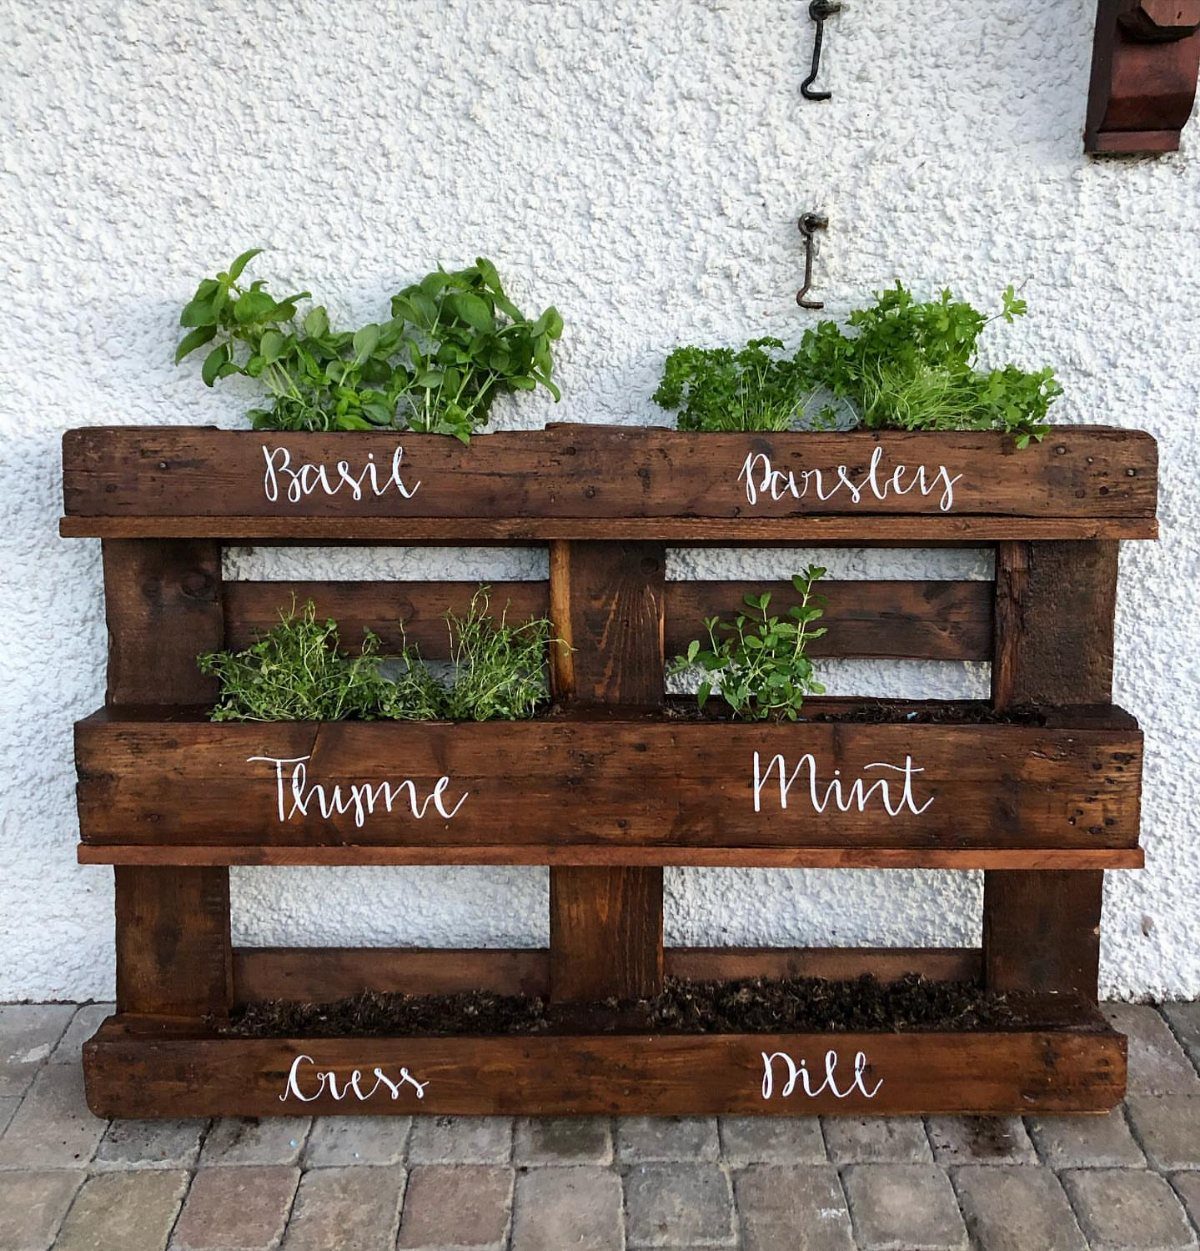
A tiered pallet planter stacks several herbs into the footprint of a small bistro table, which is why it works on a patio or a narrow balcony.
Stepping the boxes keeps each plant in reach and lets the lower ones catch light.
Mint spreads fast, so I’d give it its own box. A small label for each herb makes the planter easier to use, and it sells better as a gift.
A dark stain on the boxes gives green leaves strong contrast, especially against a light wall.
8. Wooden Picnic Caddies

Bottles, fruit and snacks stay upright in a wooden picnic caddy, so one hand carries the whole spread to the sand or the lawn.
A handle across the top is the part to get right; make it from one solid piece and fasten it well.
Cut the dividers to fit the bottles you plan to carry, then sand every edge smooth. Sell it as a set with a matching board and the price per piece goes up.
9. Wooden Birdhouses
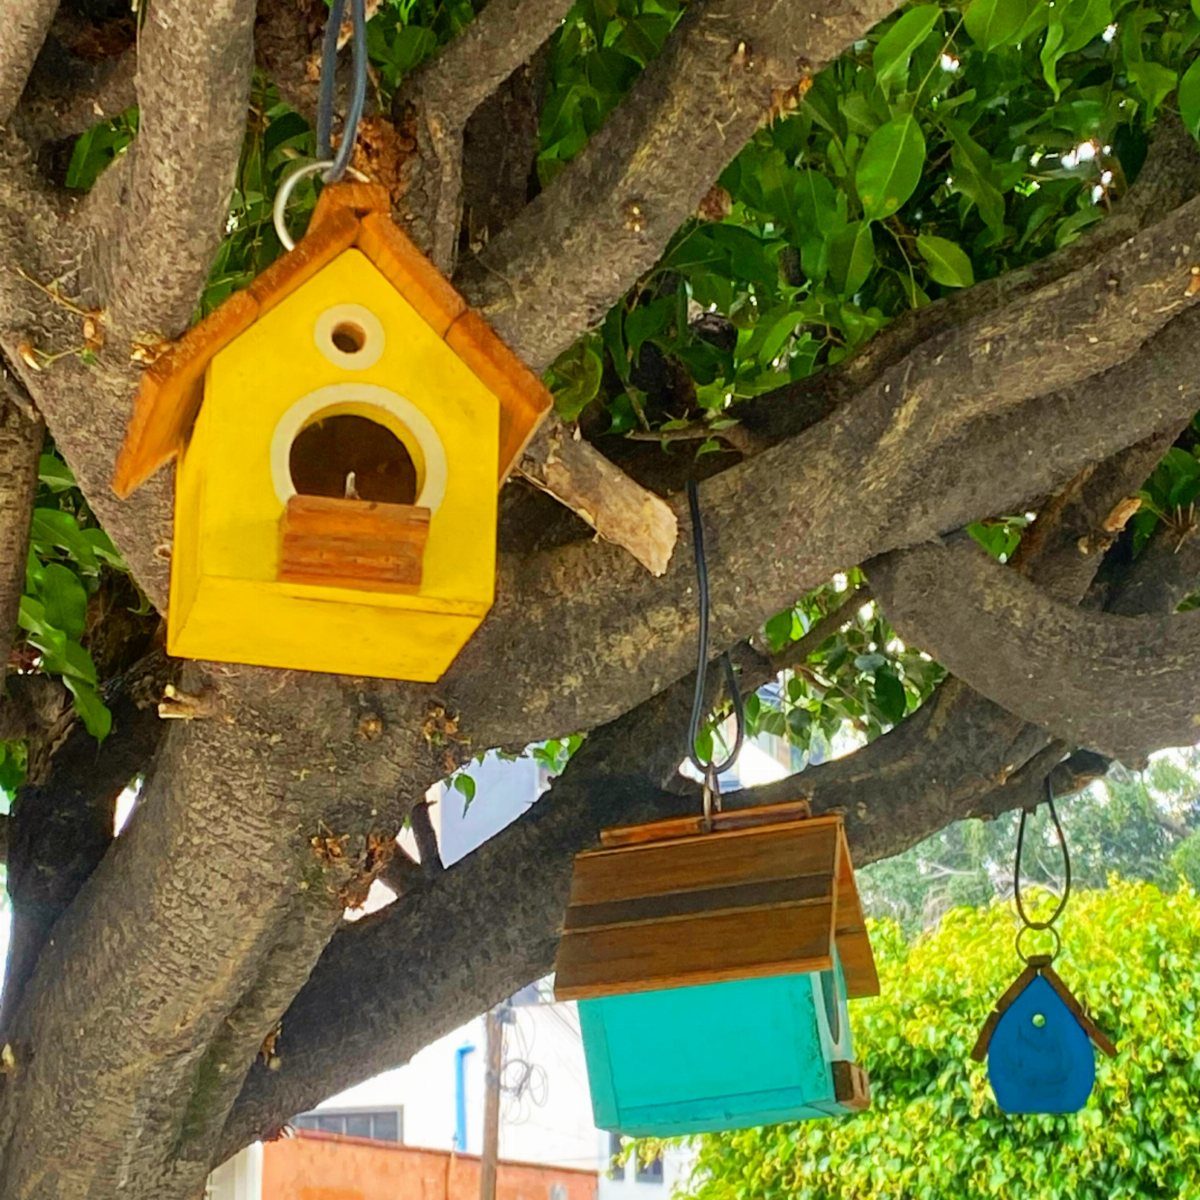
Painted birdhouses look best hung in a group at different heights, with each one in its own color. Yellow, turquoise and blue read well against green leaves, and bright paint is what makes a buyer stop at a craft table.
Exterior paint is my pick, since these hang outside. Cut the pieces from one board, assemble with glue and nails, and a small batch comes together in an afternoon.
10. Serving Trays
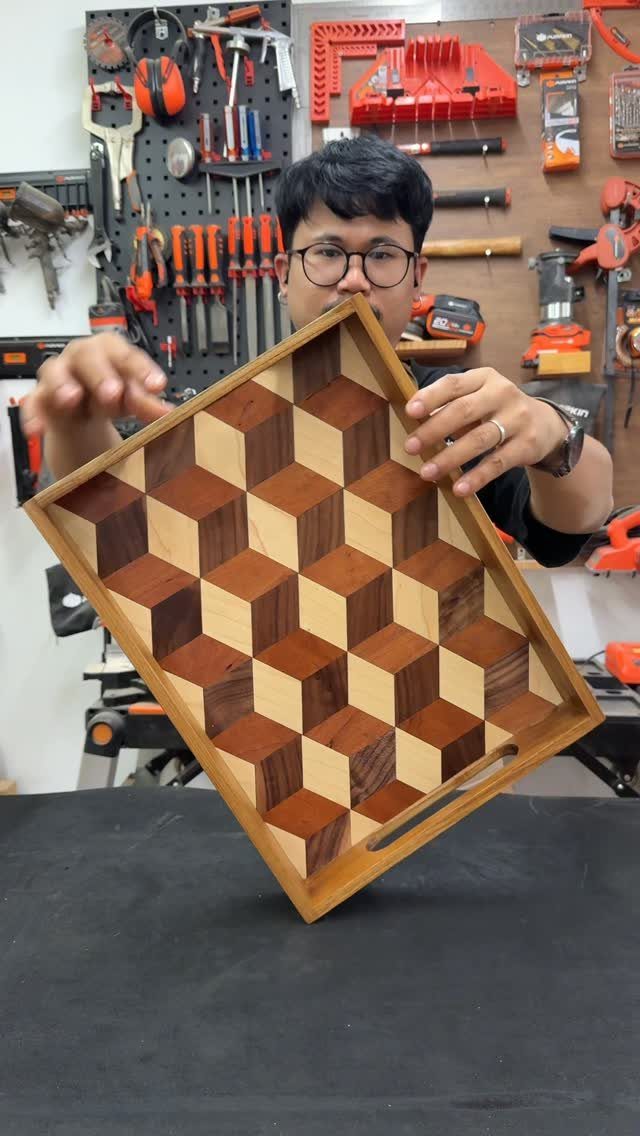
A serving tray with a 3D cube pattern looks complicated, yet it is mostly repeated cuts: rhombus pieces glued in a tiled layout. 3 wood tones give each cube its shaded faces, and the pattern does the decorating for you.
Cutting every piece to the same size is the hard part, so set a stop block on your saw. Glue the pieces to a flat base, then sand it all level before adding handles.
11. Cutting Boards
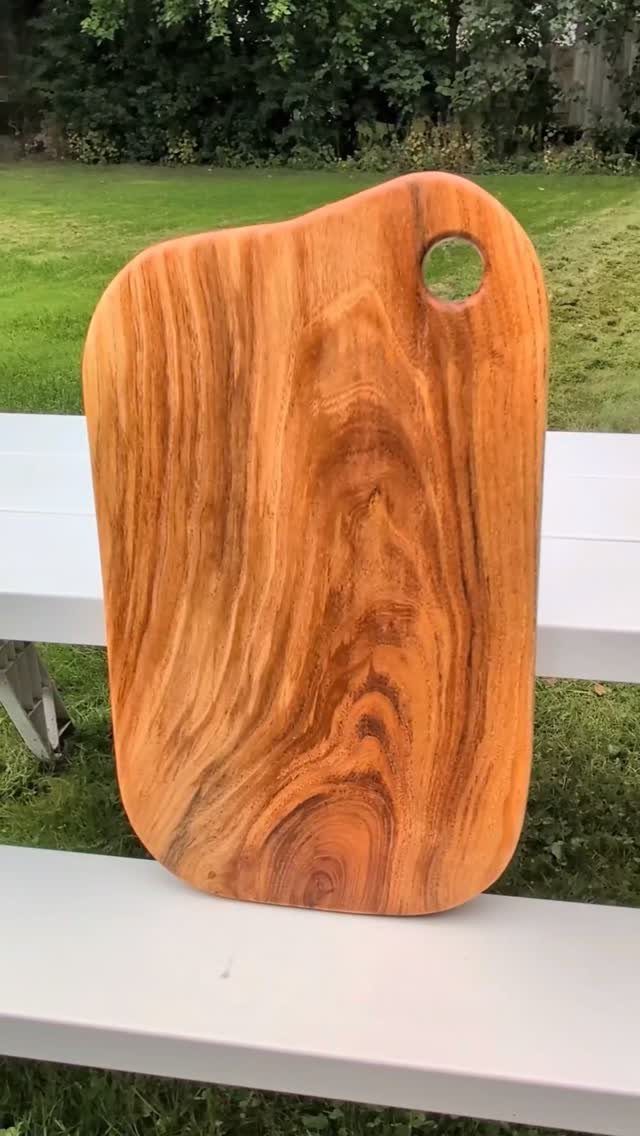
A hole drilled near one end gives a cutting board a place to hang and a bit of character. A circular cutout is easy with a drill and a large bit, so beginners can pull it off.
Choose a board where the grain shows, since plain, natural wood sells itself.
Hanging it on a hook shows it off in a kitchen, so I’d sell it that way.
12. Wooden Wall Art
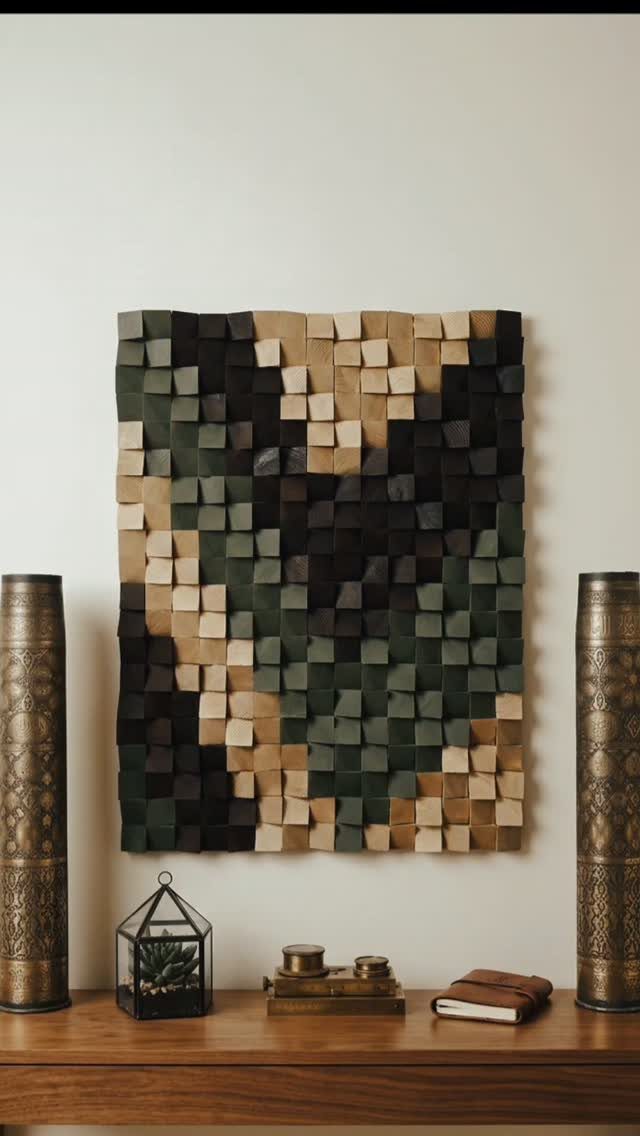
Small blocks in a mix of colors turn scrap pieces into a textured grid, and a grid like that can fill the wall above a console table.
Cutting the blocks at varied lengths adds the depth, and mixing the tones adds color without paint.
Glue them to a square backer, then sand the faces. Plan the color placement on the floor before gluing anything, because shifting a block afterward is difficult.
Leftover offcuts make this nearly free to build.
13. Wood Scraps Mail Organizers
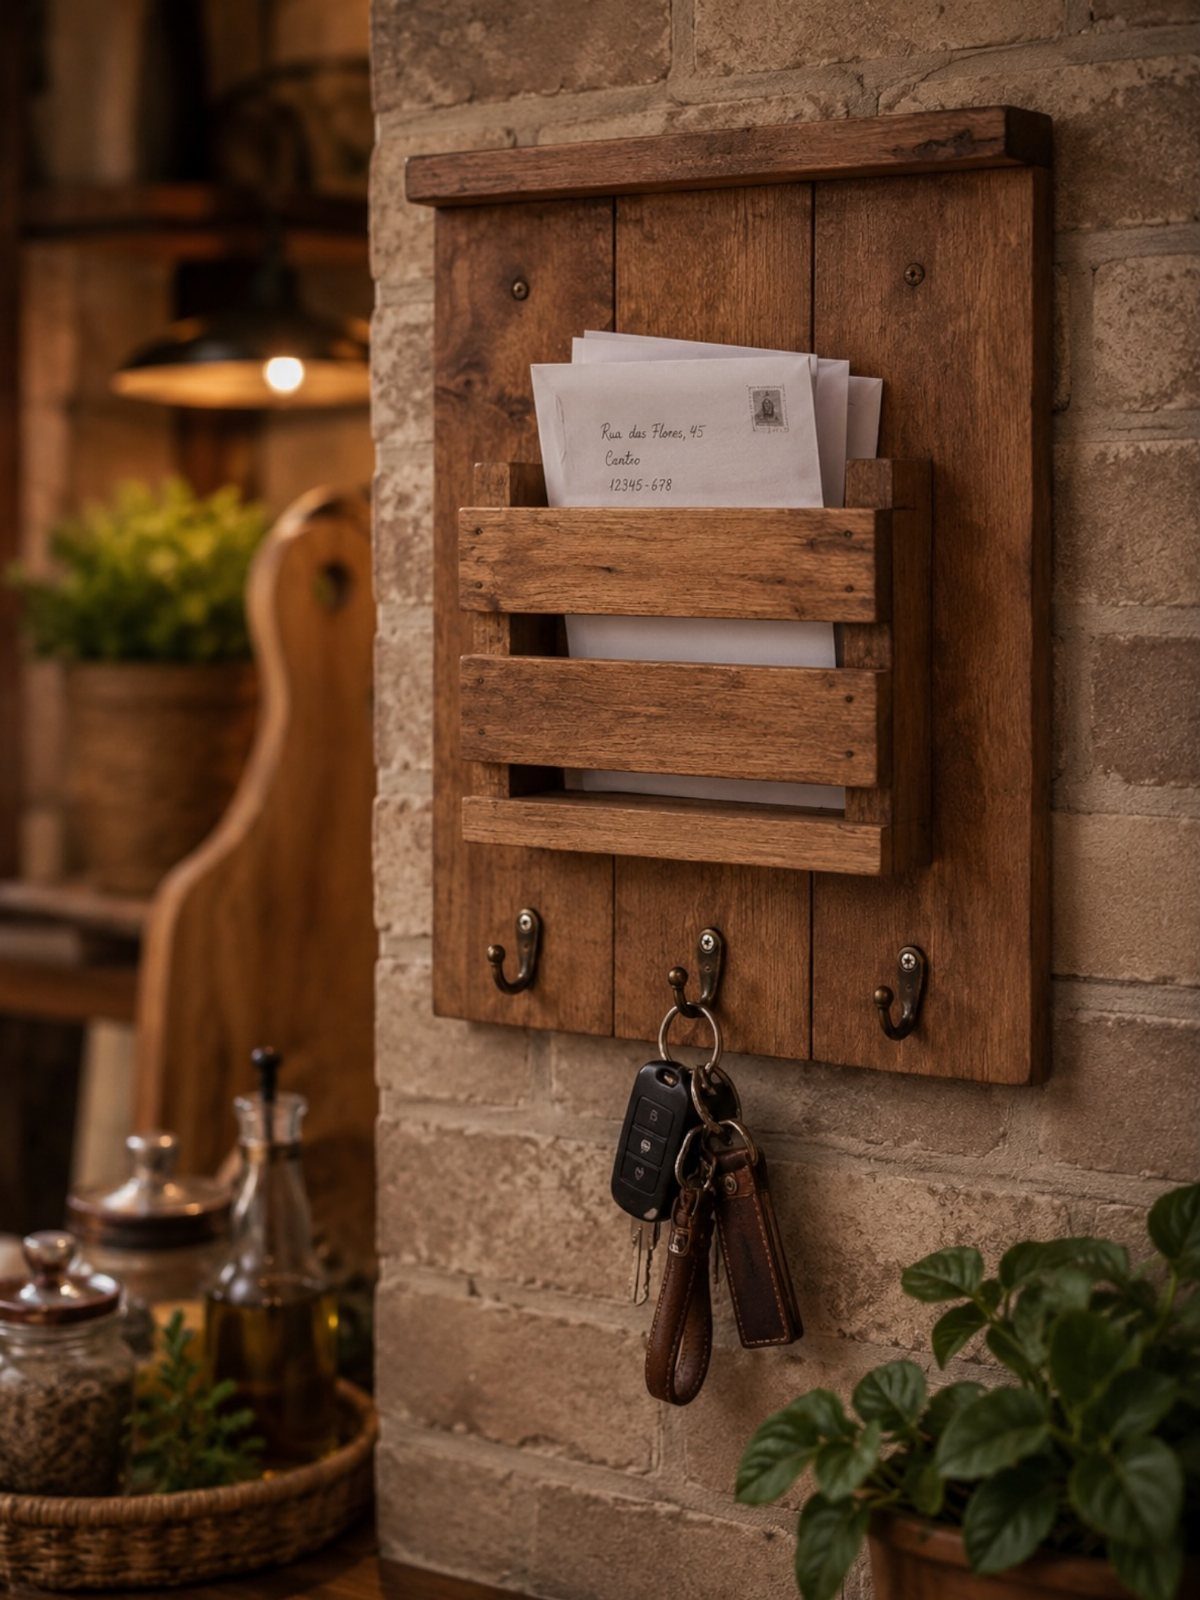
A wall-mounted mail organizer keeps letters and keys by the door, so nothing gets set down and lost. Scrap pieces are enough to build one, which keeps the cost close to nothing.
Cut the slots wide enough for standard envelopes, then sand every edge smooth so paper doesn’t snag. A row of hooks along the bottom handles keys.
Mounted on brick like this, it needs masonry anchors rather than ordinary wood screws.
14. Mason Jar Organizer
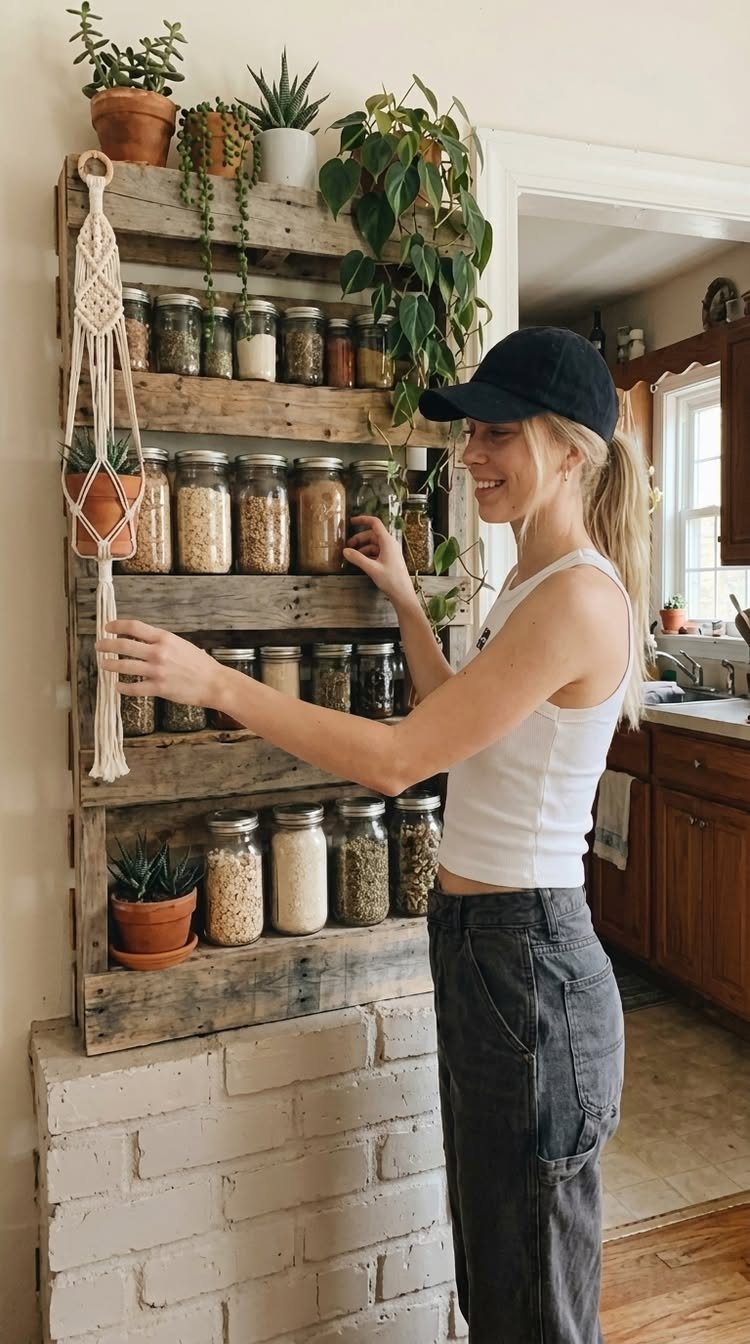
Pallet boards already have the gaps and ledges a mason jar shelf needs, so a rustic version takes little more than cleanup and mounting.
Jars hold small items like buttons, screws and spices, and a few potted plants fit on the same shelf.
Sand the pallet wood well, since raw boards leave splinters. Keep the shelf shallow enough that jars can’t be knocked off easily.
Sell it as a kitchen piece, and the jars make it a gift set.
15. Wall-Mounted Wooden Bottle Openers
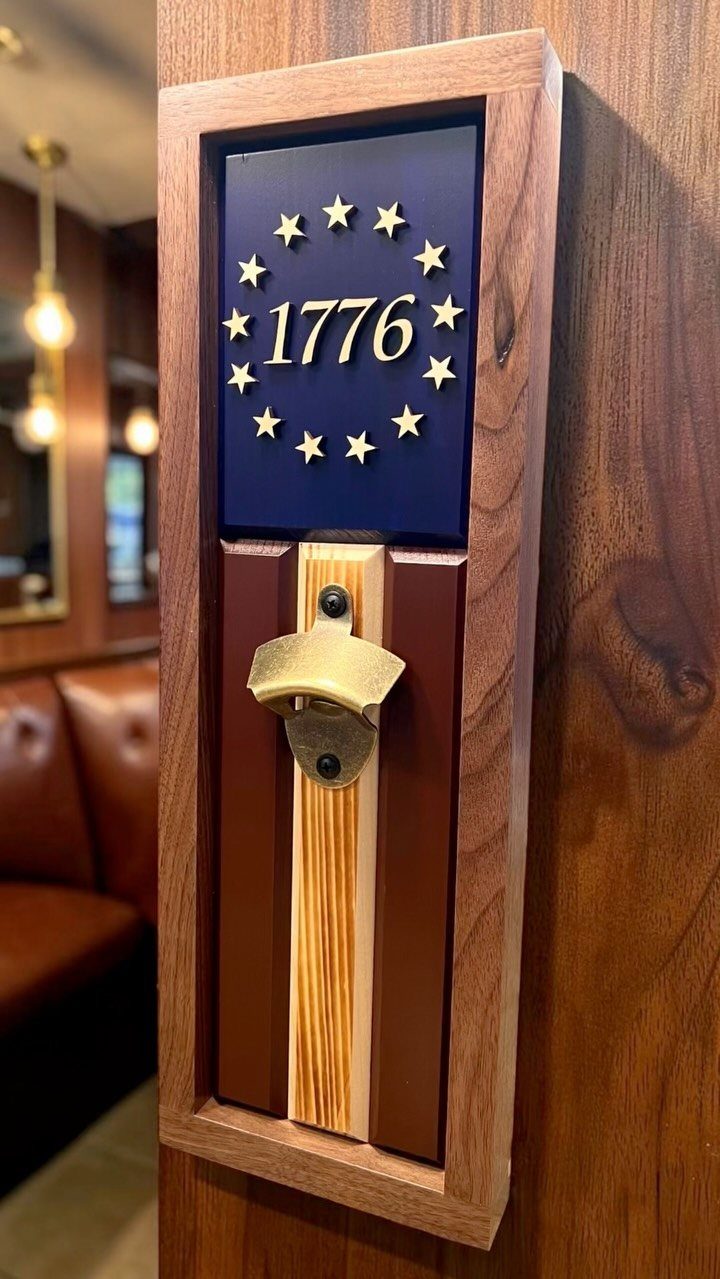
Hole spacing decides whether a bottle opener looks right, and the maker of this one used two stops and a wood spacer so both holes land in exactly the same place.
That jig is worth copying if you plan to make several.
A wall-mounted wooden bottle opener is a natural for summer sales around the Fourth of July.
Mount it at a height where a bottle fits easily beneath.
16. Handcrafted Wooden Shelves
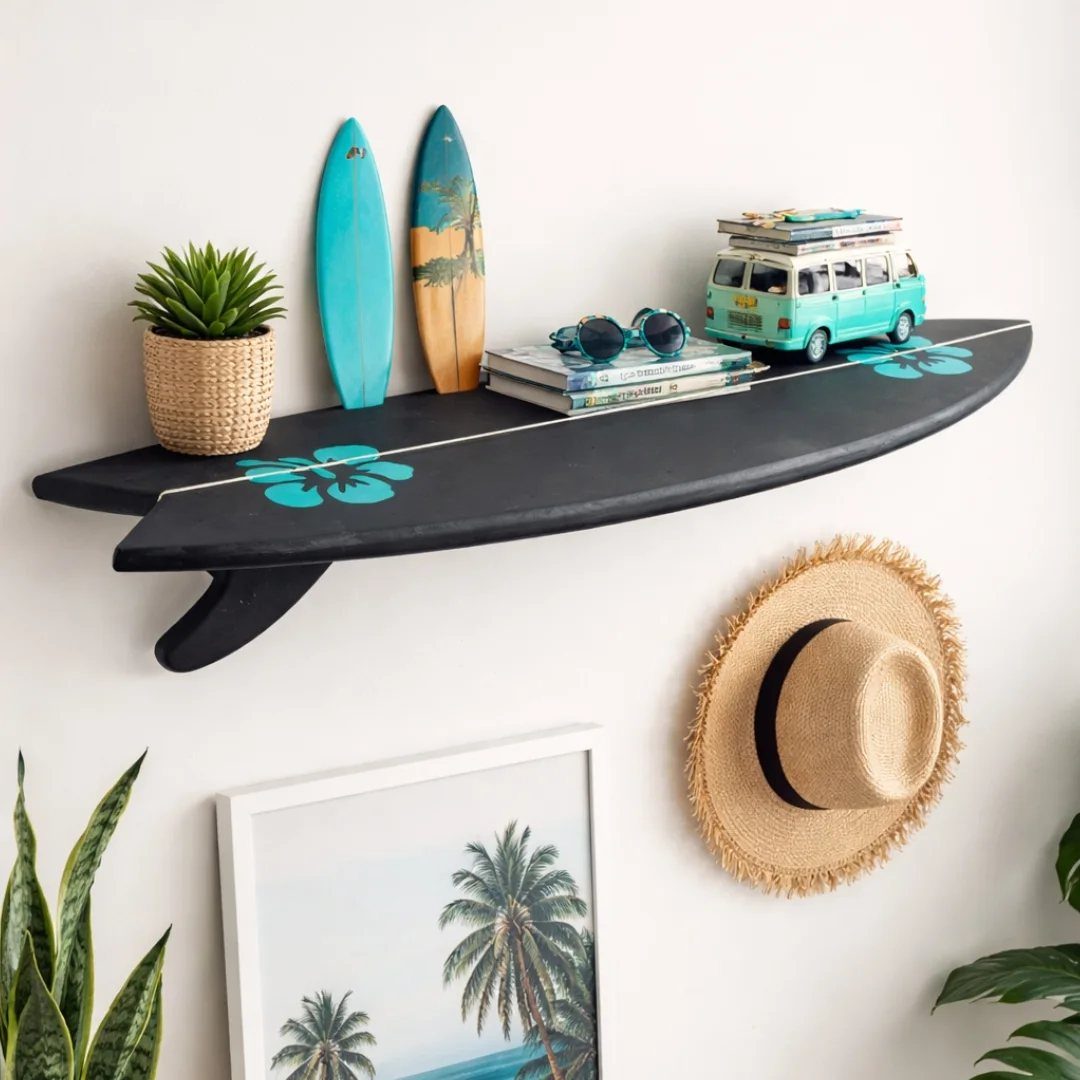
A shelf cut in the shape of a surfboard does the decorating itself, which is why it suits a beach-themed corner.
Black paint on a white wall gives it strong contrast, and the curved outline stands out even when the shelf holds only a few items.
Trace the board shape onto plywood, cut it with a jigsaw, and sand the curves smooth. Plan sturdy brackets, because books and a plant add real weight.
Other shapes work the same way.
17. Handmade Wooden Wine Caddy
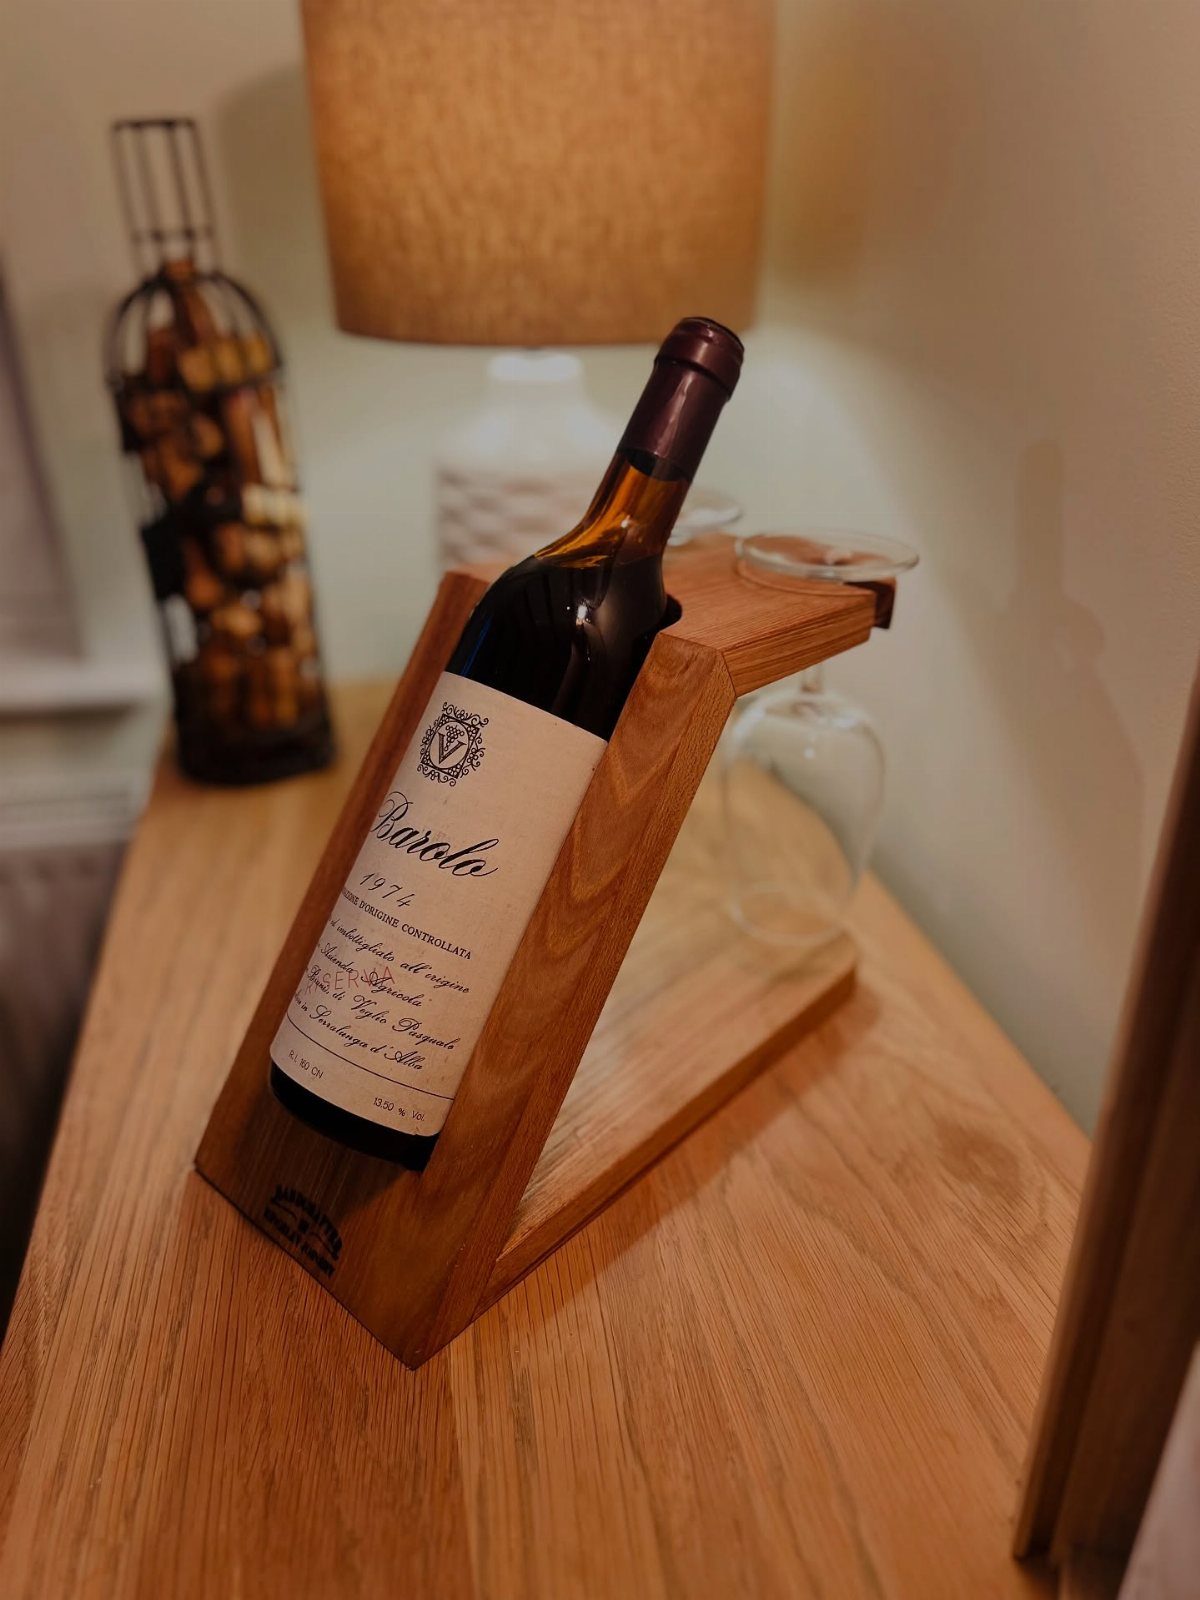
A wine caddy that holds one bottle and one glass makes a gift for someone who already has everything.
Cut a snug cradle for the bottle, plus a small ring or notch for the glass, and the piece carries a table setting in one move.
Choose a wood with handsome grain and finish it with oil, since the wood itself is the decoration.
Sand the handle until it feels good in the hand. Offer it with a bottle, and the gift is ready to sell.
18. Wooden Garden Markers
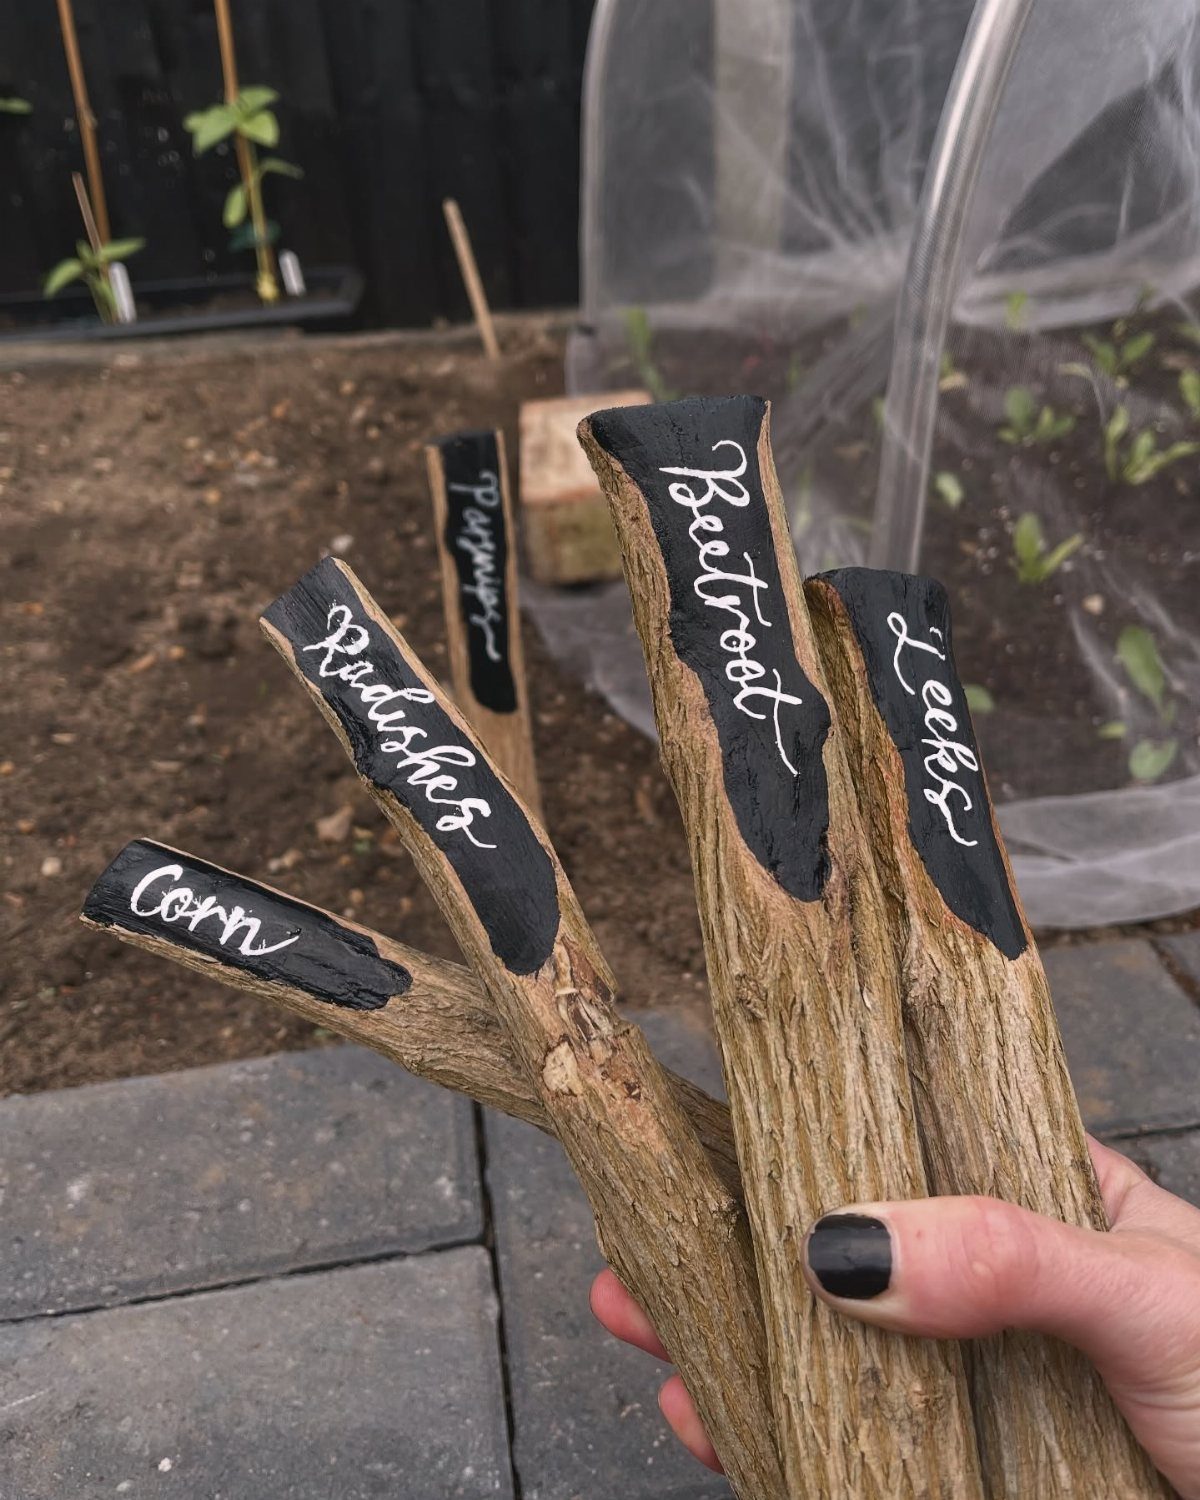
Painted garden markers cost almost nothing, since a branch or a thin scrap board is all the wood you need. Black paint with white lettering, as on these, reads clearly against soil and green leaves.
Cut one end to a point so the marker pushes into the ground. Use exterior paint, because rain will wash off anything else.
Write the plant name in cursive or block letters, then bundle a set of 4 as a garden gift.
19. Leftover Wood Solar Light Stand
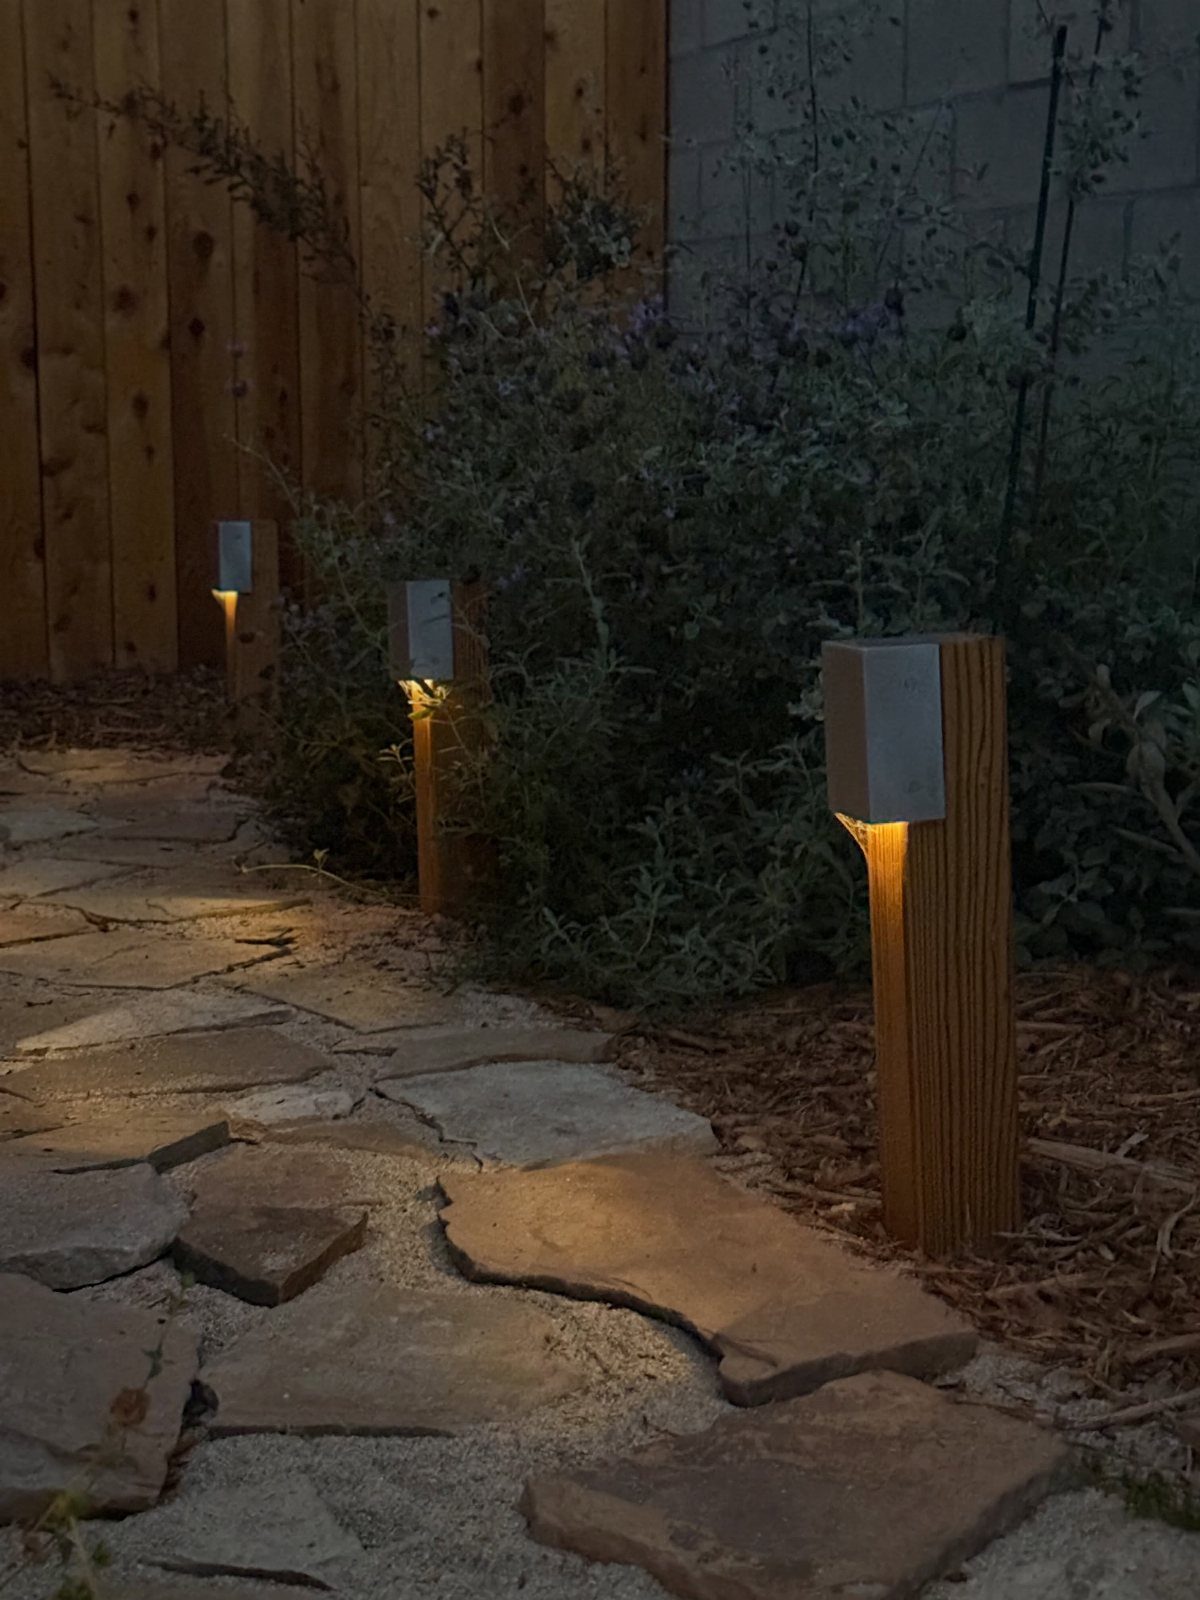
Posts cut from leftover lumber hold a solar light at a height that spreads its glow across a stone path. Space them evenly along the edge so the light reads as a line, not scattered dots.
Cut each post the same length, then sand the top flat so the light sits level. Use exterior paint or sealer, since the posts stand in weather all year.
Scrap bin pieces cover the lumber cost, so 3 stands will fit into a single afternoon of cutting and screwing.
20. Pallet Pool Surround
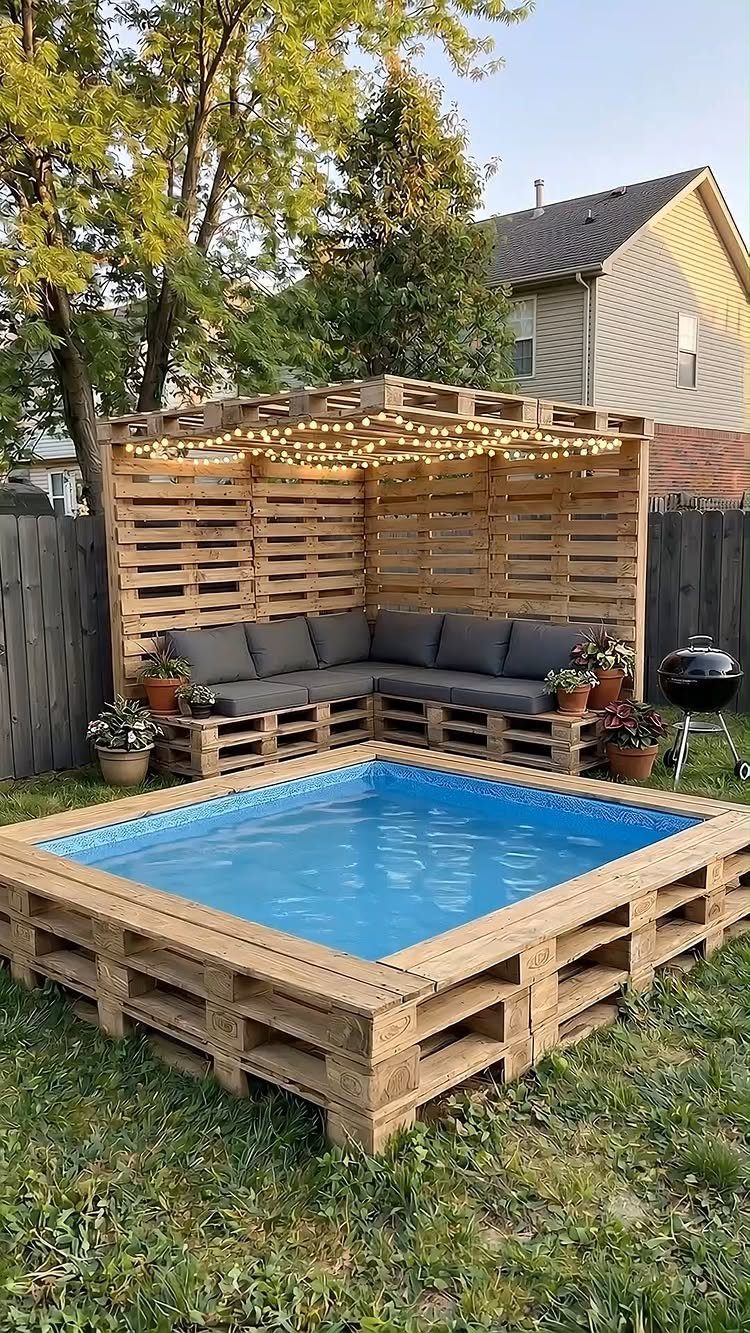
Pallet boards can frame a small square pool and build the lounge beside it from the same material.
The maker of this one cut quarter-sized pallet pieces for a sturdy frame, then lined it with a waterproof tarp reused from an old tent.
Sand every board well, since bare feet and wet skin will find any splinter. Cushions on the lounge side make it a place to stay.
String lights are an easy add-on for evenings.
21. Rustic Log Drink Dispenser
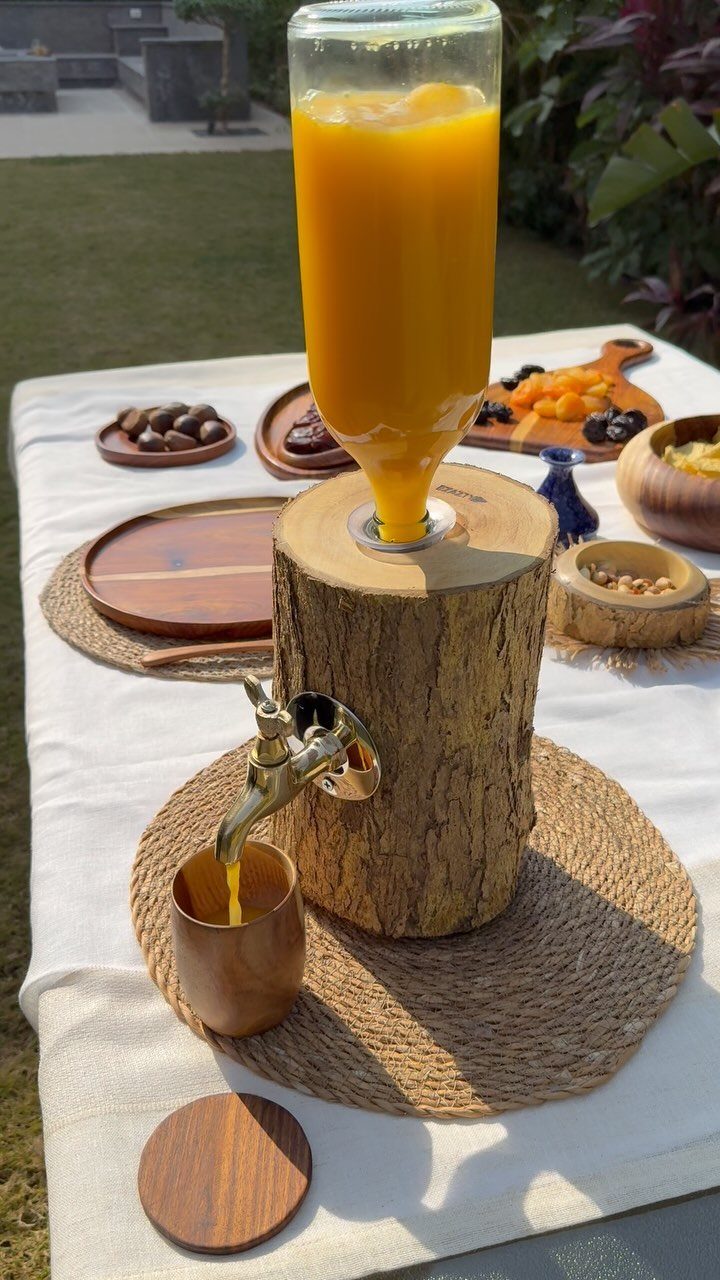
Hollowing a log to hold a glass jar gives a drink dispenser its rustic base, and a brass tap on the front does the pouring.
Drill the tap hole first, then check that the jar sits level on top before you fit anything.
I’d keep the bark on for looks, though a rough log needs a good sanding where the jar rests. Use a food-safe finish on any wood that touches the drink.
22. Rustic Folding Camp Chair
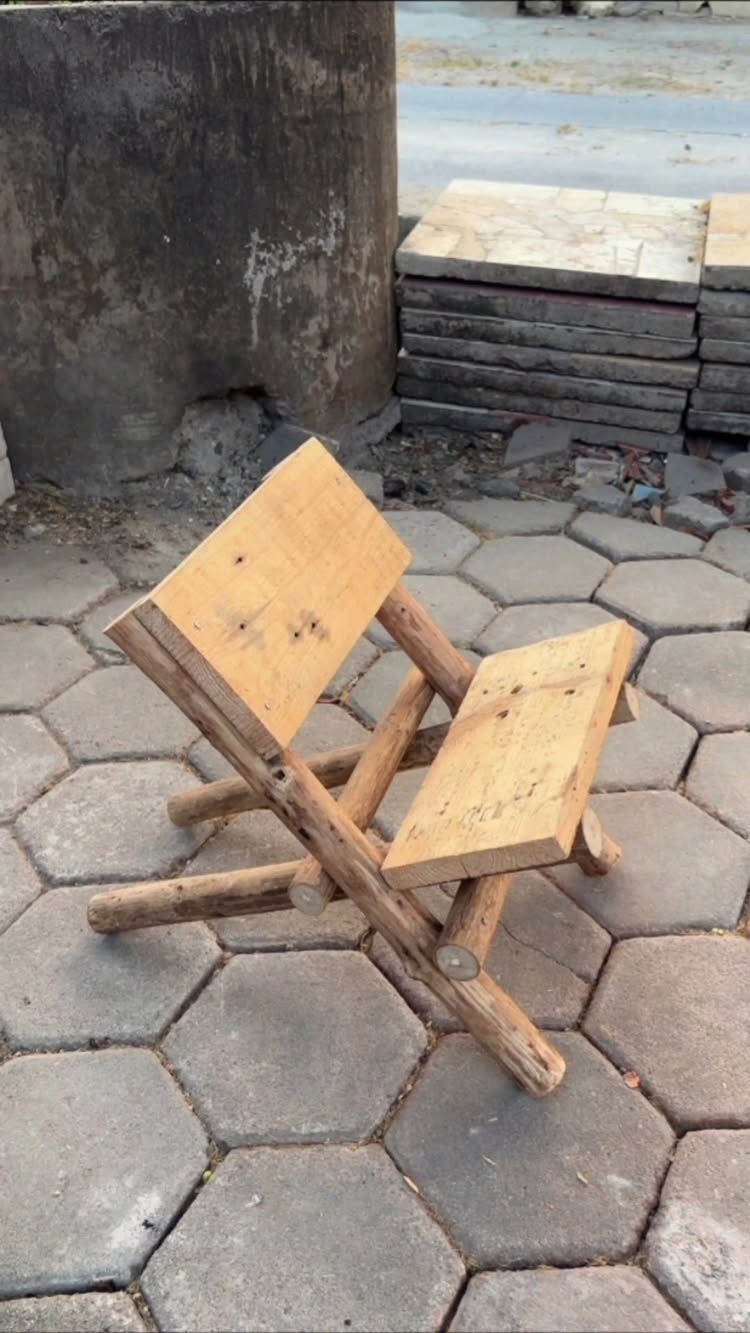
Unstripped branches for the frame and split planks for the seat give a folding chair a look no store sells. Keep the branches close in thickness, because mismatched legs make a chair wobble.
The pivot joints are the part to get right, so use bolts that let the legs swing freely but hold tight when the chair is opened. Sand the seat planks smooth, since people sit on them.
A small chair like this is light enough to carry to a campsite or around the patio.
23. Wooden Sea Animal Toys
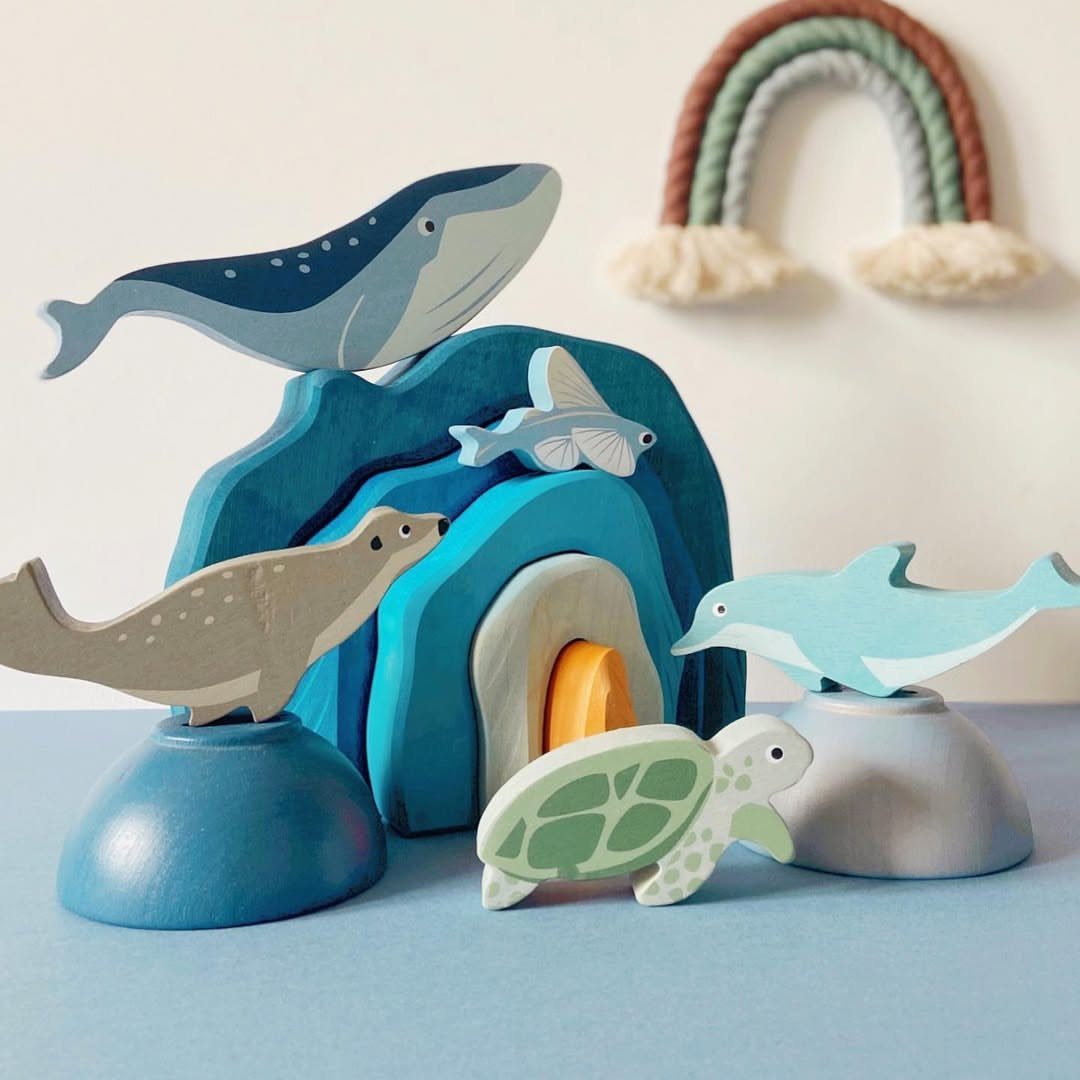
Small sea animals cut from wood, such as a whale, a dolphin, a seal, a turtle and a fish, make a toy set that sells better as a group.
A curved blue wave stand ties them together and gives kids somewhere to line them up.
Small hands will grab, chew and drop these, so round over every edge with sandpaper after the scroll saw or jigsaw cut. Use non-toxic paint on anything a child might mouth.
Sell the animals with the wave stand as one set.
24. Wooden Hanging Lantern Sconce
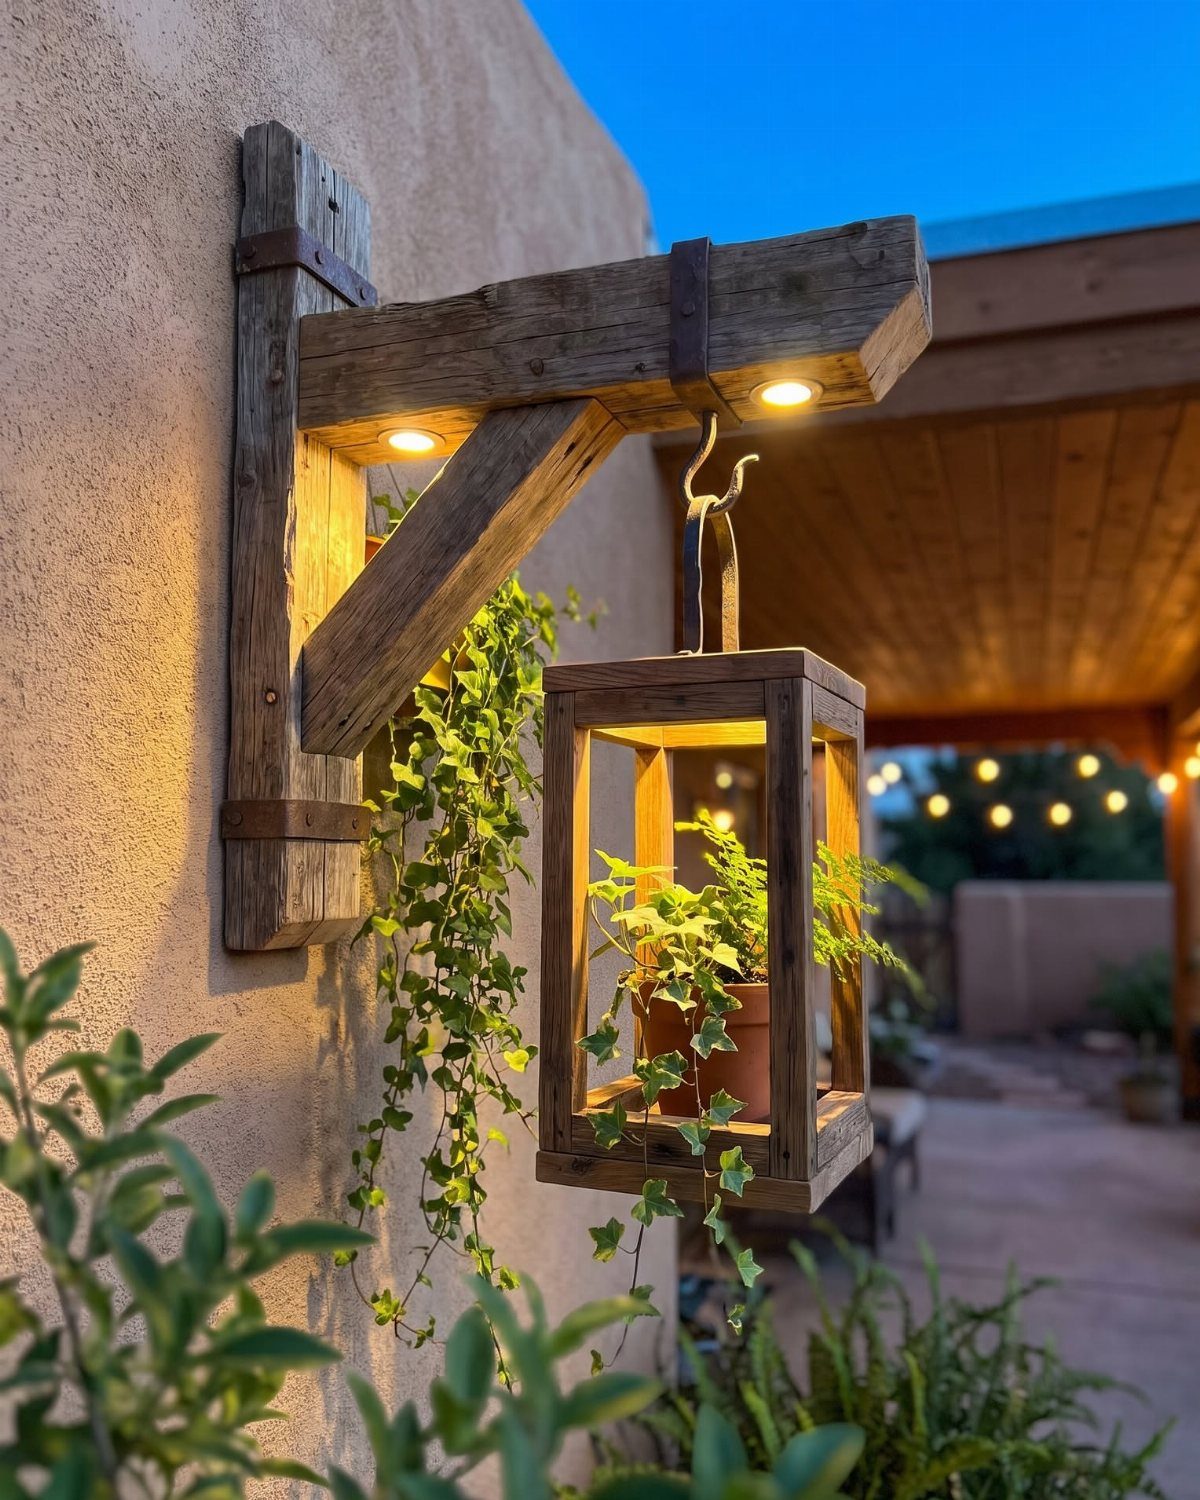
A wall bracket that holds a lantern box turns a bare stucco wall into a small display, and a trailing plant like ivy softens the wood lines.
Build the box with an open top for the plant and a sturdy arm beneath it, because soil adds weight.
On stucco, masonry anchors hold the sconce where plain wood screws would pull loose. Seal the wood with an exterior finish, since it hangs outside through every season.
Built-in lights make it glow at dusk, which is when it looks best.
Materials Needed for Projects
Pine, poplar, cedar, plywood, fence pickets, wooden rounds, and dowels all cut and paint easily, which makes them the safest starting stock. Cedar is the pick for anything that will live outdoors.
Pallet lumber can carry dirt, mold, or chemical treatments, so look for a stamp reading HT (heat treated), skip anything stained or oily, and give each board a close look before it goes in the car.
Wood glue and outdoor acrylic paint cover most of what these projects call for. A drill, a saw, and a sander are the tools I’d count as essential; everything else can wait.
Buy inexpensive boards first. Mistakes cost less on pine than on a nice hardwood, and a beginner makes a few.
If you choose pine, this project will cost around $60, while cedar will increase the cost to $90.
Selling Tips for Wood Crafts
A handful of designs made well beats a table crowded with mediocre ones. Pick a few and get them right before adding more.
Etsy, Facebook Marketplace, Instagram, a simple website of your own, farmers markets, and summer craft fairs each give a small wood project a place to find a buyer.
Online, good photos, seasonal keywords, and consistent branding help a piece stand out.
Most summer wood projects sell for $15–$60, and where yours lands depends on its size, the quality of the finish, and whether the buyer can request a custom name or design.
Personalizing is the easiest way to move toward the top of that range.
Safety Equipment for Woodworking
Safety glasses, a dust mask, hearing protection, and work gloves are the basic kit. Wear glasses and a mask every time you cut or sand, and put on ear protection for loud tools like a saw or sander.
Take gloves off around spinning blades and bits, since a glove can get caught. Use them for handling rough boards instead.
You can buy gear gradually.
A few core safety items will cover your first projects, and the rest can be added one at a time as you build more. A small garage workbench and a few basic tools are enough to begin.
Frequently Asked Questions
What are the top woodworking projects that sell the most?
Customizable wall signs, wine racks, and outdoor gear tend to lead, and in summer wine caddies and porch pieces do well too.
Personalized items like porch signs with a buyer’s chosen name or phrase sell easily, and cutting boards, birdhouses, and planter boxes also move well. Seasonal appeal and usefulness are what draw buyers.
Can beginners really build and sell these projects?
Yes. Most summer wood projects need only a drill, a saw, and a sander, plus wood glue and outdoor acrylic paint.
Start on inexpensive pine or poplar so mistakes cost little. Simple designs with fewer joints are the easiest to get right.
What are some easy small projects I can make with wood?
Garden markers, mail organizers, and wooden wall art are easy picks, and scrap pieces cover most of the lumber cost.
A garden marker is just a branch or thin board cut to a point and painted. Cutting boards with a hanging hole are simple too, since a drill and a large bit make the cutout.






