The size of your offcut pile picks the project: a single odd board is enough for a monogram letter or a fish, while a pile of mismatched lengths suits a plant stand or a hanging plank sign.
Projects range from a Christmas village you can cut in an afternoon to a kid picnic table that I’d plan as a weekend build with a helper or two.
1. Mixed Media Wood Wall Art
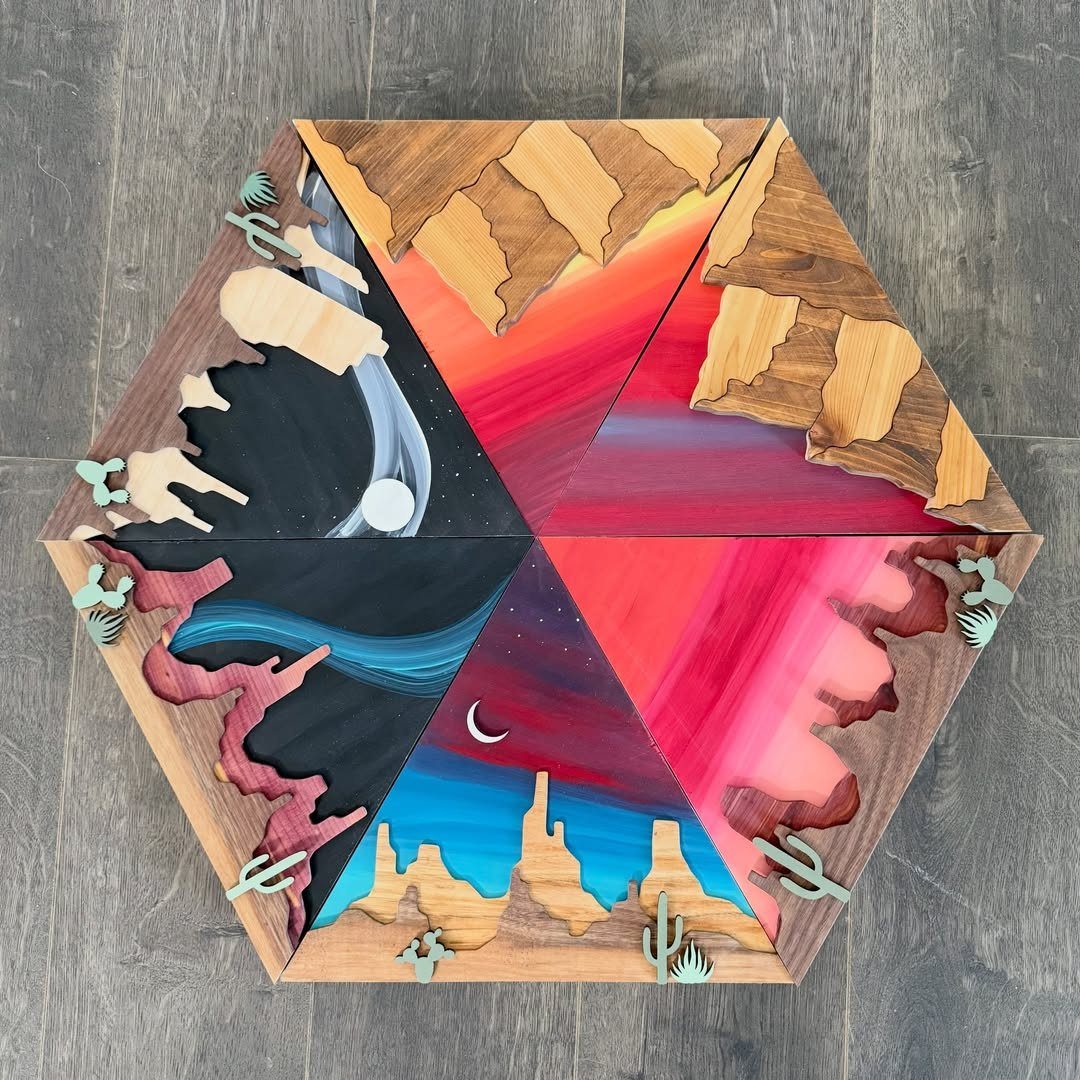
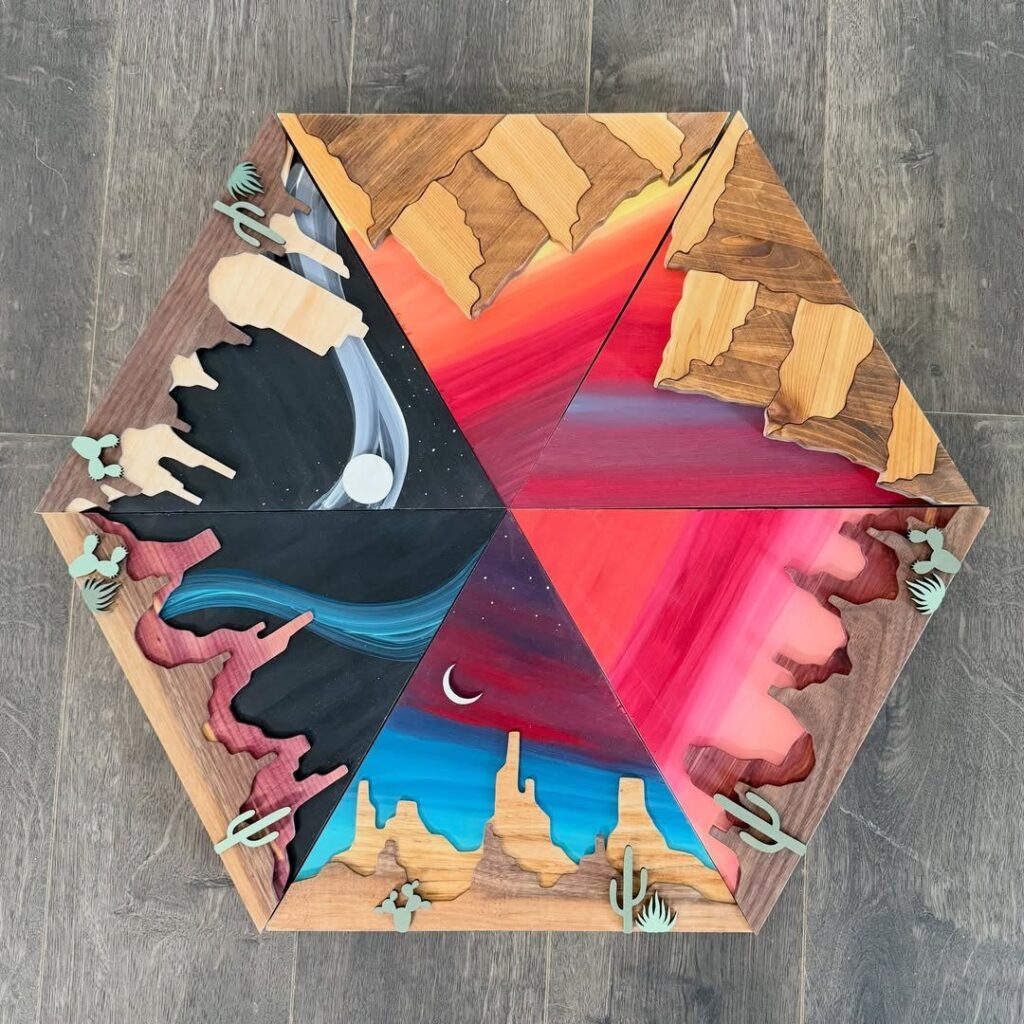
Layering is what makes a piece like this work: a painted backdrop with cut wood shapes standing in front of it. Mountains and cactus silhouettes cast small shadows, so the flat paint reads as depth.
Scrap suits it because the shapes are small.
Cut the silhouettes from offcuts, then paint the sky and ground on a base board. Glue the cutouts on last, so the paint doesn’t creep behind them.
A hexagon is a nice frame, though a square or rectangle is easier to cut.
2. DIY Plant Stand

3 tiers is a good target for scrap, since each shelf can be a different length of board. A white wash lets mismatched pieces read as one set, and it keeps the grain visible, which paint would bury.
Thin the white paint with water and wipe it on with a rag. Wipe again right away for a lighter look.
Size each shelf to the pot it will hold, and keep the heaviest plant on the bottom.
3. Bathtub Tray
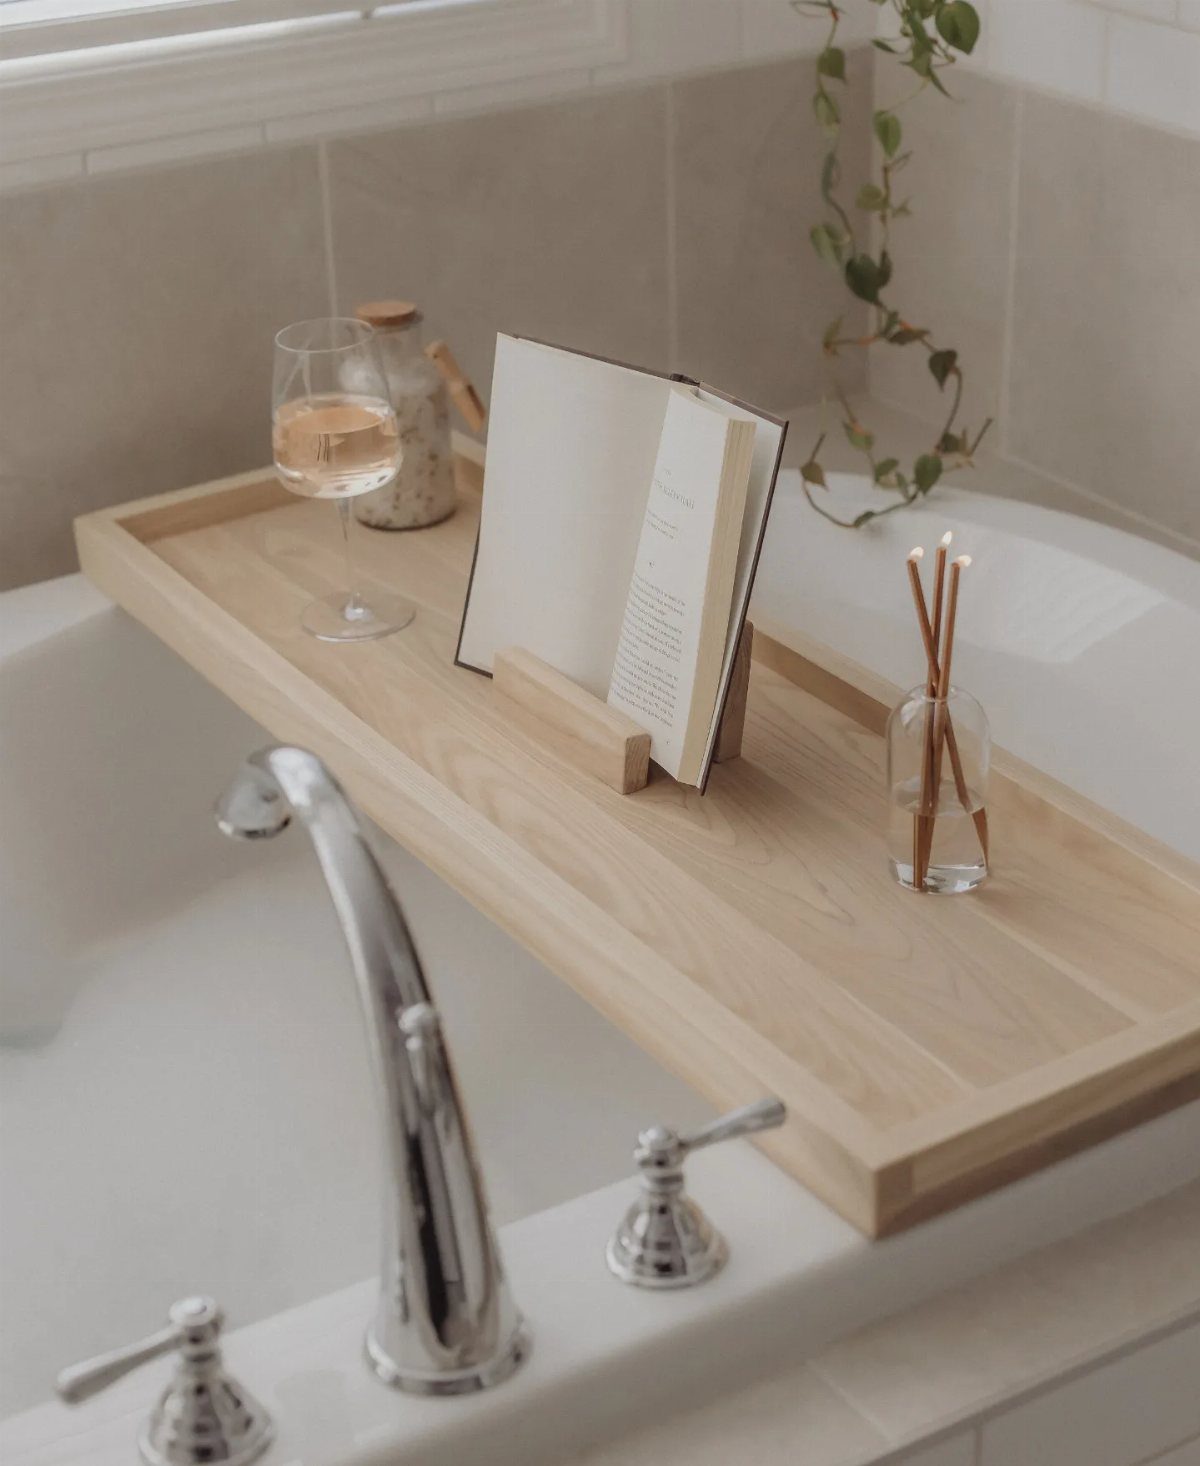
A bathtub tray only needs a flat top and 2 rails that rest on the tub edges. Scrap boards fit the job well, since the whole piece is small.
Measure the width of your tub rim before cutting the rails. Leave a little extra length on the top boards so the tray overhangs and has room for a book stand, a glass and a vase.
Sand every edge until it feels smooth against bare hands, and a light finish keeps the wood looking pale.
4. DIY Christmas Village
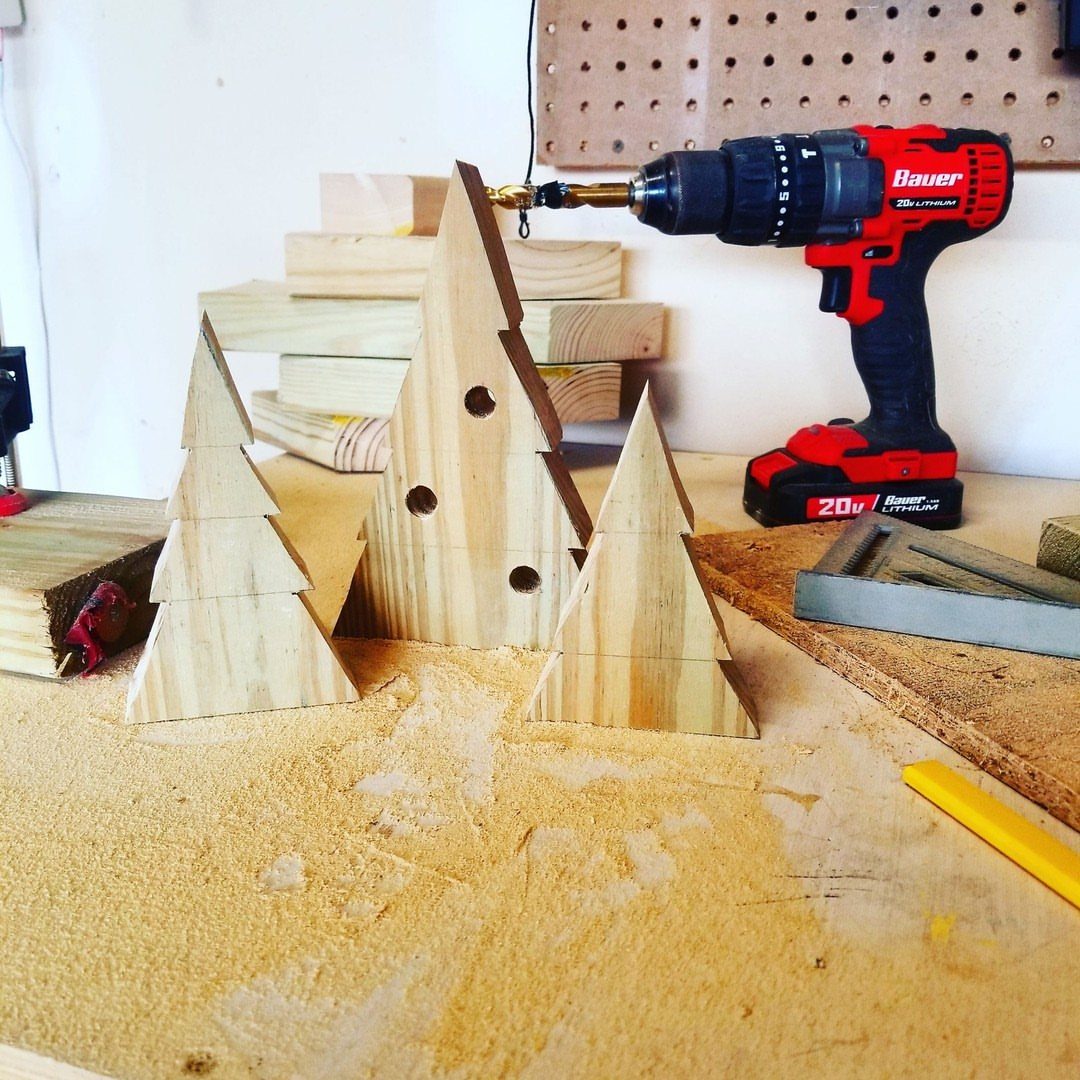
Tree cutouts are the easiest way into a wooden village, because one shape repeats at different sizes. Draw a simple triangle outline with a pencil, cut it out of scrap, and trace it again for a second and third.
Vary the heights so the group looks like a small forest.
A drill earns its place here: a hole near the top or base lets you hang or mount each piece. Sand the cut edges before painting.
5. DIY Wooden Hooks Rack
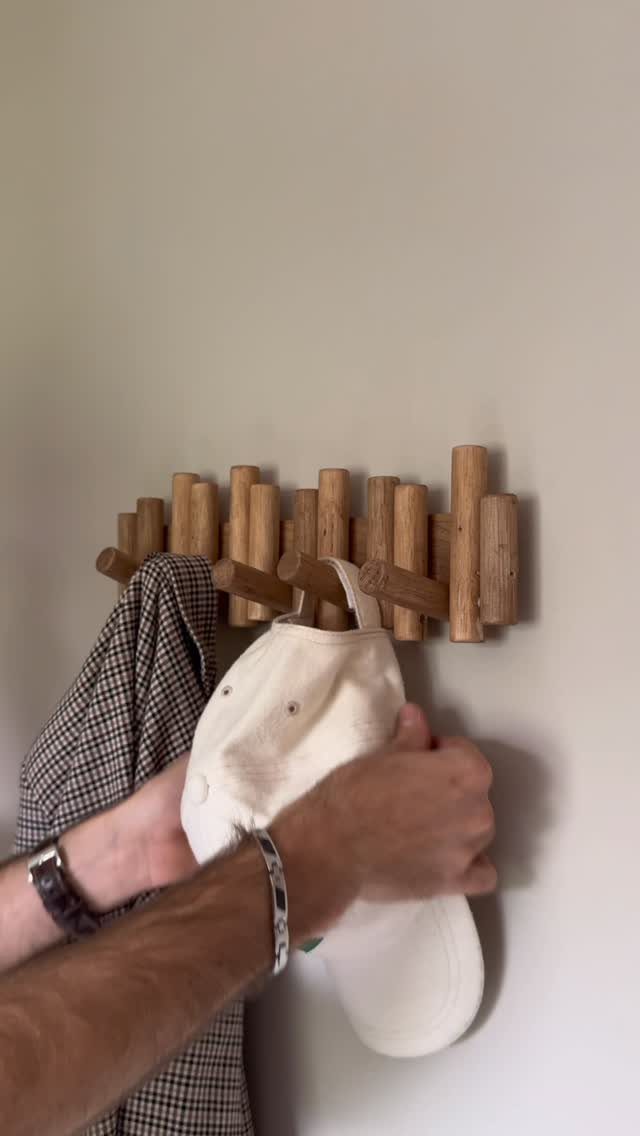
Pegs of different sizes give a hook rack more character than a row of matching store-bought hooks. Cut wooden cylinders from scrap dowel or branch stock, then drill holes into a backing board to seat them.
Test the heaviest item you plan to hang, a coat for instance, before trusting a thin peg. Thicker pegs go where the weight will be.
Screw the board into wall studs if you can, because a heavy coat on a peg pulls out on the board with a lot more force than its weight suggests.
6. DIY Kid Picnic Table
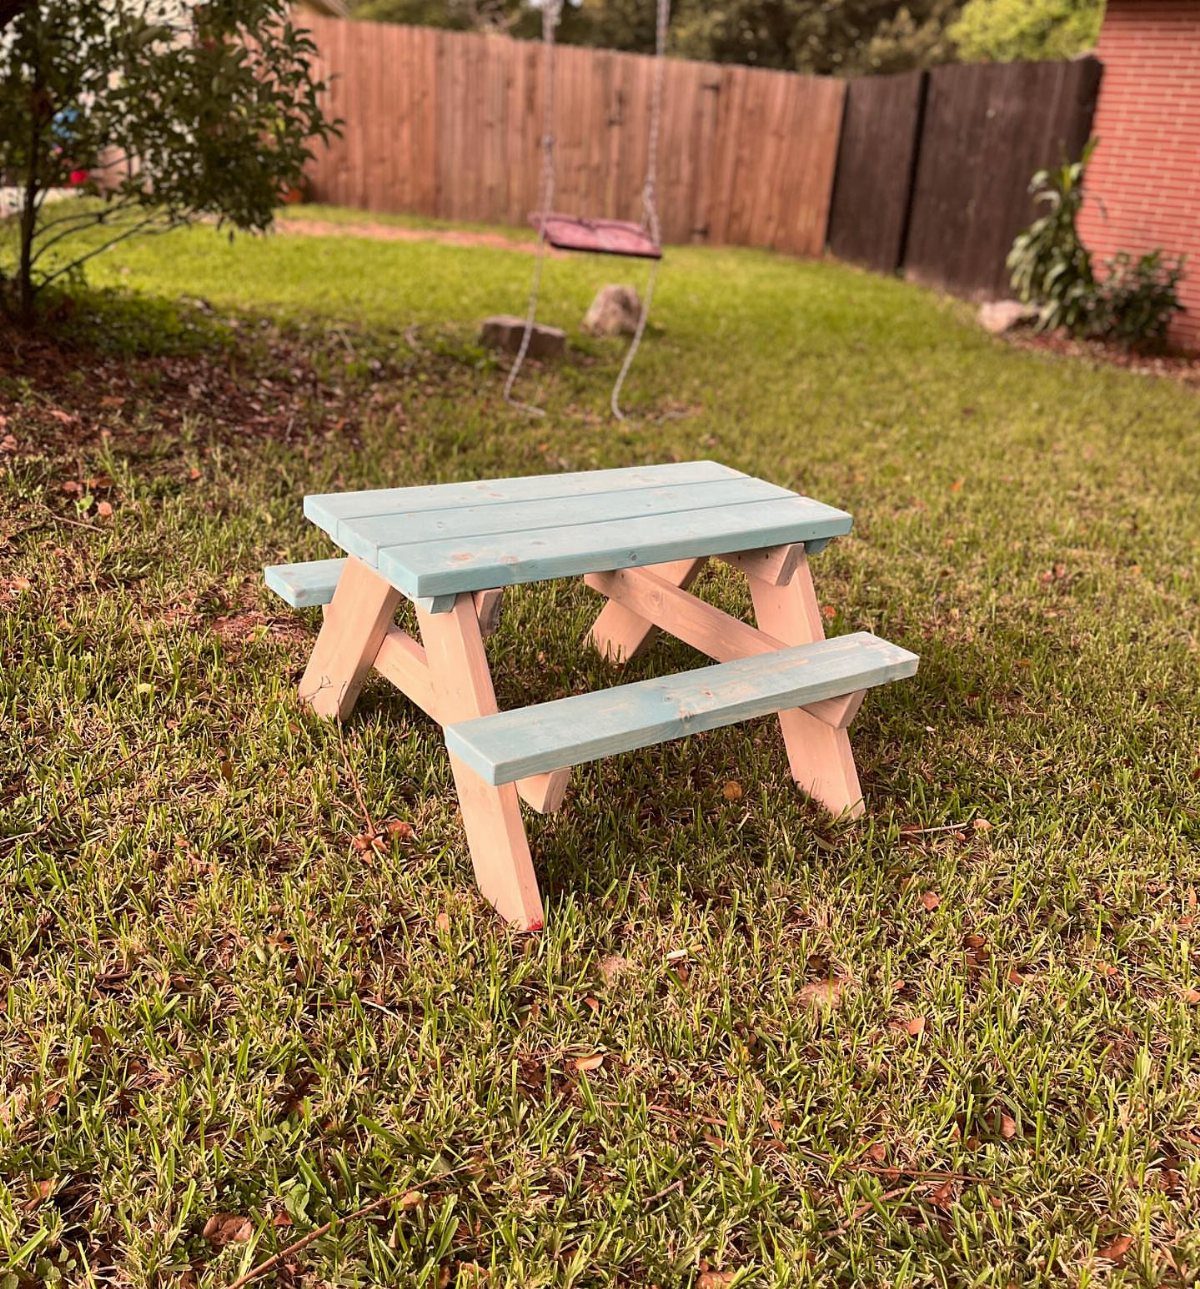
This is the longest build on the list, and I’d treat it as a weekend job with helpers. A picnic table has many parts: a top, 2 benches and the legs that tie them together.
Cut everything to size first, then let each person sand or paint a section. A light blue top and matching blue benches keep the look fresh and hide small flaws in the scrap.
Keep the size small, because it’s meant for kids. Round the corners and edges thoroughly.
7. Hand-Painted Birdhouse
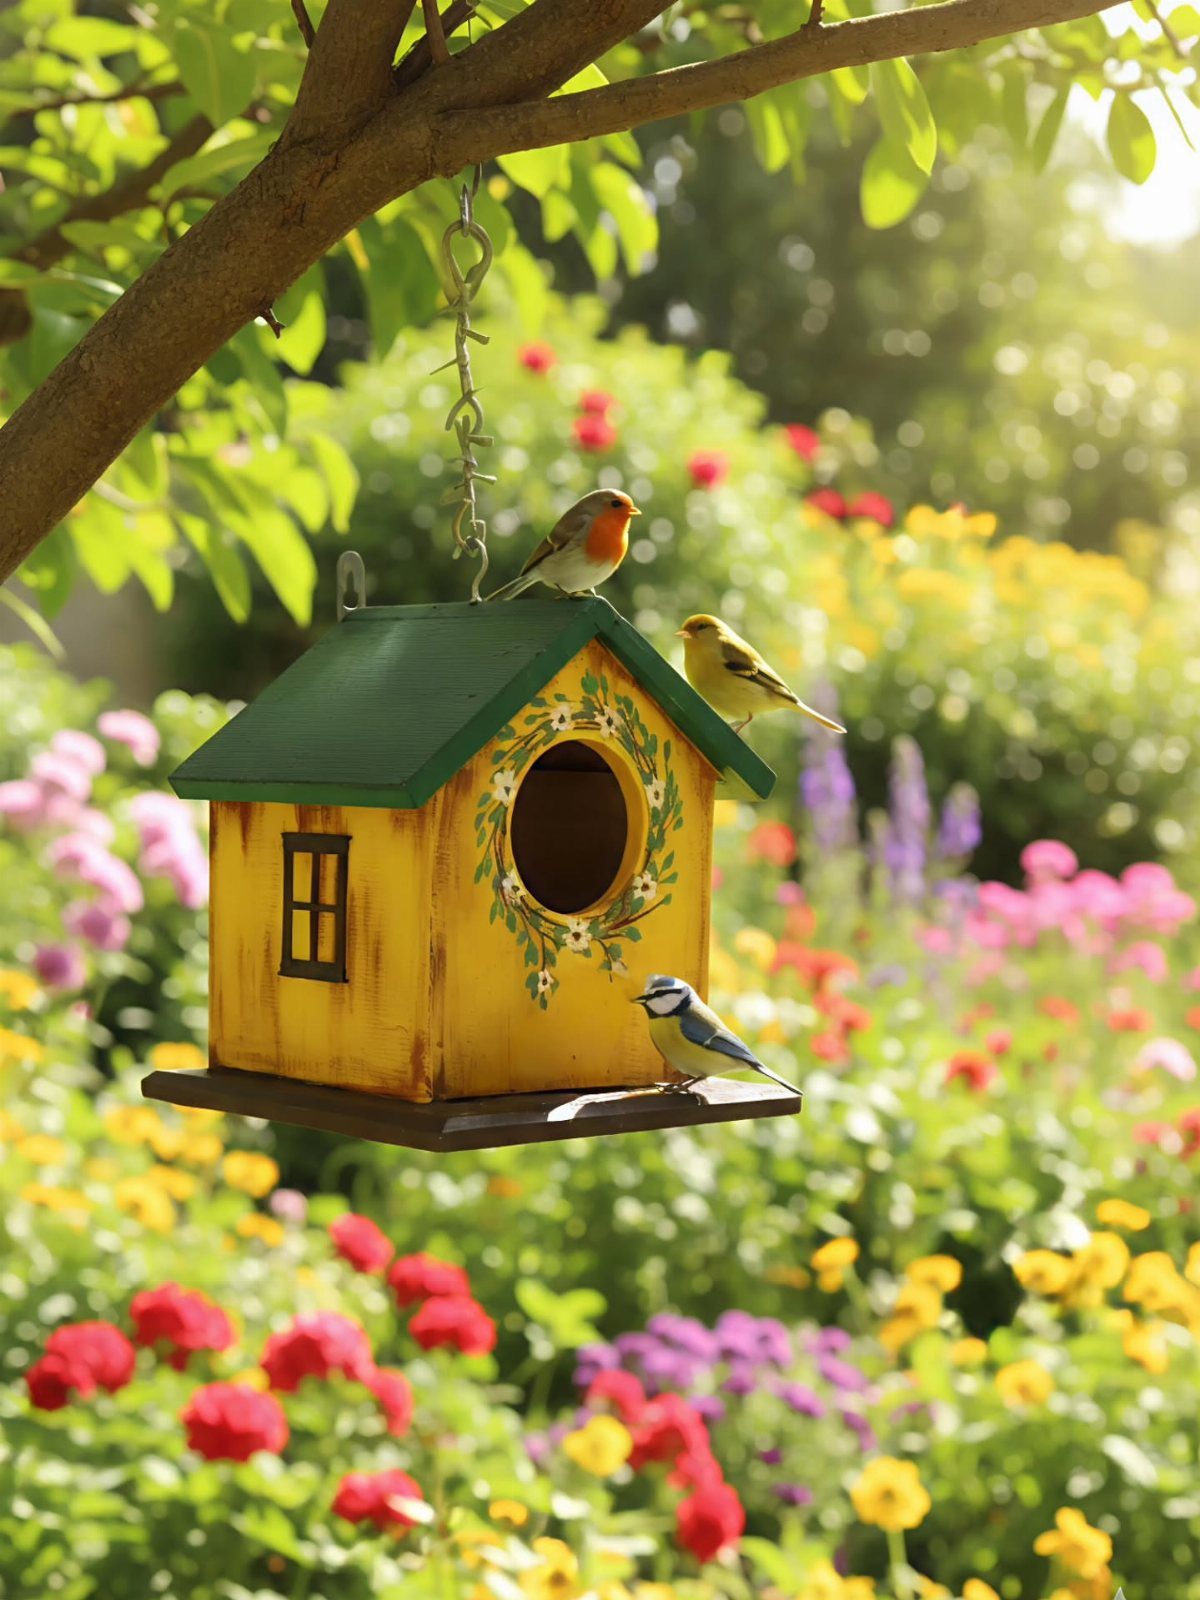
A birdhouse is a small canvas, and yellow walls with a green roof give flowers somewhere to stand out. Paint the walls first, let them dry, then add sunflowers and leaves with a small brush.
A birdhouse uses so little lumber that offcuts from other projects cover the whole build, with no need to buy a new board. Sand the surfaces before painting, and use a coat of primer if the wood is dark.
A branch loop or hook at the top lets it hang in a tree.
8. Slices of Scrap Wood Wall Art
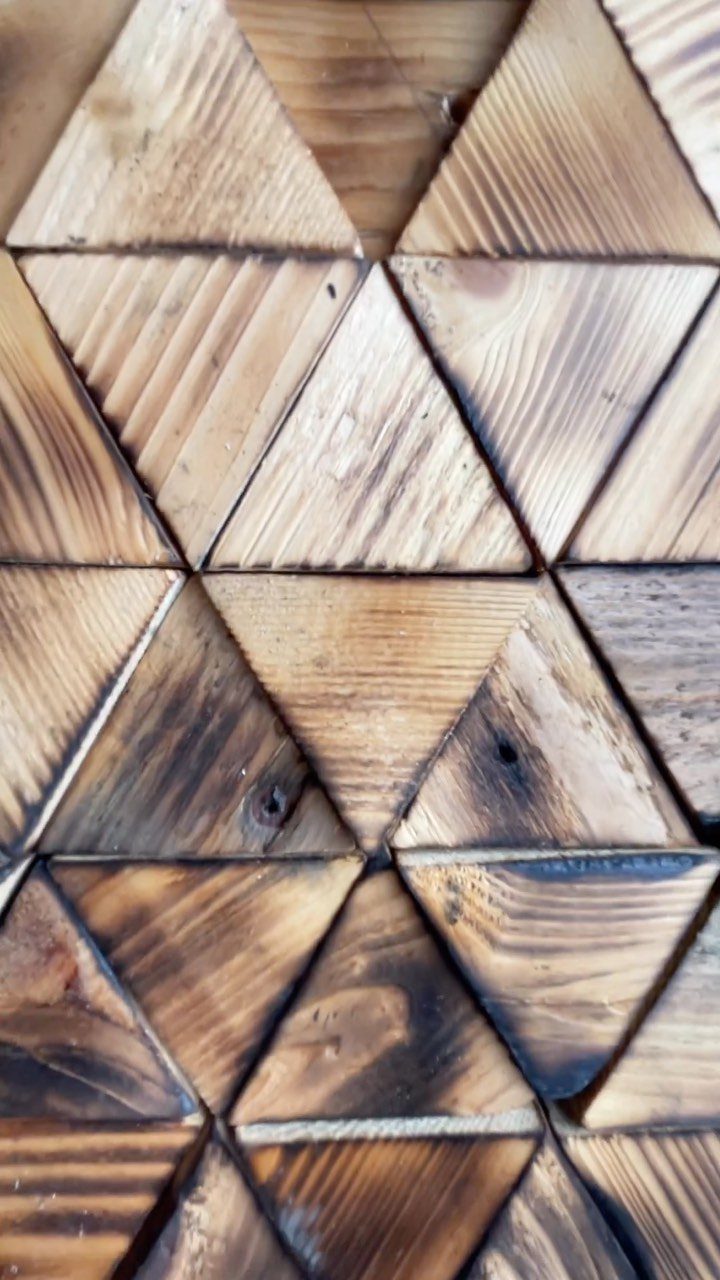
Triangles are a smart shape for scrap, since a single board can yield dozens of them and odd offcuts still fit. Mixing stains and natural grain is what gives a mosaic its depth, so don’t try to match the pieces.
Cut all the triangles from the same template so they pack together tightly. Lay the whole pattern out dry on a backing board before gluing anything.
Glue from the center outward, so any gaps end up at the edges.
9. Scrap Wood Lanterns
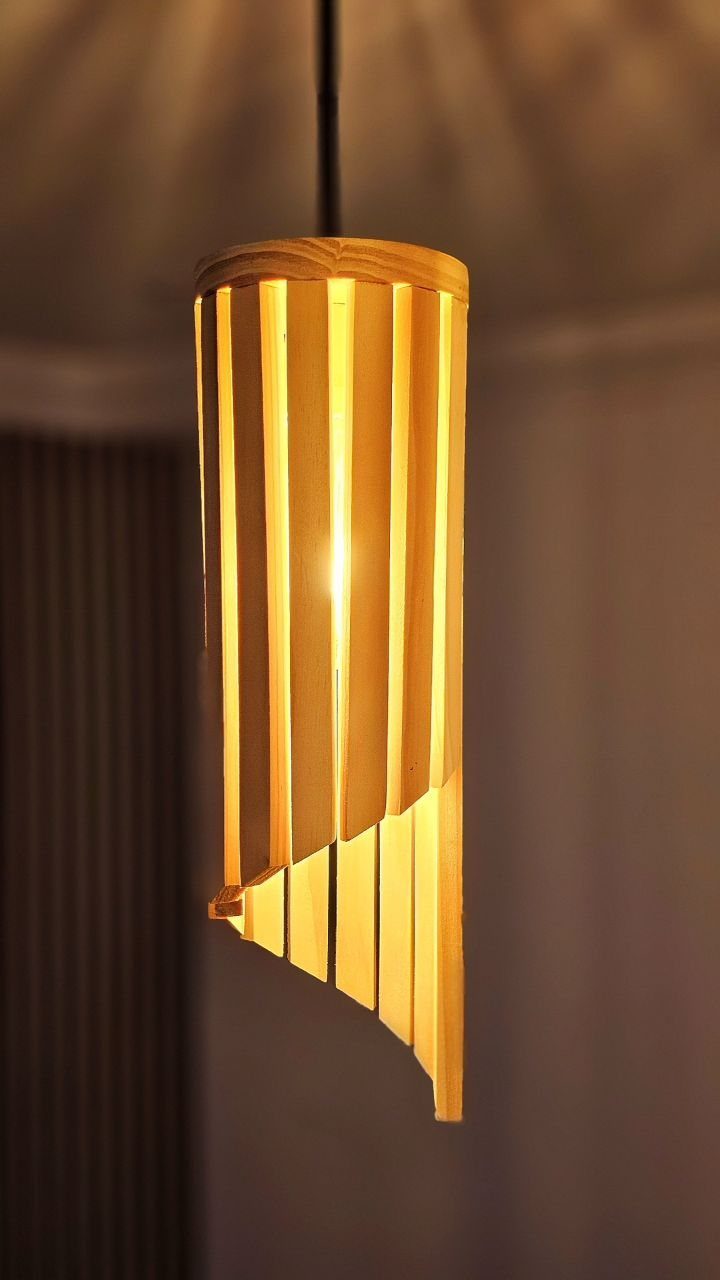
Uneven slat lengths make this lantern work: the ragged bottom edge looks deliberate, and the light spills out between the boards. Scrap suits it because every slat can be a different length.
Cut the slats, then fasten them around a ring or circular base to form the cylinder. A cord kit with a bulb socket goes inside at the top.
Sand the slat edges well before assembly, since they are easy to snag afterward.
10. DIY Scrap Wood Pumpkins
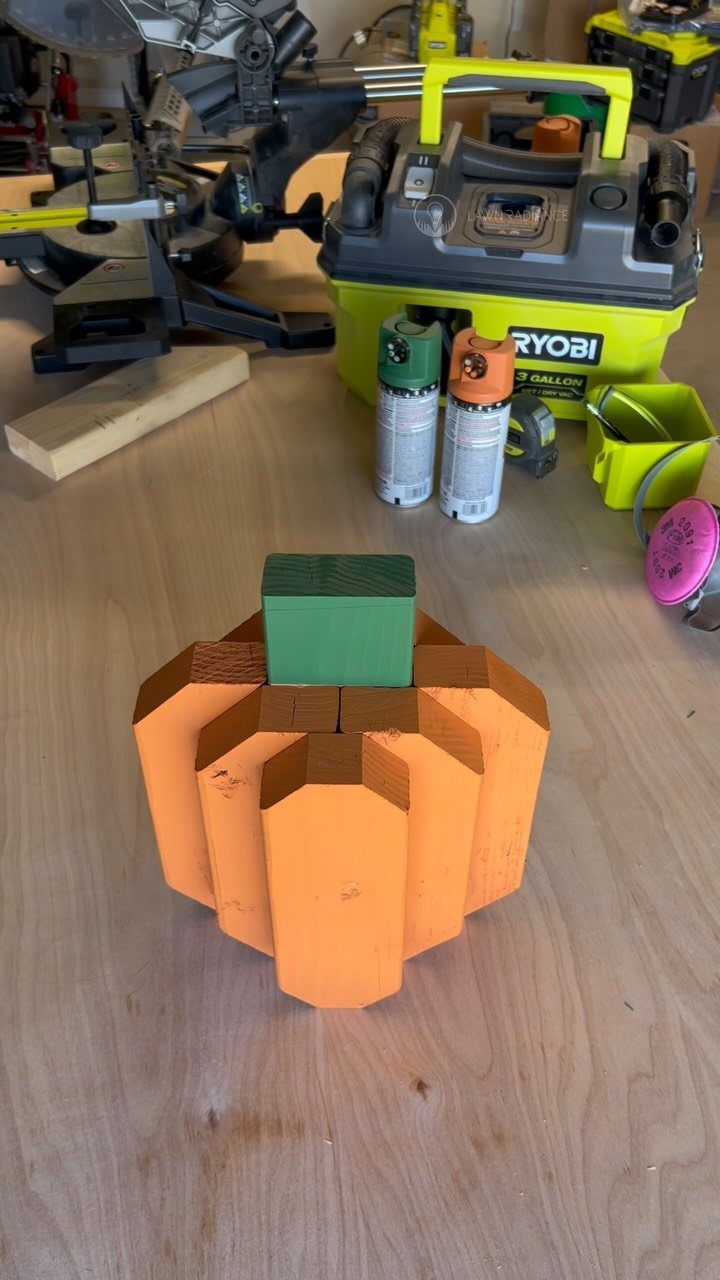
Blocks stacked and glued into a rounded shape make a pumpkin that needs no curved cuts. A miter saw does the work fast, and the bits you trim off can become the stem.
Spray paint is my pick for the orange: it covers end grain and the gaps between blocks in a single pass.
A stem in its own green, set against the orange or white body, gives the pumpkin a clear focal point.
Do the painting outdoors, and give the coats time to dry before you handle it.
11. DIY Scrap Wood Fish
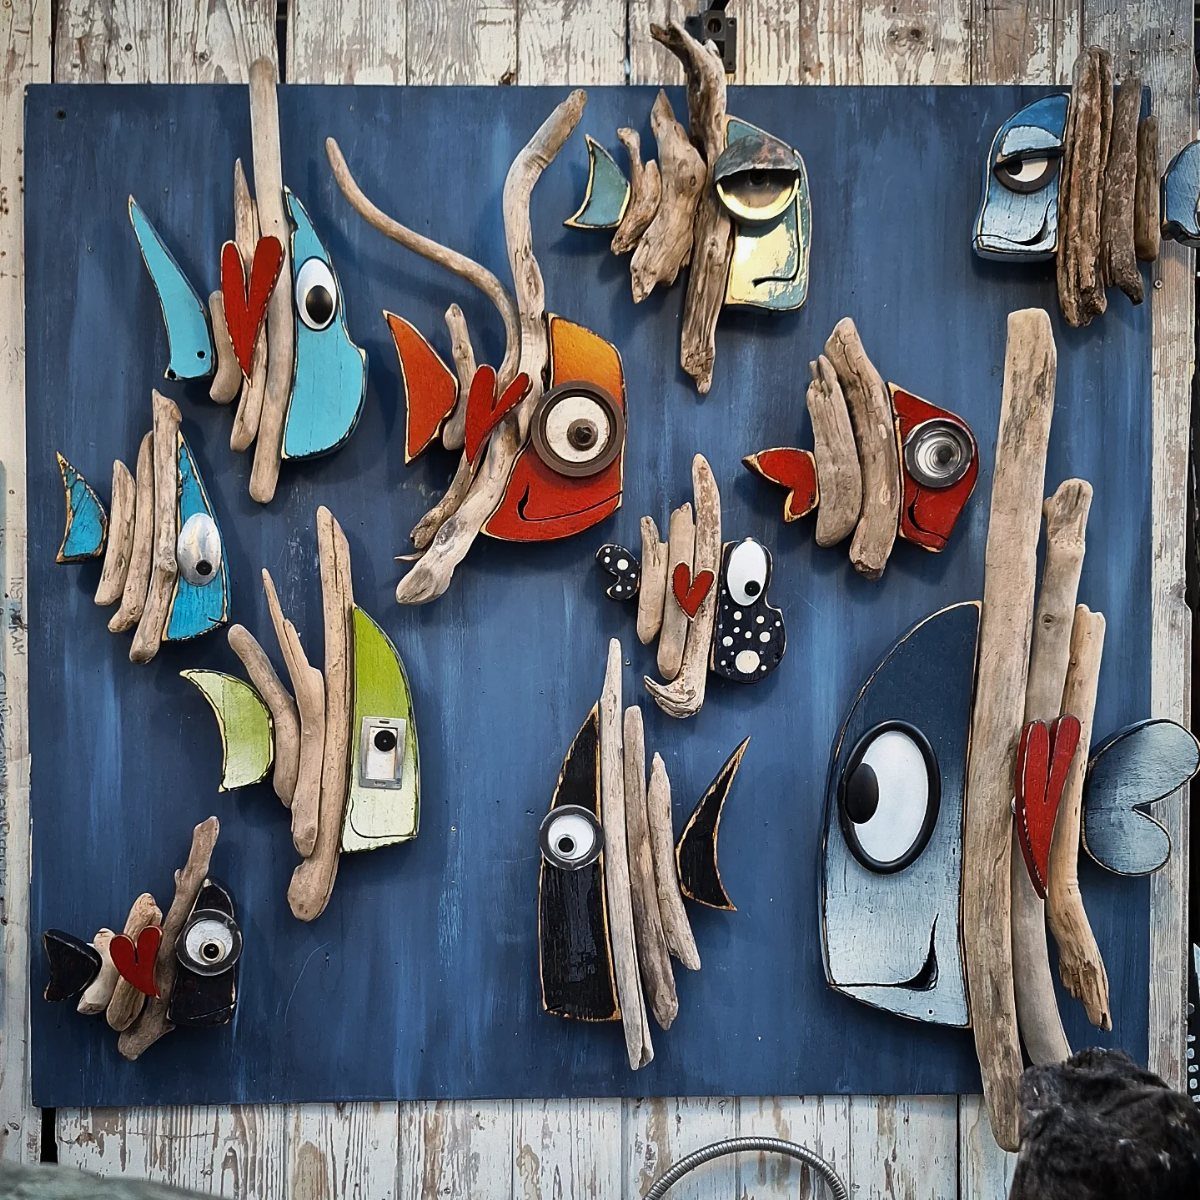
Fish are forgiving, because a body can be any odd offcut and nobody expects symmetry. Cut a simple tapered shape, add a tail from a smaller scrap, and paint stripes or dots on top.
Driftwood pieces make good bodies if you have them, and bright paint keeps them playful. Mounting several fish on one painted board gives them a pond to swim in.
Use a few different sizes so the group looks like a school rather than a row.
12. Hanging Wood Plank Quote Sign
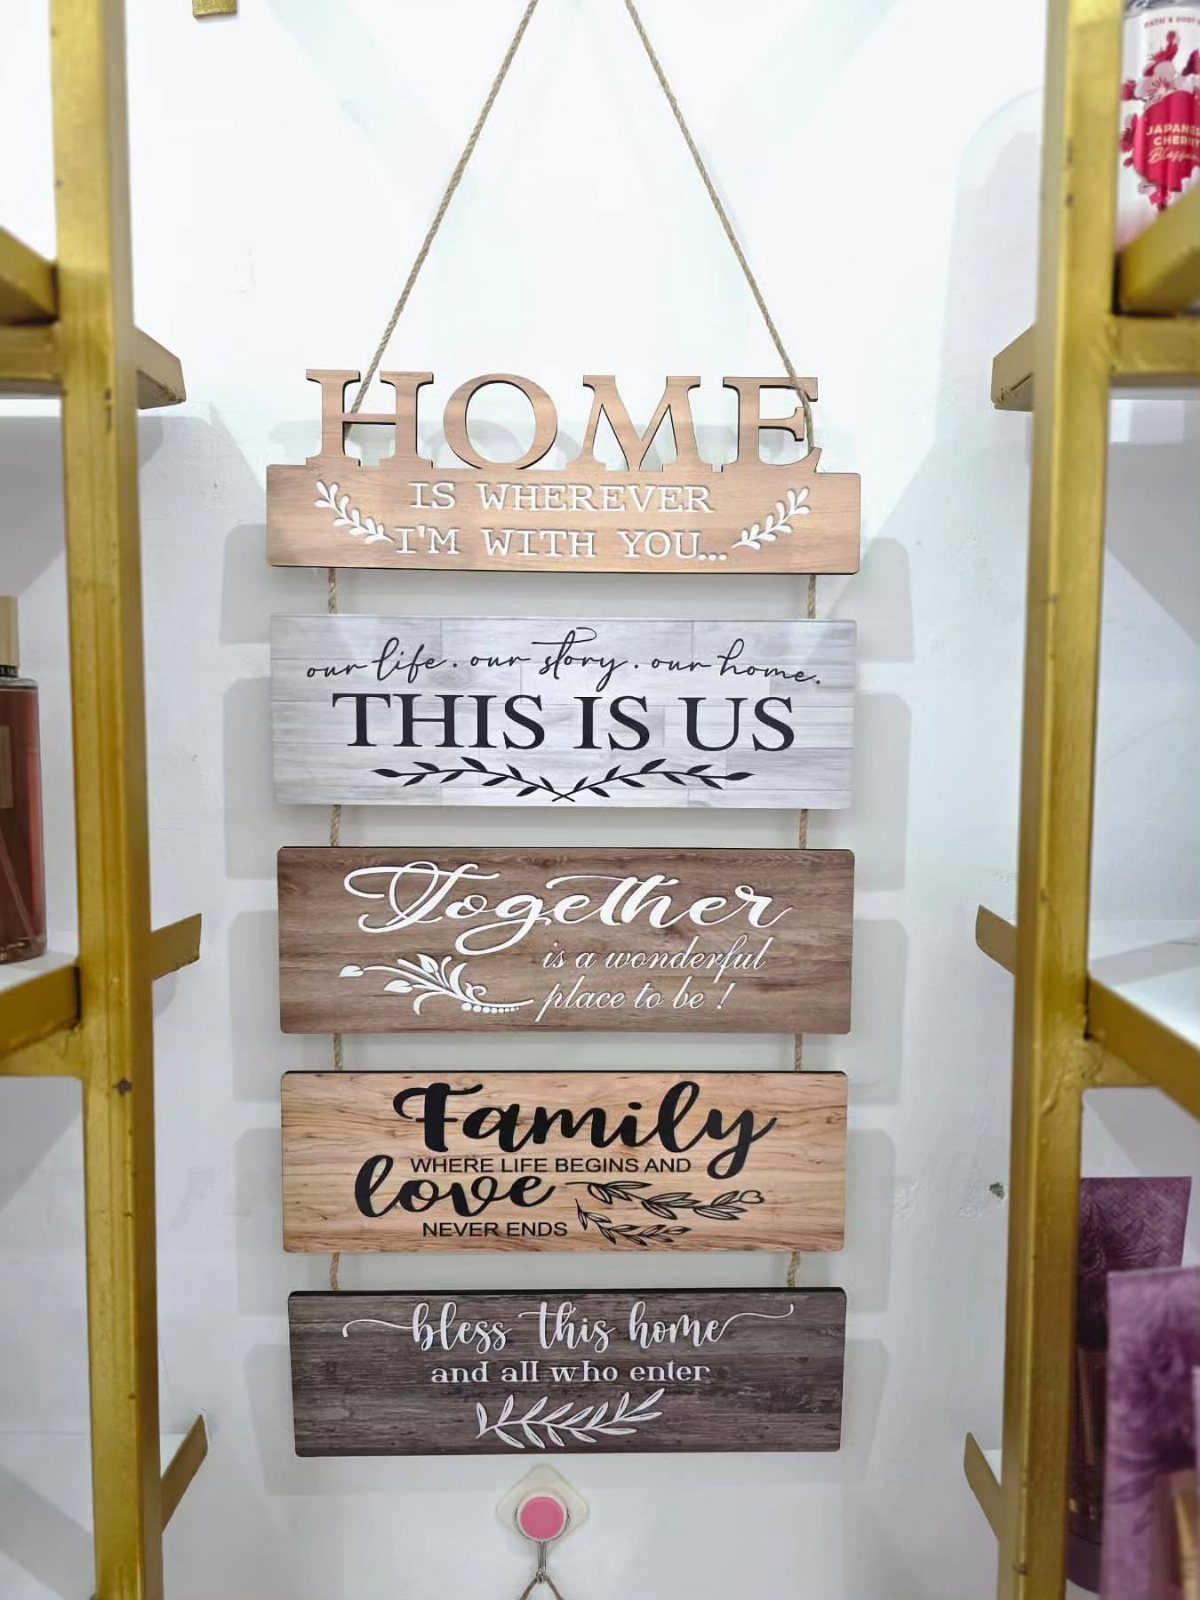
Planks tied with rope hang as one tall piece, so each board can carry a single short phrase. Quotes about home and family fit well, since short lines stay legible on narrow wood.
Paint a light base on every plank, let it dry, then add lettering. Drill a hole near each end of every board, and thread the rope through so the planks hang in a column.
Plan each phrase’s spacing before you paint, so no line runs off the edge.
13. Personalized Wooden Monogram Letter

A name in cursive on a freestanding letter reads as a gift, and it takes only one piece of scrap thick enough to stand on its own.
Sketch the letter on paper until the curves look right, then transfer it to the board with tracing paper and follow the lines with a jigsaw.
White paint on the letter lets a colored script stand out.
Blue on white, as here, gives clear contrast. Sand the cut edges smooth and let the base coat dry fully before you touch a brush to the lettering.
Pencil the name lightly before painting it. Cursive needs one steady stroke per letter, so practice on a spare board first.
Benefits of Scrap Wood Projects
Scrap wood costs little or nothing, so a project that would otherwise need new lumber can come straight out of the offcut bin for free.
That lowers the stakes, too. A botched cut on a leftover piece stings far less than one on a fresh board.
Reusing wood also keeps it out of landfills, where it adds to emissions as it breaks down. Every board you use again is one less cut from a living tree.
Scrap also gives you something new lumber rarely does: odd species, mismatched colors and weathered surfaces that no store stocks. Each piece you make ends up different from anyone else’s.
Tools for Scrap Wood Projects
A reliable cutting tool and a power drill cover most of what scrap projects ask for. A jigsaw handles curves, and a miter saw gives clean, repeatable angles on small pieces.
Wood glue and a few clamps hold joints while they set. A sander, even a basic palm model, takes rough offcuts to a finish that feels good in the hand.
A pocket hole jig is worth owning if you plan to join boards into frames or shelves. Buying a good tool secondhand beats buying a cheap one new, since precision and safety both depend on it.
Wear safety glasses and a dust mask, and add hearing protection for loud saws. Check scrap for nails and staples before cutting, because hidden metal chips blades and throws debris.
Creative Ideas for Scrap Wood
Mixing species is the easiest way to get contrast without paint. Pair a pale wood like pine with something darker, and the grain differences do the design work.
Vary board sizes within a piece, too. Narrow strips beside wide planks create rhythm that matching pieces never would.
Metal adds texture that wood alone can’t. Reclaimed hardware, brackets or sheet scraps can serve as handles, accents or inlays.
When you’re stuck, look at nature for color pairings and patterns, or browse design magazines and online forums for shapes worth borrowing.
Frequently Asked Questions
What is it called when you make art out of wood?
It’s usually called wood art or woodcraft.
Pieces made from leftovers, like painted birdhouses, mosaics or cutout shapes, fall under that same label. Offcuts bring odd species, clashing tones and weathered faces, so no 2 pieces end up looking alike.
Does Lowe’s have free wood scraps?
Some stores may offer free scraps, so ask at your local store.
Policies vary by location. If you have a woodworking friend, their offcut bin is another free source, and small projects like birdhouses use so little lumber that offcuts cover the whole build.






