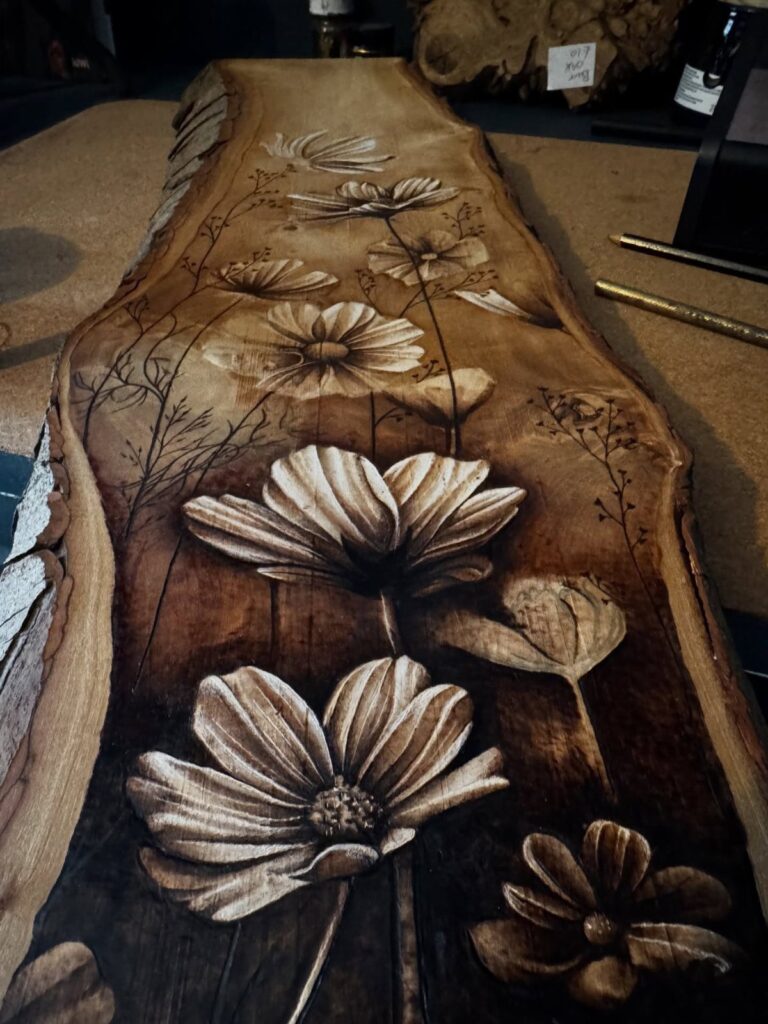
Wood burn designs range from quick Zig-Zag borders and Thin Outlining that fit in an afternoon to Packed Dots and Mandala Patterns that can take a full evening, and the skill you already have decides where to start.
If your hand shakes, pick Random Curls and Swirls or Dark Fill, which hide wobbles; if your lines are steady, try Thin Outlining or Calligraphy Style Lining.
Whatever you choose, practice the stroke on a scrap board first, since pressure and how long the tip sits in one spot set every shade.
1. Hair Strokes
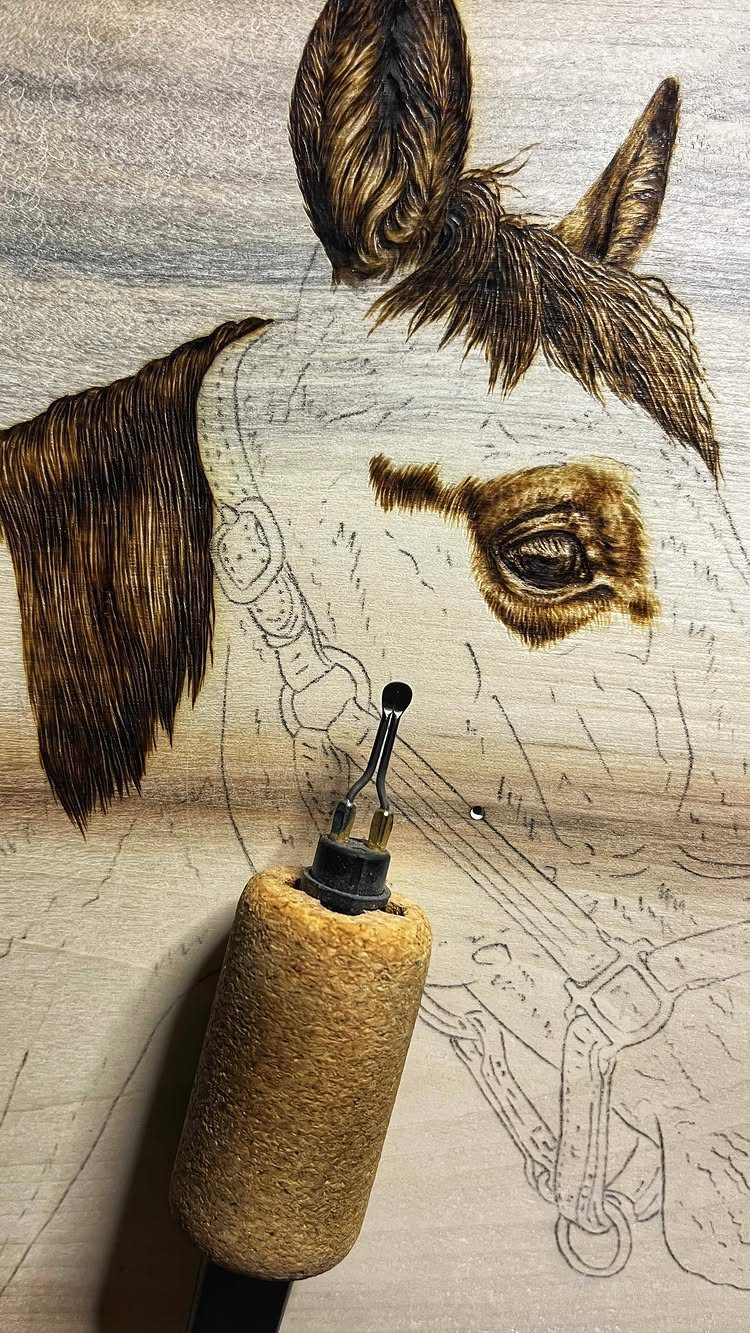
Fur and hair read as texture when the burn follows the direction the hair grows. Short, quick flicks of the pen, lifted at the end of each stroke, taper into fine points that look like individual hairs.
Beginners do well on an animal head because mistakes hide in the layering. Keep the strokes light first, then go back over the shadowed areas to build depth.
Practice a row of curved flicks on scrap wood before touching the real piece.
2. Mandala Patterns
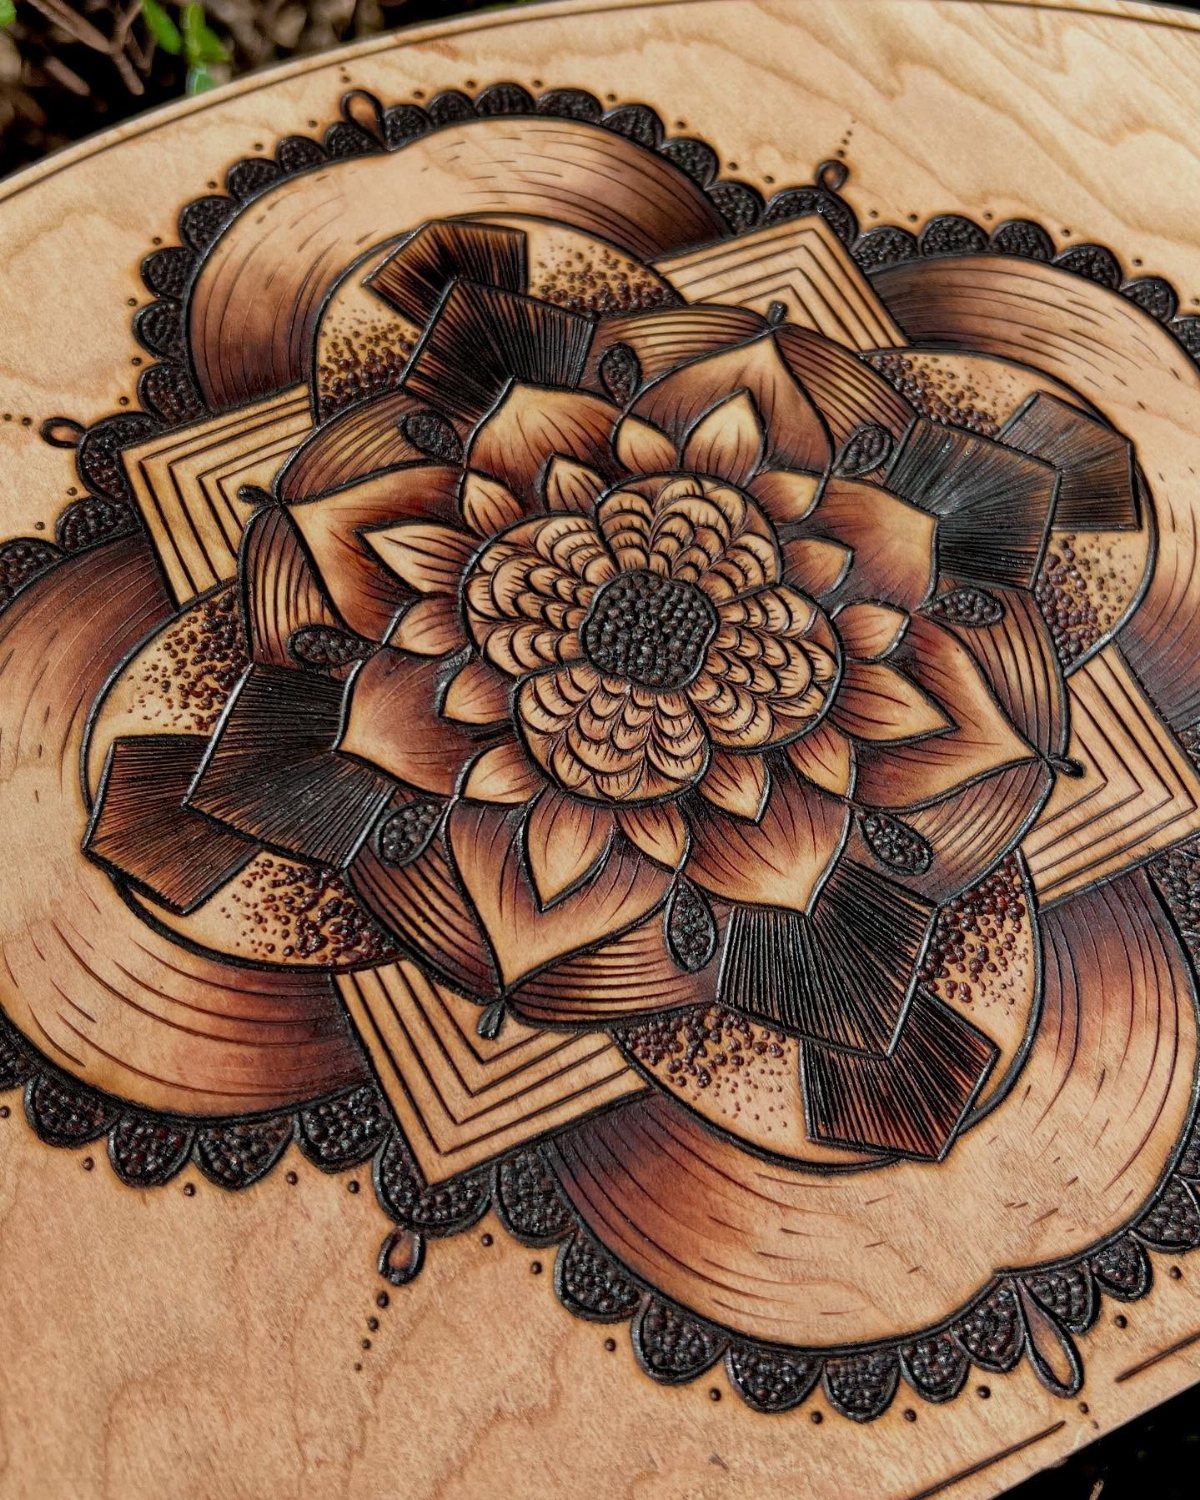
Mandalas reward patience and a steady hand: repeat one small petal shape around a center point, and every line has to land close to its twin for the pattern to look deliberate.
Light wood suits them well, since fine detail and shading stay easy to read.
Start with a pencil grid of lines through the center, then burn from the middle outward so your hand never smudges finished work.
Add shading to a few petals only; I find a mandala looks richer with contrast than with every ring filled.
3. Thin Outlining
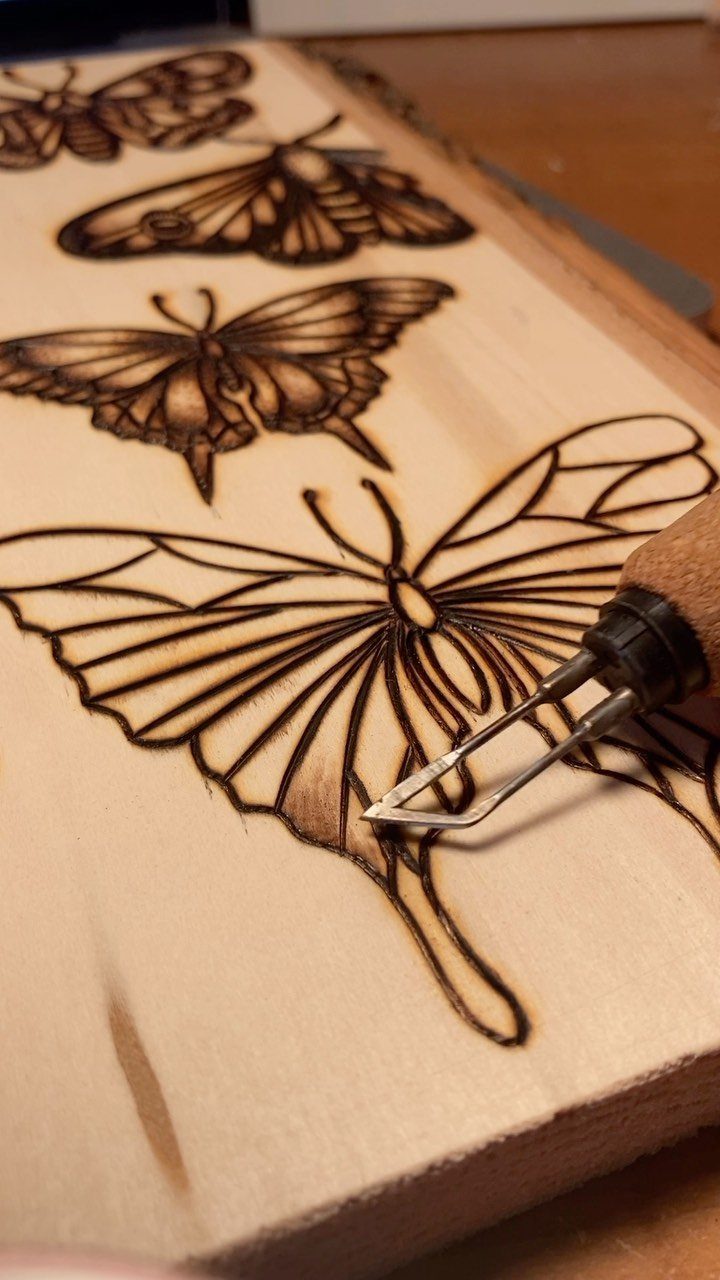
A thin outline is the simplest way to make a drawing look finished. Trace a pencil sketch with a fine tip, moving slowly and steadily, and keep the line the same weight all the way around.
Butterflies are a good first shape because the curves are gentle and the wings repeat. Rushing makes lines wobble and thicken, so slow down on corners.
Outlines alone can carry a whole piece, and they leave you free to add fill or shading later.
4. Packed Dots
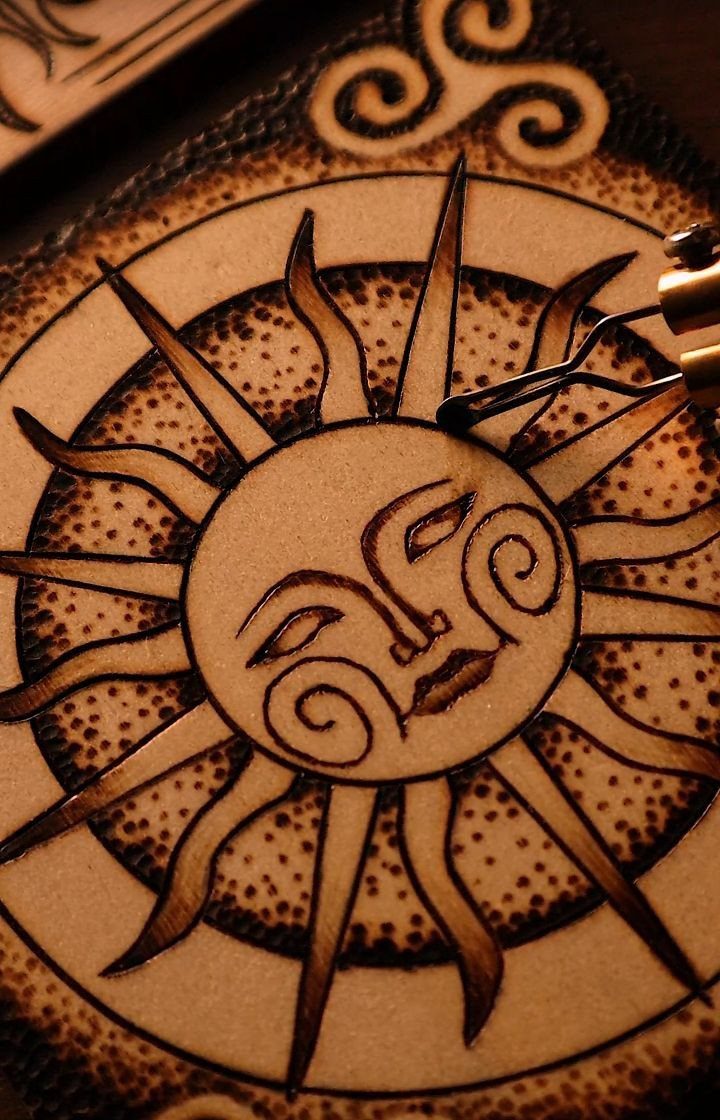
Dots turn flat shapes into something with depth. Press the tip down, lift straight up, and repeat, placing them close together where you want shadow and spreading them apart where you want light.
Stippling is slow, and that is its cost; a small sun face can take a full evening. The upside is control, since each dot is tiny and hard to ruin.
Keep each touch the same length of time so the dots stay a consistent size.
5. Random Curls and Swirls
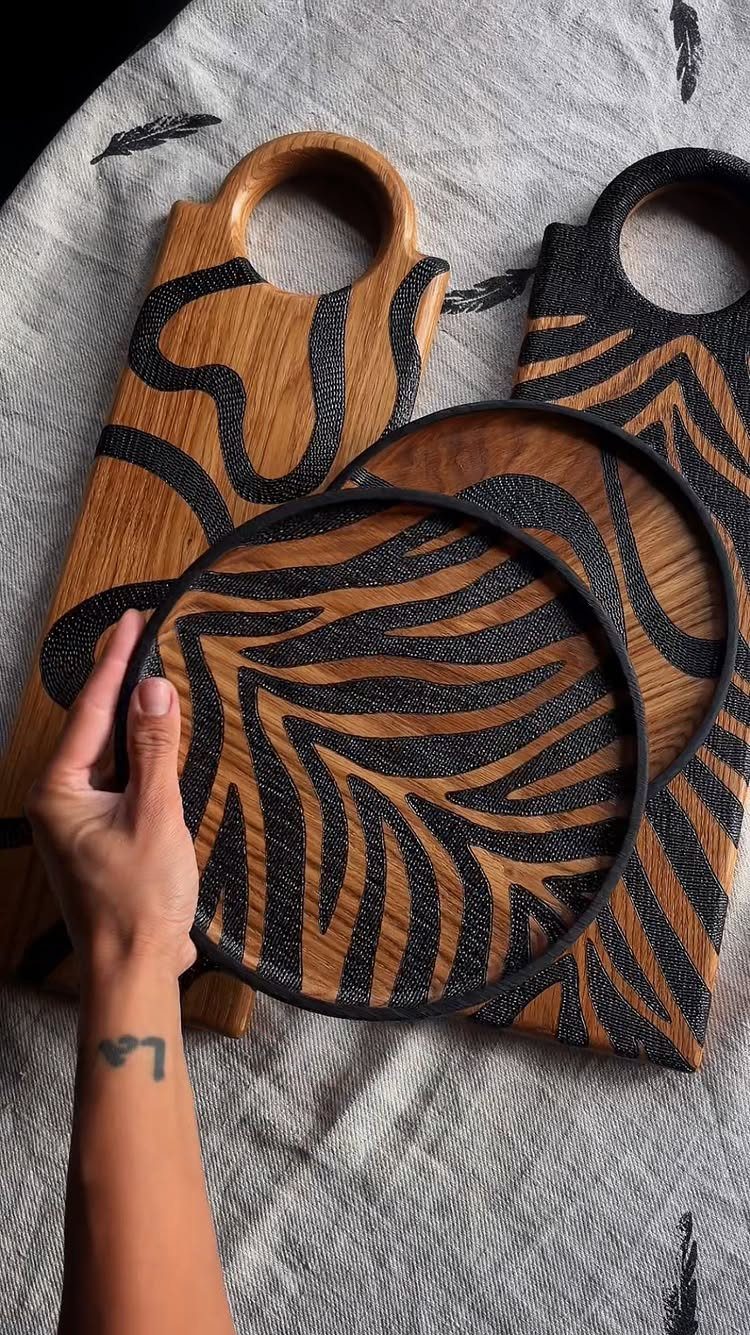
Loose curls and swirls are the most forgiving wood burning pattern I know, because nothing has to match and a wobbly line just reads as part of the design.
Let the pen wander in rounded, flowing lines, and fill gaps with smaller curls rather than planning a layout.
They suit platters and cutting boards well, since a big open surface can take an organic pattern without it feeling crowded. Vary the spacing so some areas stay bare.
A pencil guide is optional; I prefer to skip it and keep the lines relaxed.
6. Zig-Zag
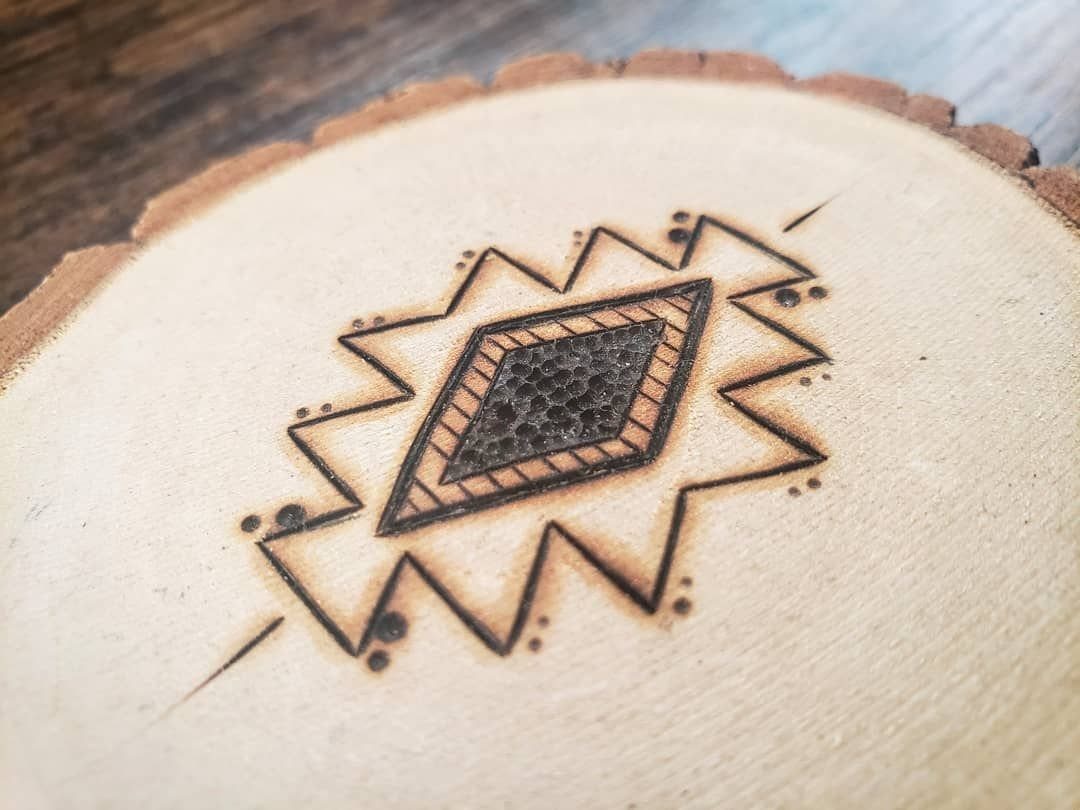
Zig-zags are my go-to filler for borders and empty gaps. A straight row of sharp, even angles frames a central shape and makes a wood slice look finished.
Mark two light pencil guidelines and burn between them, so the peaks stay level. Keep your speed steady, because slowing at each point leaves darker dots at the corners.
A bold zig-zag pairs well with a stippled center: the hard, straight lines sit against the soft shading of the dots, and each makes the other look sharper.
7. Dark Fill
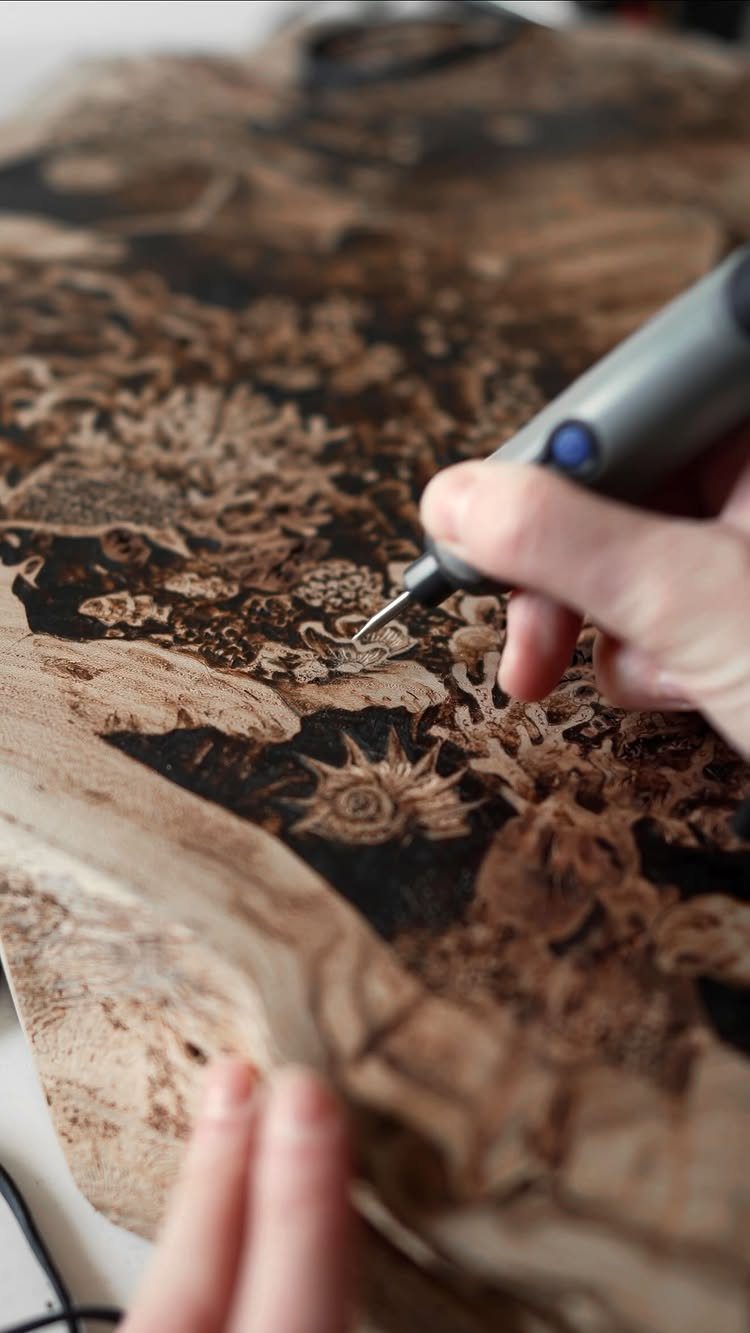
Dark fill means burning a shape solid until no bare wood shows inside it. The contrast is the appeal: a filled petal or leaf sits hard against the pale grain and stands out from a distance.
Work in small, overlapping passes instead of one slow, heavy press. Burn the edges first, then pack the inside, and let the tip move in a steady back-and-forth so the color stays even.
Patience is the cost, since a large shape takes a while. I would start with a leaf-sized area.
8. Calligraphy Style Lining
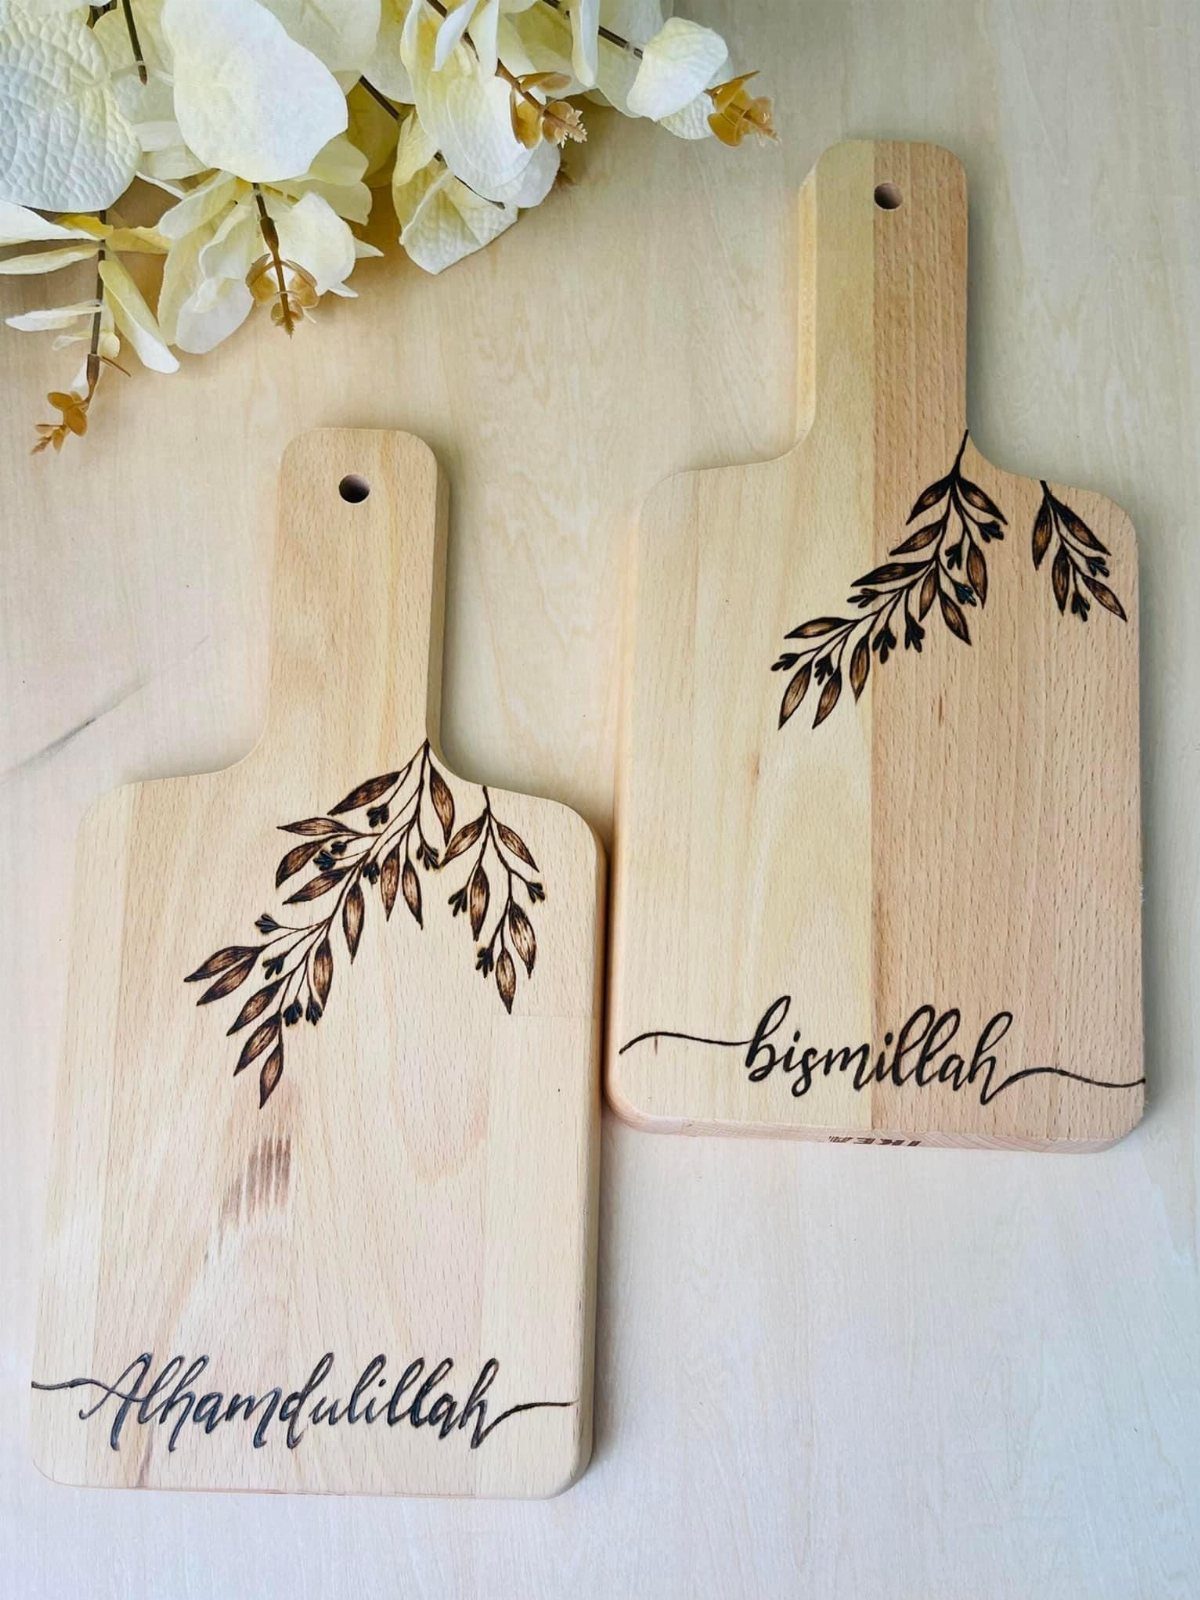
Cursive lettering turns a plain board into a gift, and a few burned branches beside the words make it feel finished. Light wood such as these cutting boards gives the thin, flowing strokes plenty of contrast.
Write the words in pencil first and adjust the spacing before any heat touches the surface. Then burn slowly, because a cursive line only looks graceful when the pressure stays even through the curves.
Let the thin upstrokes stay light and press a little more on the downstrokes. Practice the word on scrap wood once.
9. Floral Patterns
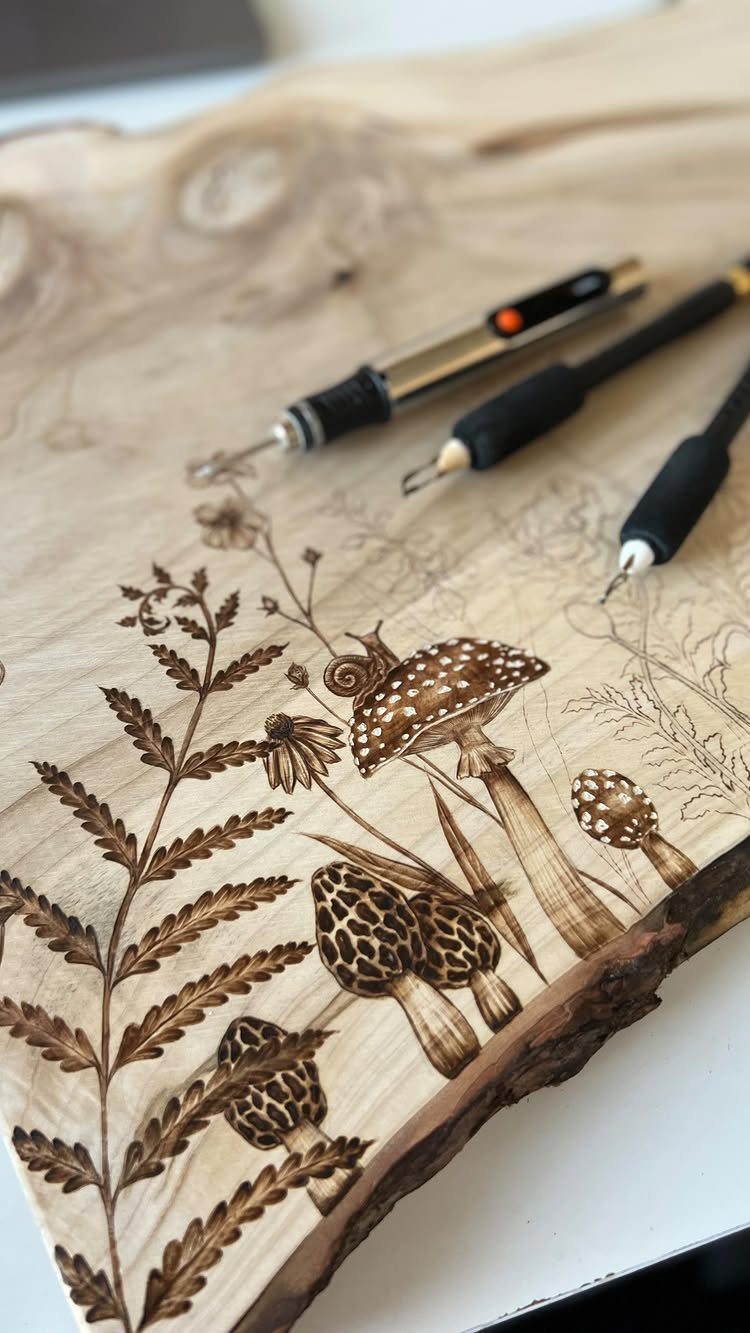
Ferns, mushrooms and flowers suit wood burning because their shapes are simple and the grain adds a natural backdrop. Sketch the main stems in pencil, then burn the outlines before adding any detail.
Keep the leaves loose; fern fronds are just a spine with short repeated strokes along each side. Save shading for a few spots, such as under a mushroom cap, so the drawing has depth without looking heavy.
A fine tip handles the small details. I would pick a slab with a smooth, even surface for a first try.
10. Tree Patterns
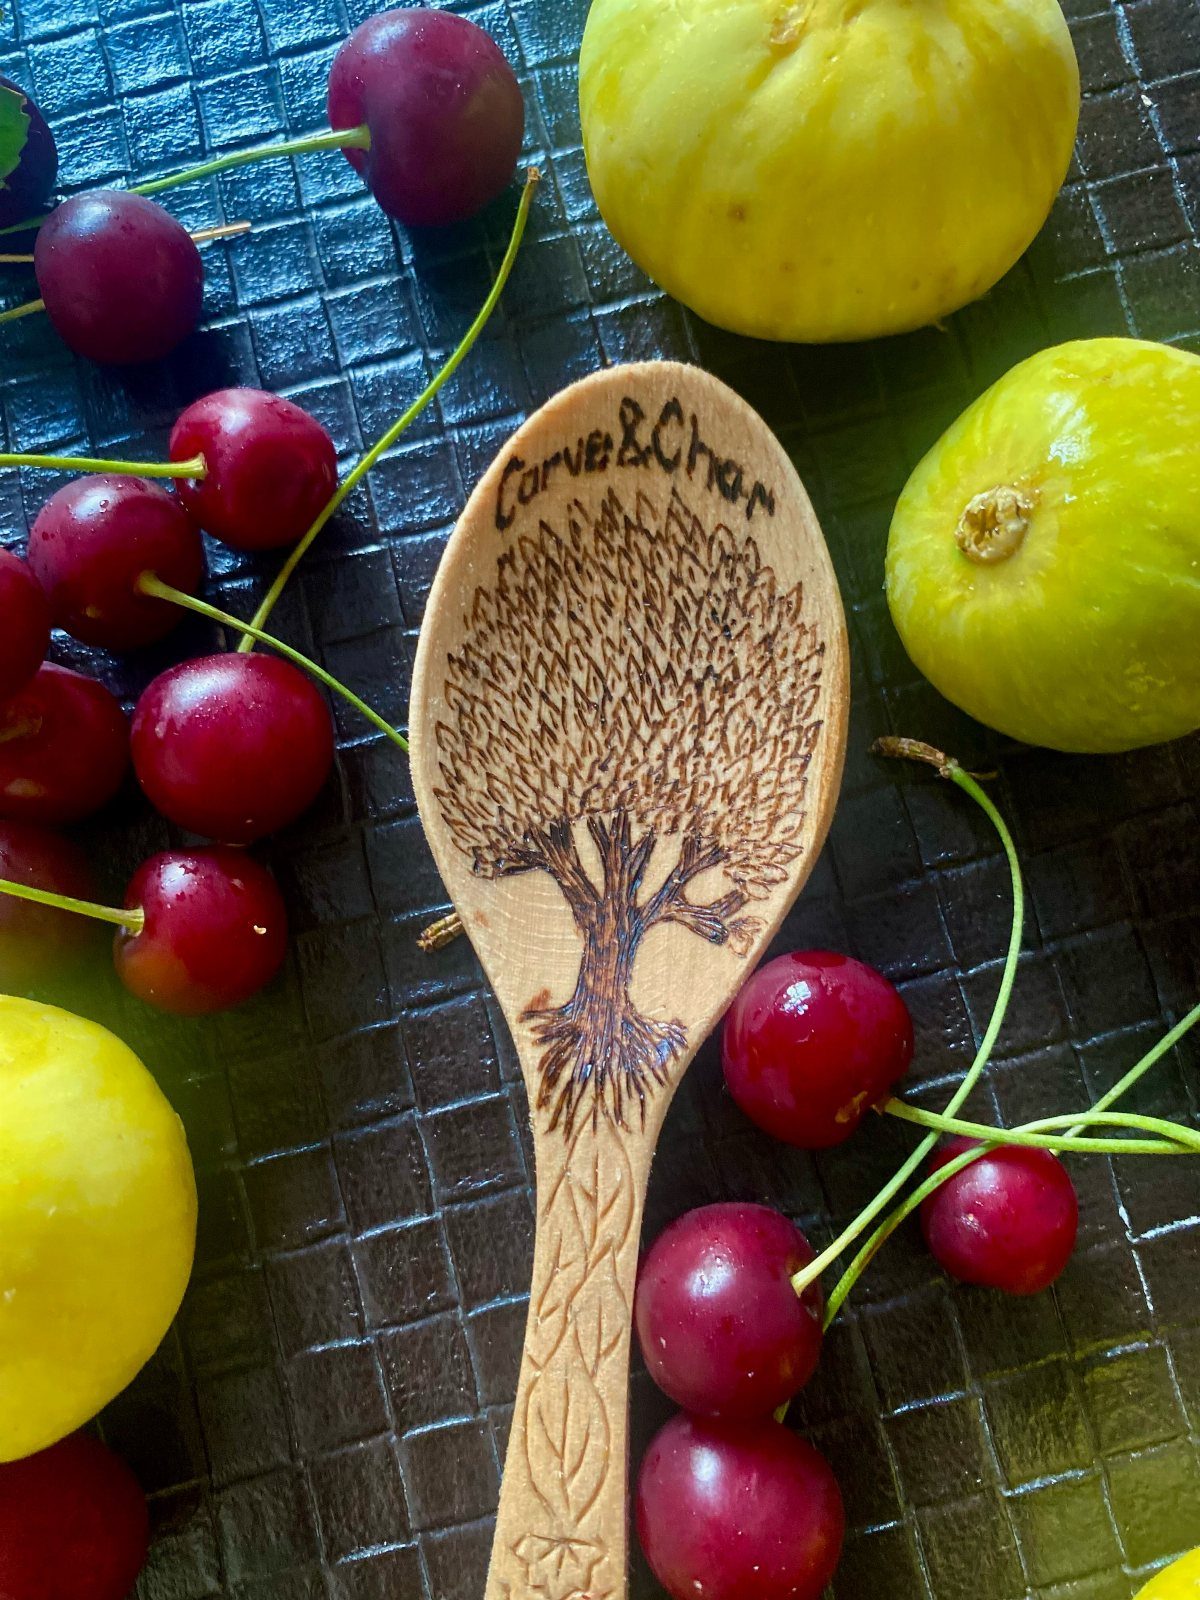
A tree is a forgiving subject: a trunk, a few branches and some leaf marks, and the design reads at once. The slim, curved surface of a spoon handle suits a tall, narrow tree.
Burn the trunk first, then let the branches split into thinner lines as they climb. Short, light dabs or small leaf shapes fill out the crown.
Sketch lightly in pencil, since a curved surface makes it hard to judge proportions by eye. Adding a short word beneath the tree, as on this spoon, gives the piece a maker’s-mark feel.
11. Animal Silhouettes
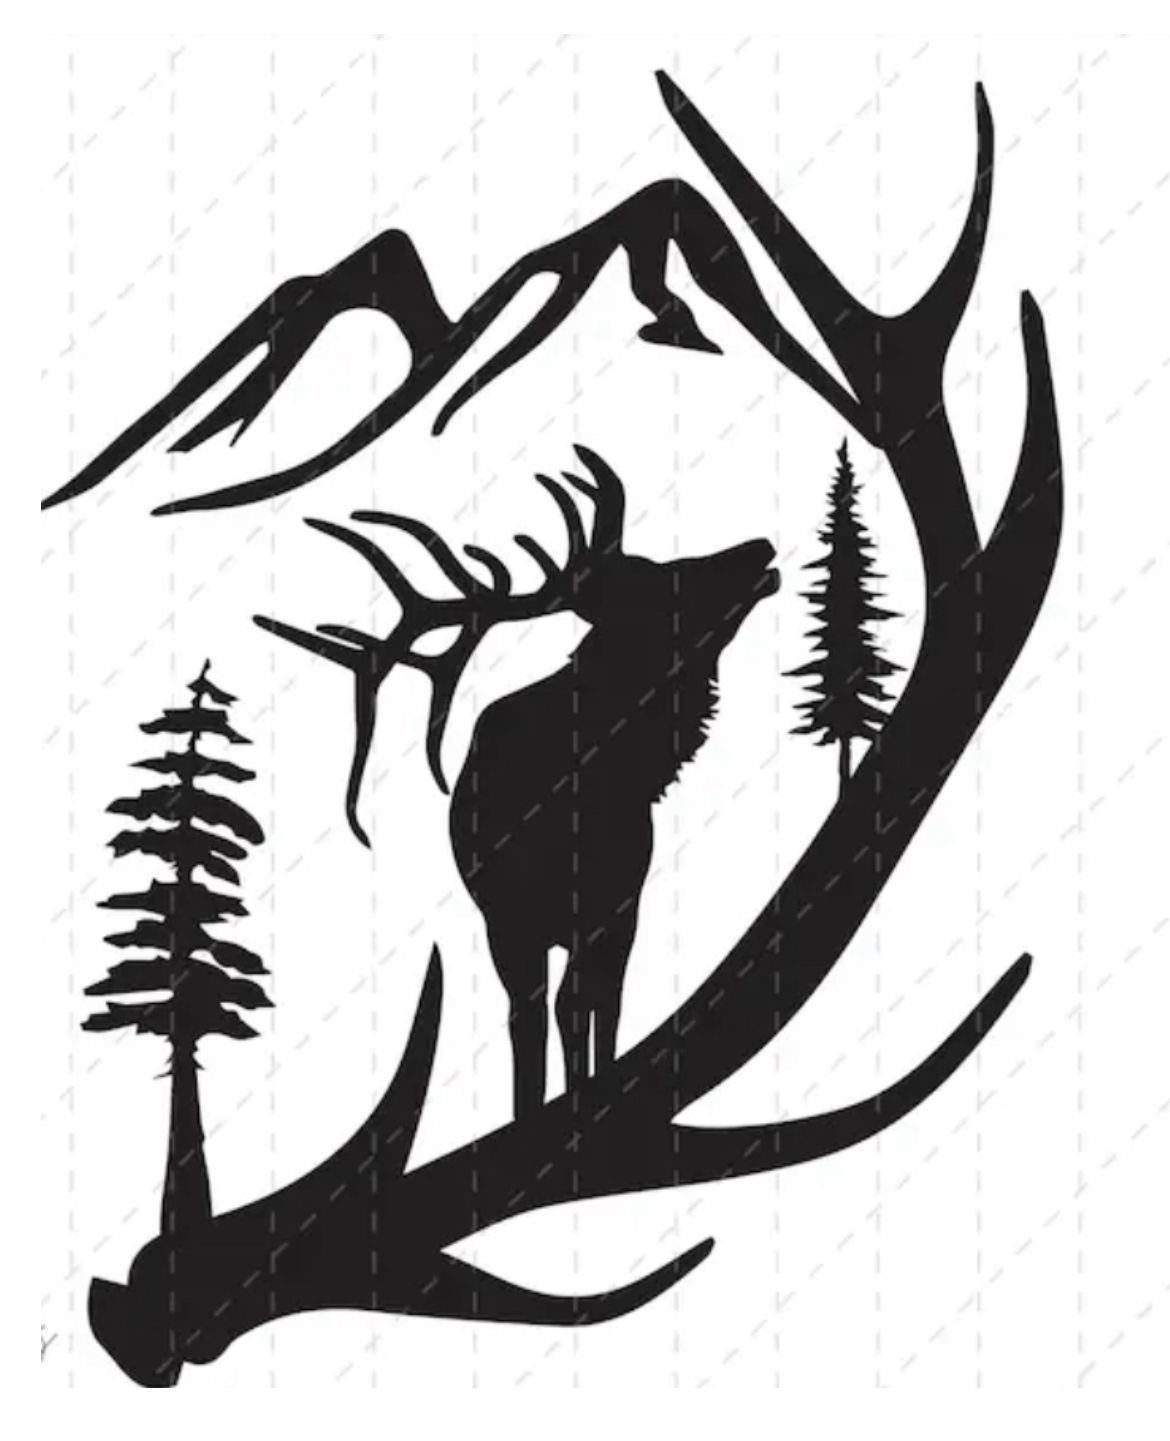
A silhouette is the easiest way to get a bold animal from a beginner’s hand, because you burn one solid shape and skip the interior detail. Antlers and a clear profile make a stag a strong choice.
Trace or draw the outline in pencil, burn the edge carefully, then fill the inside with dark, even strokes. Add pine trees and mountains as simple solid shapes to frame the animal.
Keep the outline crisp, since the whole design depends on it. Pick a pose with a clear profile and few thin parts.
12. Simple Wood Burning Projects
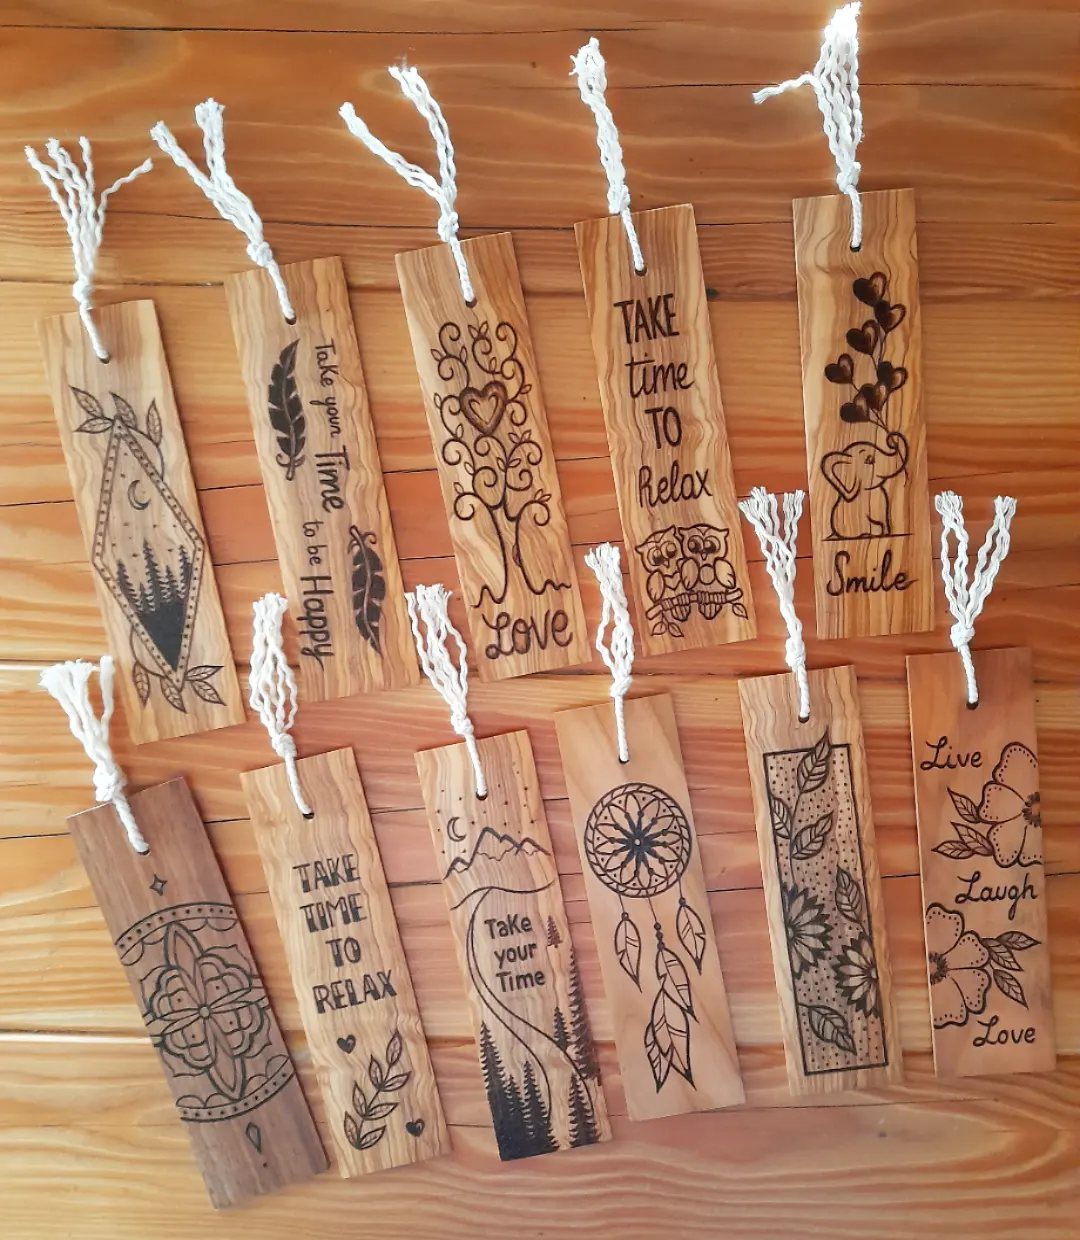
Bookmarks are about the best first project I can suggest: small, flat and quick to finish in an afternoon. A short phrase like "Smile" or a tiny simple doodle is enough.
Cut or buy thin wood strips, sand them smooth, and pencil your design before burning. Drill or punch a small hole at the top and thread a string through it.
Since each one is tiny, a slip costs you very little, and a batch makes an easy gift. Try several different designs on one set.
Tips for Beginners
Pick one stroke and repeat it until it feels automatic.
A burn’s size, shade and depth all come from two things: how hard you press and how long the tip sits in one spot, so spend a few minutes on a scrap board before touching your project.
Match the tip to the job. A fine tip draws detail lines, a wider edged tip lays down shading as lines packed close together, and a larger round tip suits filling a space solid.
A calligraphy tip gives you the thick and thin line work that cursive needs.
Cross-hatching is worth adding to your practice rows. Sets of parallel lines crossing at an angle build shading without any smudging.
If drawing freehand makes you nervous, a free printable stencil pattern gets you started with a ready-made design.
Materials for Wood Burning
Sand the surface smooth before the burner is even warm. Grain ridges and rough patches catch the tip and make lines skip, so a smooth board pays off fast.
Wood slices, sticks and flat boards all take a burn well, and each gives a different feel. Slices suit small botanical or text designs, while boards give you room for lettering.
Scorch paint is a different route if you want less fuss. You brush or sponge it on, heat it, and the paint darkens.
It is sold as permanent, waterproof and food-safe once burned, and it works with brushes, sponges and markers. Mica powder adds a holographic effect.
I would still learn on plain wood first, since that teaches heat control.
Transferring Designs
Graphite paper is the easiest way to move a design onto wood. Tape the printed line art over the board with the graphite sheet underneath, then trace over the lines with a pencil, pressing firmly enough to leave a mark.
Lift a corner to check before you untape anything. Faint lines are better than heavy ones, since a sponge or eraser can clean up stray graphite once the burn is done.
Keep the print taped so it cannot slide, because a shifted tracing leaves doubled lines.
If drawing is new to you, practice sketching simple shapes first. A clean transfer only helps if you can follow the lines steadily with the burner.
Frequently Asked Questions
What is a wood burning hobby called?
It’s called pyrography, though most people just say wood burning. Wood burning, also called pyrography, means drawing into the surface with a hot pen; pressure and dwell time set how dark and deep each mark turns out.
What are some tips and tricks for wood burning?
Choose a single stroke and practice it over and over on scrap wood until your hand does it without thinking.
Each tip has its own job: a fine point for thin detail lines, a wide edged tip for shading, and a big round tip for solid filled areas.
Smooth the board with sandpaper before you start, because rough spots snag the tip and cause skipped lines. Starting with simple designs keeps early mistakes cheap.
What’s the best wood for wood burning art?
Light, fine-grained woods such as basswood and birch are the usual picks. Pale wood gives fine lines and shading plenty of contrast, and a smooth, sanded surface lets the tip glide.
How do I transfer a design onto wood for burning?
Use graphite paper. Tape every side of the print so it stays put, and peek under one corner to confirm the lines transferred before you pull it off.
Faint lines are better than heavy ones, since stray graphite can be cleaned off with a sponge or eraser afterward.
What is the easiest wood burning design for a beginner?
Curls and swirls forgive the most mistakes, as nothing needs to line up and a shaky stroke simply looks like part of the pattern.
Solid silhouettes of animals are another easy pick: you fill in a single shape and never worry about interior detail.
How do I make shading with a wood burner?
Shading comes from pressure and time. Light, quick passes give pale tones, while more pressure or a longer hold on one spot gives darker ones.
Pack lines tightly with a wide edged tip to build shading, and try cross-hatching, where parallel lines overlap at an angle, to deepen tone without smudges. Dots packed close together also read as shadow.






