The projects here run from a six-bottle beer caddy built out of scrap boards to a mahogany entry table where one bad cut in expensive lumber stings.
A Cutting Board or Desk Organizer is a plain rectangle with simple joints, and it forgives mistakes that a hinge on the Folding Workbench or the taper on the Shaker Side Table will not, so pick the build that adds just 1 new skill to the ones you already have.
1. Cutting Boards
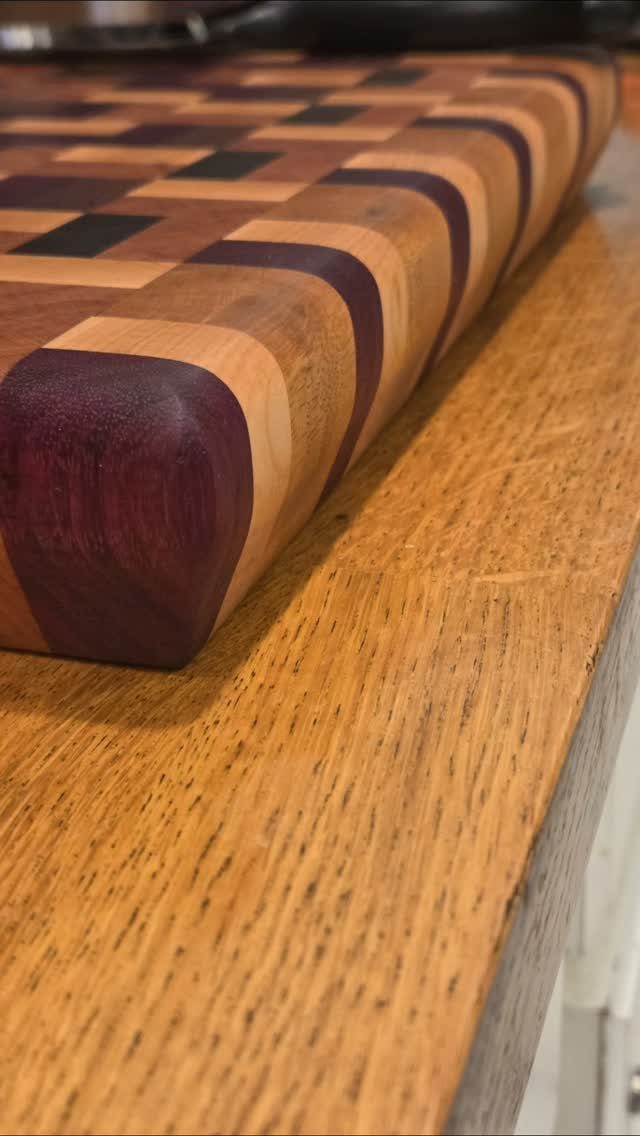
A checkerboard end-grain board earns its place on the counter through contrast: pairing a light wood with a dark one makes the pattern read from across the room.
An edge-grain cutting board is a forgiving first project, though an end-grain board is a different job.
For an edge-grain board the glue-up is a single pass, the shape is a rectangle, and the finished board is a kitchen tool you will reach for daily.
I would pick 2 woods that differ clearly in color, since similar tones blur the squares once the board is sanded.
2. Desk Organizers
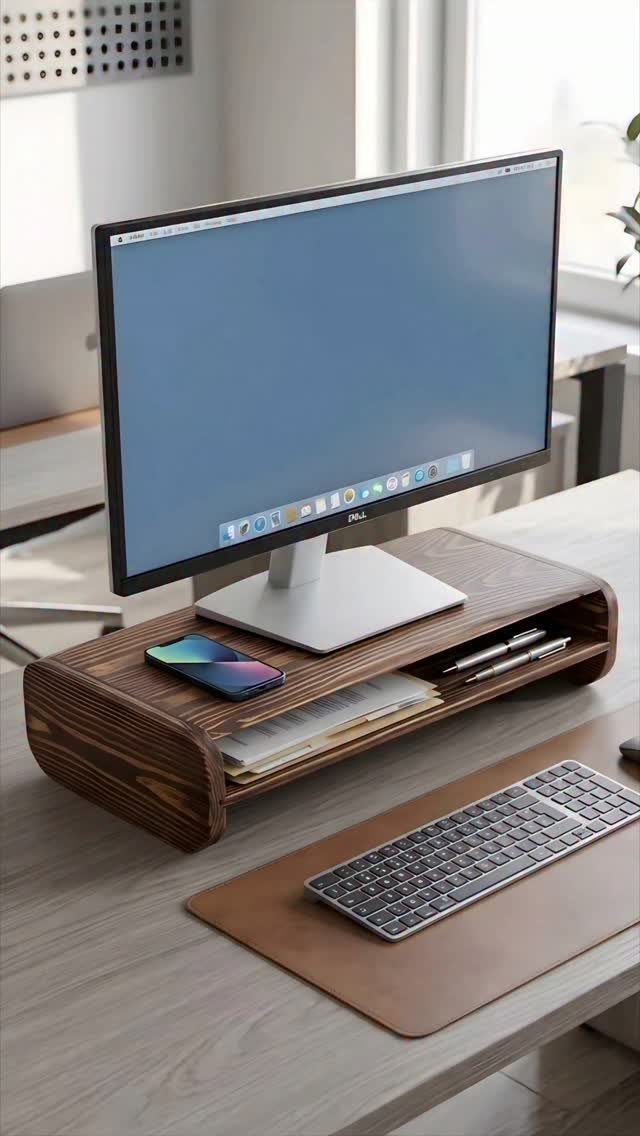
A monitor stand with slots built into it solves two desk problems in one piece: it lifts the screen and gives a phone, loose papers and pens a permanent spot.
For a beginner, the appeal is that it is basically a box with dividers, which basic tools can handle in an afternoon.
Size the slots to what you actually carry, and check your monitor base against the plan’s footprint first so the finished organizer fits under it. A stand that wobbles under a screen is worse than no stand.
3. Birdhouses
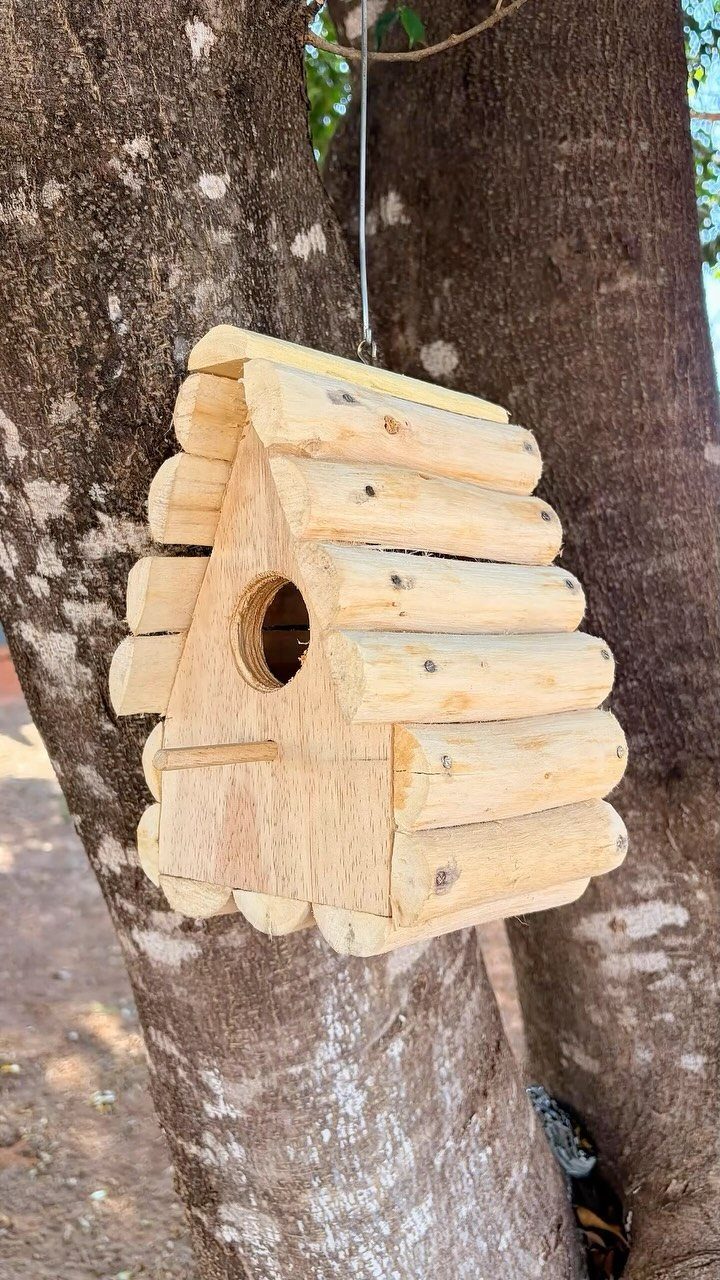
Small logs stacked into walls give a birdhouse its rustic look, and the round, bark-edged pieces hide a lot of rough cutting.
That forgiveness makes it a good pick for newer makers. Hang a birdhouse from a sturdy branch or mount it on a bracket fixed to a post, and keep it clear of anything a squirrel can leap from.
A plain wooden version with flat boards is the tidier alternative if you prefer clean lines over a woodsy look.
4. Coat Racks
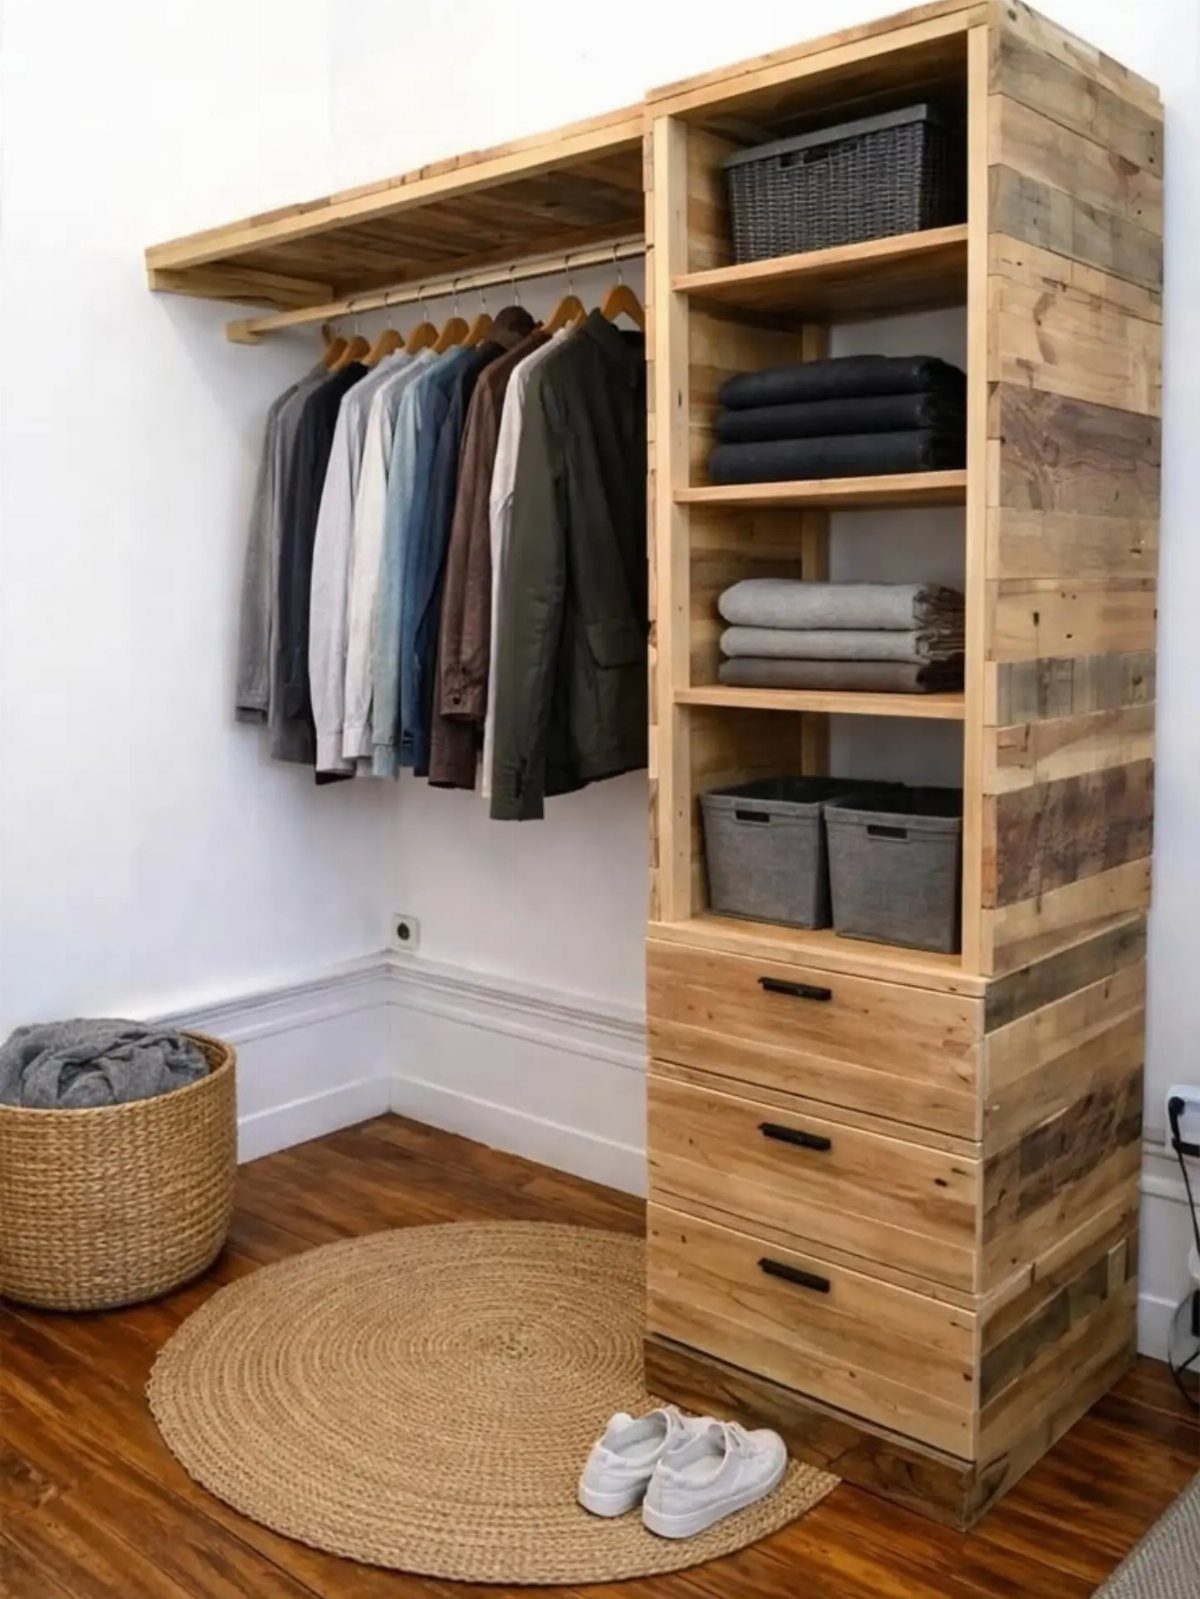
Pairing hooks with shelving and drawers turns an entryway wall into a full drop zone: coats hang up top, bins sit on the shelf, and small things disappear into drawers.
The drawers are the hardest part, so a beginner could build the rack and shelf first and add drawers later.
Anchor the whole unit to the wall studs, because a rack loaded with winter coats pulls forward more than you would expect.
5. Wine Racks
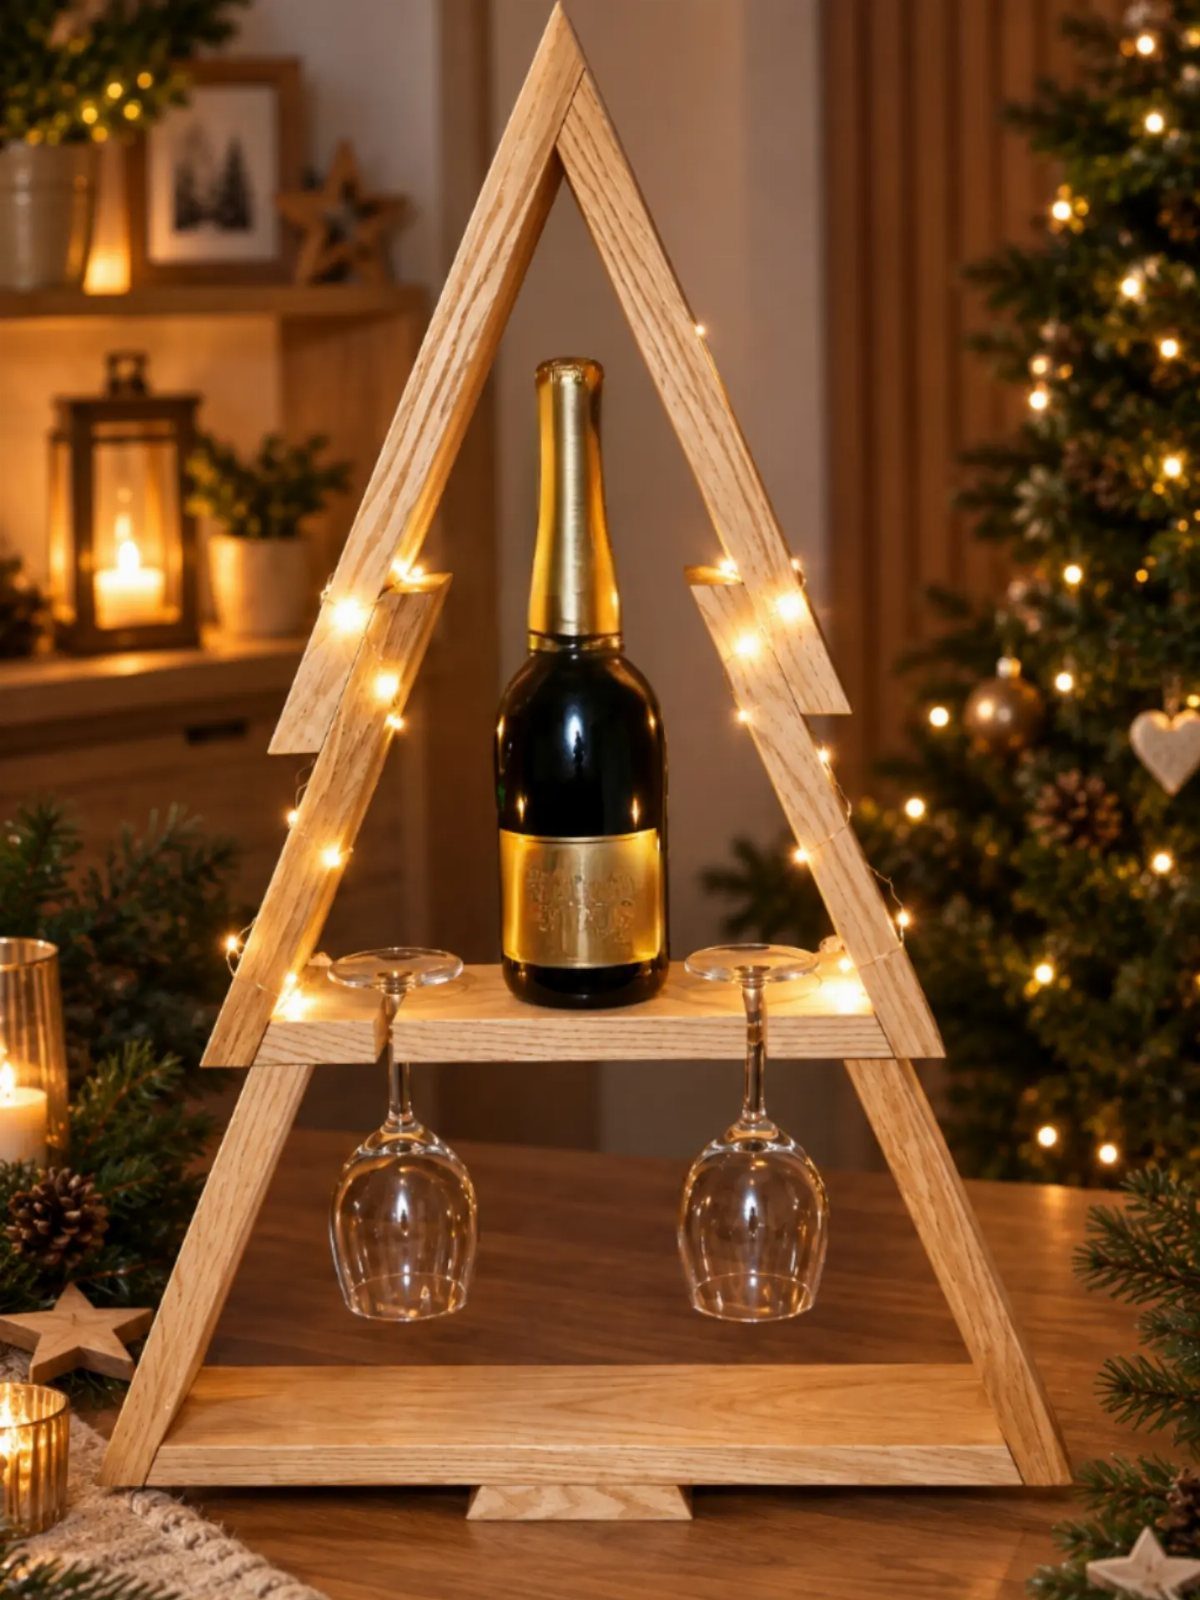
An A-frame wine rack is about as simple as wine storage gets: 2 angled sides, a few cross pieces, and a shape that stands without any hardware on the wall.
I like it as a tabletop piece, since it holds a bottle or 2 plus glasses and looks good with a string of lights around it.
Cut both sides from the same template so the angles match, or the bottles will lean and the whole frame will rock.
6. Planter Boxes
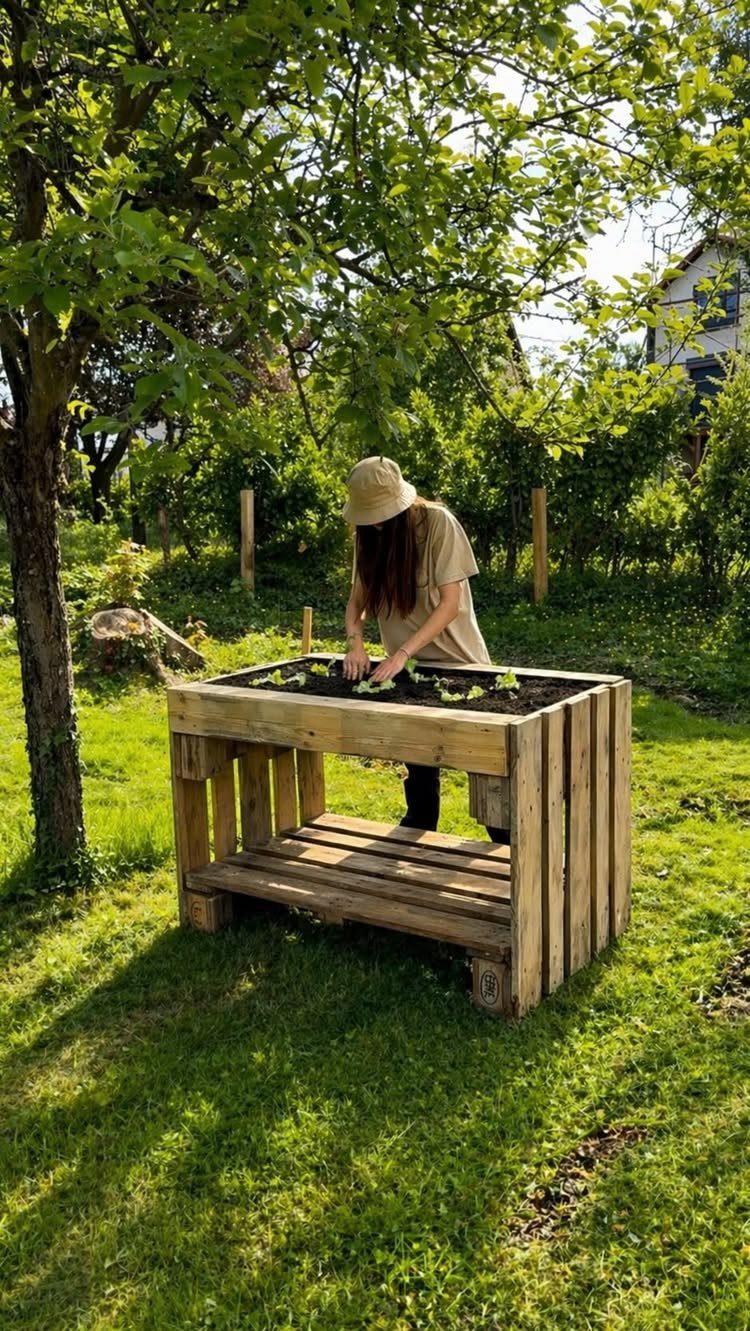
A raised planter box with a lower shelf gives you growing space at a comfortable height and a spot beneath for pots, tools or a watering can.
Standing at a box instead of kneeling is easier on the back, which is the real argument for building one this way.
Choose a sunny spot before you build, because a full box is heavy and hard to move. Wood that stays damp will wear out, so pick your lumber with that in mind.
7. DIY Beer Caddy
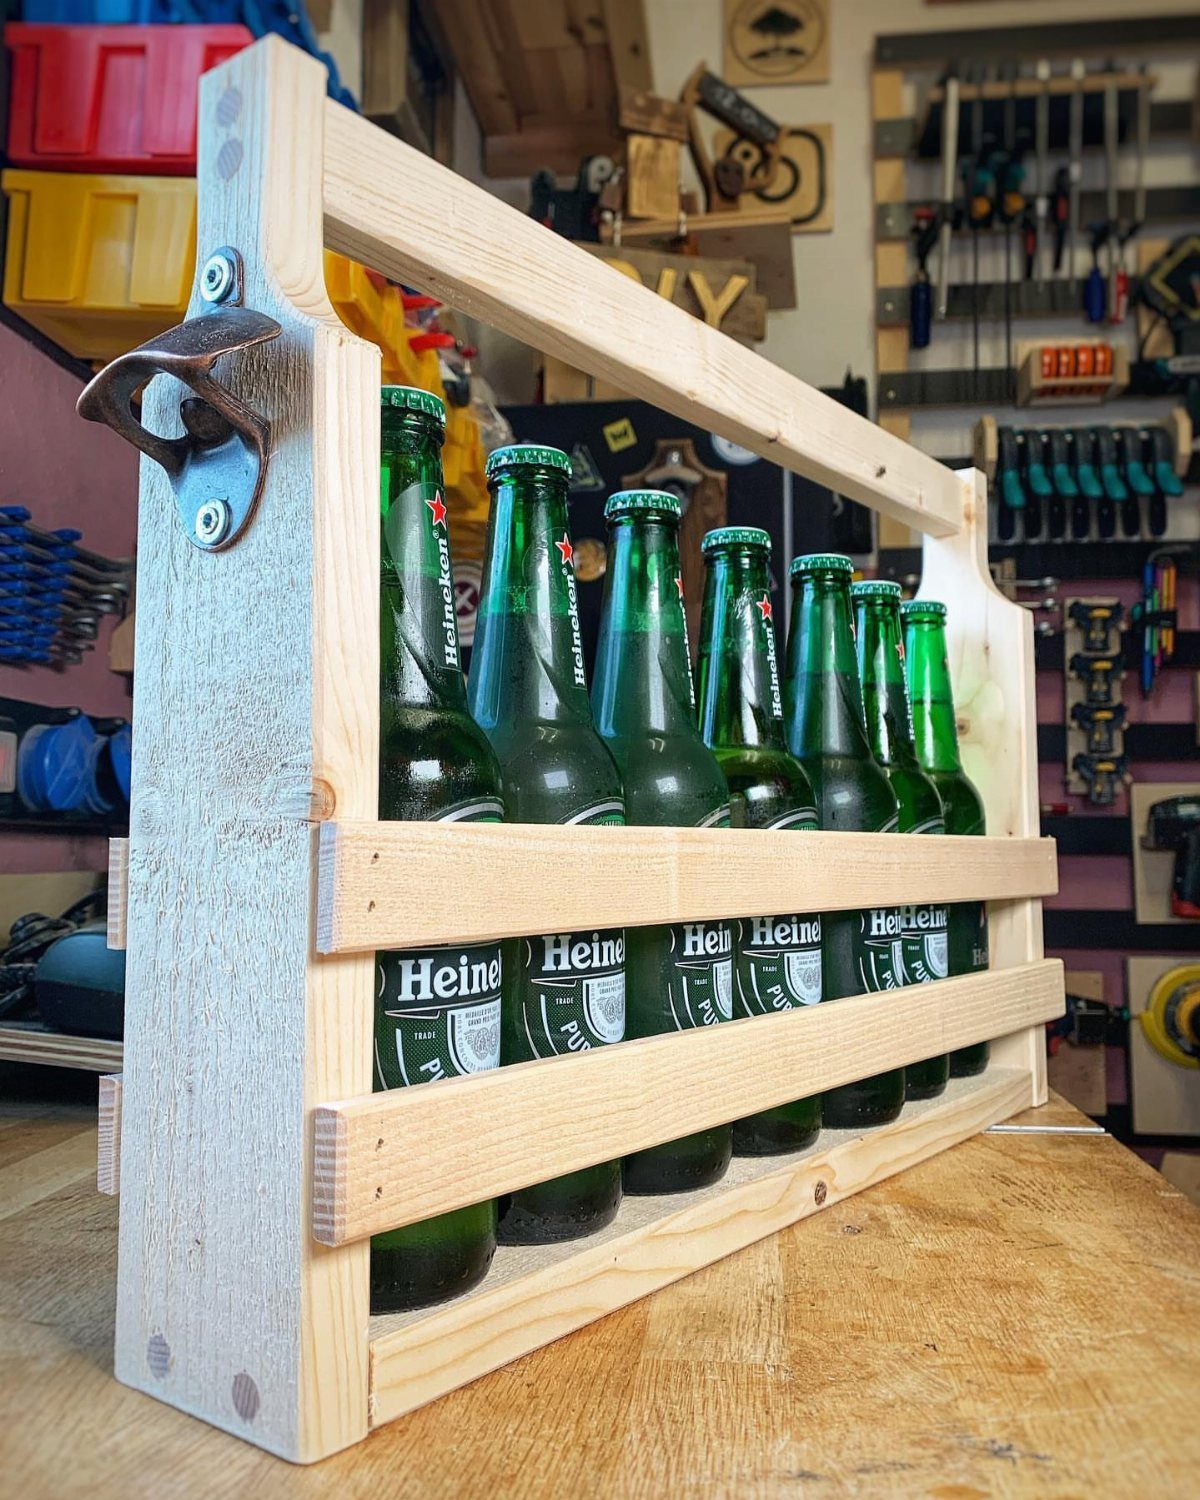
A six-bottle caddy with a center handle turns a round of beer into one trip from the kitchen to the patio.
Build the slots to fit the bottle, not the other way around. Measure a bottle’s base and set the dividers a little wider, so glass slides in and out without wedging.
A caddy this size is a small weekend build, and scrap boards from a bigger project will cover it. Sand the handle well, since it takes all the weight.
8. Easy Picnic Table
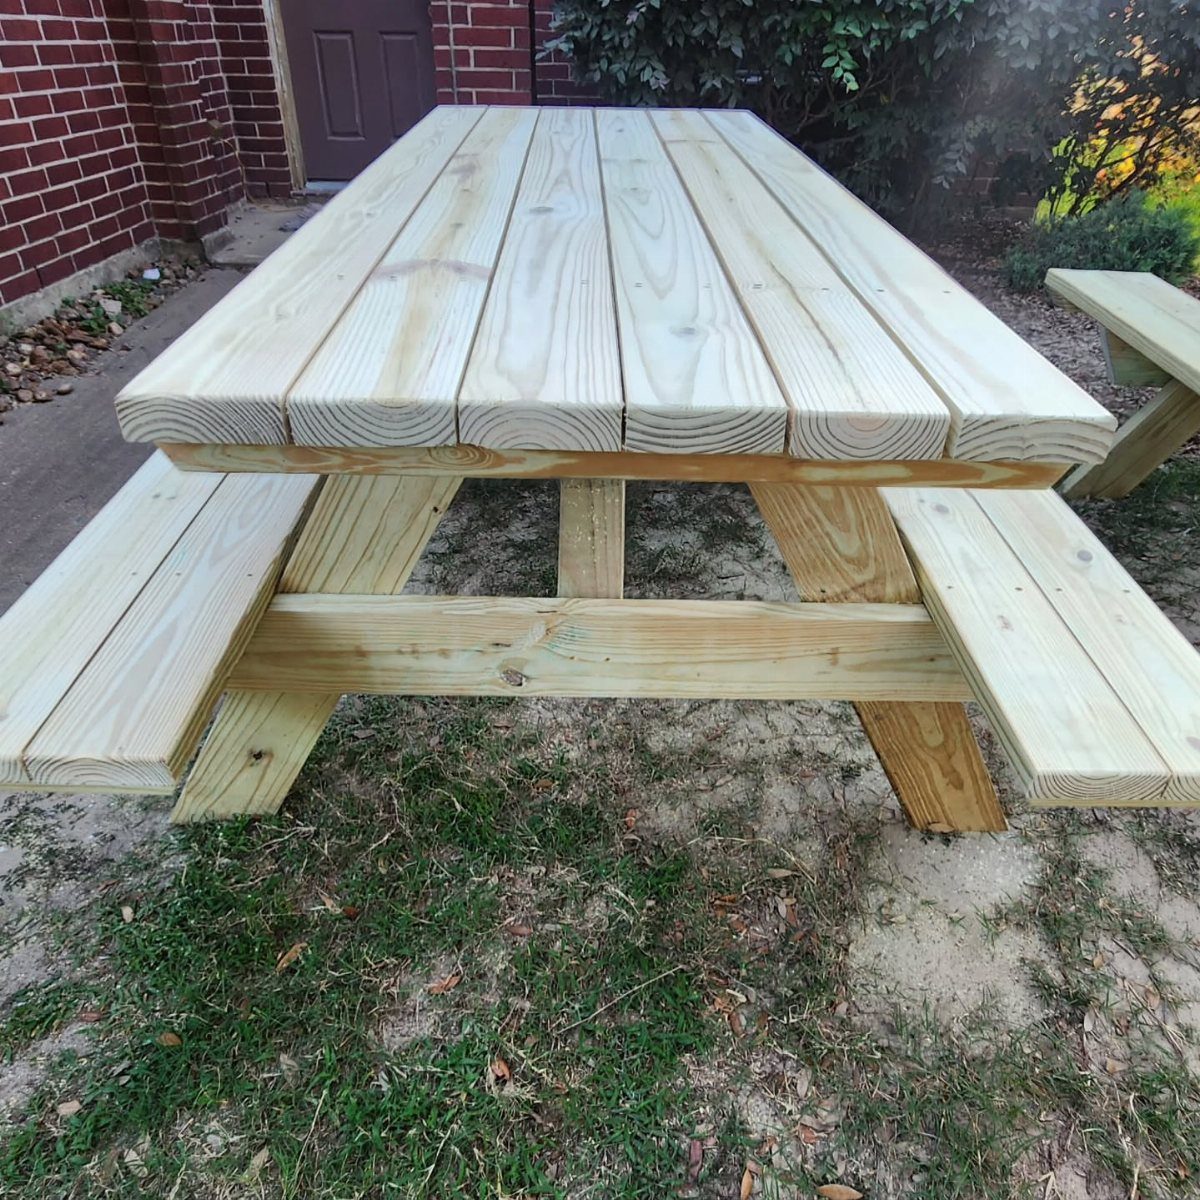
Benches attached to the table make a picnic table one solid unit, so nothing slides out of place on uneven grass.
For a first outdoor build, that single-piece design is the easy route: no separate seating to square up and match. Cut the matching legs and braces in pairs from one template so the table sits level.
Use screws made for outdoor lumber, and pick wood that handles weather. Bare boards left in the rain will gray and crack, so plan on a sealer.
9. Folding Workbench
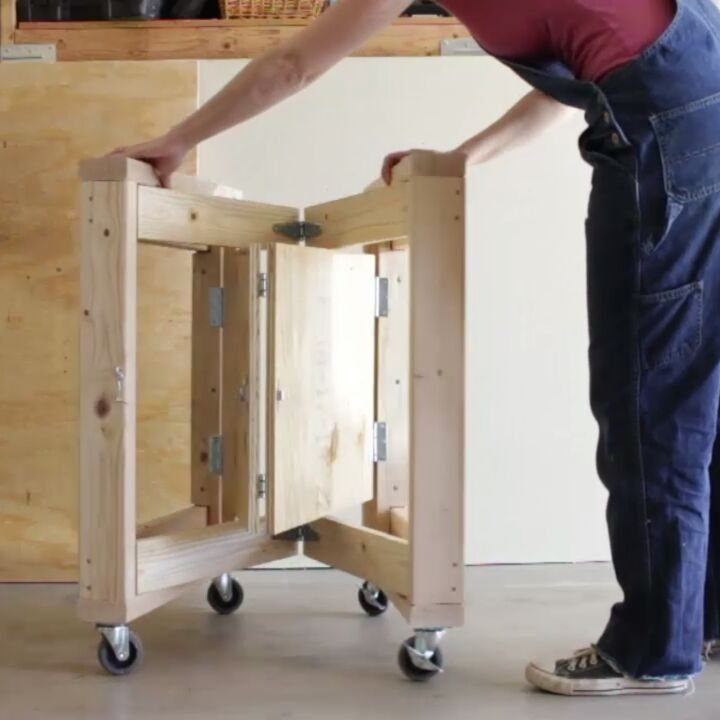
Casters plus a fold-down design give a workbench that rolls out when you need a surface and tucks against the wall when you don’t.
That suits anyone working in a garage or spare room with no space for a permanent bench. I would choose locking casters, because a bench that creeps while you saw or plane is a nuisance.
Check that the hinges and braces are solid before loading it, since a folding frame has more weak points than a fixed one. Test it with a heavy piece of lumber first.
10. Shaker Side Table
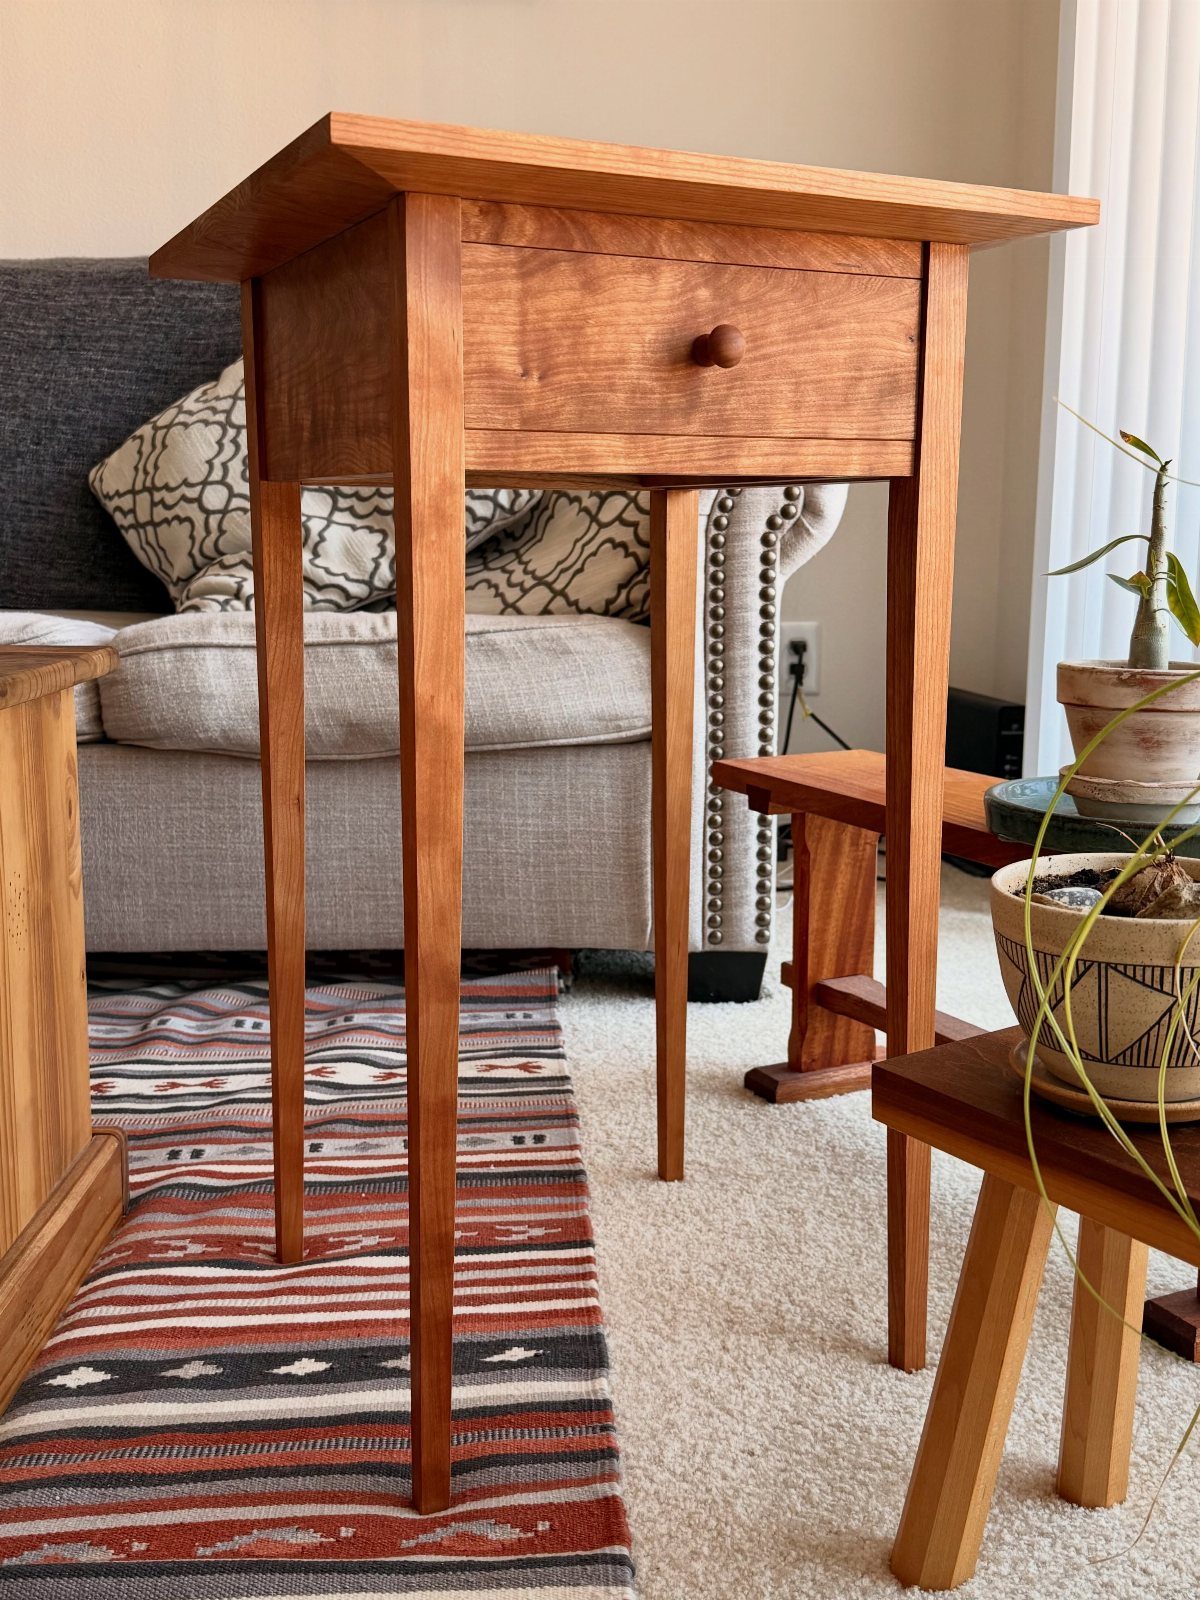
Tapered legs and a single drawer are what make a Shaker side table look so calm: no carving, no ornament, just clean lines.
Those same plain lines leave nowhere to hide mistakes, which is why it tests skills. The drawer must slide smoothly with even gaps, and the legs must taper identically.
I would practice the taper on scrap before cutting the real legs. Take your time fitting the drawer, because that step usually decides whether the table looks handmade in a good way or a sloppy one.
11. Whiskey Cabinet
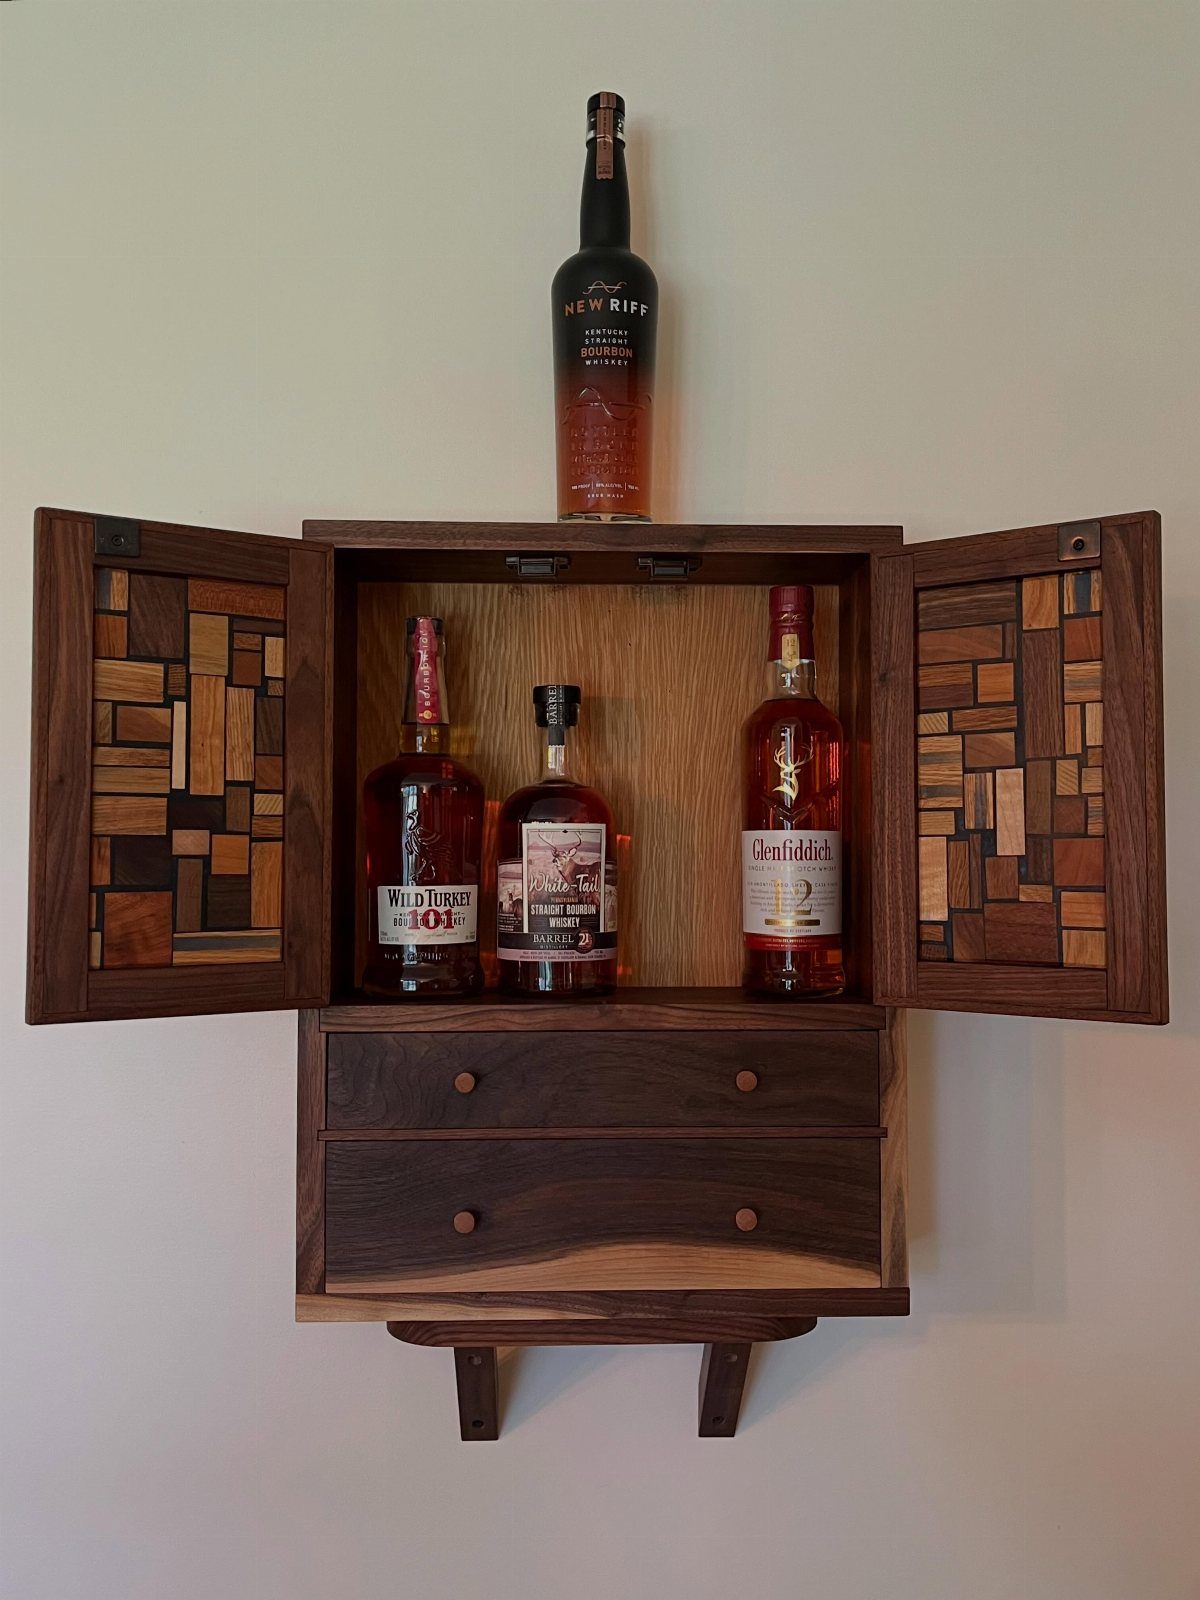
A wall-mounted cabinet with two doors and two drawers keeps bottles and glassware in one closed unit, and it works in a den, dining room or hallway.
The mosaic doors are the showpiece, but they take patience. Cut the small pieces from one board where you can, so grain and color stay consistent.
If that sounds like too much, plain flat doors give you the same cabinet in less time. Bottles are heavy, so anchor the cabinet into wall studs rather than drywall alone.
12. Mahogany Entry Table
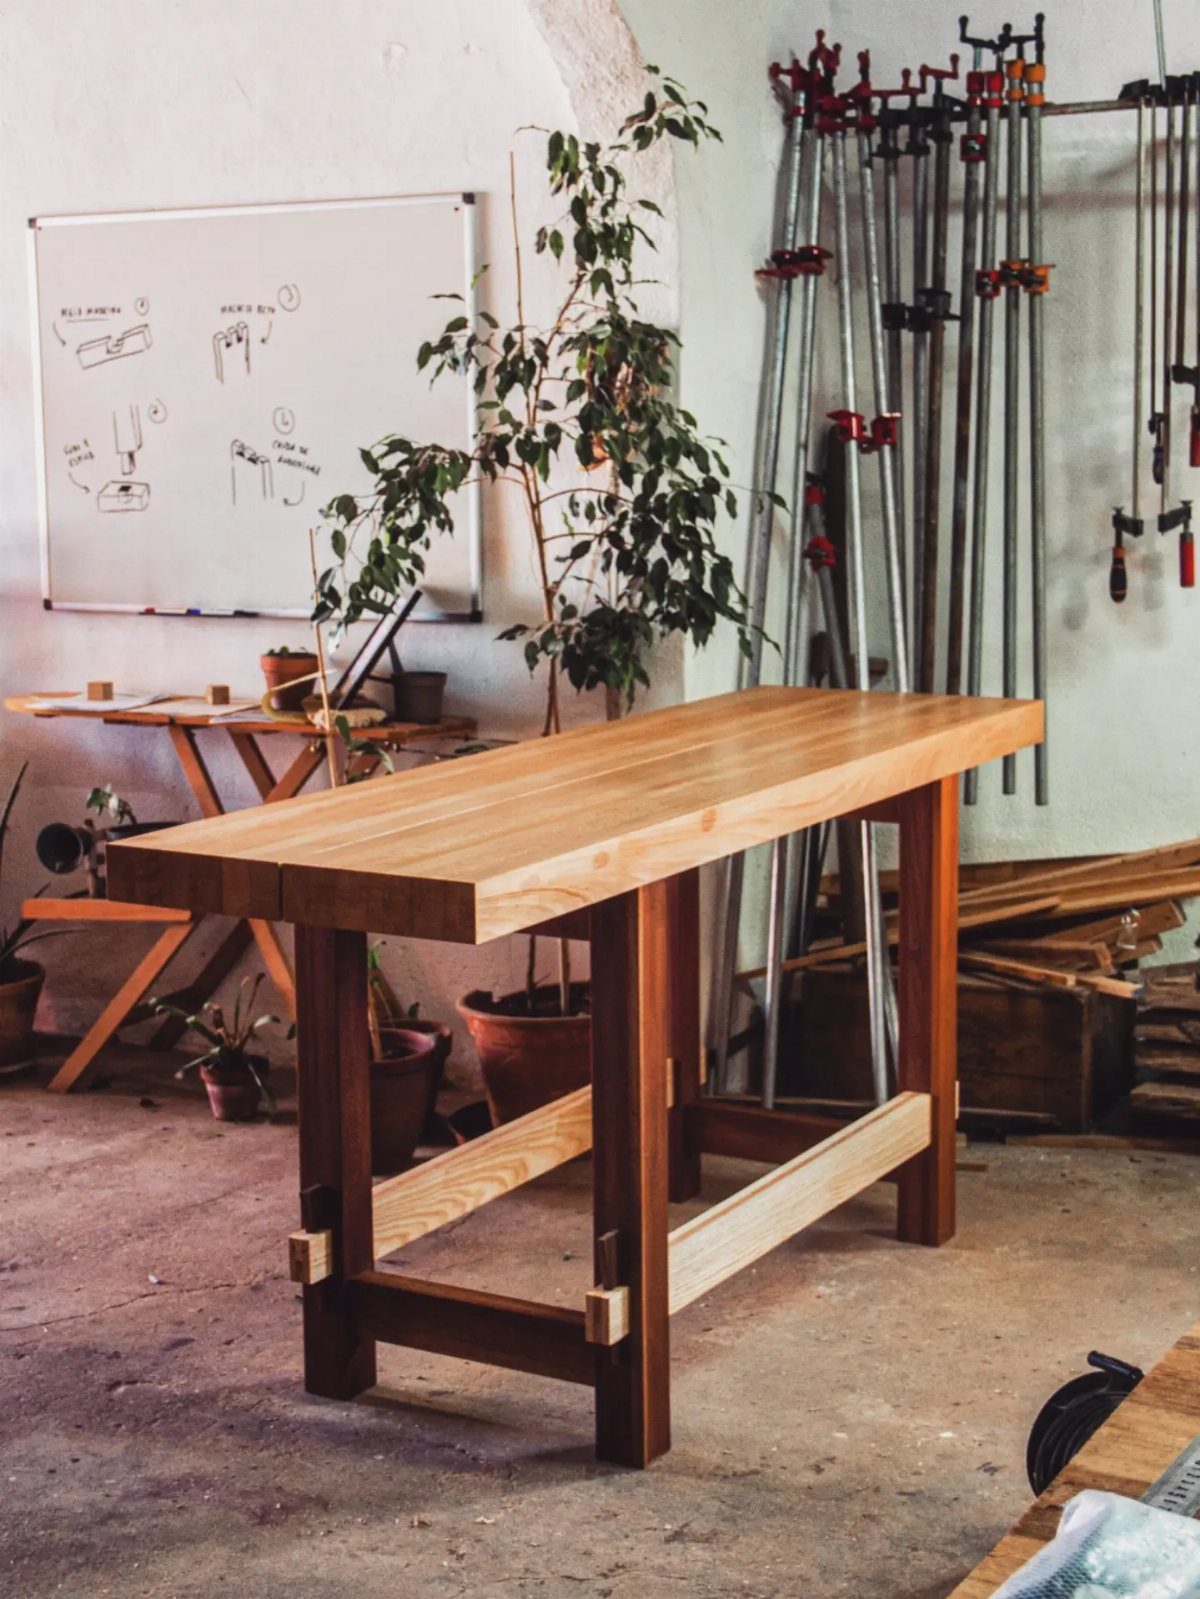
A thick solid-wood top on dark legs gives an entry table real weight, and mahogany is the wood that suits that look.
Solid hardwood costs more than pine or plywood, so buy a little extra and measure twice before every cut. Keep the top long and narrow so it fits a hallway without crowding the door.
Sand through the grits slowly and finish with an oil or varnish to bring out the color. Mistakes in expensive lumber sting, so cut a practice joint in scrap first.
13. Interlocking Square Wall Shelf
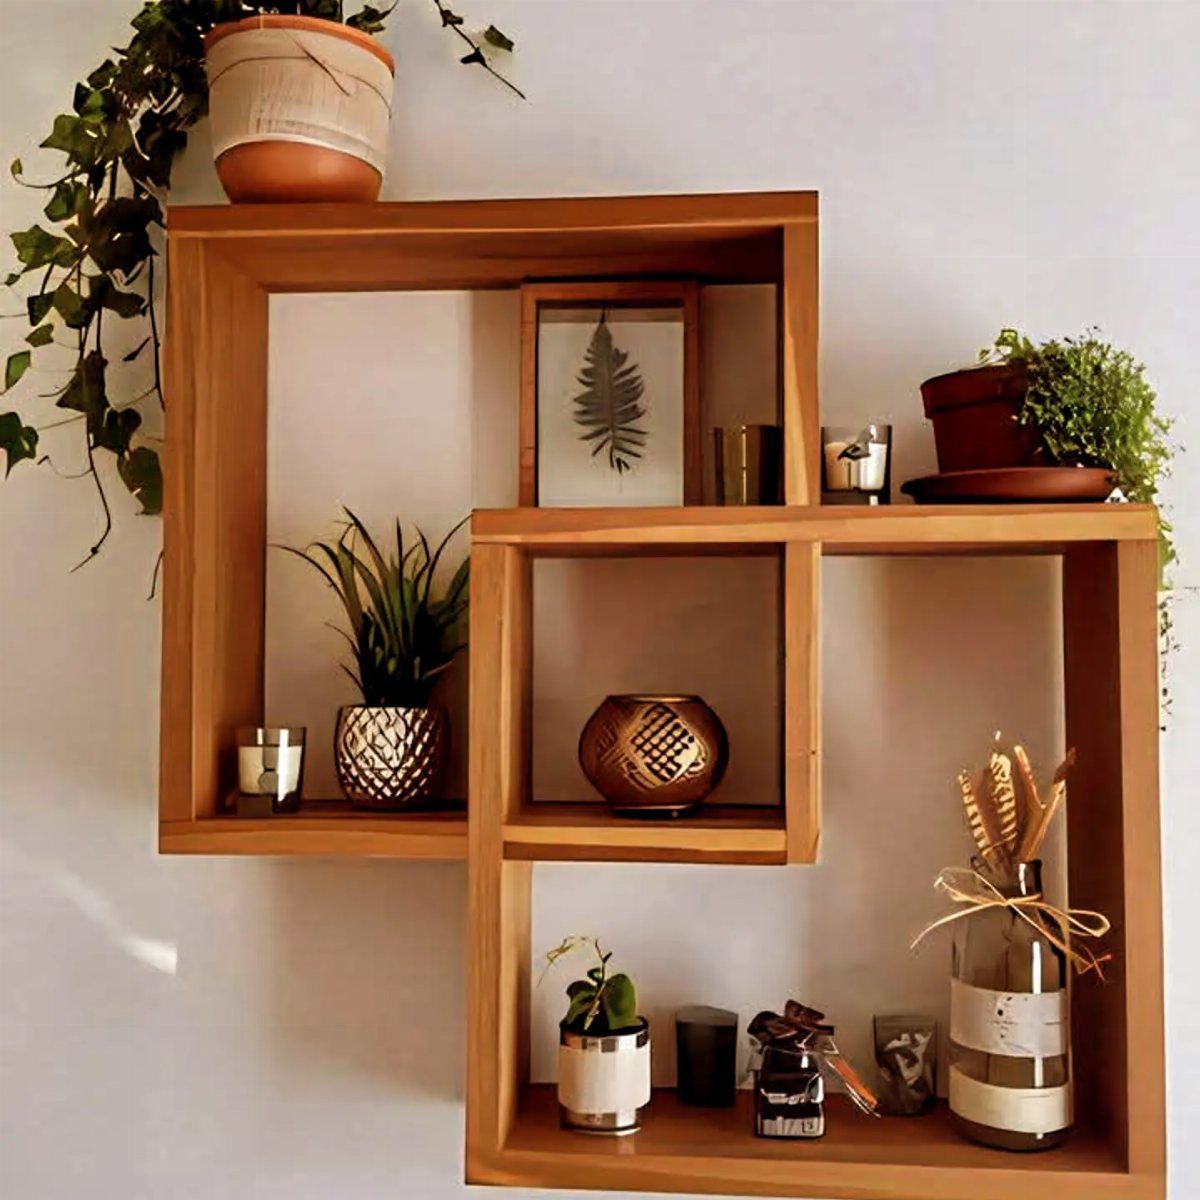
3 squares locked into each other make a wall shelf that works as a piece of geometry first and storage second, with each compartment framing its own small scene.
Cut all the square frames from the same stock so the grain and color match.
Check each joint with a dry fit before gluing, since a slightly off corner shows right away in a design this regular. Mount it with screws into wall studs.
14. Screw and Hardware Organizer
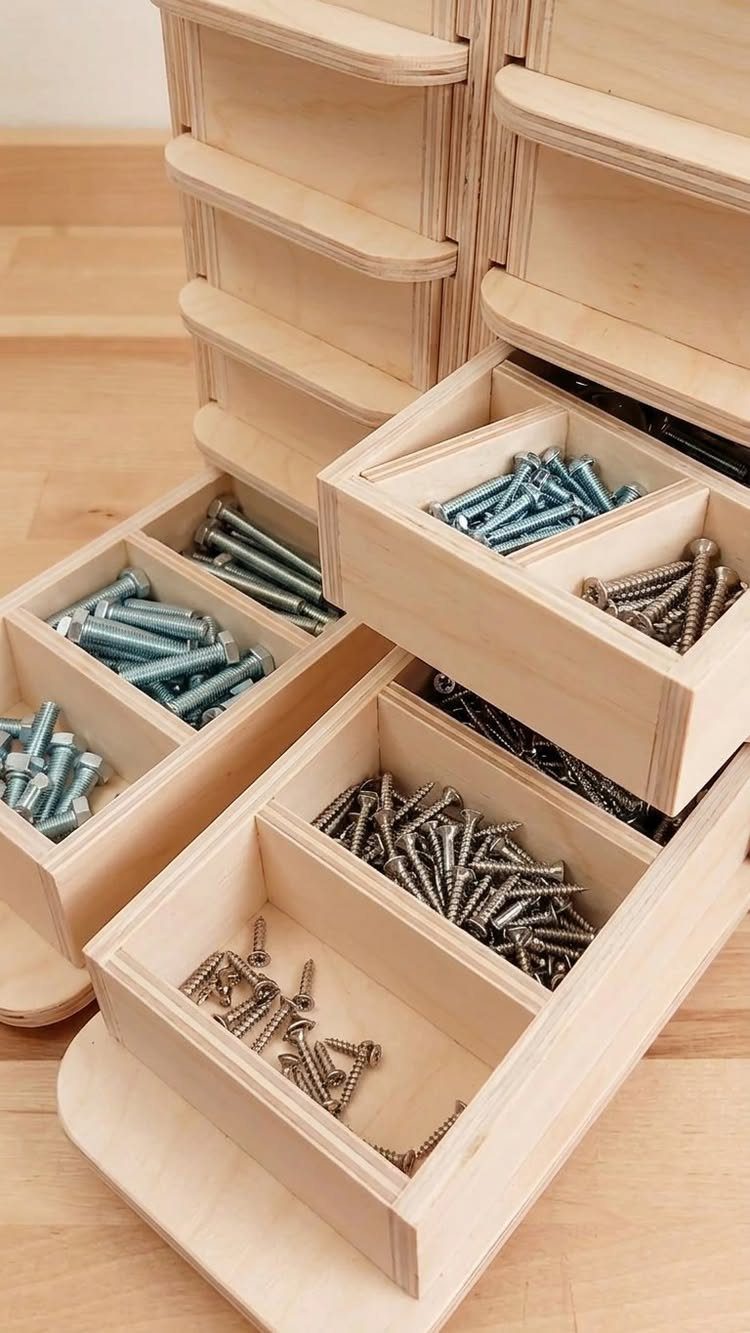
Plywood drawers sized for screws and bolts keep small hardware sorted, so you stop digging through a coffee can for the right length.
For a first build, plywood is a sensible pick: it is flat, easy to cut with basic tools, and the drawers are just small open boxes.
Make one drawer first and test it, then repeat it for the rest. Group hardware by type and label the fronts, or the neat cabinet turns into a tidy junk pile.
15. Wood Serving Tray with Handles
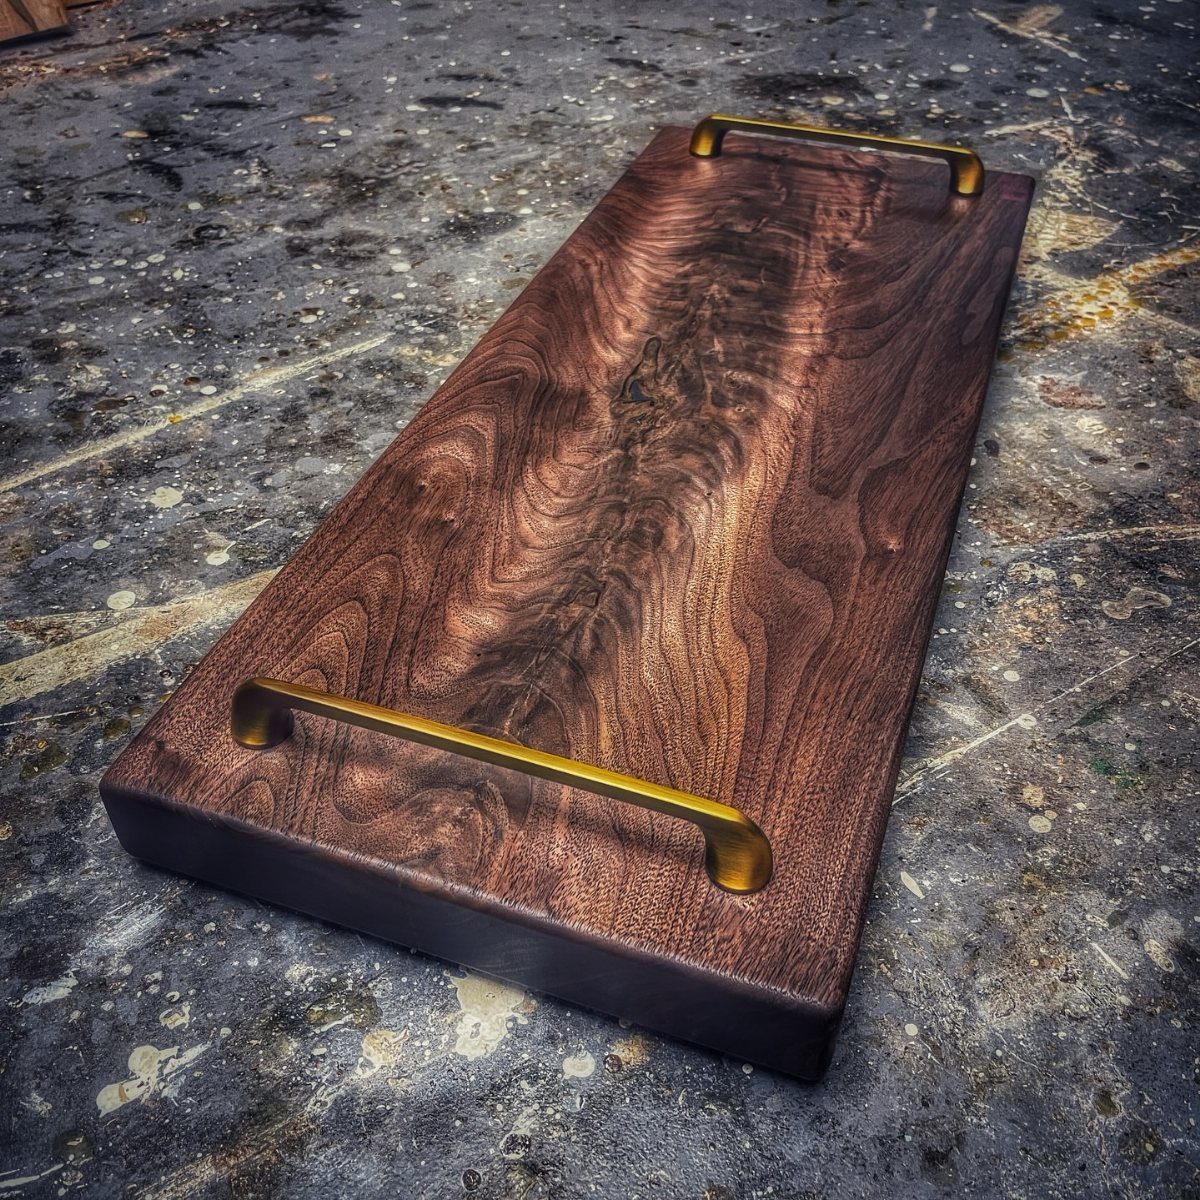
Dark wood with brass handles gives a plain tray a finished, store-bought look, and the handles are what make it easy to carry loaded.
Size the tray to the surface it will usually sit on, such as an ottoman or counter.
Sand through the grits before finishing, since dark wood shows scratches and uneven stain. Set the handles level and centered on each end, and drill pilot holes so the screws don’t split the wood.
16. Wooden Perpetual Wall Calendar
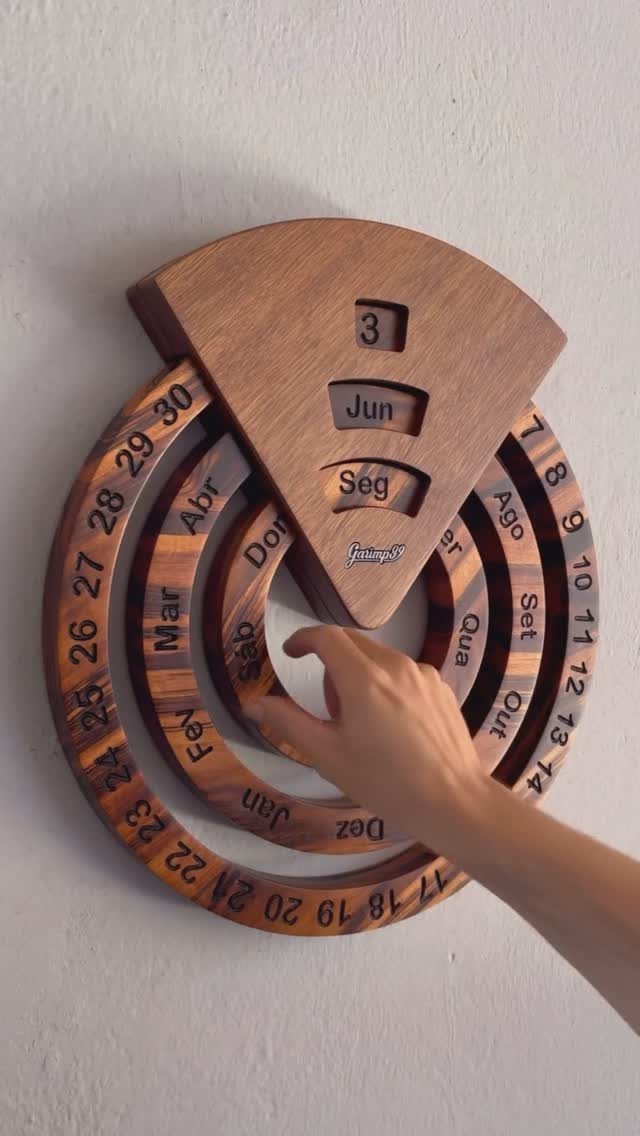
A round calendar with turning rings for the day and month is a project that rewards careful layout more than heavy cutting.
Lay out the lettering first, on paper or with a pencil sketch, because wood burning and saw cuts can’t be undone.
Rings that spin need a smooth, even surface and a fixed center pin, so sand each ring edge well. Wood burning suits the numbers and month names nicely, and I would trace them from a printed template.
Label the month and day pieces in whatever language you use at home; any set of words works as long as the letters fit the blocks.
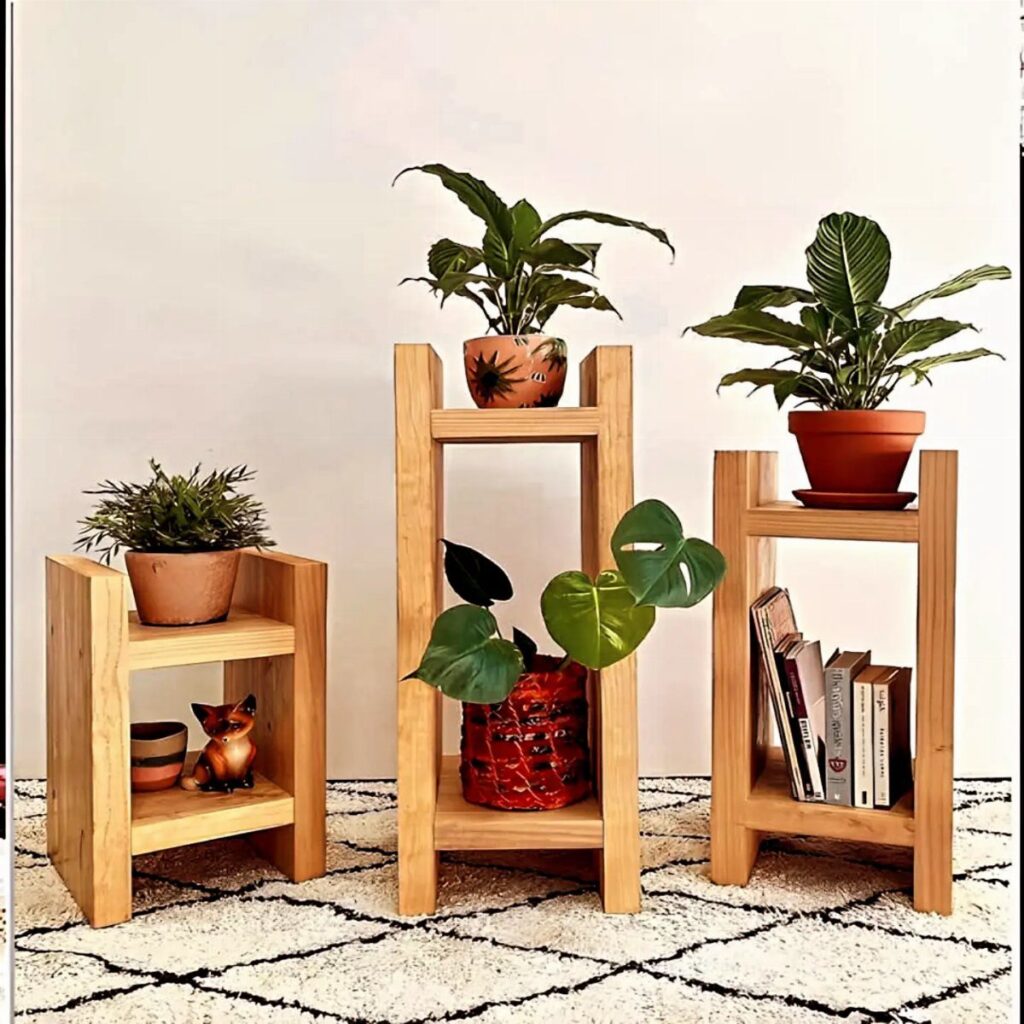
17. Multi-Tier Plant Stand
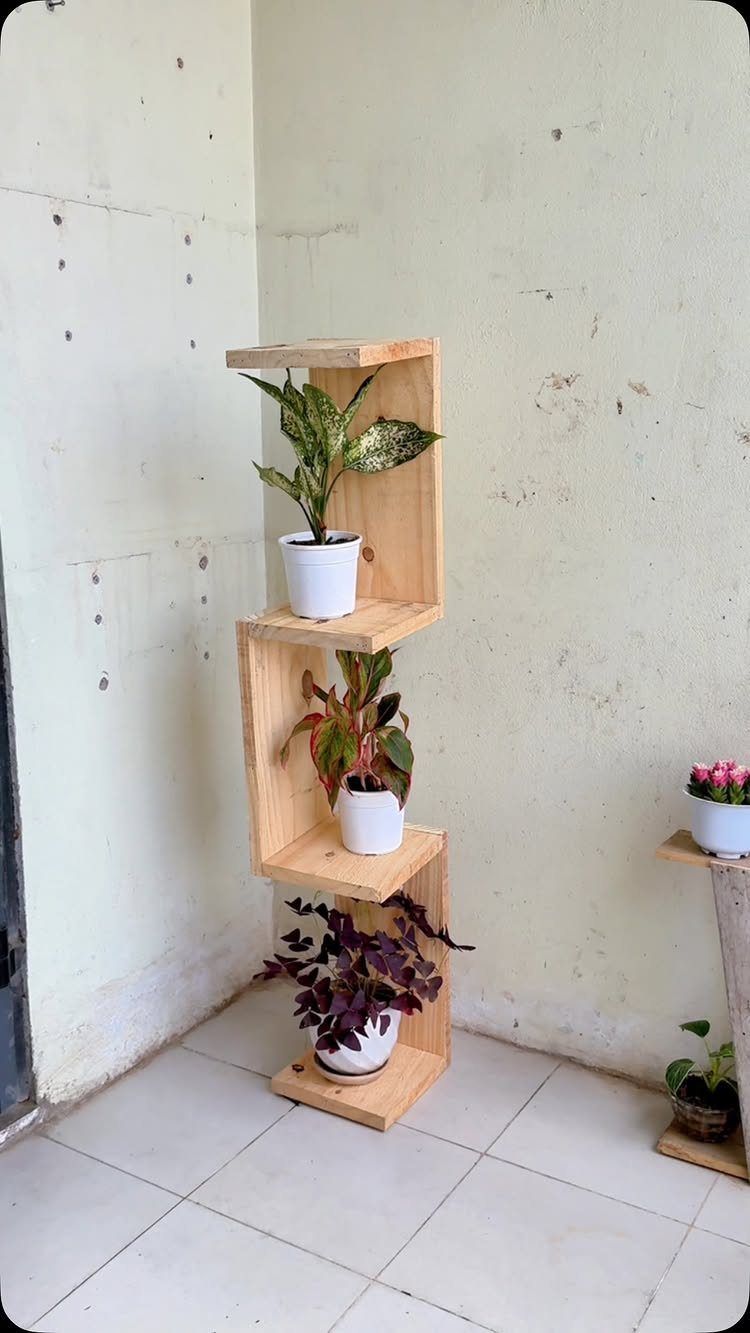
Staggered tiers let every plant get its own spot, and a light wood like the one here keeps the stand from competing with the greenery.
Each shelf has to hold a full pot of damp soil, so keep the spans short and use thick boards.
Set the pots on saucers, because water will stain bare wood. Plan the tier spacing around your tallest plant before cutting anything.
18. Three-Tier Accent Table
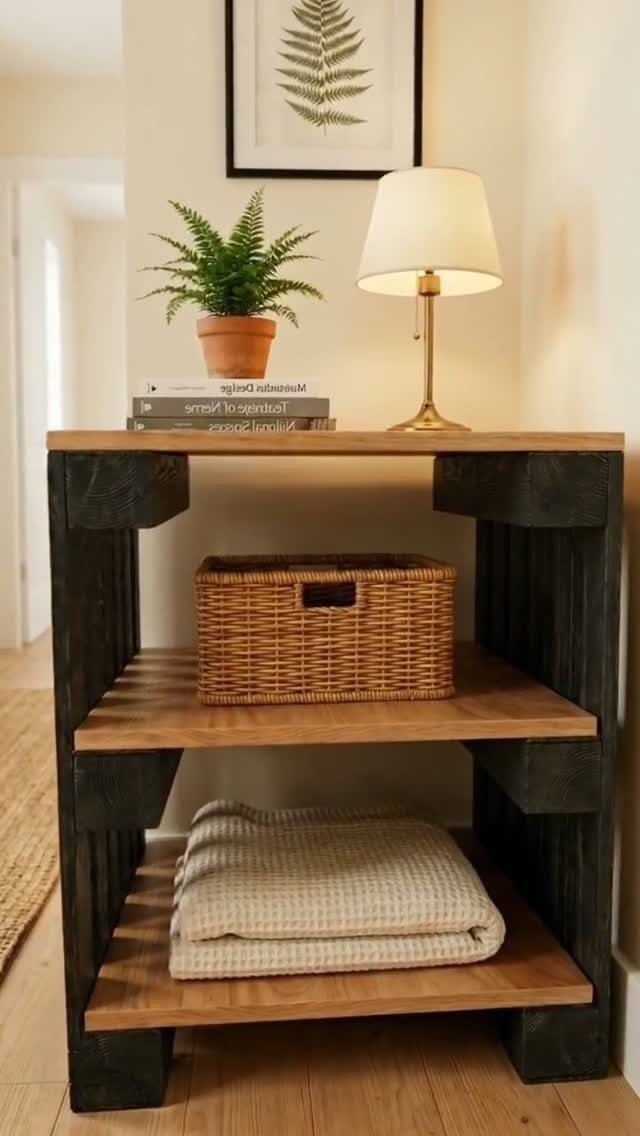
Black uprights against natural wood shelves give a simple three-tier table a modern, graphic look, and it handles lamps, baskets and blankets at once.
Paint or stain the supports before assembly, because cutting in around finished shelves is slow work.
Keep the shelves identical in size so the table looks planned. Check that it stands level and doesn’t rock before you load the top with a lamp.
Skill Levels for Projects
Skill level is less about the project’s size than about how many joints must fit and how much surface must be finished. A rectangle with simple butt joints forgives errors that a drawer or a mitered corner never will.
Many plans are written for beginners, so start there and step up one new skill at a time. If a build adds a drawer, a hinge or a taper, keep everything else about it plain.
Read the whole plan before buying lumber. If a step uses a technique you have never tried, practice it on scrap first.
Advice on Using Plans
Plans are not required. Some woodworkers skip them and build from experience and visual memory, sizing parts by eye and by habit.
That approach works once you have built the same kind of piece several times. For a first attempt, a plan saves you wasted lumber, and it gives you a cut list to check against.
A middle path is to follow a plan once, then sketch the next version from memory and adjust the dimensions to fit your space.
Write your changes on the plan as you go. A pencil note beats trying to remember why a board was cut short.
Materials and Tools
3 materials cover most of these builds: dimensional lumber, plywood and solid wood. Dimensional lumber is the cheapest and easiest to find, plywood stays flat and cuts cleanly, and solid wood gives the best grain and the most polished finish.
Basic tools are often enough. A saw, a drill, a sander, a tape measure and a square will handle most plans.
Buy lumber that is straight.
Sight down each board for bow or twist before it goes in the cart, since a warped board fights you at every joint. Wear eye and ear protection whenever the saw or sander runs.
Frequently Asked Questions
Do you use plans when you build?
Not every woodworker does. Experienced builders often skip the paper, because after several of the same piece their eye and memory handle the sizing.
On a first build, a plan is worth following: it keeps you from wasting boards, and its cut list gives you something to check each part against.
What are some good woodworking projects for beginners?
Pick something built mostly from rectangles and simple joints, like a monitor stand with slots, a checkerboard cutting board, a log-walled birdhouse or a plywood hardware organizer.
These take basic tools and forgive small errors. Drawers, hinges and tapered legs add real difficulty, so introduce just one per project and keep every other part simple.






