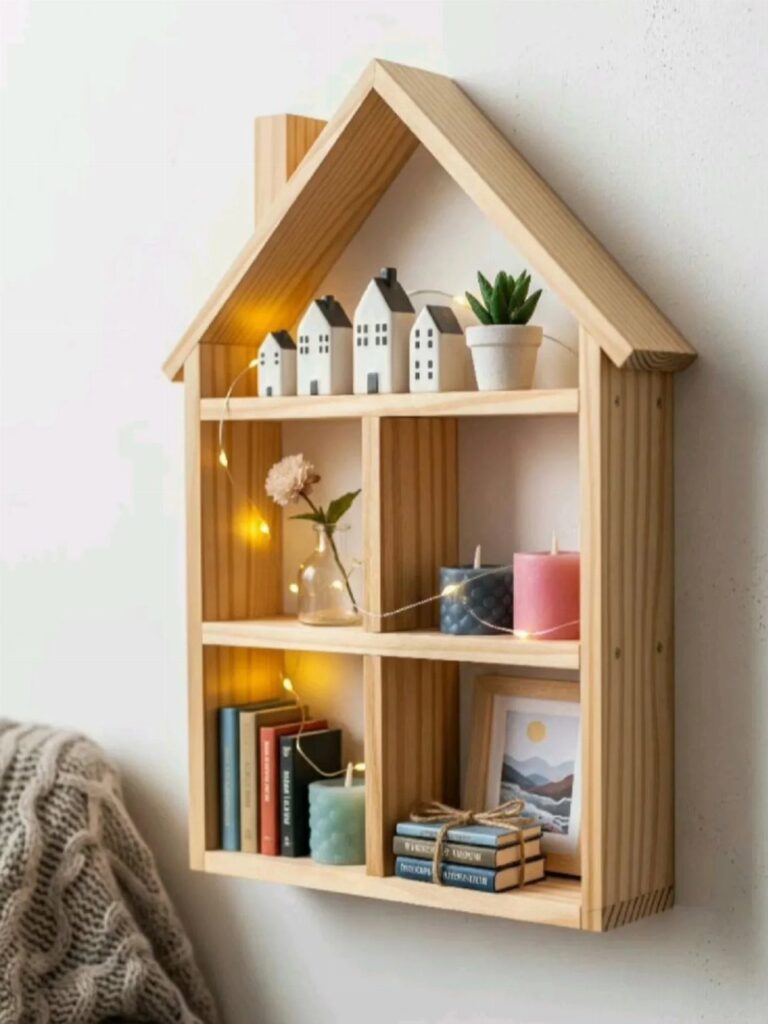
The ideas here range from a set of coasters you can cut and finish in one sitting to a side table, a jewelry box, or a dollhouse furniture set where every part is tiny.
Where the piece will live decides the finish: anything near water, like a planter box, a bird feeder or a doormat, needs sealed wood, while a laptop stand or pencil caddy can stay bare.
1. DIY Plant Stand
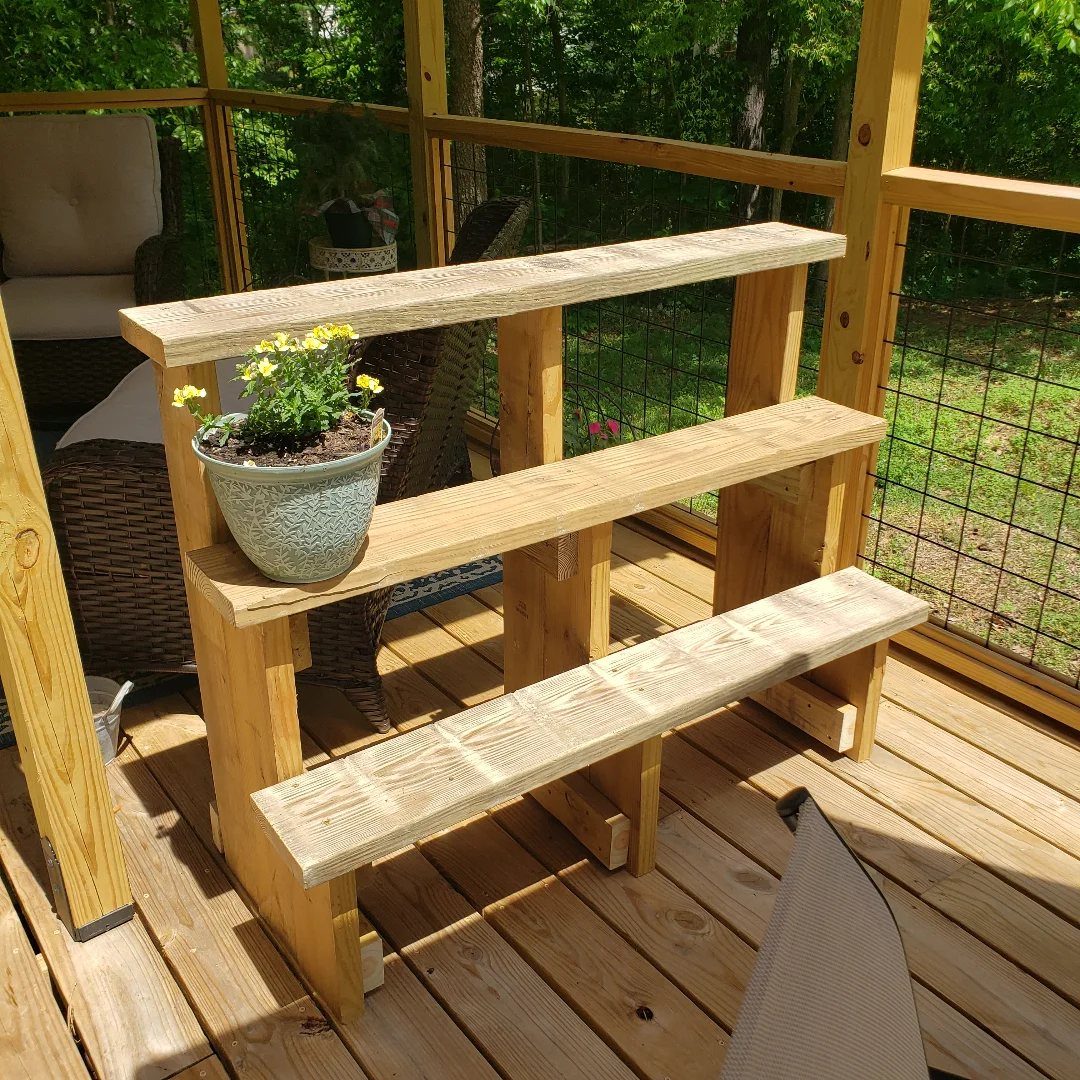
A three-tier stand gives you three planting levels on the footprint of one pot, which is why it works so well on a deck or porch where floor space runs short.
Cut the shelves to different widths if you want the lower tier to hold the biggest pot. Wider at the bottom also keeps the stand from feeling top-heavy.
Sand the edges well and seal the wood if the stand will live outdoors.
2. Storage Box
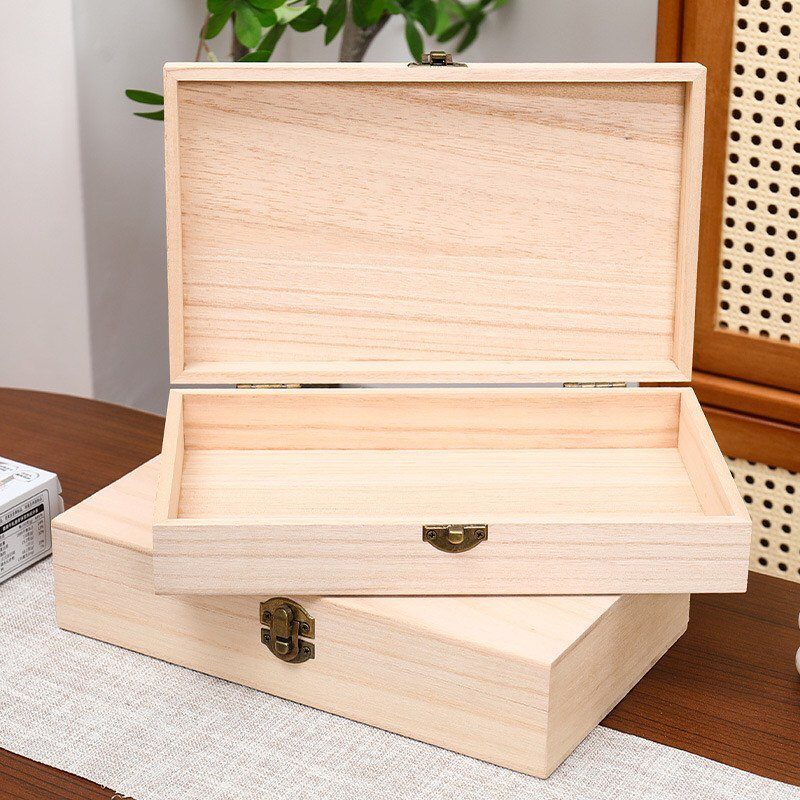
Hinged lids and metal clasps turn a plain wooden box into something that closes properly, and that is the detail I would not skip. A box without a latch ends up holding toys on the floor.
Light natural wood looks good left unfinished, though a clear coat keeps it from picking up grime. Set the hinges flush so the lid sits square.
Make two in different sizes: one for craft supplies, one for toys.
3. DIY Wooden Hooks
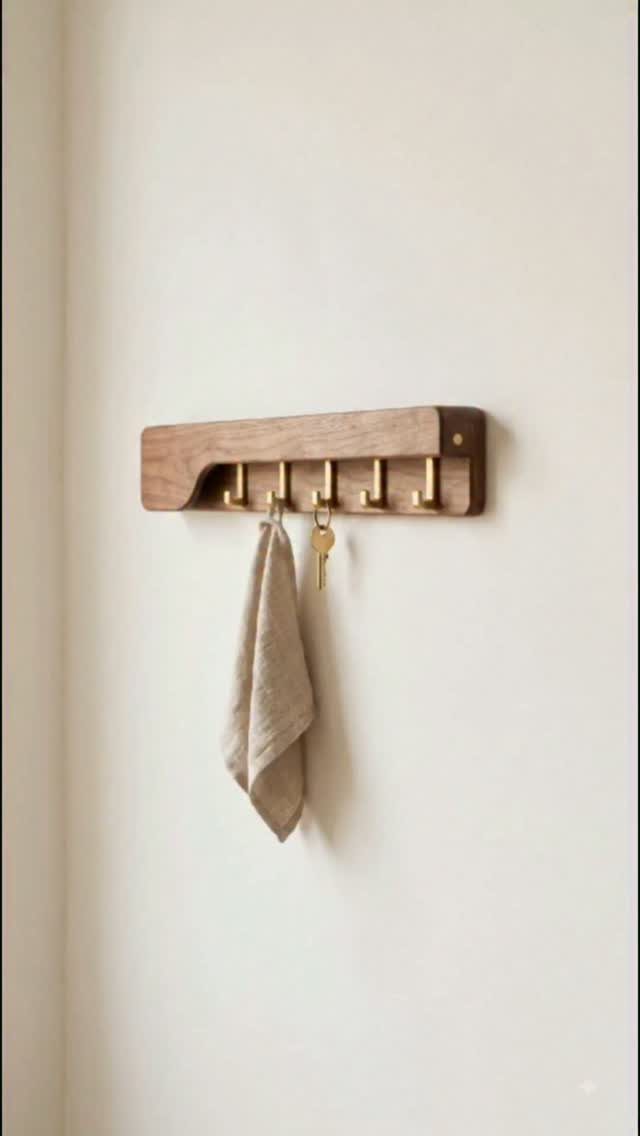
A single wood rail with a row of hooks is about as quick as a wall project gets. Cut the board, sand it, space the hooks evenly and screw them on.
Gold hardware against pale wood looks polished for very little money, and a rack this size is enough for keys and a cloth by the door.
Pre-drill the hook holes so the board doesn’t split, and mount into studs if the rack will carry coats.
4. DIY Wooden Wall Art
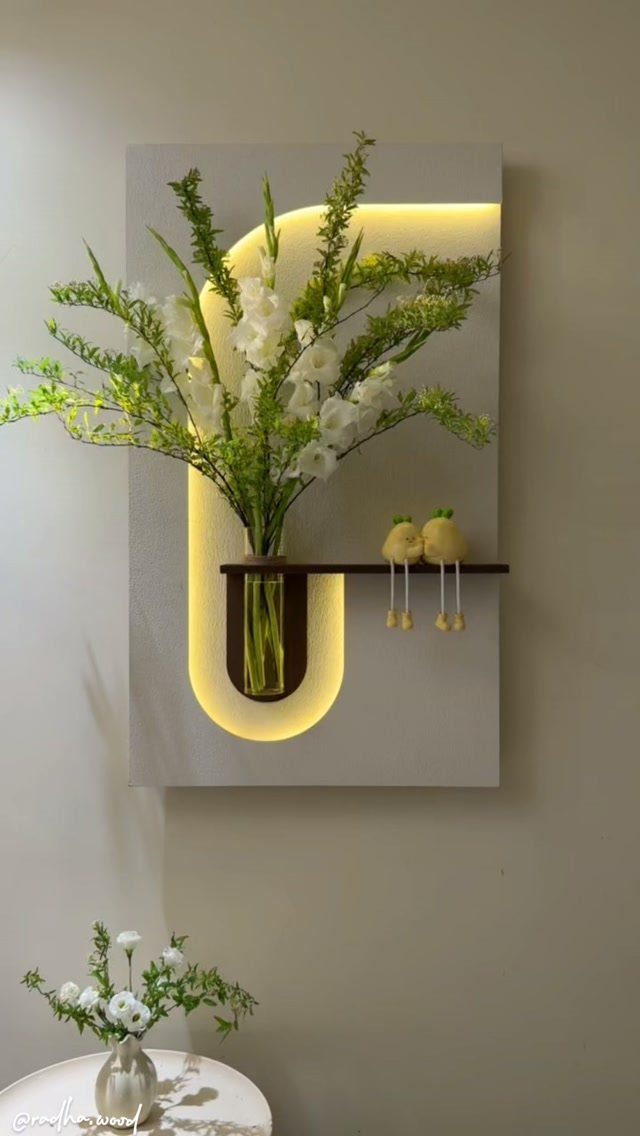
Wall art gets more interesting when it does a job. A panel with a backlit cutout and a small shelf gives you a glowing focal point and a spot for a vase.
Plan the wiring for the light before you assemble anything, since it has to hide behind the panel. A paint-white finish keeps the glow soft.
Keep the shelf shallow so flowers and small figurines sit steady without crowding the design.
5. DIY Wooden Planter Box
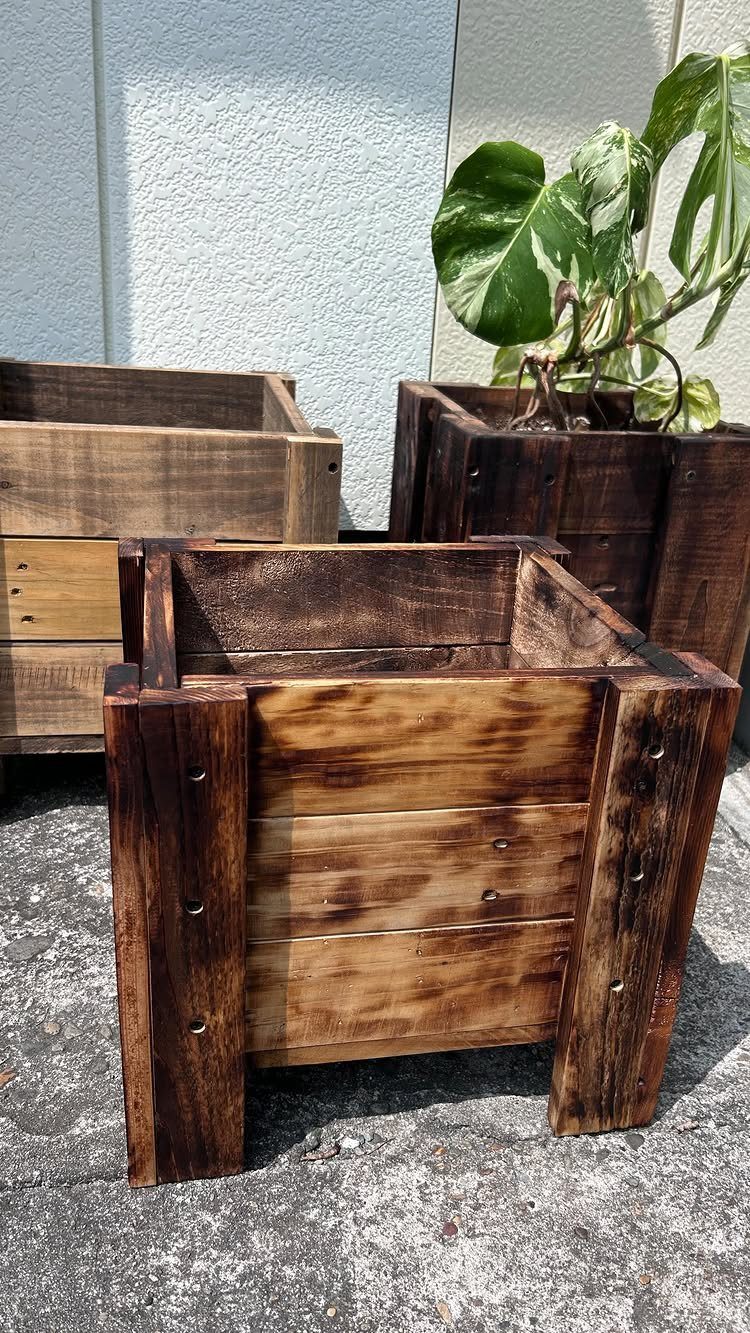
Dark stain makes ordinary planter boxes look rustic and weathered, and grouping three sizes together looks better than one big box. Build them from the same board width so the cuts stay simple.
Drill drainage holes in the bottoms before you plant. Skipping them is the most common way these end up with rotted roots.
Stain the inside too if you can, or line it with plastic.
6. DIY Wooden Towel Ladder
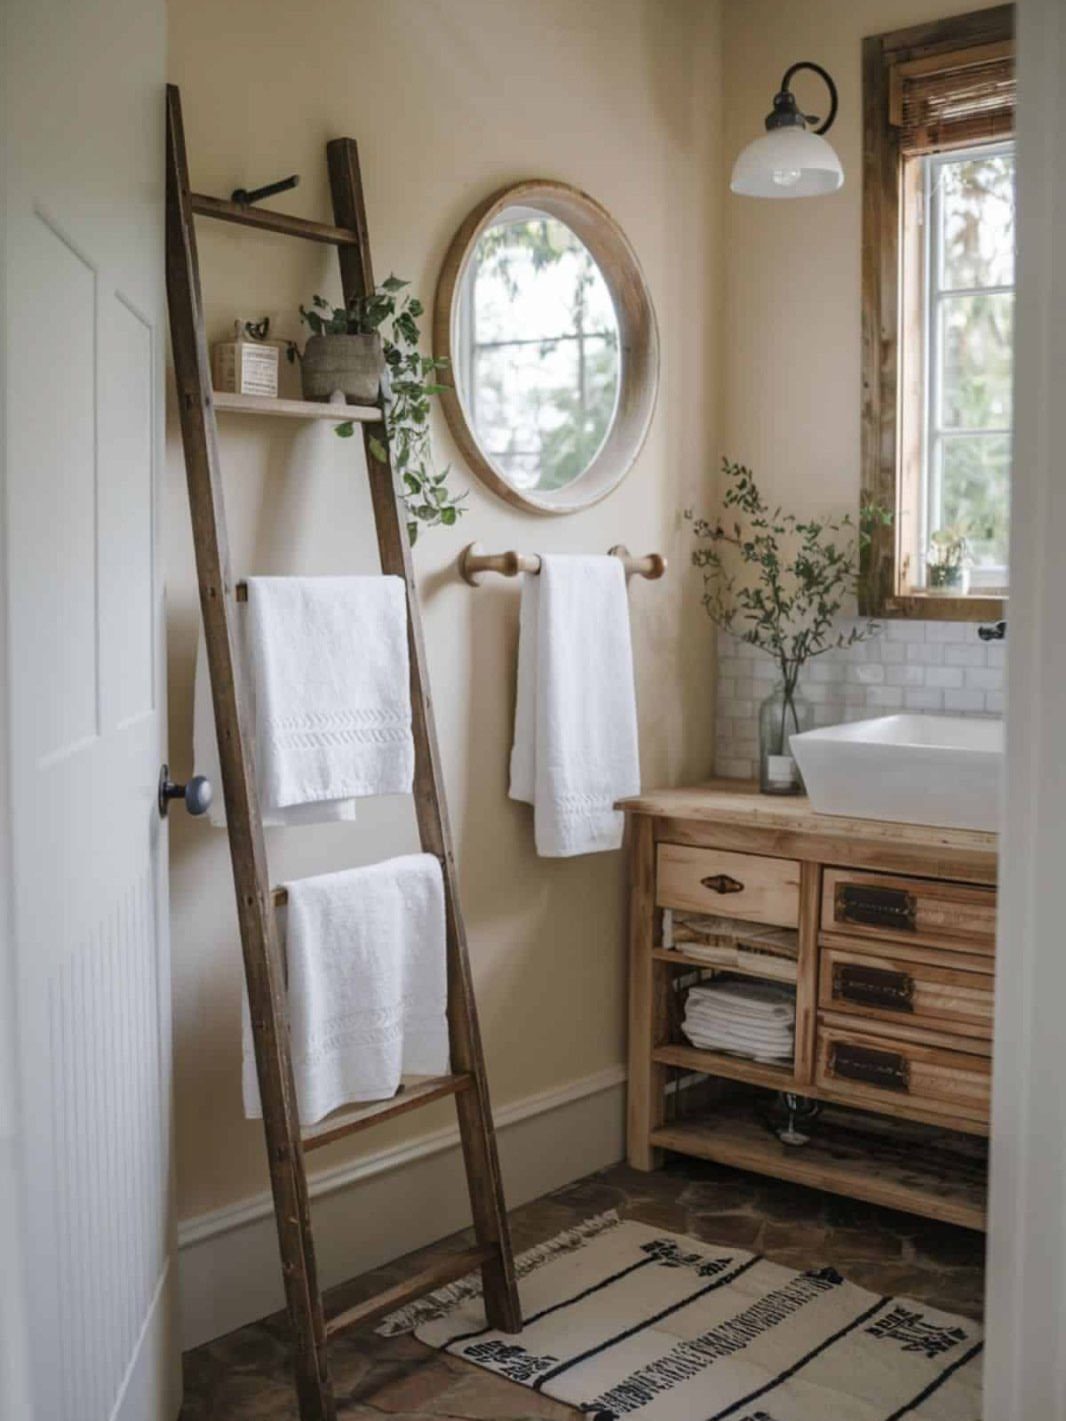
A towel ladder leans against the wall with no mounting, so it suits a rental bathroom as well as a rustic one. 2 side rails and evenly spaced rungs are all it takes.
Space the rungs wide enough for a folded towel to hang without bunching. Seal the wood well, since bathroom steam is hard on bare boards.
Angle the top of the rails slightly so the ladder rests flat against the wall.
7. Reclaimed Wood Shelves
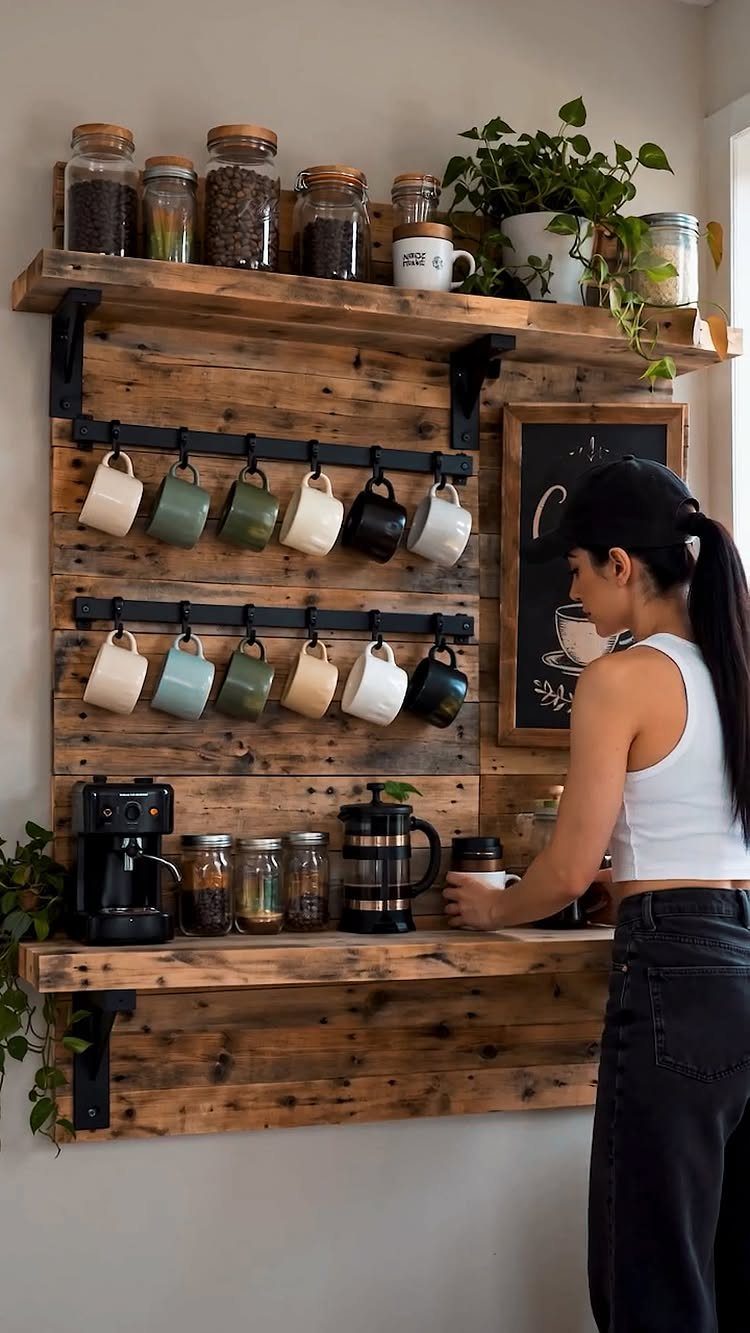
Open shelves hung with mug hooks turn a bare kitchen wall into a coffee station, and reclaimed boards give it a weathered look that new lumber needs stain to fake.
Keep the shelves deep enough for jars and a coffee maker, and leave clear space between the shelf and the mug row so handles swing free.
Sand reclaimed boards well before sealing them, since old wood holds splinters.
8. Pencil Caddy
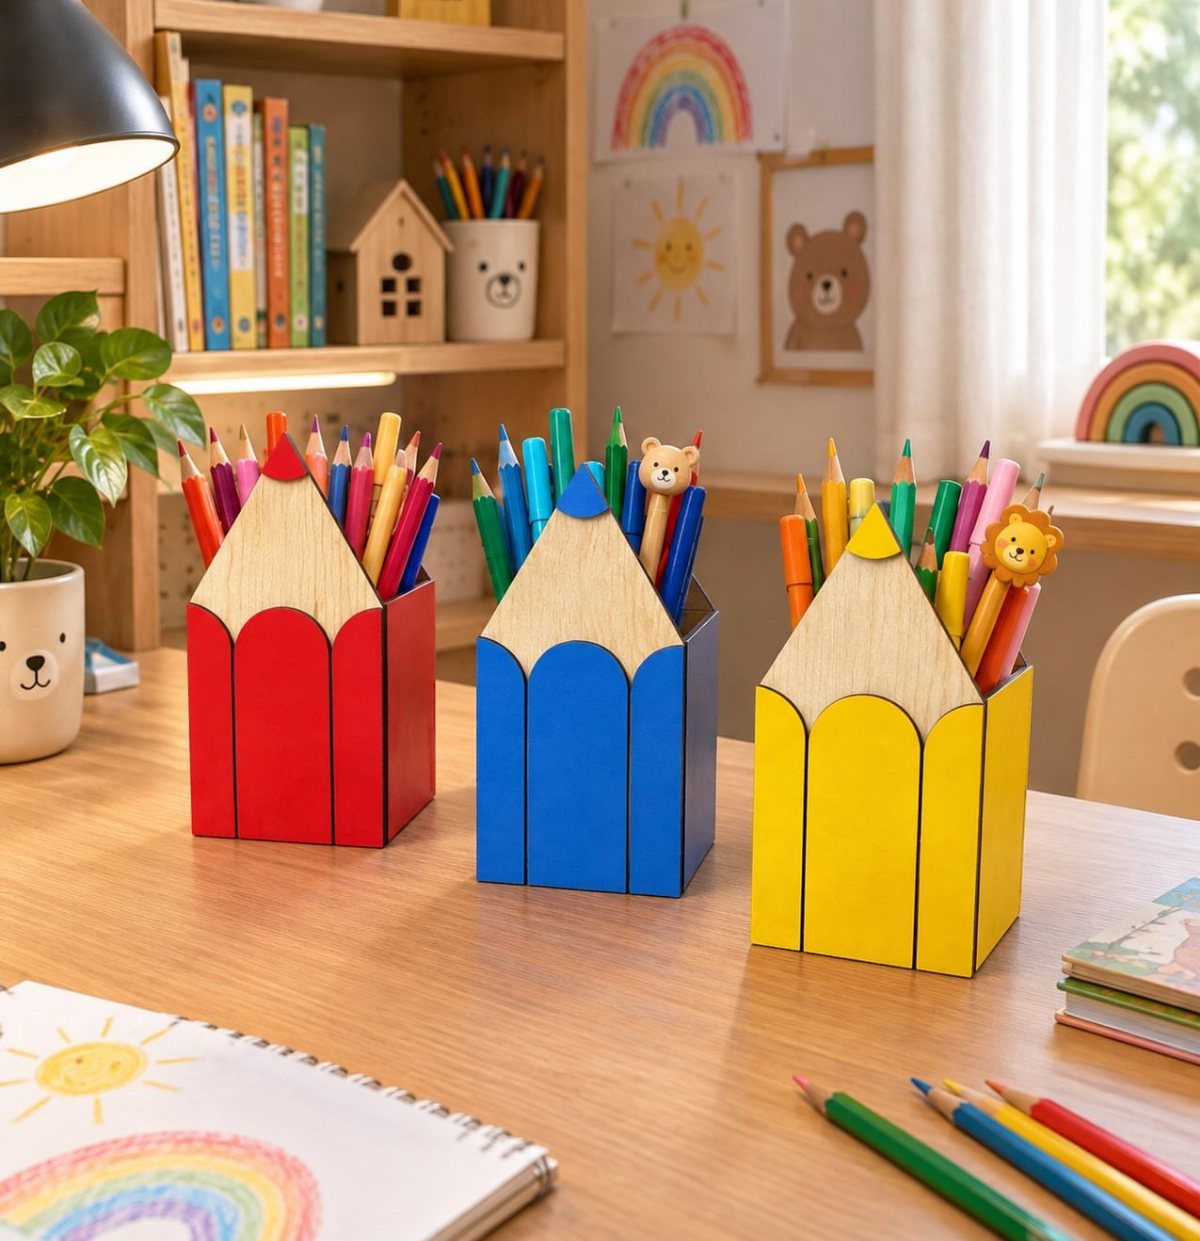
Kids get to swing a hammer on this one, and that is the reason I like it.
A caddy cut in the shape of a pencil, with a pointed tip and a painted band, holds real pencils and looks like a toy.
Let a child do the nailing while you hold the pieces steady.
Sand every edge before painting, since small hands will be handling it.
9. DIY Cutting Board Stand
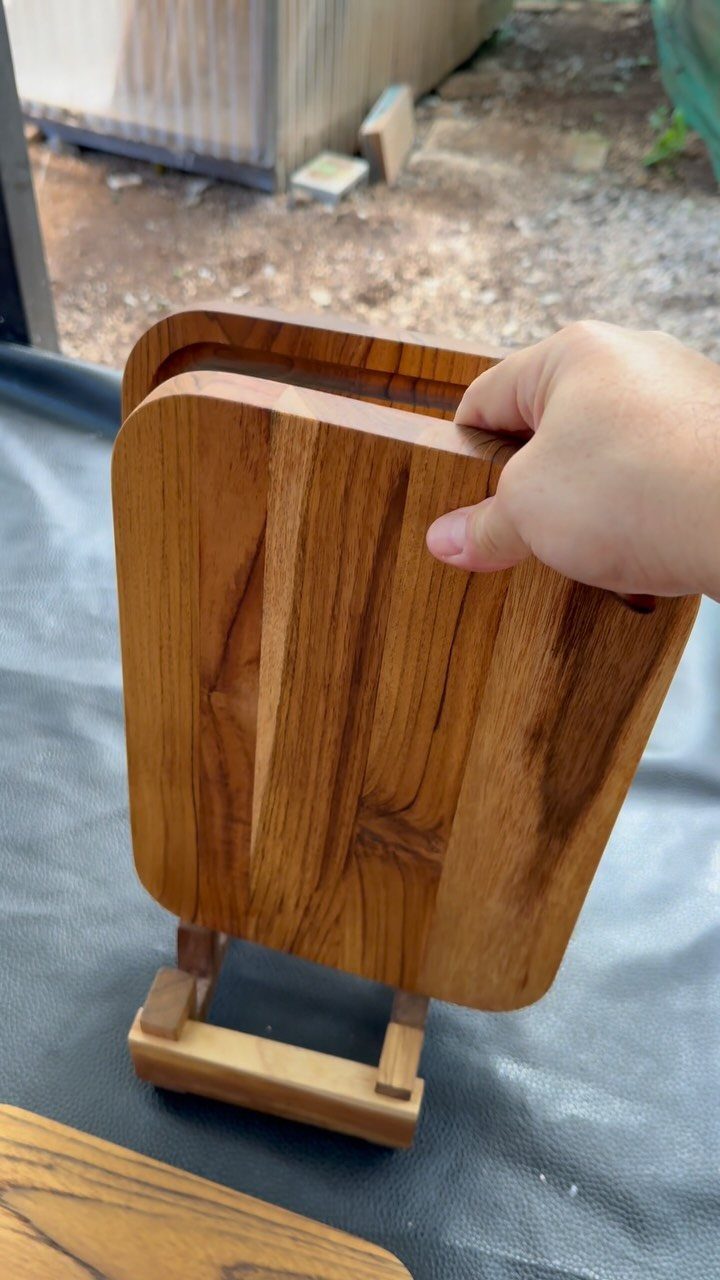
A small wooden stand holds a cutting board upright so it dries in the open air and stays within reach. That beats a board buried in a cabinet.
Cut the slot a little wider than the board is thick so it slides in and out easily. A stand this small is a quick scrap-wood job.
Seal the wood, since it will sit near water and kitchen mess.
10. DIY Spice Rack
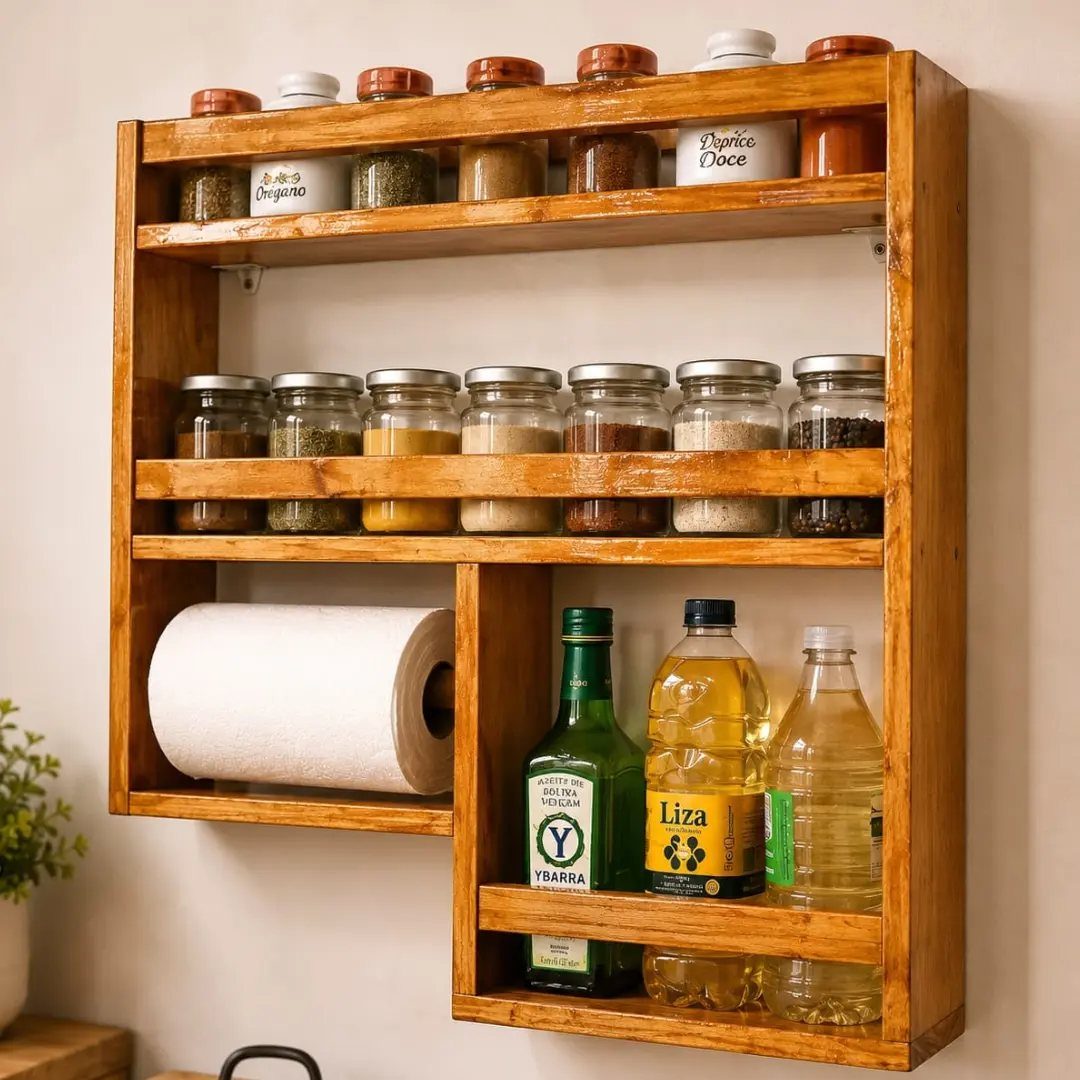
A wall rack with a shelf for spice jars and a dowel for a paper towel roll clears counter space, and it beats a drawer because every label stays in view.
Space the shelves to fit your tallest bottle, and add a small front lip so jars don’t slide off.
Mount into studs or use anchors rated for the load, since glass jars add up fast.
11. DIY Laptop Stand
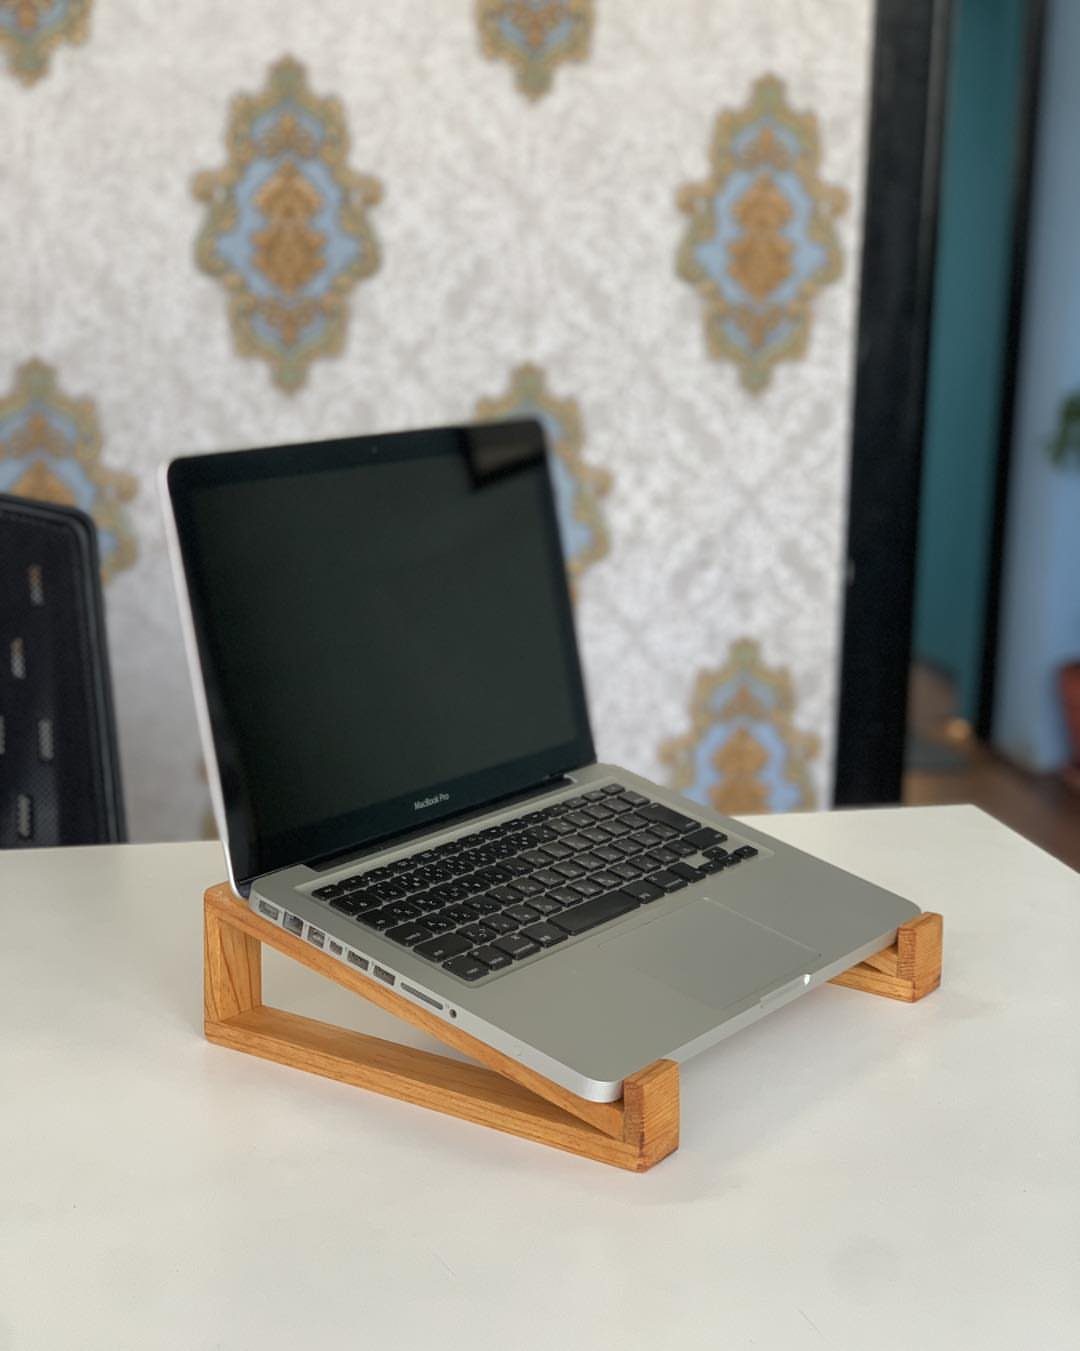
Raising a laptop closer to eye level keeps your neck from tipping down all day, and a small wooden stand does that for the cost of a few scraps.
Light wood suits a white desk. Cut the stand so the back sits higher than the front, and leave room underneath to tuck a keyboard away.
Check that the top is wide enough to support the laptop’s full base.
12. DIY Wooden Lanterns
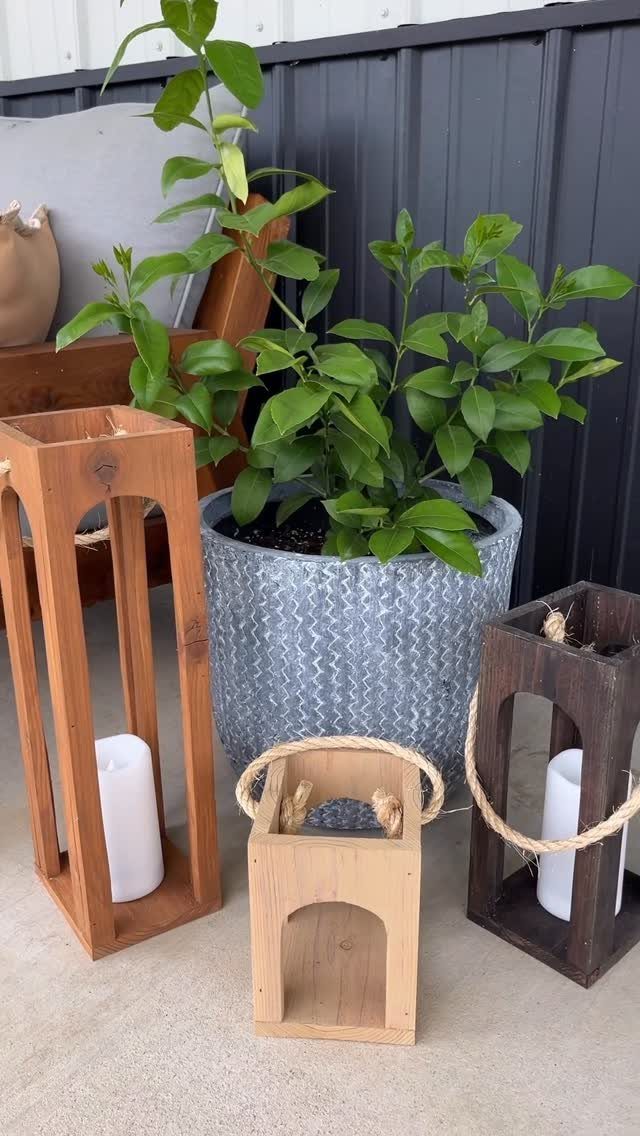
Lanterns in 3 sizes and stains look better together than a matched set, and a cluster by a plant or chair reads as decor you can leave out all year.
Build each as a wooden frame with open sides so a white candle shows through. Vary the heights, then stain each one a different shade.
Keep the candle well inside the frame and away from the wood. A battery candle is the safer pick for a small lantern.
13. DIY Wooden Doormat
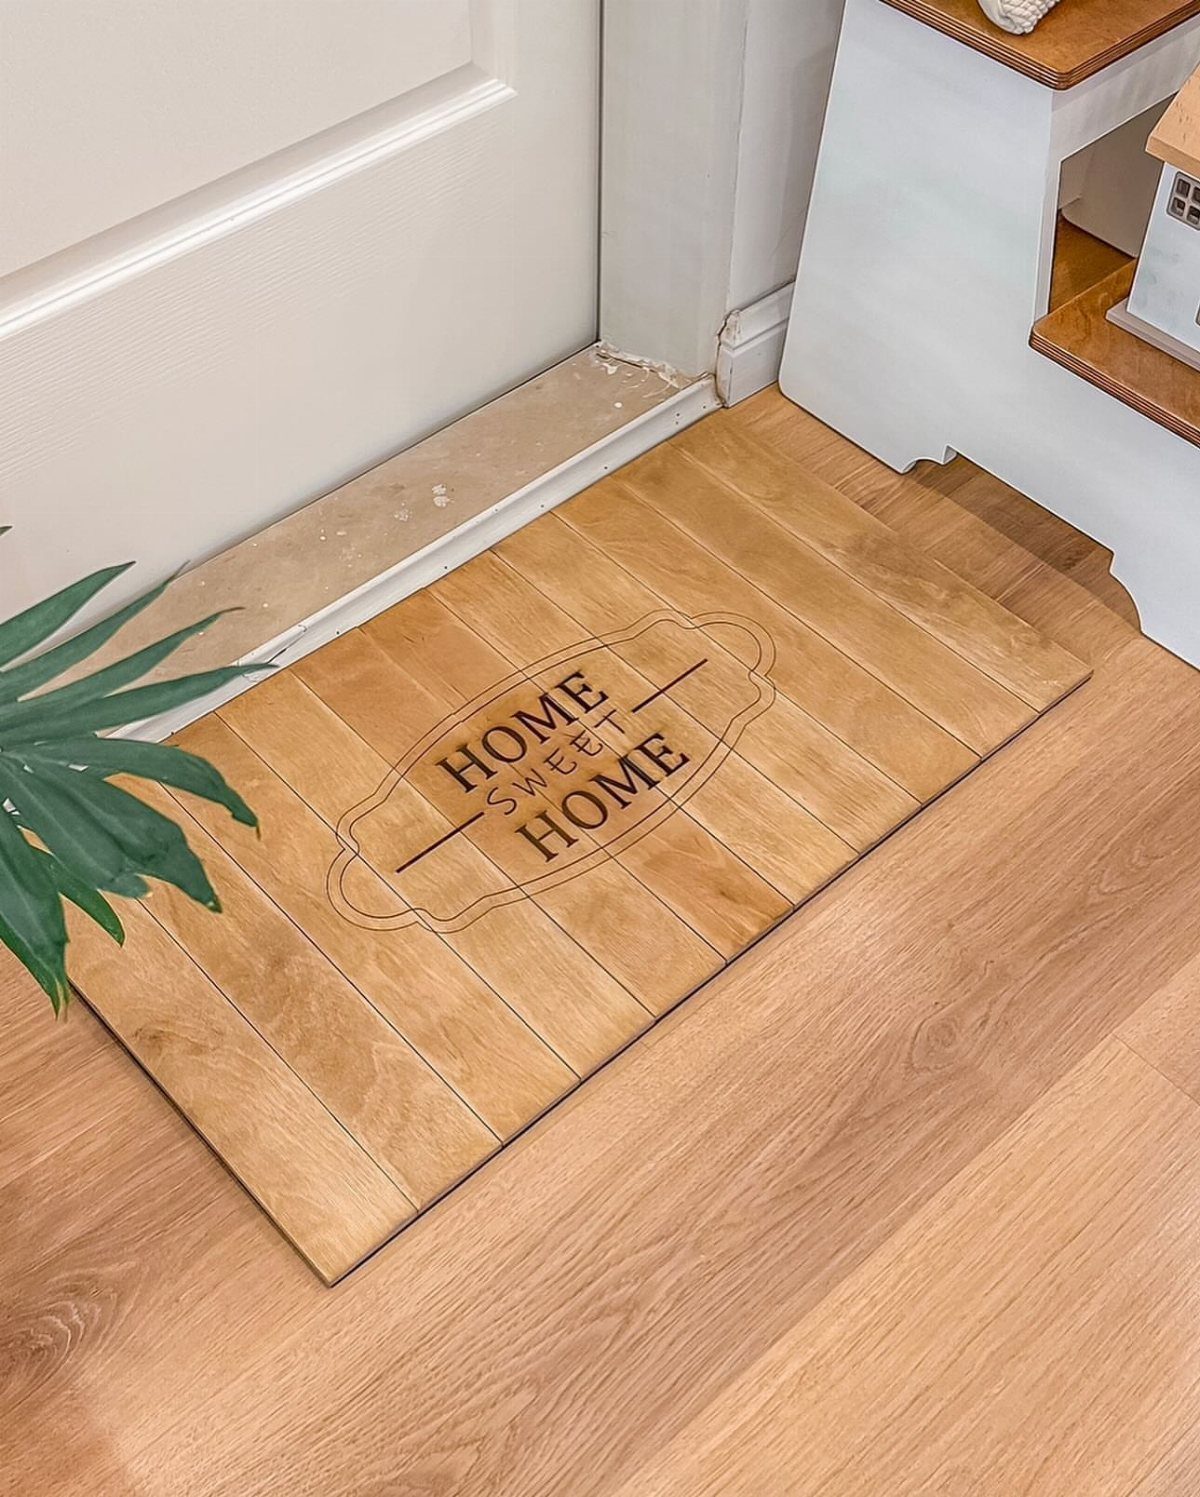
A wooden doormat with a carved or engraved phrase greets people before the door even opens, and "Home Sweet Home" is a classic that suits nearly any entry.
Cut the boards, sand them smooth, and engrave the letters with a wood burner or a router if you have one. Slats laid side by side make a flat, tidy surface.
Seal it well if it sits at the door, since boots and weather are hard on bare wood.
14. DIY Wooden Serving Tray
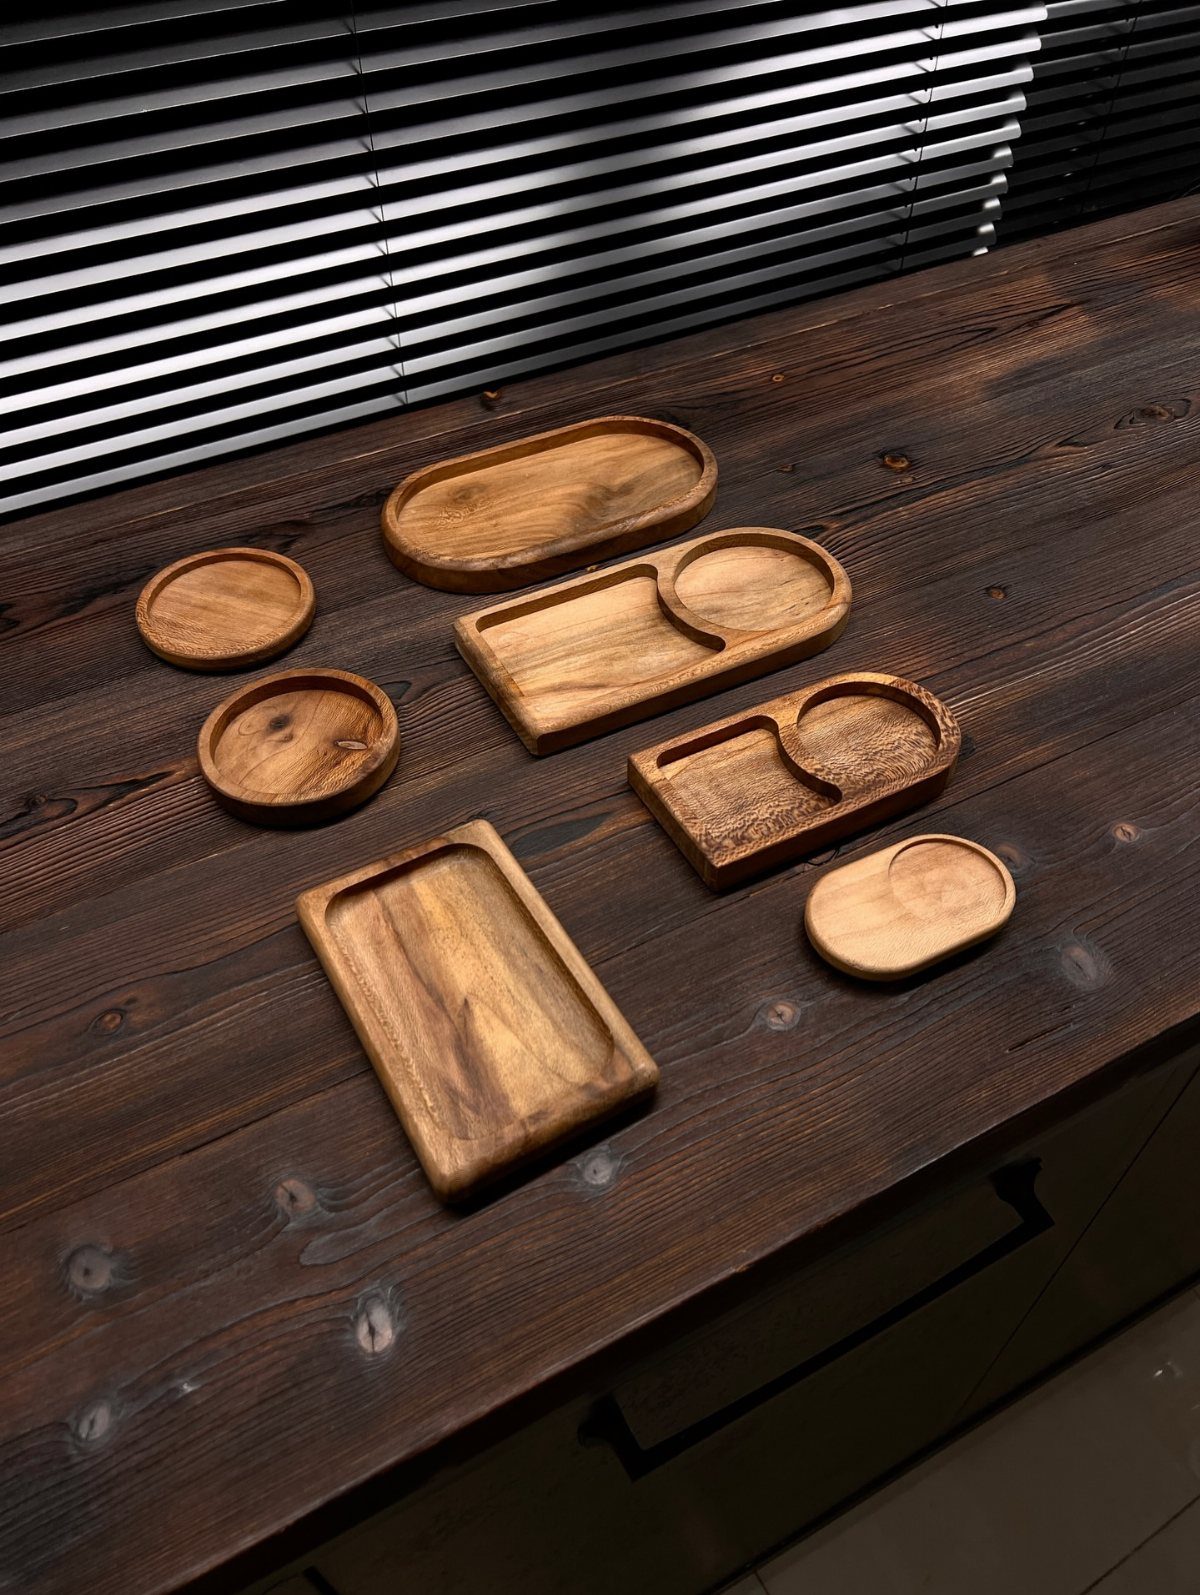
Small trays in a mix of shapes and sizes make a stronger display than one large tray, and each one is a short scrap-wood job.
Cut a flat base, add low sides, and sand every edge smooth, because hands will grip them. Round and oval shapes take more cutting than rectangles, so start with a rectangle.
Finish the wood with a food-safe oil if the tray will carry snacks.
15. DIY Dog Bowl Stand
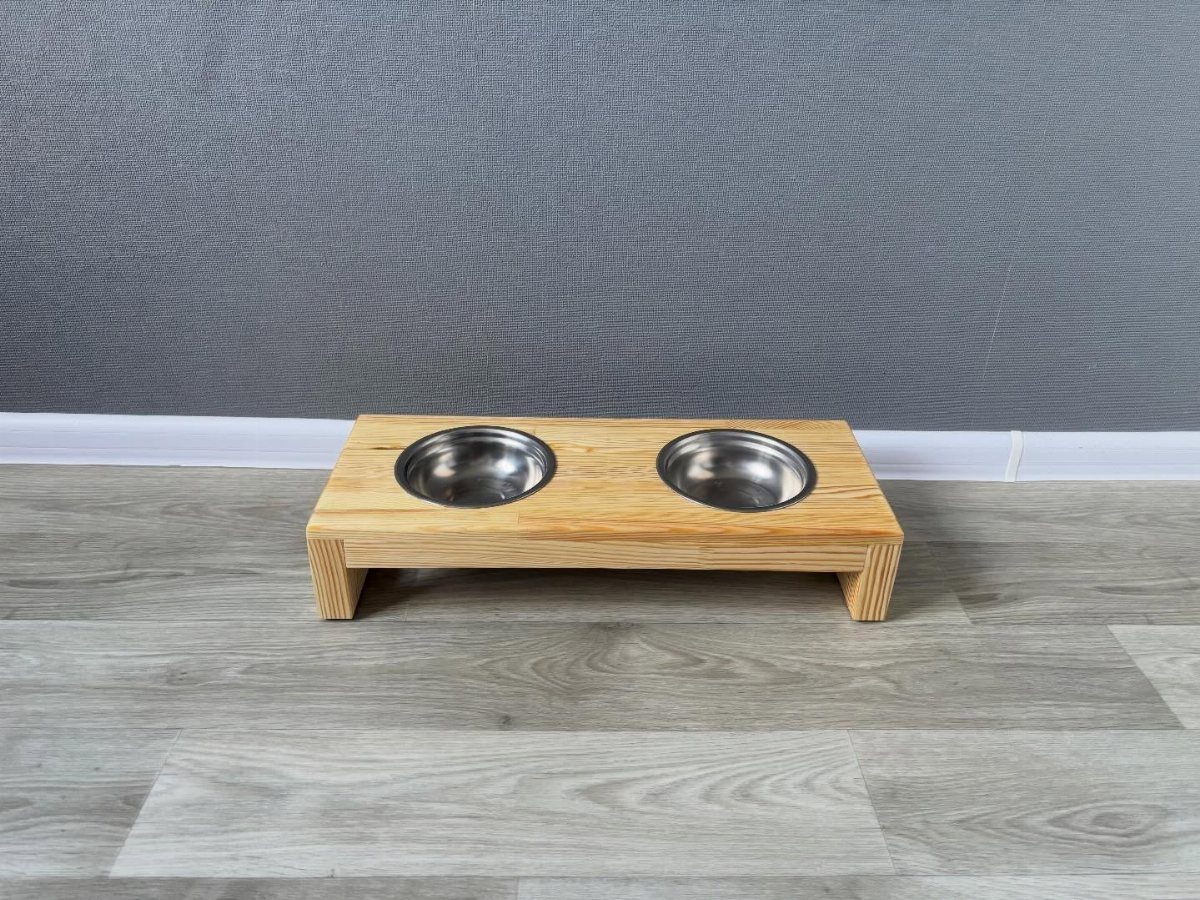
A raised bowl stand lifts the food and water off the floor, so a dog doesn’t have to stoop as far to eat, and that’s the job this little project does best.
Cut the 2 openings to fit your bowls, since stainless steel bowls drop into the top and stay put. Measure the bowl rim first, and make the hole slightly smaller so the rim rests on the wood.
Size the height to your dog, and seal the wood well against spills.
16. DIY Wooden Picture Frame
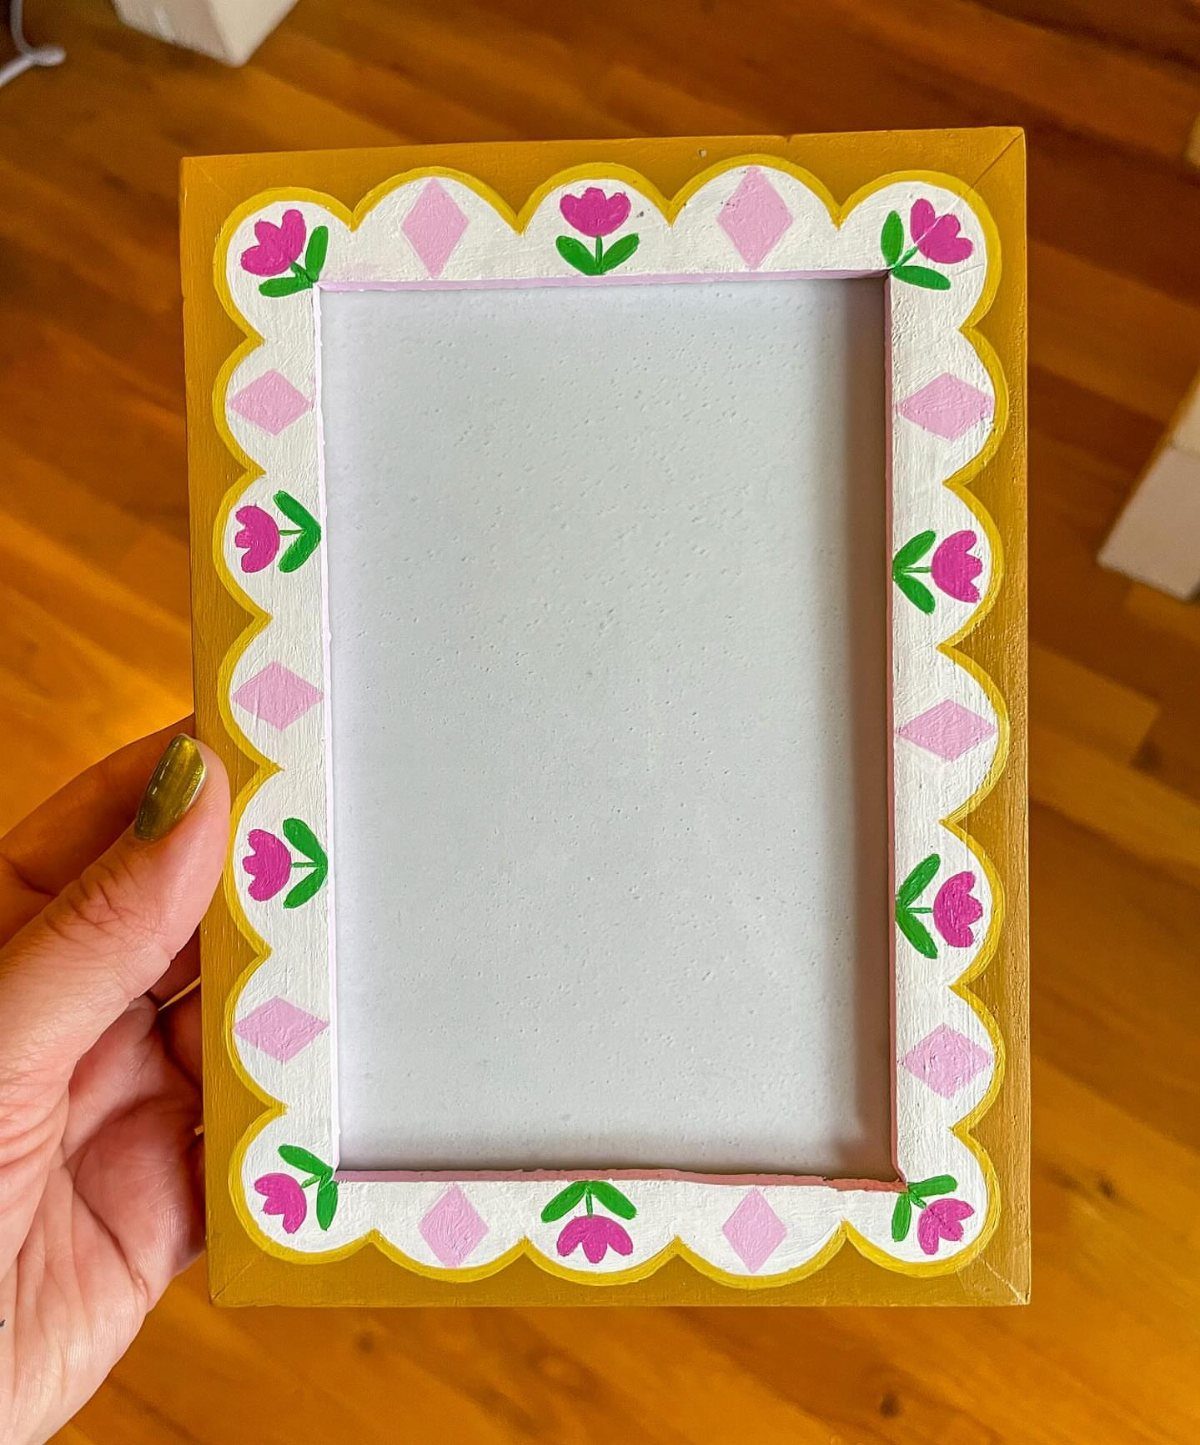
Scalloped edges and painted flowers turn a plain frame into something personal, and a small yellow one like this fits a favorite snapshot well.
Cut the scallops with a jigsaw or coping saw, then sand the curves smooth. Paint the base color first and let it dry before adding white trim and small details.
Keep the decoration off the opening so it doesn’t crowd the photo.
17. DIY Wooden Birdhouse
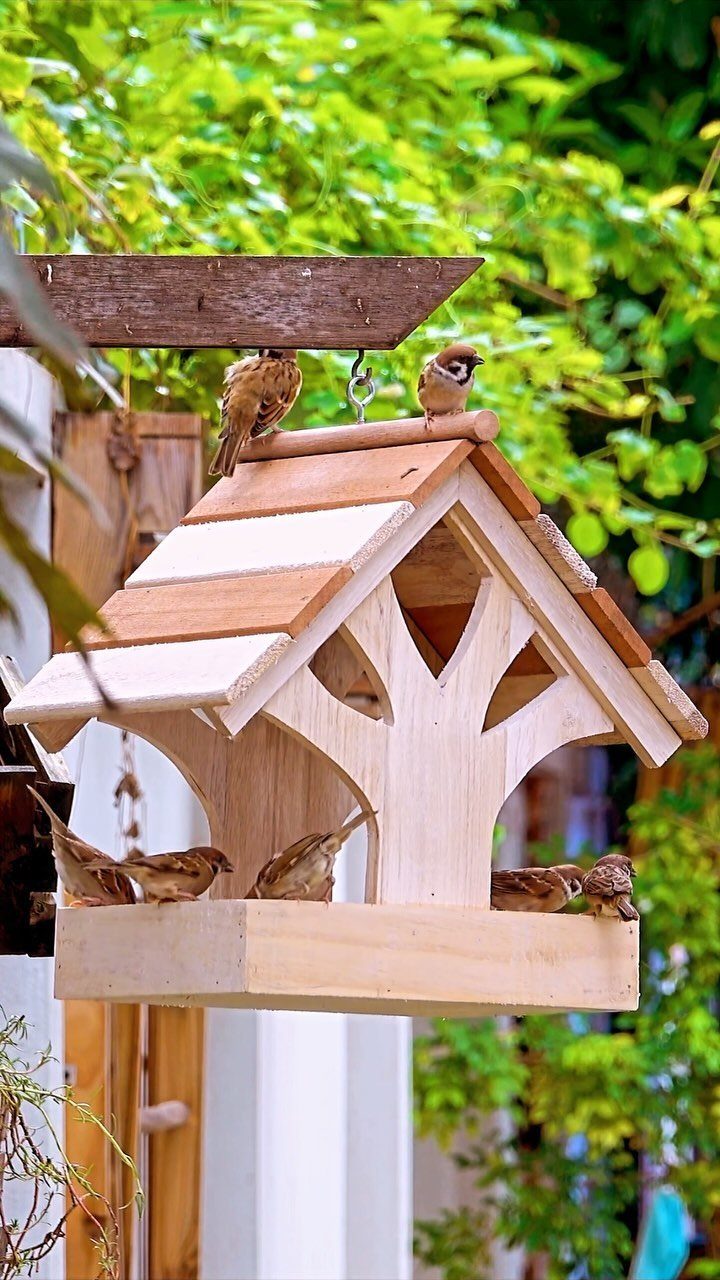
Birdhouses remain a classic for a reason: a box, a pitched roof and a round entry hole are all the structure you need.
A cutout in the front, like a tree shape, adds character without extra work. Leave the wood light and natural so it blends into foliage.
Sand the edges and drill the entry hole cleanly, then screw the roof on rather than gluing it.
18. DIY Wooden Coasters
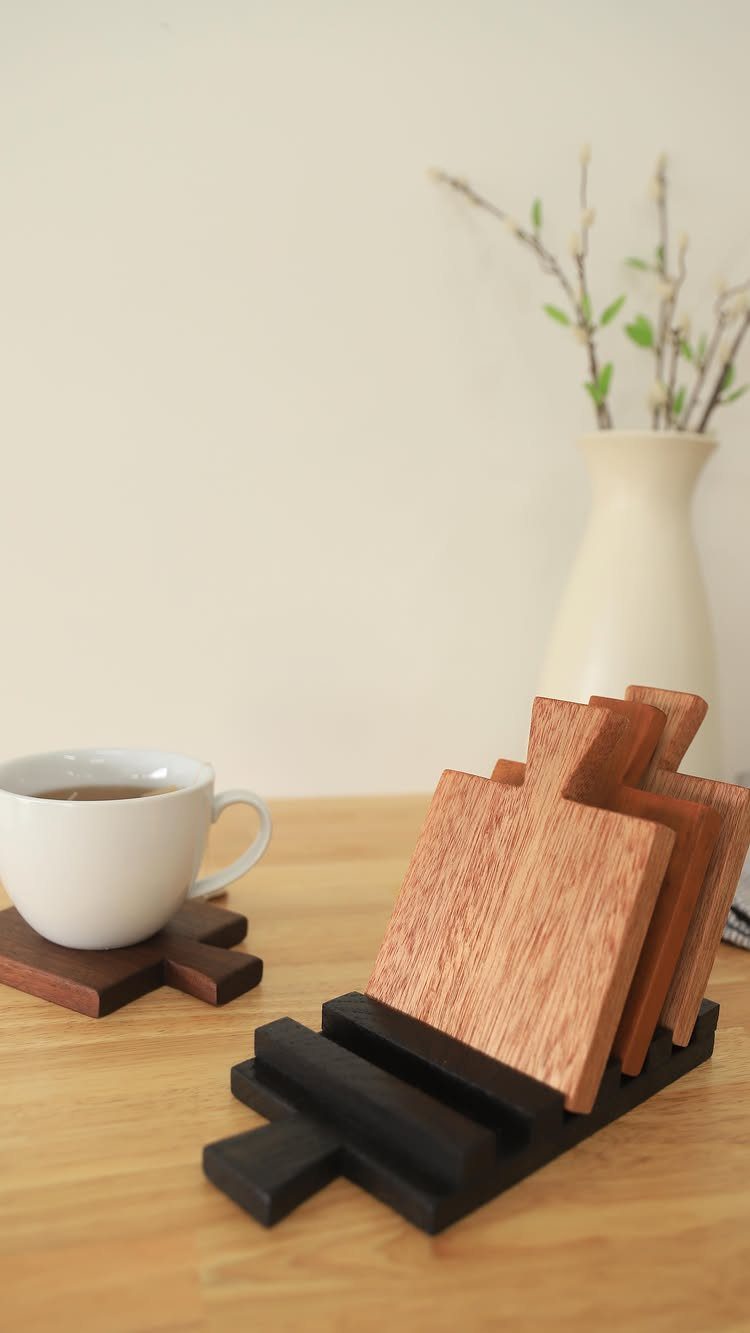
Coasters are about the easiest wood project there is: cut identical squares or rounds, sand them, and finish them.
A holder keeps the set together on the table, and it is worth making one to match. Pick one wood and one finish so the set looks consistent.
Seal the tops, since a damp cup will mark bare wood quickly. Customizing them with a burned design is an easy next step.
19. DIY Wooden Phone Holder
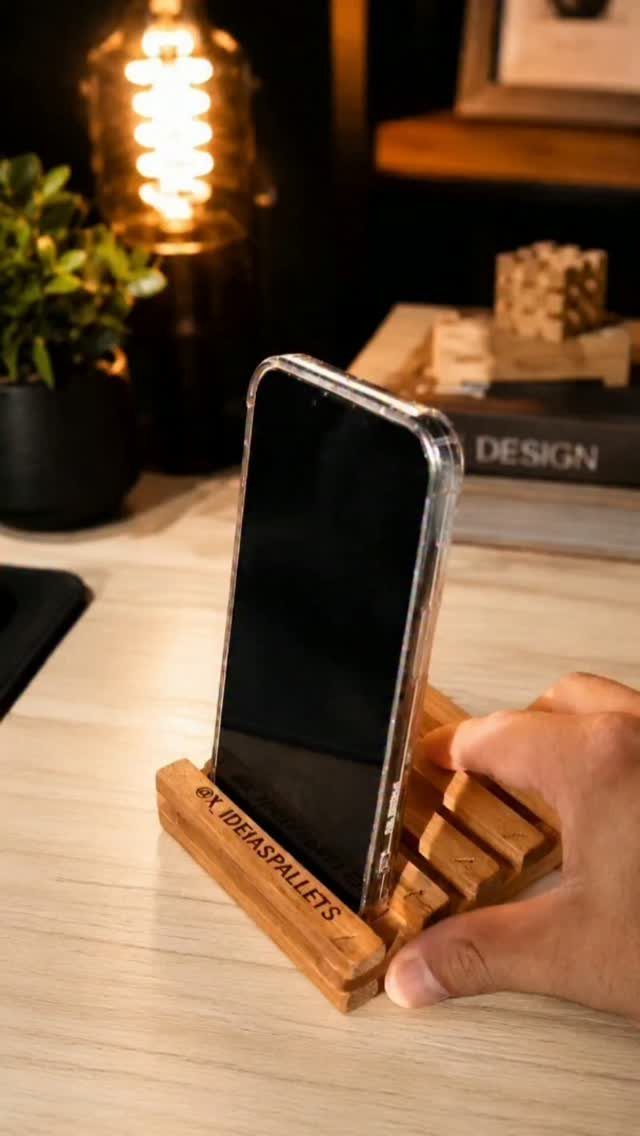
A small wooden holder keeps a phone upright on the desk, so the screen stays in view for video calls, recipes or a charging cable run. Pallet-style slats suit it, and scrap boards are plenty for something this size.
Cut a slot a little wider than the phone’s thickness so it slides in without a fight, and sand the inside edges smooth so they don’t scratch the case.
Hold the phone against the slot before you glue anything, to check the angle.
20. DIY Wooden Bird Feeder
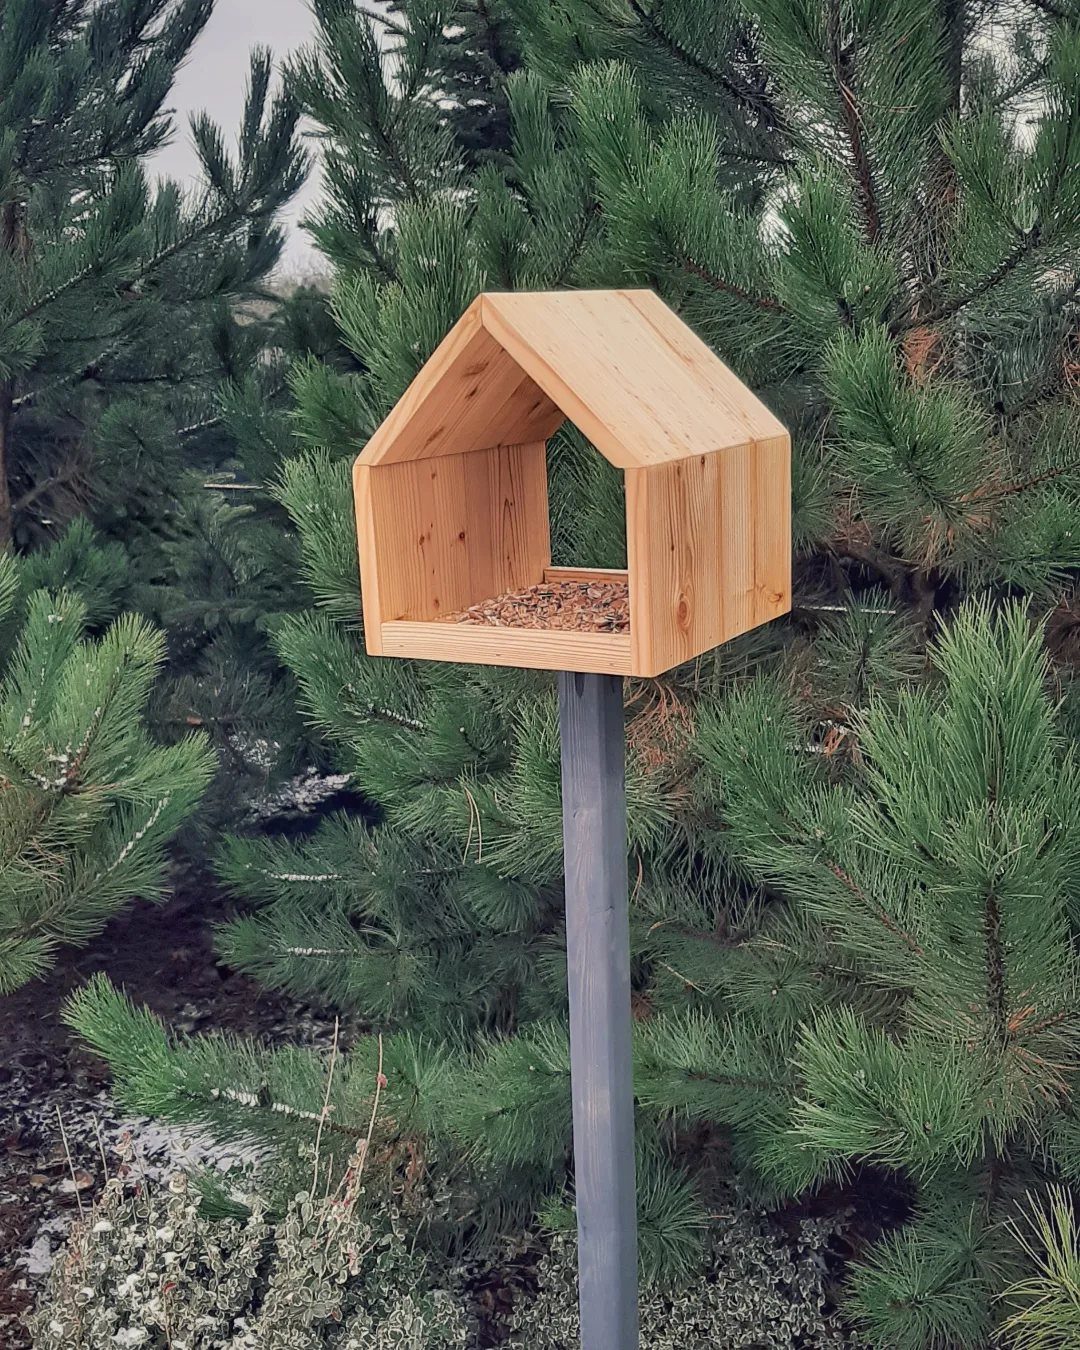
A house-shaped feeder with a peaked roof gives birds a place to land and gives you a reason to look out the window.
Build the box from plain boards, screw the roof on so you can lift it for refilling, and leave the wood natural so it blends in among the trees.
Mount it on a post at a height you can reach with a seed scoop.
21. DIY Lap Desk
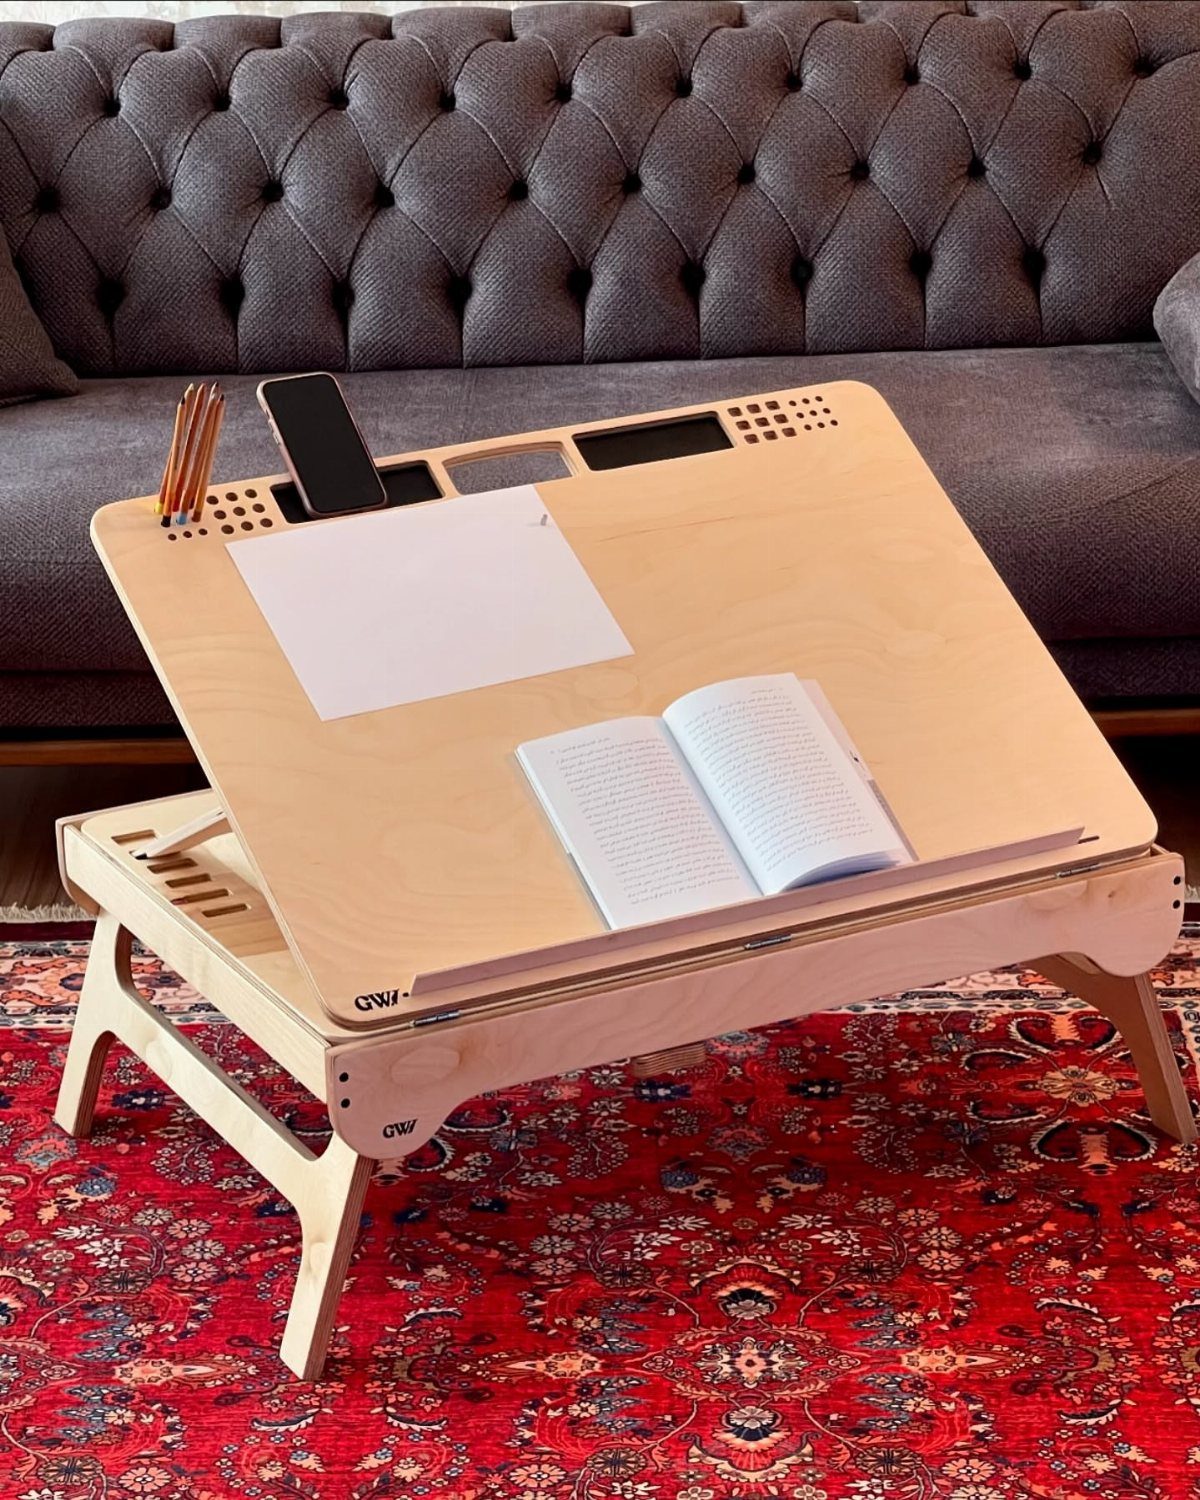
A single sheet goes a long way, so the material cost stays low.
Sand the edges until nothing catches on your clothes, since this one lives on your knees. A light clear finish keeps the grain pale and the surface smooth.
Keep the top wide enough for a book and a phone side by side.
22. Wooden Wall Clock
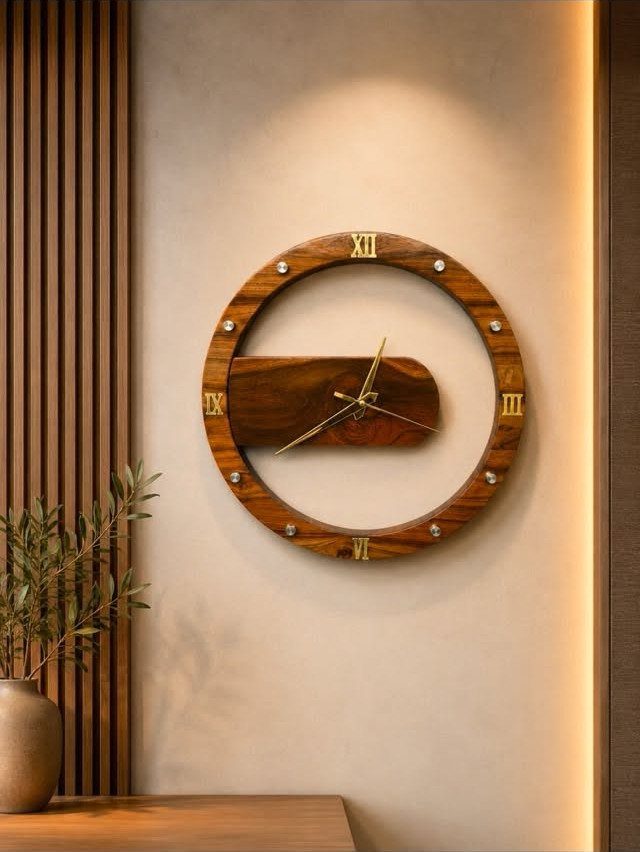
Scrap wood can become a round wall clock with real presence, and gold Roman numerals on a pale face do most of the styling for you.
Cut the circle with a jigsaw and sand the edge until it reads as one clean curve.
Mark the numeral positions before you paint anything, so the spacing stays even all the way around.
Gold hands against light wood look polished, and a clock kit supplies the movement.
23. DIY Wooden Step Stool
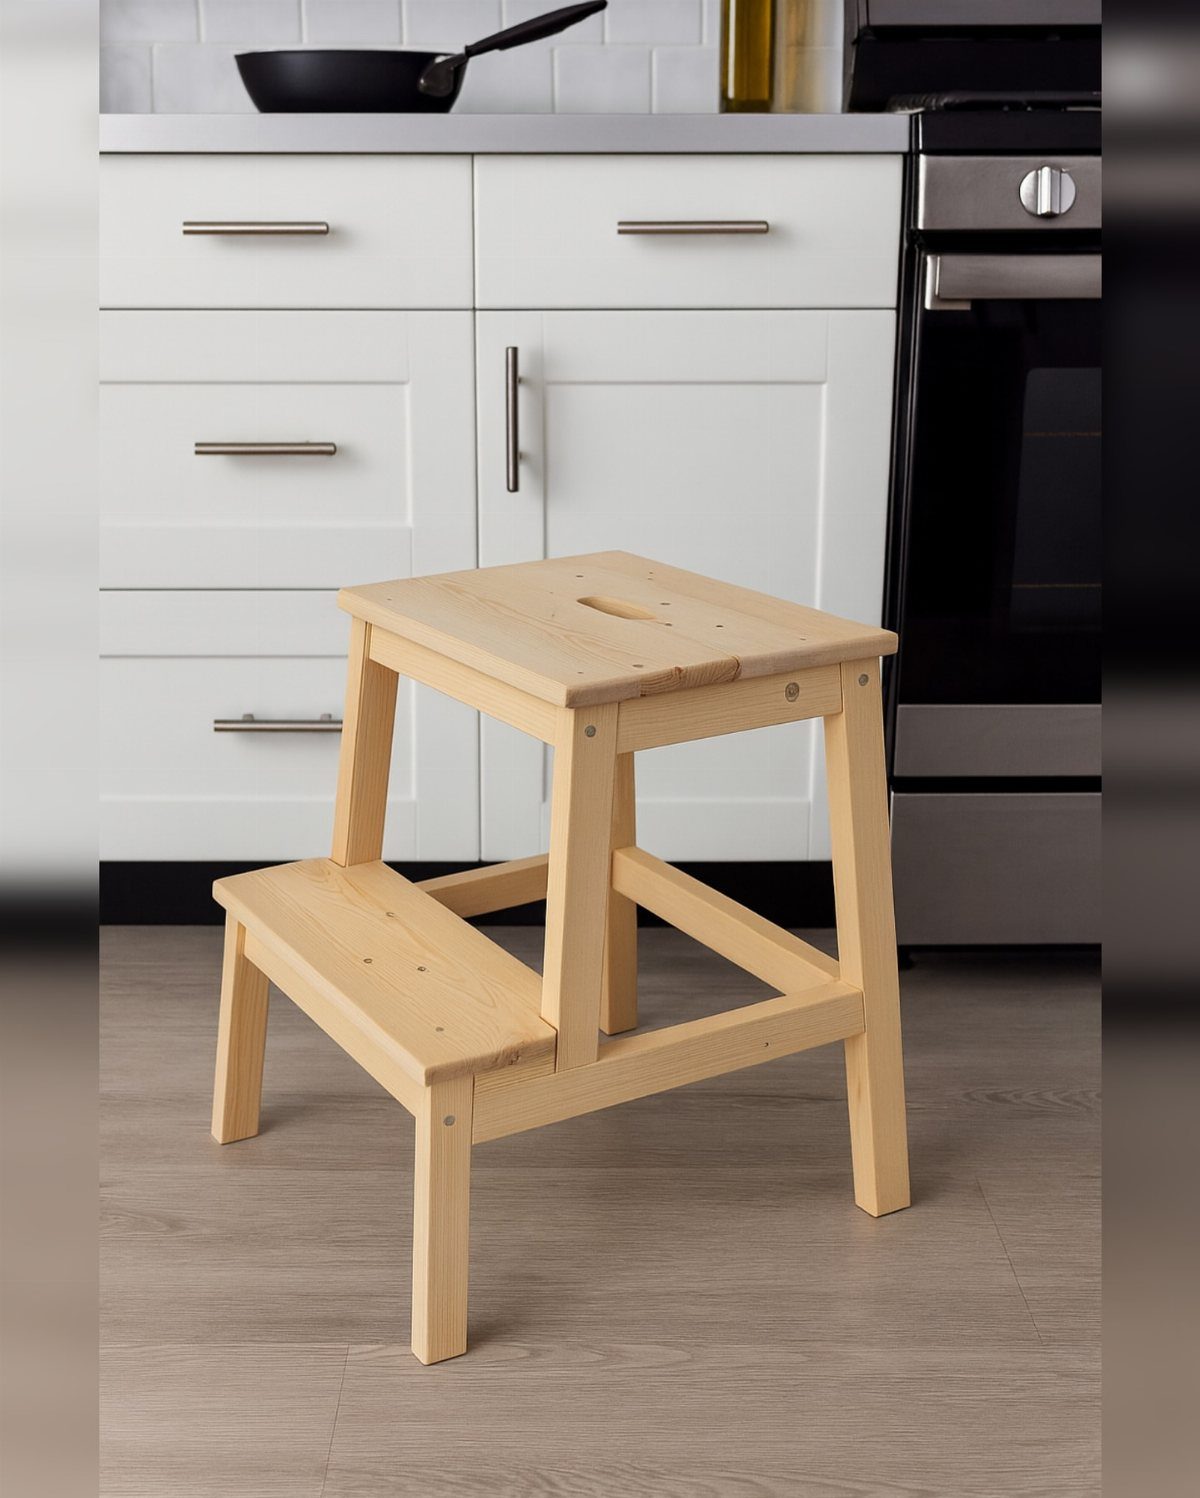
2 steps are plenty for a kitchen stool, and a light wood finish blends in with white cabinets. Kids can reach the counter with it, and you can reach the top shelf.
Screw the steps into the side frames rather than relying on glue alone, since this piece carries body weight. Round over each edge with 120-grit paper, since bare feet and hands will find every sharp corner.
Set the first step low enough that a small child can climb it comfortably.
24. DIY Wooden Candle Holder
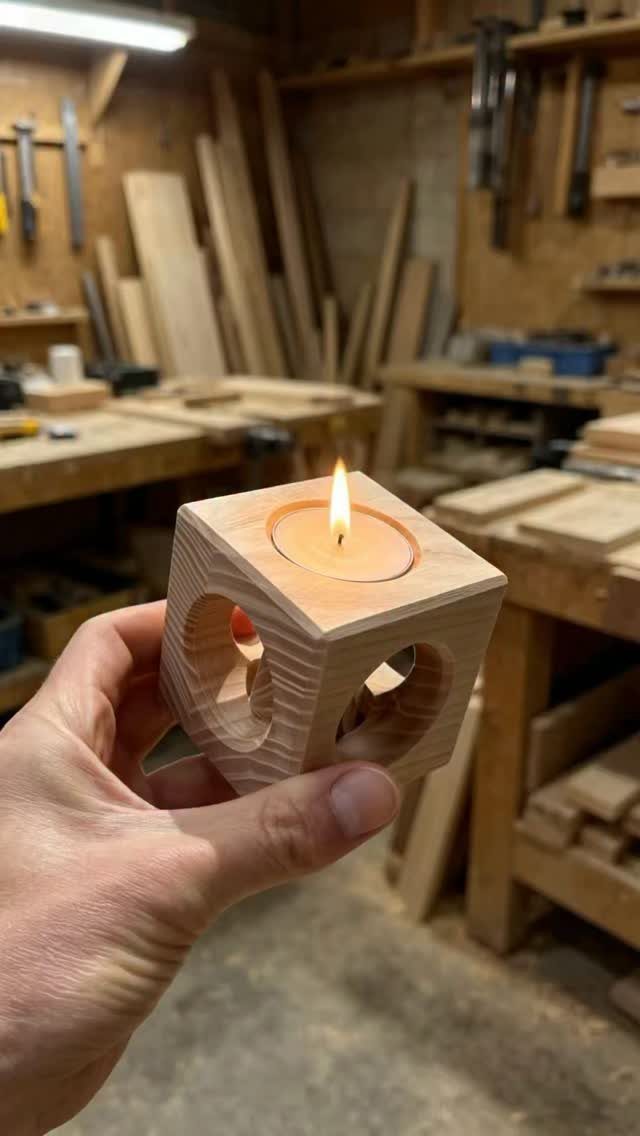
A small cube of wood with a recess for a tea light makes a centerpiece that costs next to nothing, and one block is a short afternoon job. Three in a row looks better than a single one.
Drill the recess to fit the tea light snugly, then sand the outside smooth. Leaving the wood bare shows off the grain.
Keep a flame away from the wood edges, or use a battery tea light instead.
25. DIY Wooden Jewelry Box
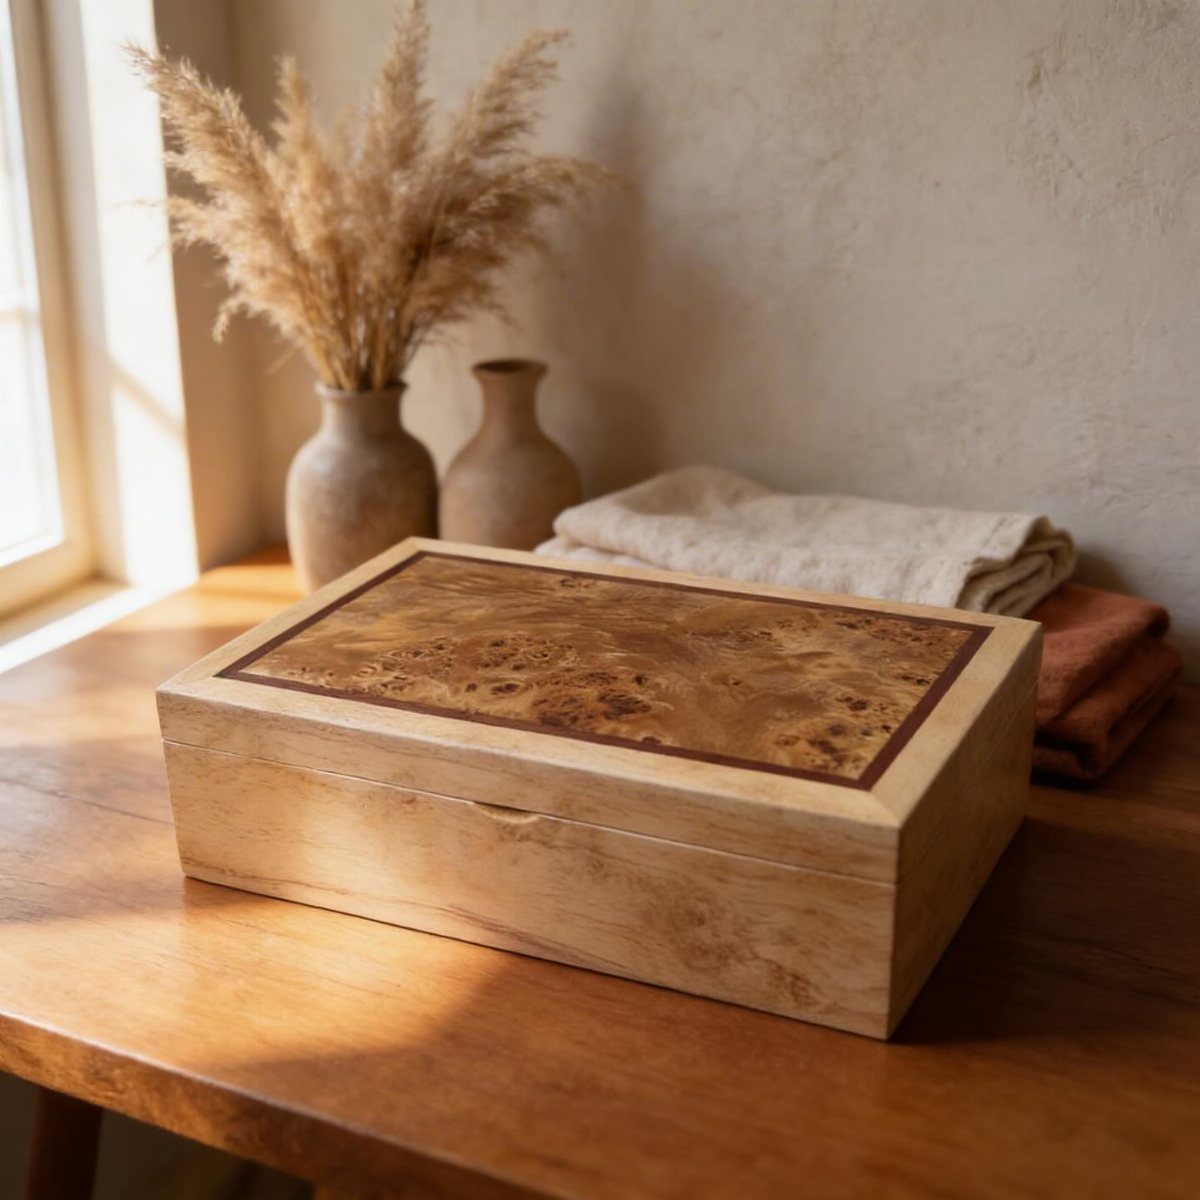
A jewelry box with a burl wood inlay on the lid keeps necklaces and rings in one spot and keeps dust off them, and the swirled grain on top does the decorating for you.
Cut the lid from a plain board, then set a thin burl panel into it so the figure shows against the surrounding wood. Sand the box smooth inside, where chains can snag.
A lined tray is an easy add-on if you want rings kept apart.
26. DIY Wooden Ring Toss Game
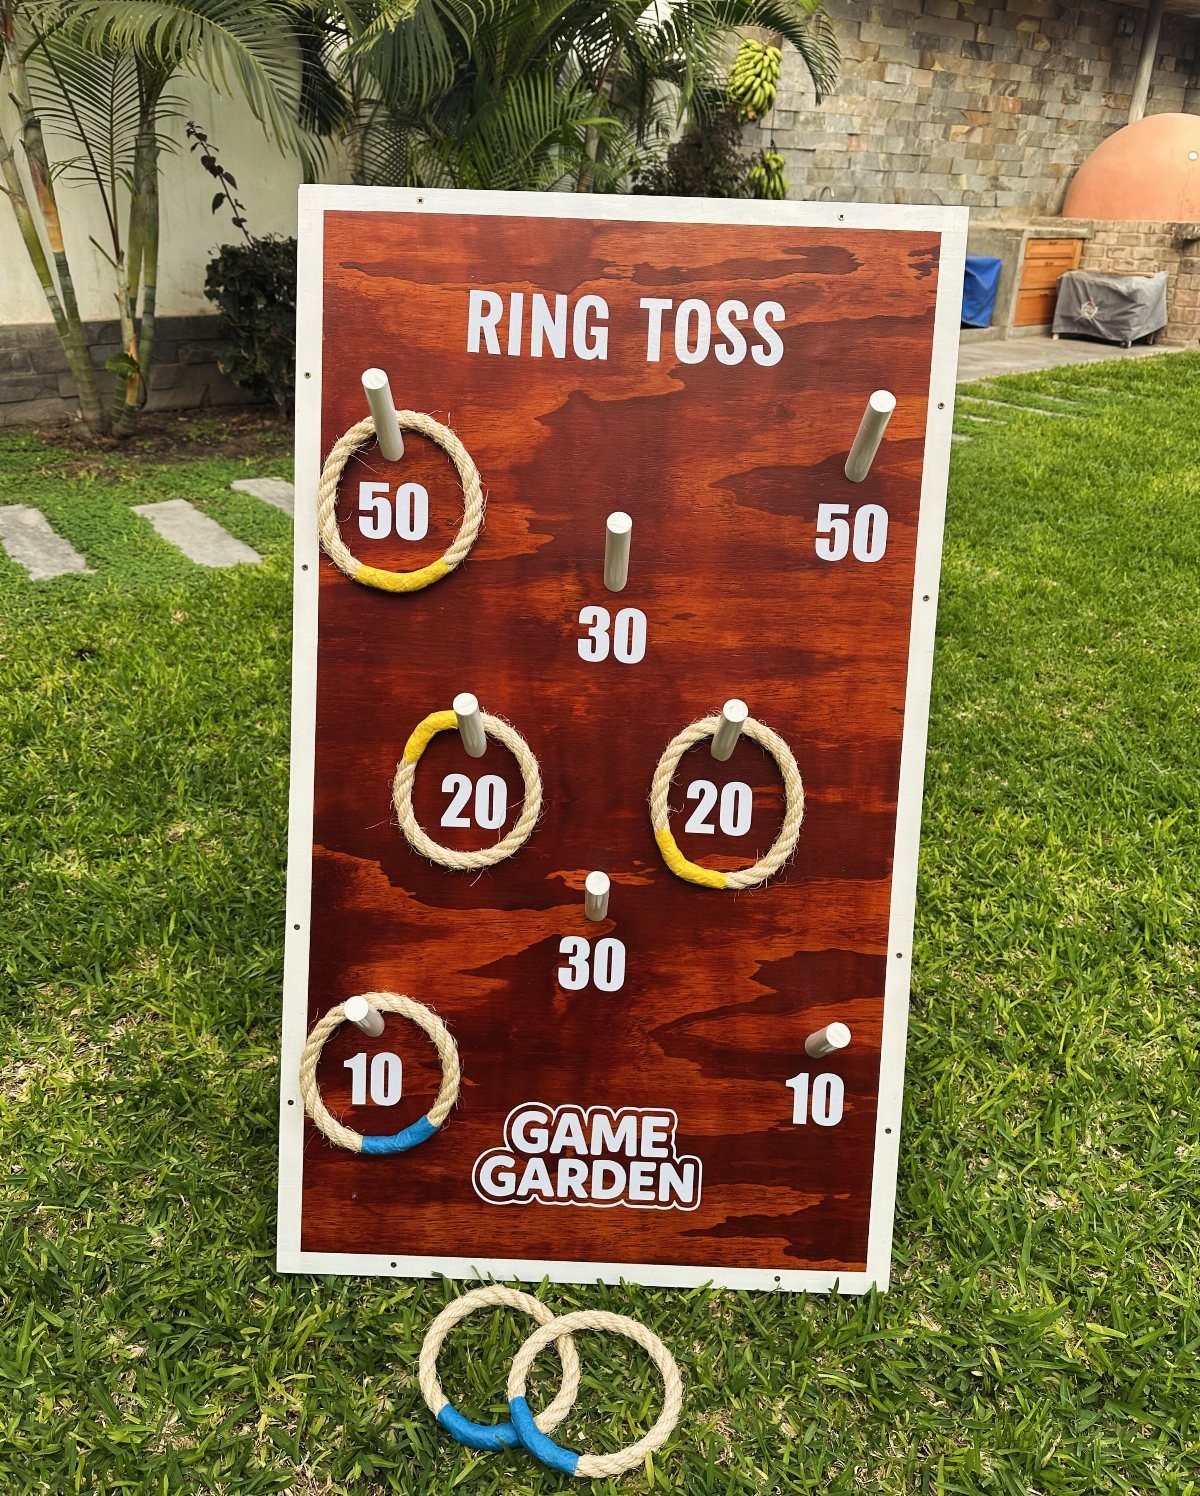
Rope rings and a board of pegs make a ring toss that works on a lawn, and painting point values beside each peg turns it into a real game.
Set the pegs at different distances or in a staggered pattern so the high scores take some aim. Sand the board and round the peg tops so nothing splinters in a hand.
Paint the title and numbers large enough to read from the throwing line.
27. DIY Wooden Garden Trellis
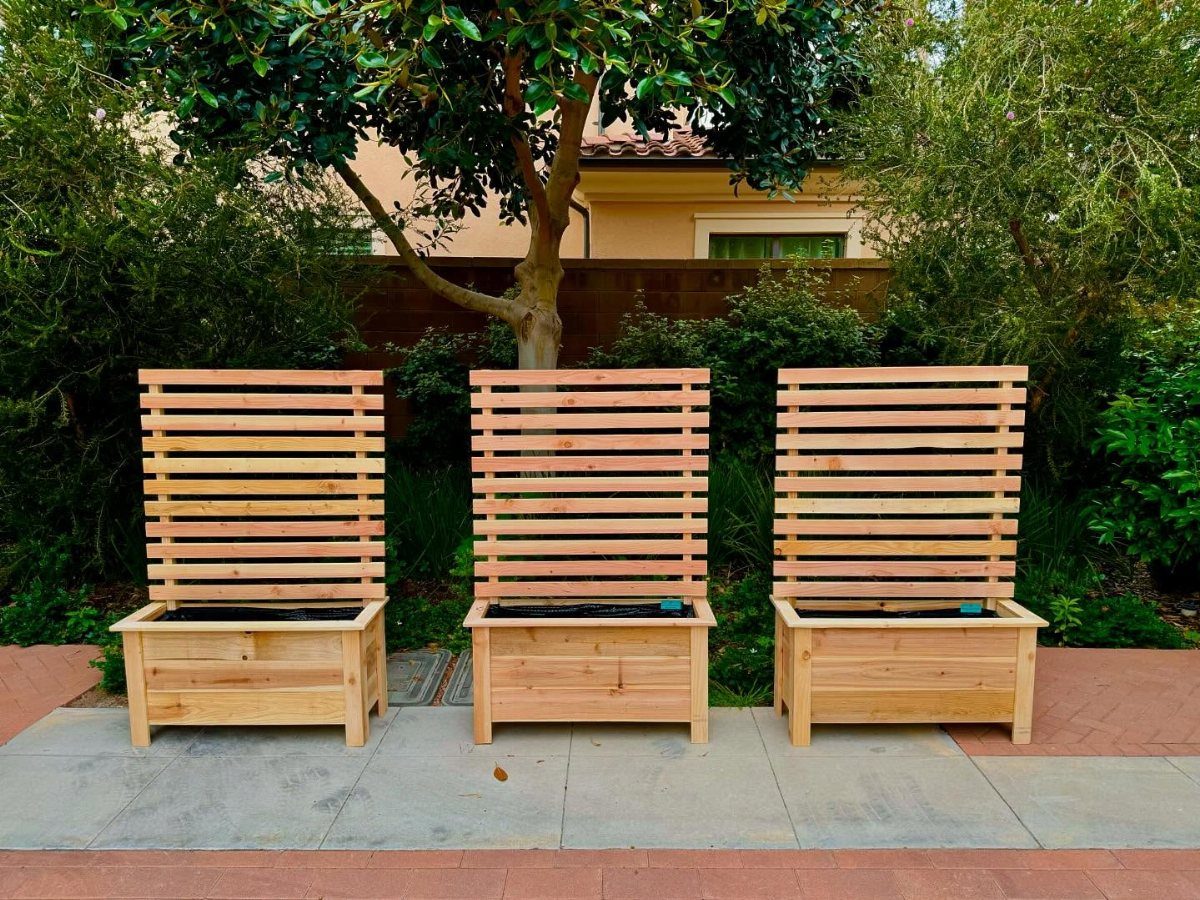
A slatted trellis fixed to the back of a planter box gives climbing plants something to grab, and building 3 identical boxes keeps the cuts repeatable and the row tidy.
Make the trellis tall, with slats spaced evenly so tendrils can wrap them. Screw it to the box rather than gluing it, since a grown vine pulls hard.
Poke a few drainage holes through the bottom of each planter box so water can escape, and give the wood an outdoor finish before it meets the weather.
28. DIY Wooden Side Table
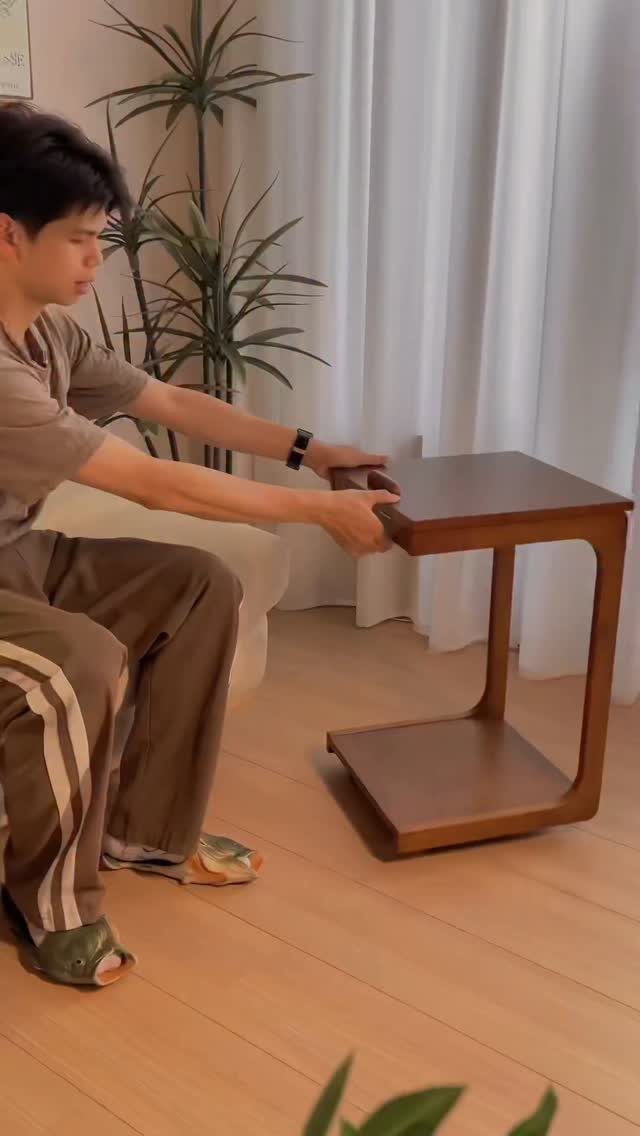
A small side table with a square top and a lower shelf is a good afternoon build, and a dark brown stain makes plain boards look richer than they cost.
Cut the legs, then two square panels, one for the top and one for the shelf. Fix the shelf at the same height on every leg, and check the table for square before the glue sets.
Wobble is the usual flaw, so test it on a flat floor before you stain.
The table shown here costs less than $30 to build, but there is a wide variety to choose from for the top, including slate, granite, limestone, marble or decorative tile.
29. Miniature Wooden Model House
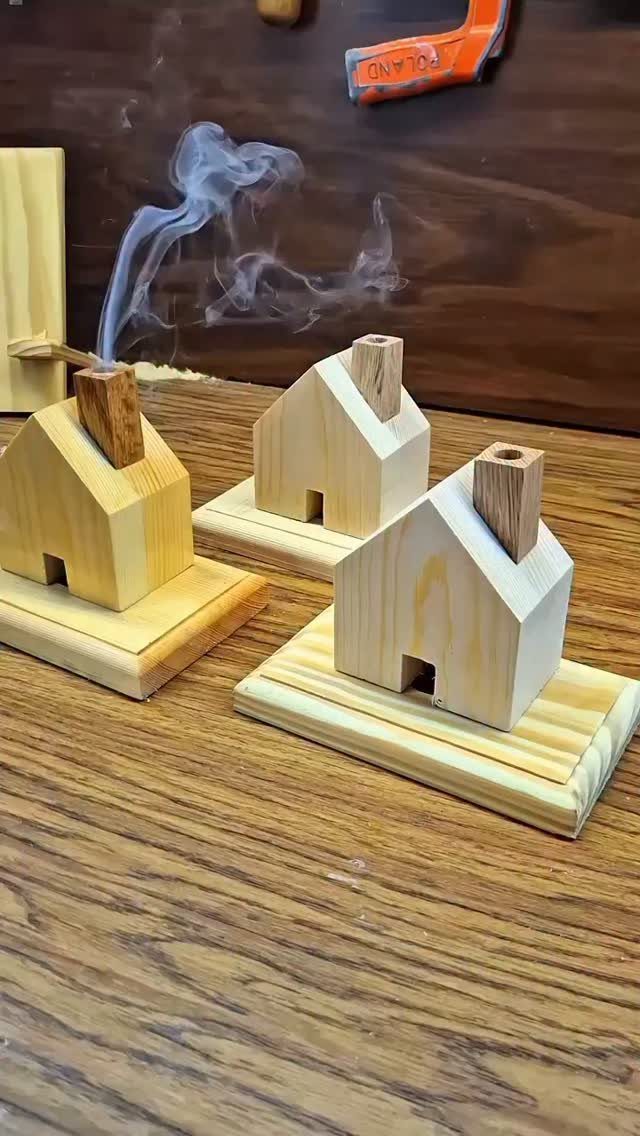
Tiny houses with chimneys on wooden bases look charming left unfinished, and each one uses only a few scraps. Bare wood also shows the grain, which paint would hide.
Cut the walls and a pitched roof, then glue the house to a base so it can be moved without coming apart. Sand the corners before assembly, since they are hard to reach afterward.
A set of three in different sizes looks better than one.
30. Popsicle Stick Biplane Model
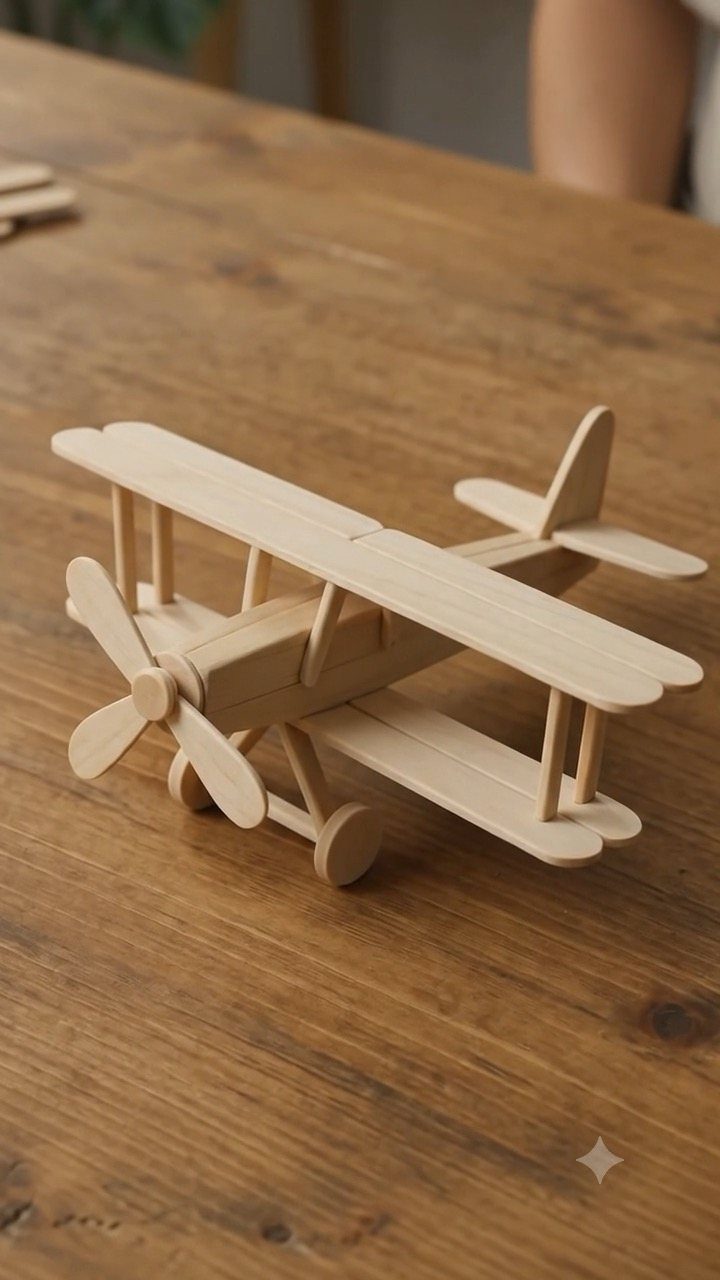
A biplane built from popsicle sticks and wooden dowels is a cheap craft that rewards patience. The sticks make the wings and body, and the dowels handle the struts and axles.
Glue the 2 wings flat and let them dry fully before joining them with the dowel struts. Use the dowels to keep the wings parallel, and hold each joint until it grips.
Light wood looks good left natural, and it is a display piece, not a flyer.
31. Toy Car Display Garage
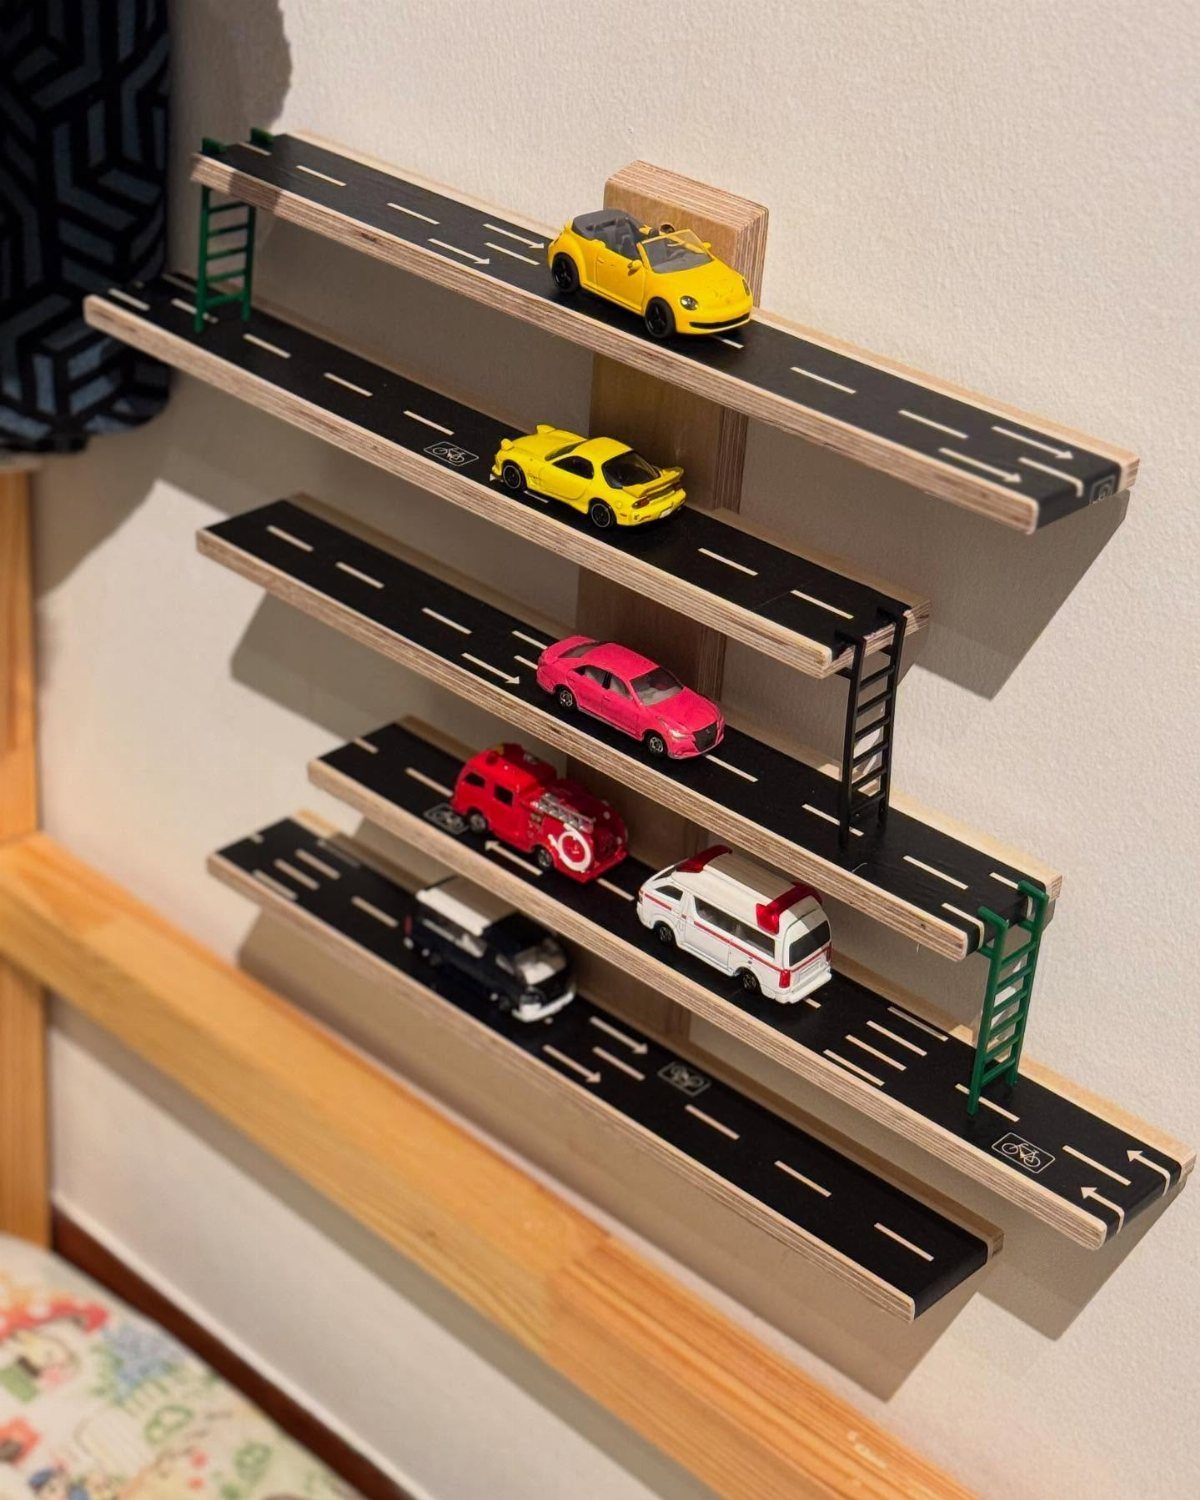
Tiers of narrow shelves turn a wall into a road system, and each shelf holds a row of cars parked side by side. Wall mounting keeps the floor clear, which suits a small room.
Cut each shelf the same length and space the tiers evenly, with enough height between them for the tallest car. Add a thin lip along the front edge so cars don’t roll off.
Screw the rack to the wall through the back, and the side ladders can be small scraps glued on after sanding.
32. Dollhouse Miniature Wooden Furniture
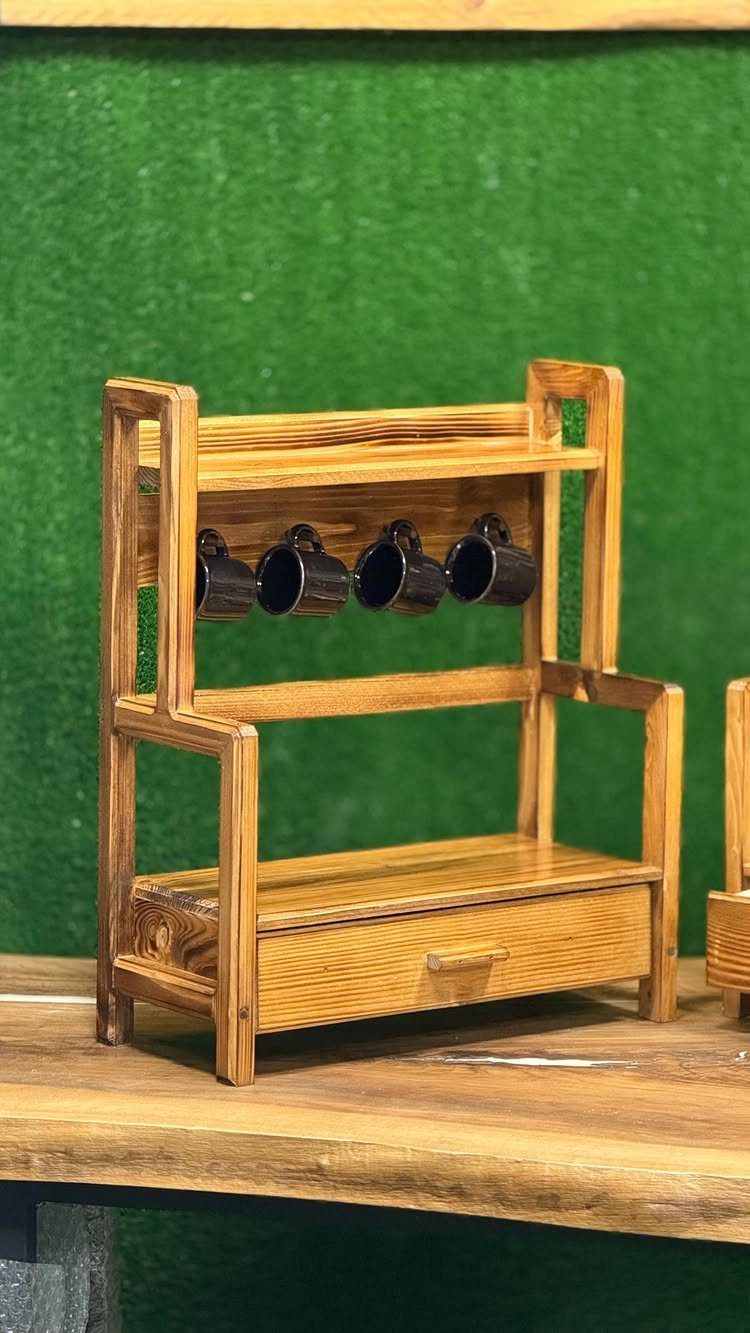
A dollhouse shelf unit with a mug rack above and one small drawer below is a project where scale is the whole challenge. Every piece is tiny, so cut slowly and sand by hand.
Make the drawer first and build the opening around it, leaving a hair of clearance so it slides. Small pegs or screw eyes can hold the mugs on the rack.
Glue the joints and clamp them with clothespins. Paint or stain after assembly, thin coats only, so the drawer doesn’t stick.
Using Scrap Wood
Scrap piles grow with every build, and a pile you never touch is just clutter. Sort it once: pull out offcuts long enough to be useful, and toss the splintered or cracked bits.
Keep the keepers by size, not by species, in a bin or a milk crate. When a new idea needs a small piece, you will find it in a minute instead of cutting into a fresh board.
Check each piece for old nails or screws before it goes near a saw blade. A metal detector isn’t needed; a quick look and a pass of your hand along the faces catches most of them.
Pieces from different projects rarely match in color. Stain or paint evens that out, so plan on a finish that covers the differences.
Tips for Beginners
Pick a first build with straight cuts and few parts. A handsaw, a drill, sandpaper and wood glue are enough for most small pieces.
Practice one skill per project.
Measure twice and mark with a pencil line you can see. Cut on the waste side of the line, then sand to it.
Drill a test hole in a scrap before you drill the real piece. It shows you how the bit behaves and whether the wood splits.
Save curves, joinery and inlays for later. Once your edges meet cleanly and your sanding is even, those harder builds feel like extensions of what you already know.
Project Customization
Change one thing at a time. Size is the easiest: scale every dimension by the same amount so the proportions hold, and recheck the fit of any part that holds something, like a slot or a recess.
Finish is the next lever.
Paint, stain and clear coat each change the mood of a piece. Test on an offcut first, because the same stain reads darker on some boards than others.
Match the piece to the room. Pull a color from your wall, rug or hardware, then repeat it once on the project.
Write down your changes as you go. Next time you make the piece, you will have your own plans.
Frequently Asked Questions
What are some good small woodworking projects?
Coasters, a plant stand, a wall hook rail and a spice rack are all good starting points.
Coasters make a gentle starting point: cut a stack of matching squares or rounds, sand the faces and edges smooth, then seal the tops so a sweating glass leaves no ring.
A hook rail is nearly as quick, and pre-drilling the holes keeps the board from splitting.
What can I make with small pieces of wood?
Coasters, a candle holder, a picture frame, a phone holder or a small serving tray all fit on scraps.
A tea light holder is just a small block of wood with a recess drilled to fit the candle snugly. Sort your offcuts by size in a bin so the right piece is easy to find when an idea strikes.
What small wooden items sell well?
Decor pieces, organizers and small useful items are the safest bets, since they are cheap to make and easy to display.
Trays, coasters and candle holders look best in sets of different sizes or matching finishes. Sand every edge and seal the wood, because buyers handle these pieces and a rough or unfinished surface shows quickly.






