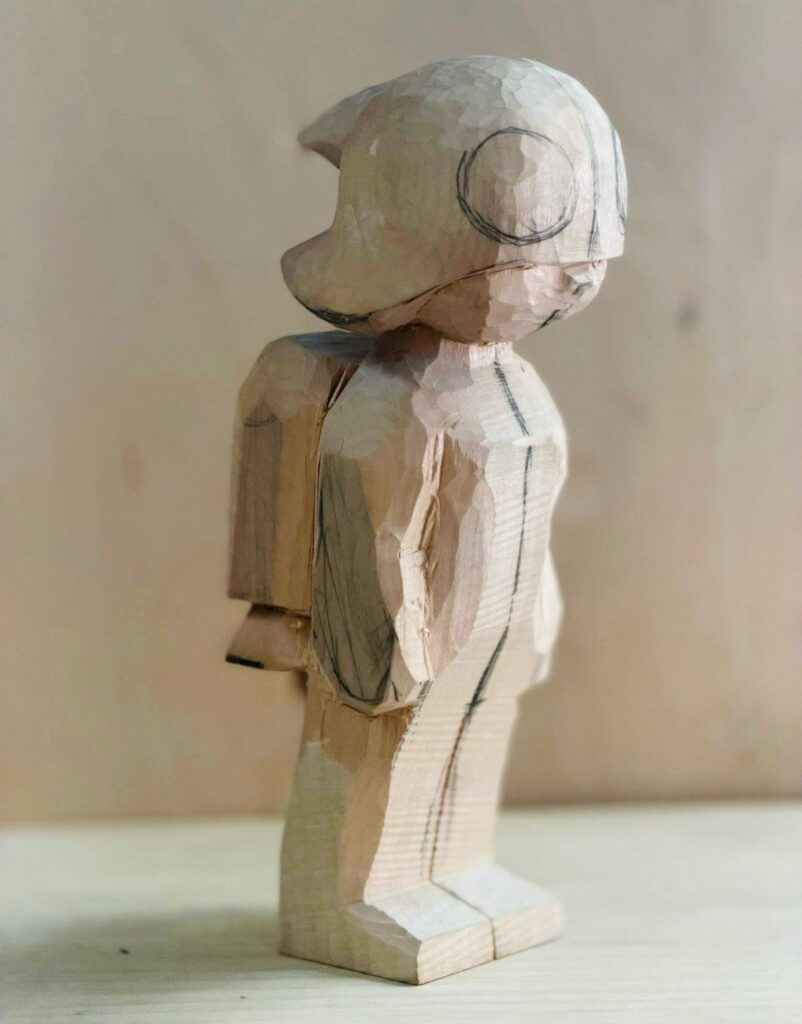
Skill level should decide where you start: the Comfort Bird and the Basic Mushroom forgive a slipped cut, while the Miniature Warrior Figure and the Wood Spirit Faces ask for steadier knife control.
1. Comfort Bird
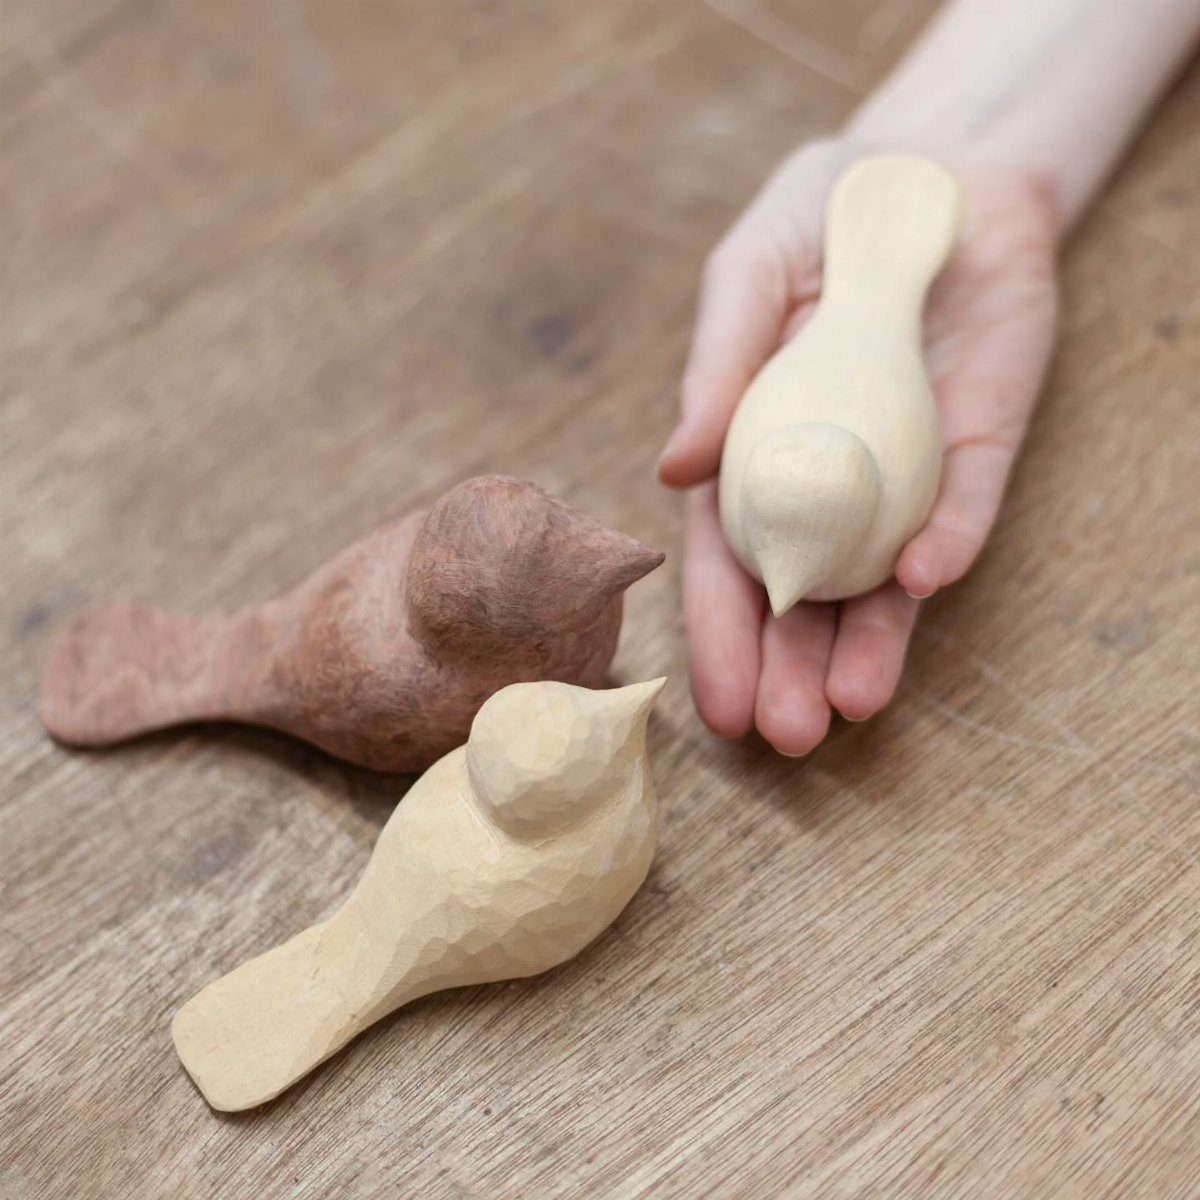
A small bird is about the friendliest first carve there is: a rounded body, a short tail, a head that barely needs more than a gentle point for the beak.
Because the shape is so simple, you spend your time on the part that matters, which is smoothing the curves until the bird feels good in your palm.
Carve a batch of 3 in one sitting: once the first bird’s proportions are dialed in, the second and third go faster, and they make an easy gift set.
By the third, your cuts will be calmer than they were on the first.
2. Basic Mushroom
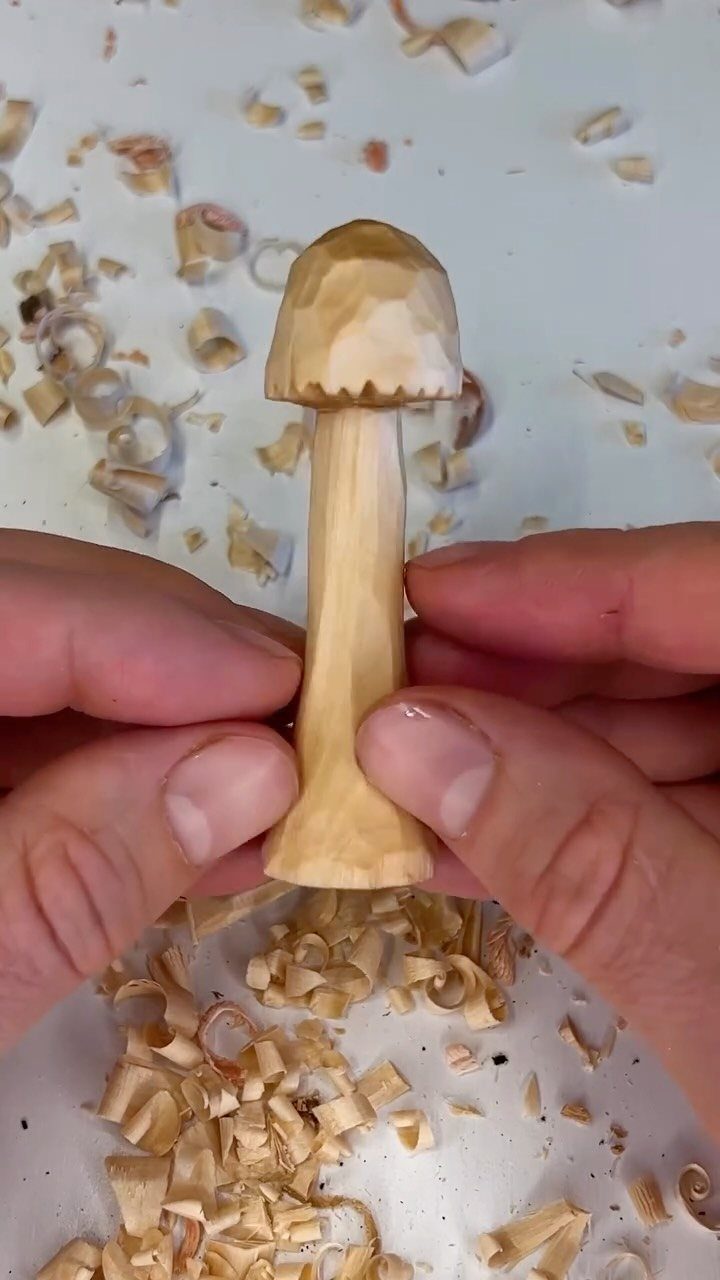
A mushroom is just 2 forms stacked: a straight stem, then a domed cap that sits over it and overhangs a little. That pairing is the reason I hand it to beginners first.
Rough out the stem with a whittling knife, then use a small gouge to hollow the underside of the cap so it overhangs the stem. Round the cap’s top with shallow, shaving-thin cuts.
Expect a pile of light shavings and a stem that ends up slimmer than planned. Leave it a bit thicker than you think it should be.
3. Carving Small Characters
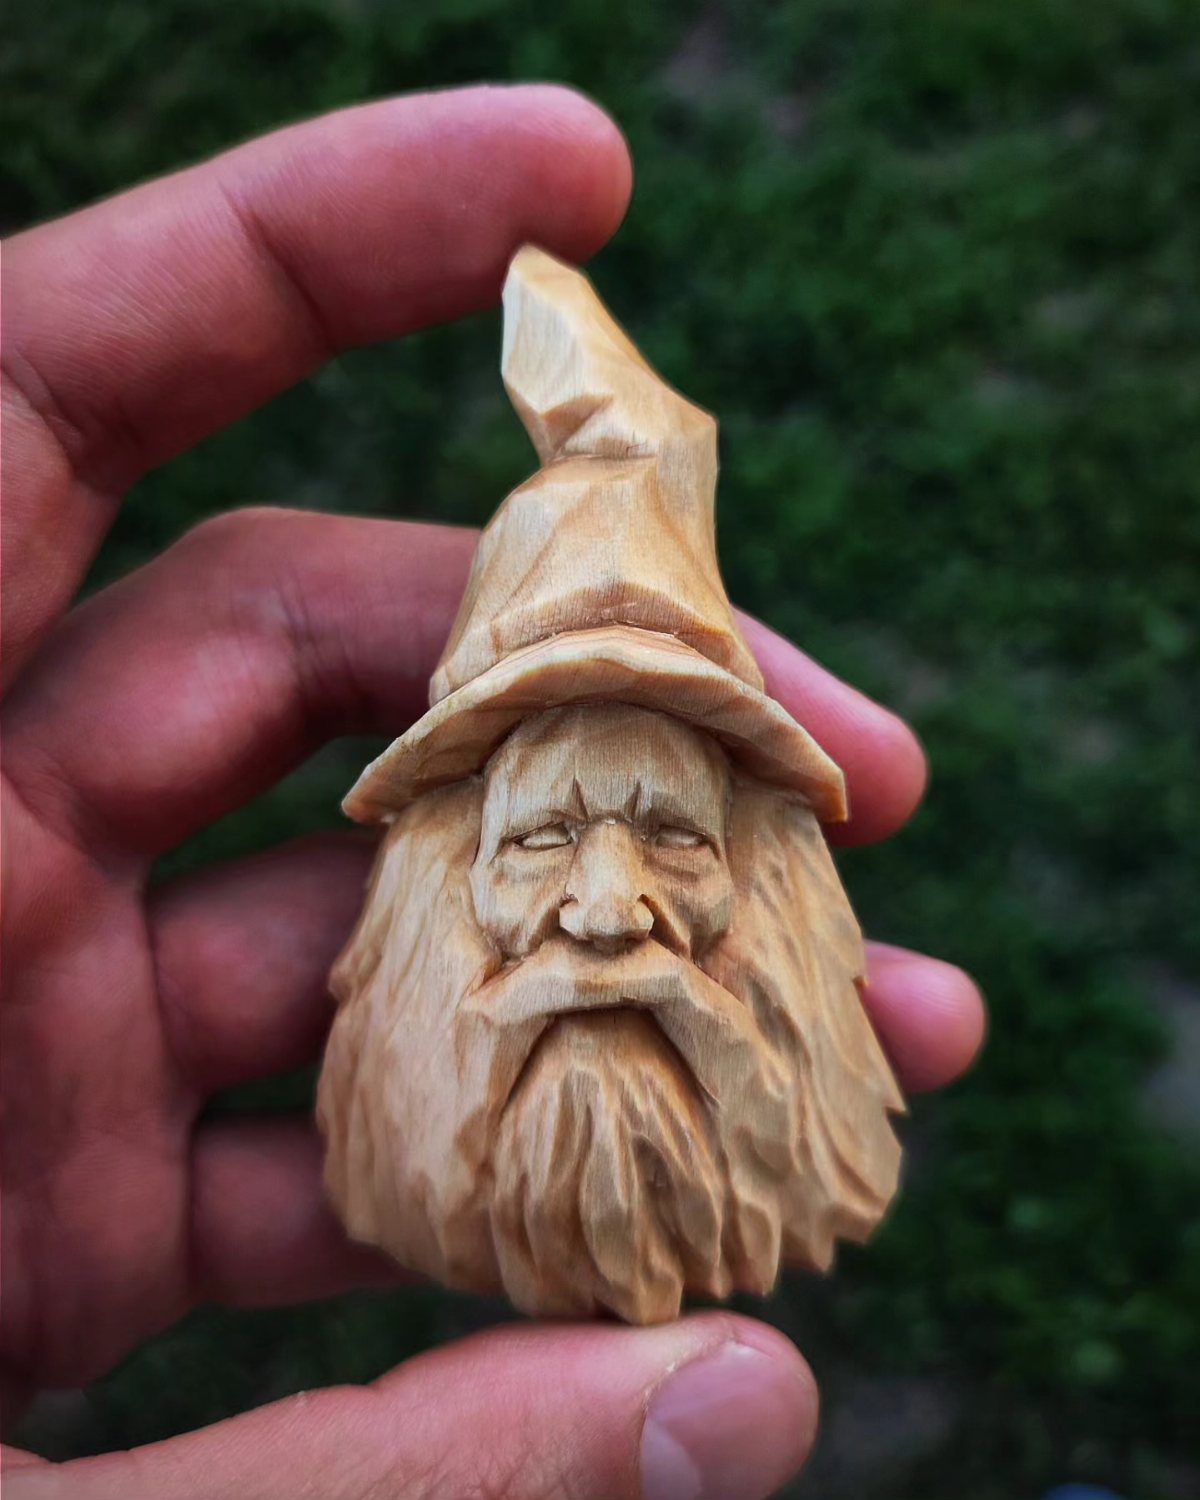
A bearded face under a pointed hat can fit in your palm and still have more attitude than a figure 3 times its size. Small caricatures reward exaggeration: a big nose, a heavy brow, a beard that swallows the chin.
Keep the cuts simple. A few deliberate slices for the eyes and brim read better than fussy detail you cannot see at this scale.
Start with the hat and beard, since they set the character before the face does.
4. Carving Gnomes and Trolls
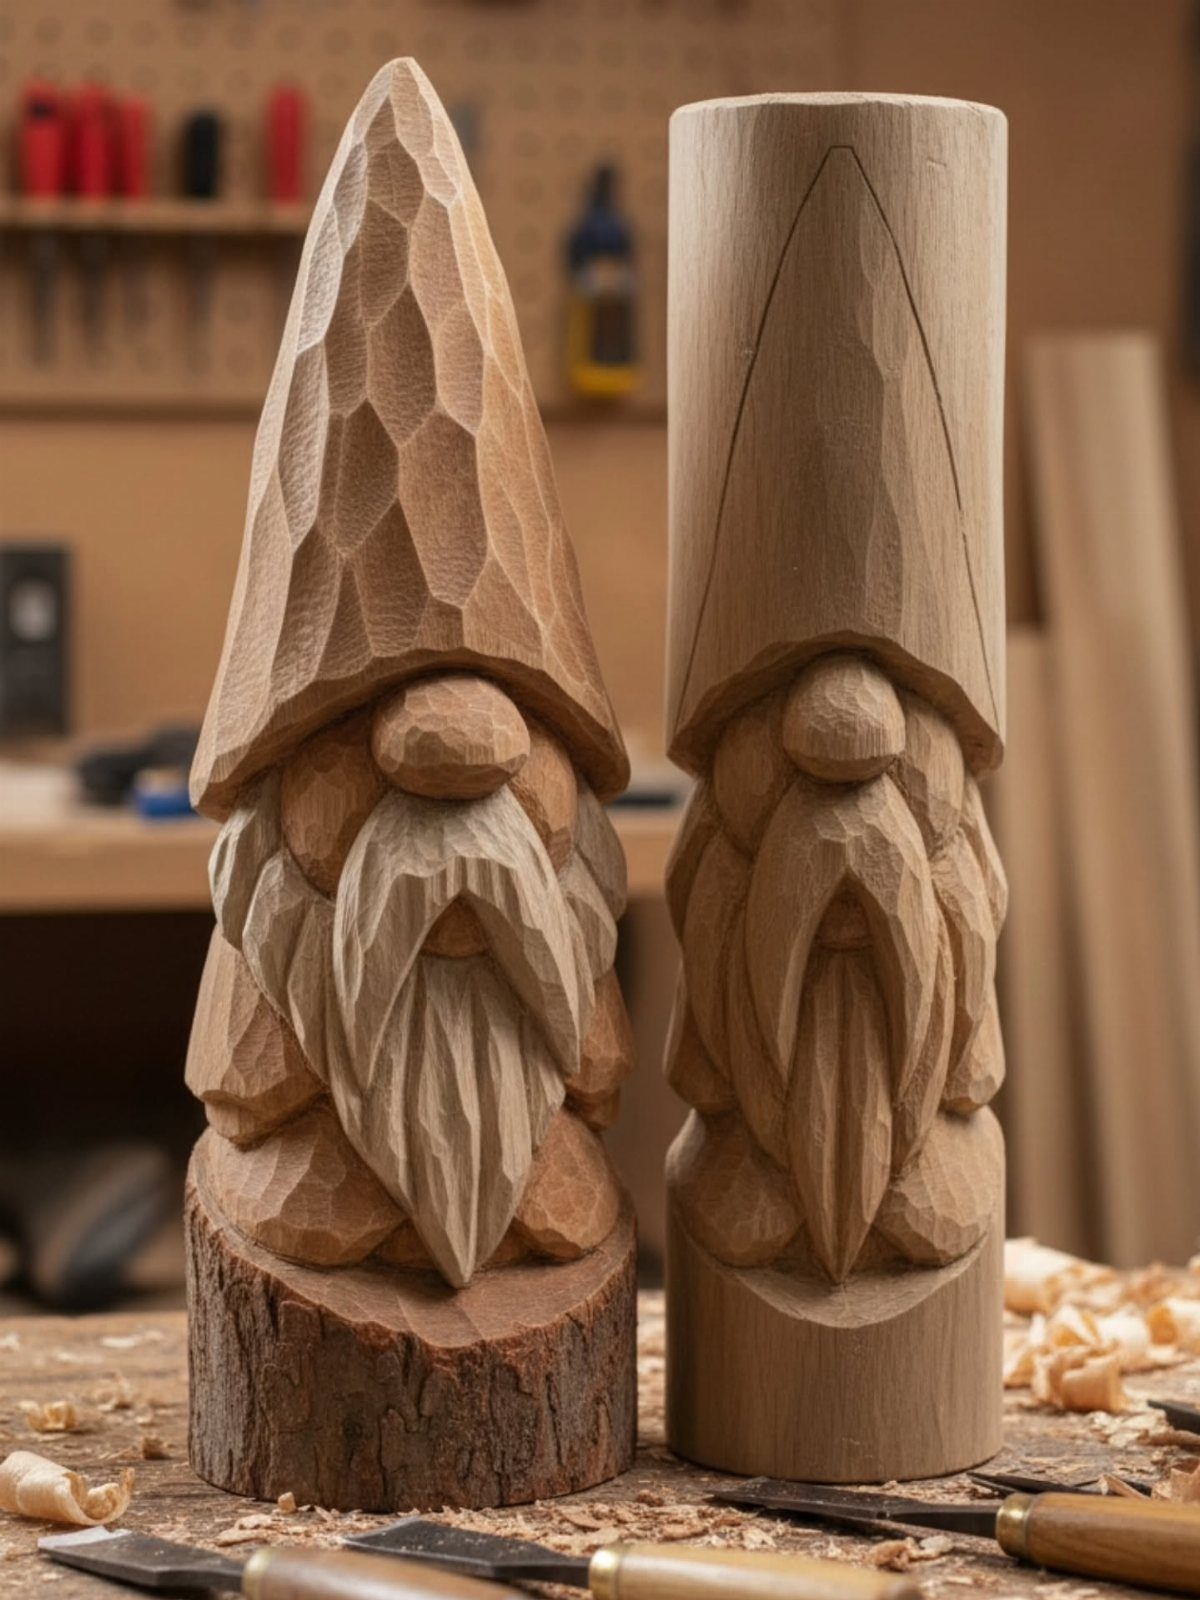
Gnomes and trolls forgive mistakes, which makes them ideal practice. A lumpy nose or a crooked hat just adds to the folk-tale look.
Carve two in a row, as the workbench photo suggests. The first teaches you where the proportions go wrong; the second goes faster and looks better.
Block out the body, hat and beard as one chunky mass before adding any detail. Trolls can stay rougher and more weathered, while gnomes want smoother, rounder lines.
5. Colorful Monster Characters
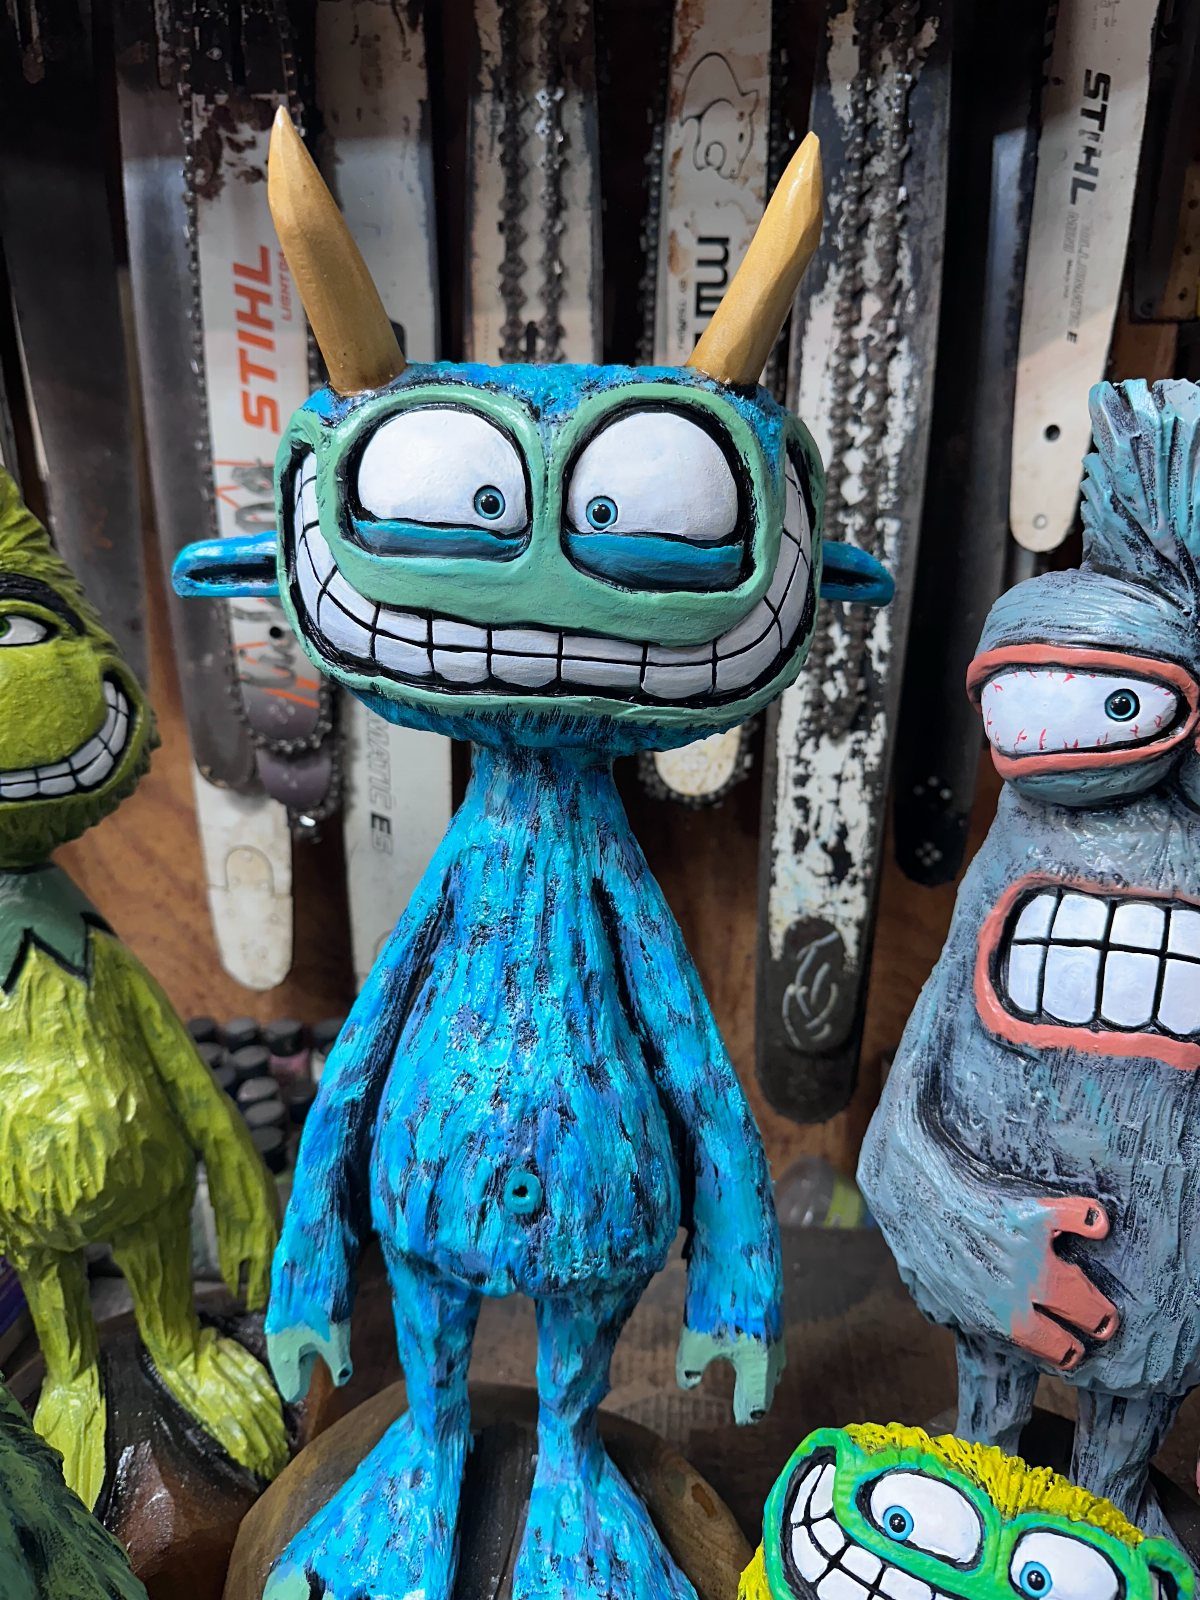
Paint does most of the work here. A carved monster only needs a rounded body, a pair of horns, and a wide mouth with chunky teeth, then bold color makes it read as a character.
Keep the carved shapes big and simple so the grin and the eyes stand out. Oversized eyes are the quickest way to get that friendly-silly look.
I like painting one in blue with contrasting horns. Use a bright base color first, then add the eyes and teeth last.
6. Whimsical Mushroom Person
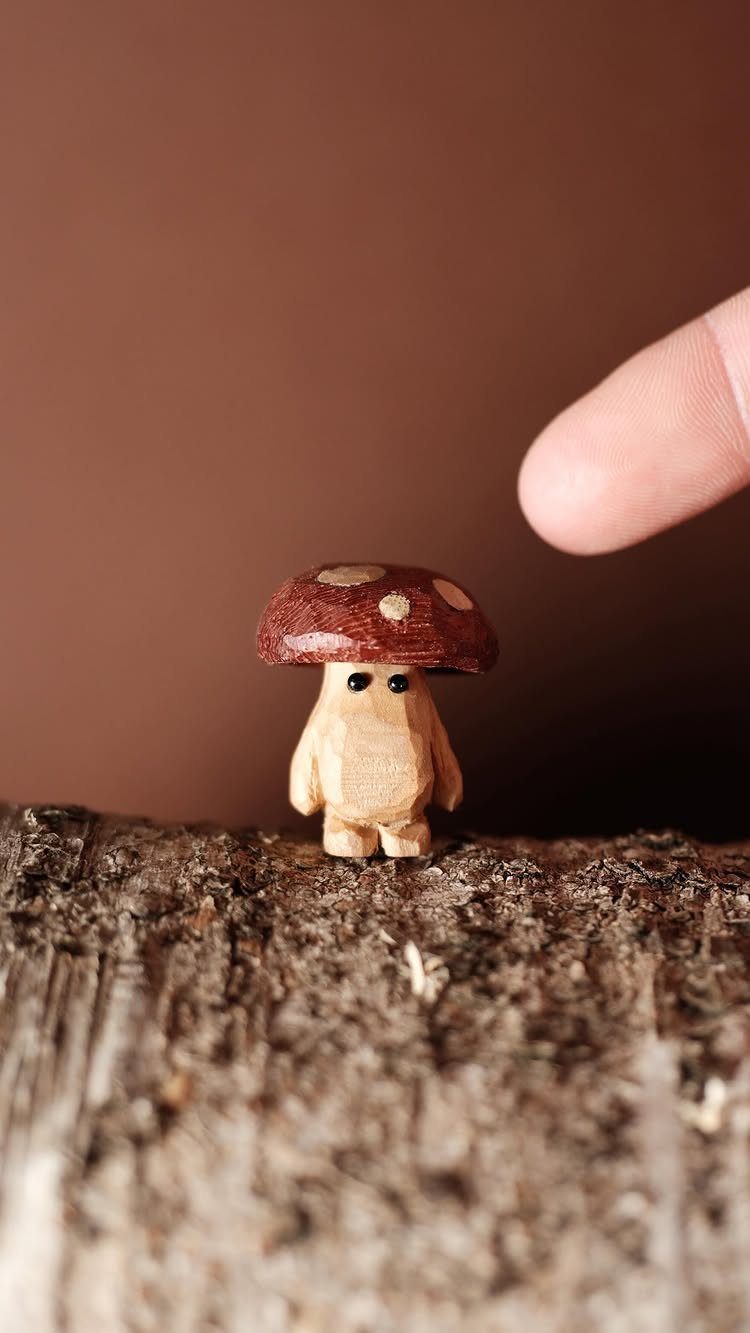
A mushroom cap on a tiny figure gives you a character in about the time a plain mushroom takes. The body is a simple little person, and the red cap does the talking.
Keep the face minimal: 2 black dots for eyes are enough. Anything more gets crowded at this size.
Mounting it on a piece of tree bark gives the figure a base and a woodland setting at no extra cost. Paint the cap after carving, and let it dry fully before you set the figure down.
7. Wood Spirit Faces
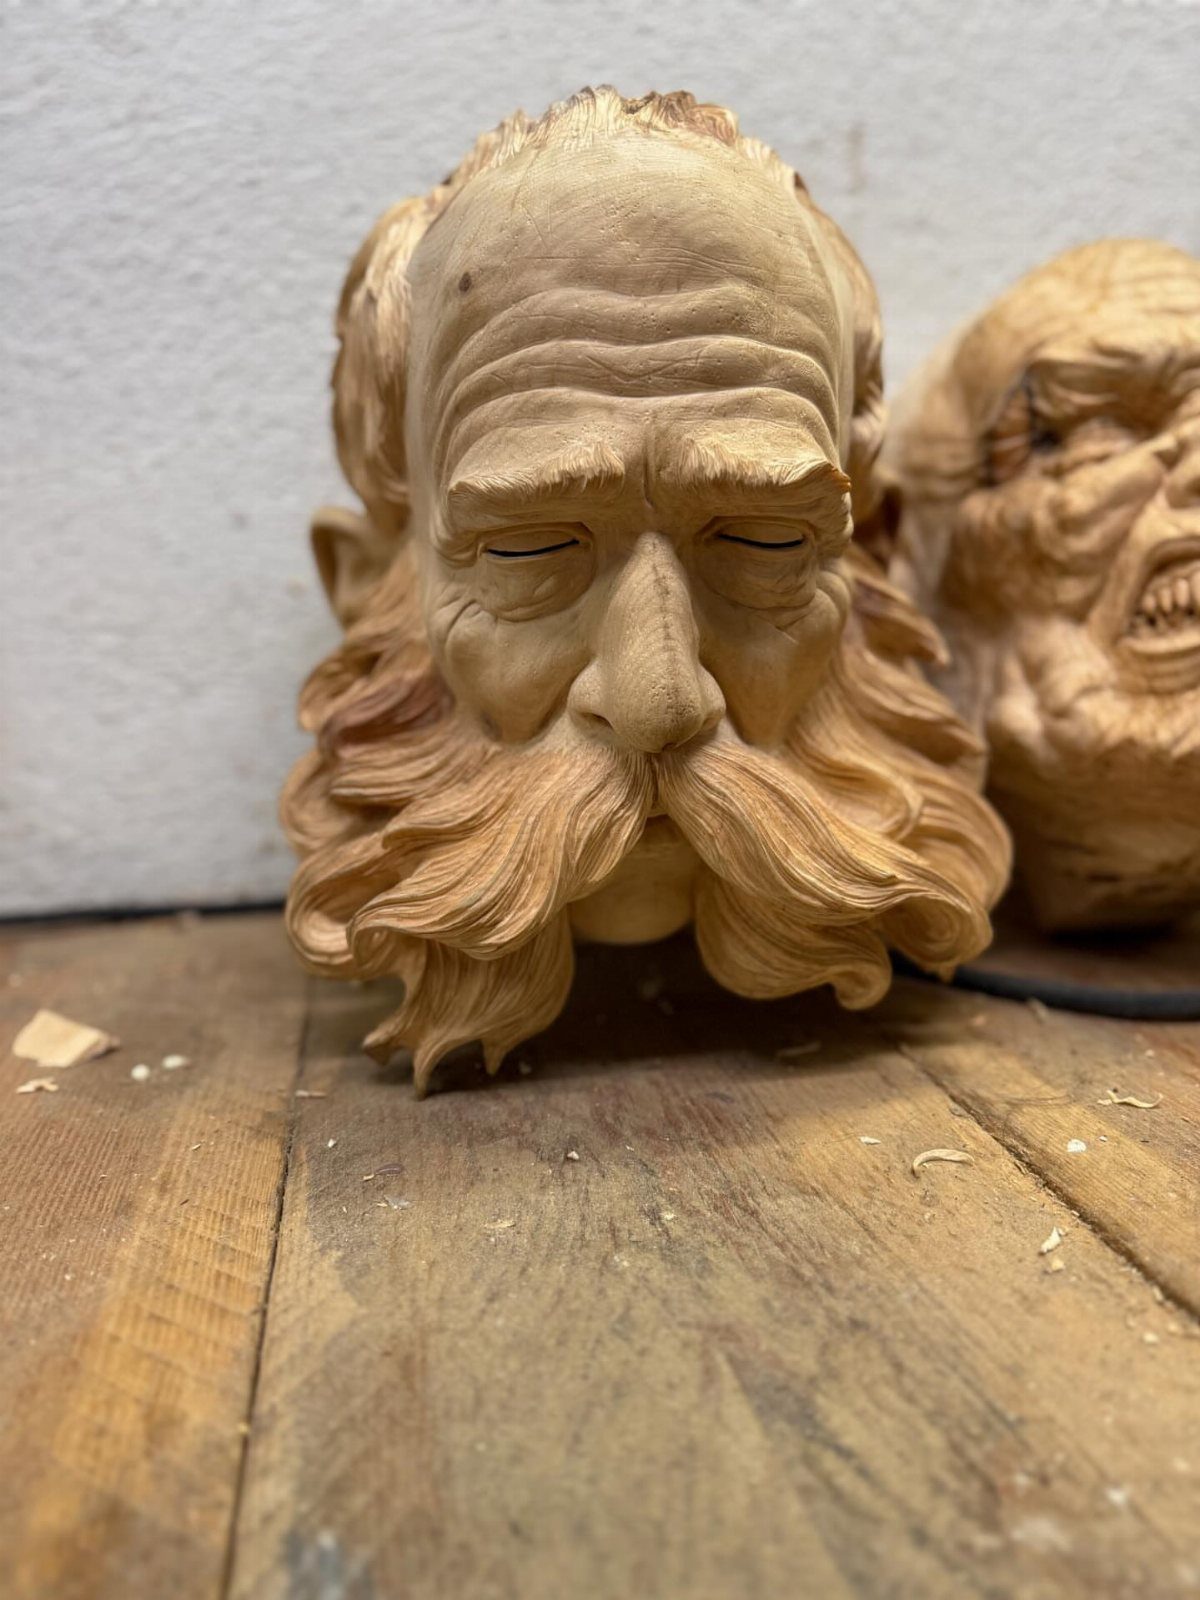
Deep wrinkles and a long beard do the work of a whole personality, and both come from cuts a beginner can make.
Elderly faces suit this reader because lines and furrows are forgiving: a slightly uneven wrinkle reads as age, not as an error.
Start by roughing the head and beard out as a single block, and save the separate features for later cuts. Then cut the brow and cheekbones deeper than feels natural, since shadows fade once the wood is sanded or finished.
Run the beard in long, flowing strokes, and leave the lines of the face shorter and tighter.
8. Miniature Warrior Figure
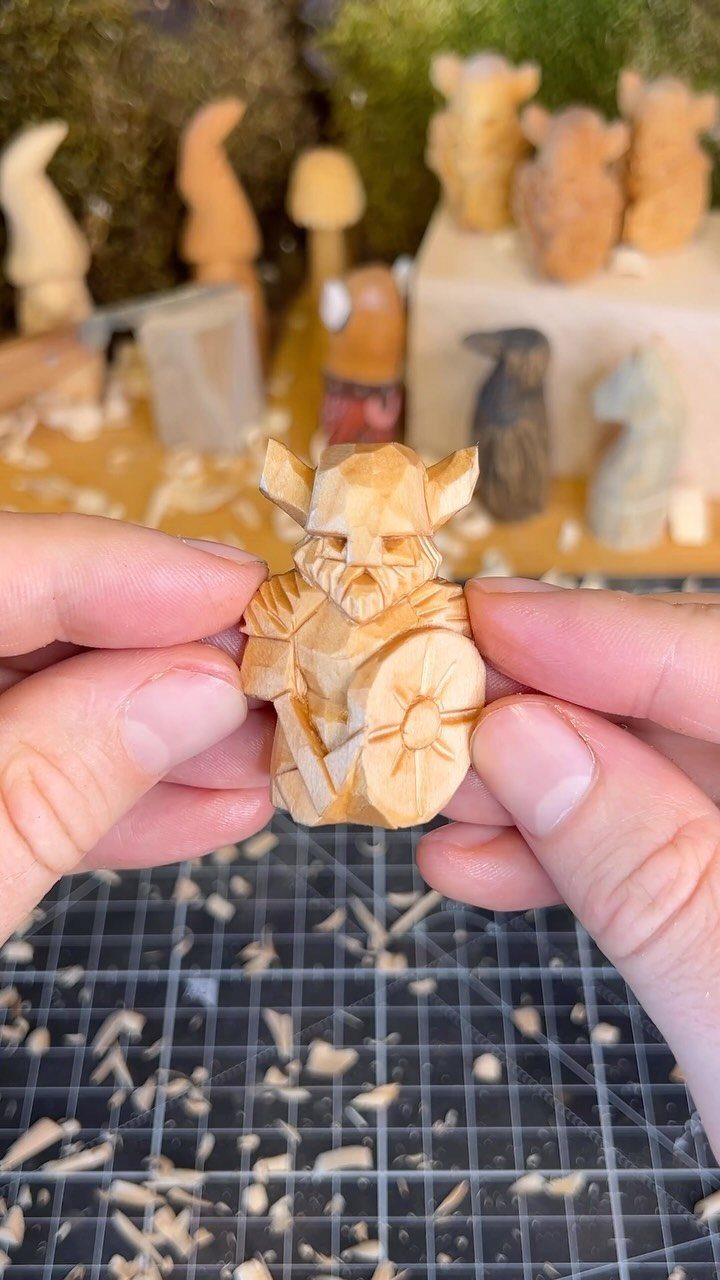
A warrior carved in flat, faceted planes is easier than a smooth, rounded figure. Each cut stays visible, so there is nothing to blend, and the low-poly look turns knife marks into a feature.
Carve the shield as part of the body, with the arm tucked against it, instead of as a separate piece. It keeps the thin parts from snapping off.
Work the torso, legs and head as simple blocks, and save the shield edge for last. Keep the figure small enough to hold in one hand.
9. Hooded Wizard with Staff
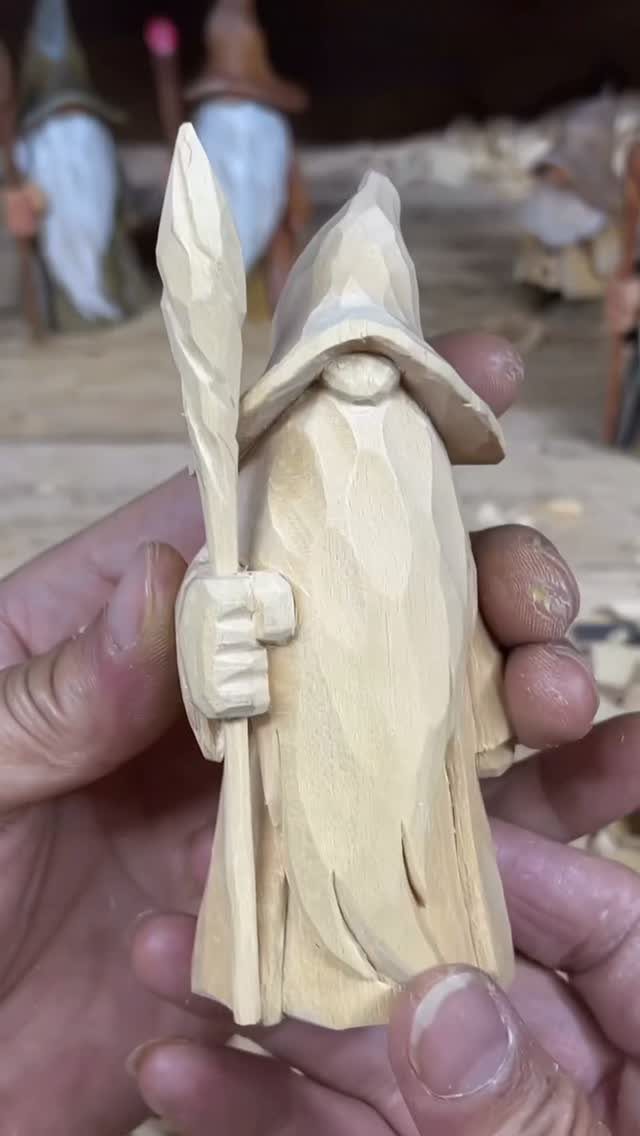
A hood and robe hide most of a wizard’s anatomy, which is the reason I like this carve for beginners.
You get a tall, smooth silhouette, a beard poking out below the hood, and no hands or feet to fuss over.
Leave the staff chunky. A thin one breaks the first time it catches a knife, and a thick one still looks right at this size.
Cut the hood’s opening first, then tuck the beard beneath it. Fold lines in the robe need only a few long cuts.
Essential Tools for Carving
A whittling knife and a small gouge cover nearly every beginner carve.
The knife shapes and rough-cuts, and the gouge makes curves and hollows. Both suit a first toolkit.
Chisels handle straight cuts and fine details, but they sit at an intermediate level. A mallet joins them for controlled force, and it earns its place once you move up to chisel work.
Sandpaper works at every skill level, so keep a few sheets nearby. A rotary tool handles intricate detail, though I would call it an expert tool and skip it at first.
A V-tool is worth adding later. A V-tool does two things: it separates one area from another and cuts narrow V-shaped grooves, and those grooves give you sharp, clean edges.
Wear safety gear every time you carve. A cut-resistant glove on the hand that holds the wood is the piece I would buy first.
Carving Techniques
Sketch the character on paper before the knife touches wood. A quick sketch before the first cut saves a block you can’t replace.
Which way the grain runs determines whether a blade glides or tears. Cut with the grain and the knife glides; cut against it and the wood tears or splits, so read the lines before each stroke.
Depth and pressure come next. Take thin, controlled slices and let the blade do the work, because forcing a deep cut is how pieces break.
Dull tools are the most common reason a carve goes wrong. They slip, they tear the surface, and they raise the risk of an accident, so stop and sharpen the moment cuts start to feel like effort.
Rushing leads to uneven carving, and a patient hand fixes more than any extra tool.
Frequently Asked Questions
What are some cool wood carving ideas?
A comfort bird, a simple mushroom, and small gnomes or trolls are good places to start. A hooded wizard with a staff, a bearded wood spirit face, and a painted monster with horns and chunky teeth are also fun.
Most of these use simple shapes that a beginner can finish quickly, and the exaggerated details give them personality.
What is the rule of three in wood carving?
I don’t know of a formal rule by that name, but carving 3 of the same piece in one sitting works well.
By the second and third, the proportions are settled and your cuts get calmer and faster. A batch of 3 birds also makes an easy gift set.
What is the easiest thing to carve for a beginner?
For a first project, a small bird is hard to beat: the body is just a rounded lump, the tail is short, and the beak needs only a light point cut into the head.
A plain mushroom is just as approachable, since it is a stem topped by a domed cap.
Why does wood tear when I carve it?
You are most likely cutting against the grain, or your blade is dull.
Grain direction decides how the blade behaves: with it, the knife glides, and against it, the fibers lift and split, so I check which way the lines run before every stroke.
Dull steel causes tearing as well, because it slips and crushes the surface instead of slicing it; once a cut takes real effort, stop and hone the edge.






