The chairs here run from an old tire with wooden slats to a high-back patio chair, and the right one depends on what you already have: a stack of pallets, a metal frame, or nothing but a saw and a lumber budget.
Pick the build that matches what’s already in your garage, then let the wood decide how much finishing you’re signing up for.
1. Adirondack Outdoor Chair
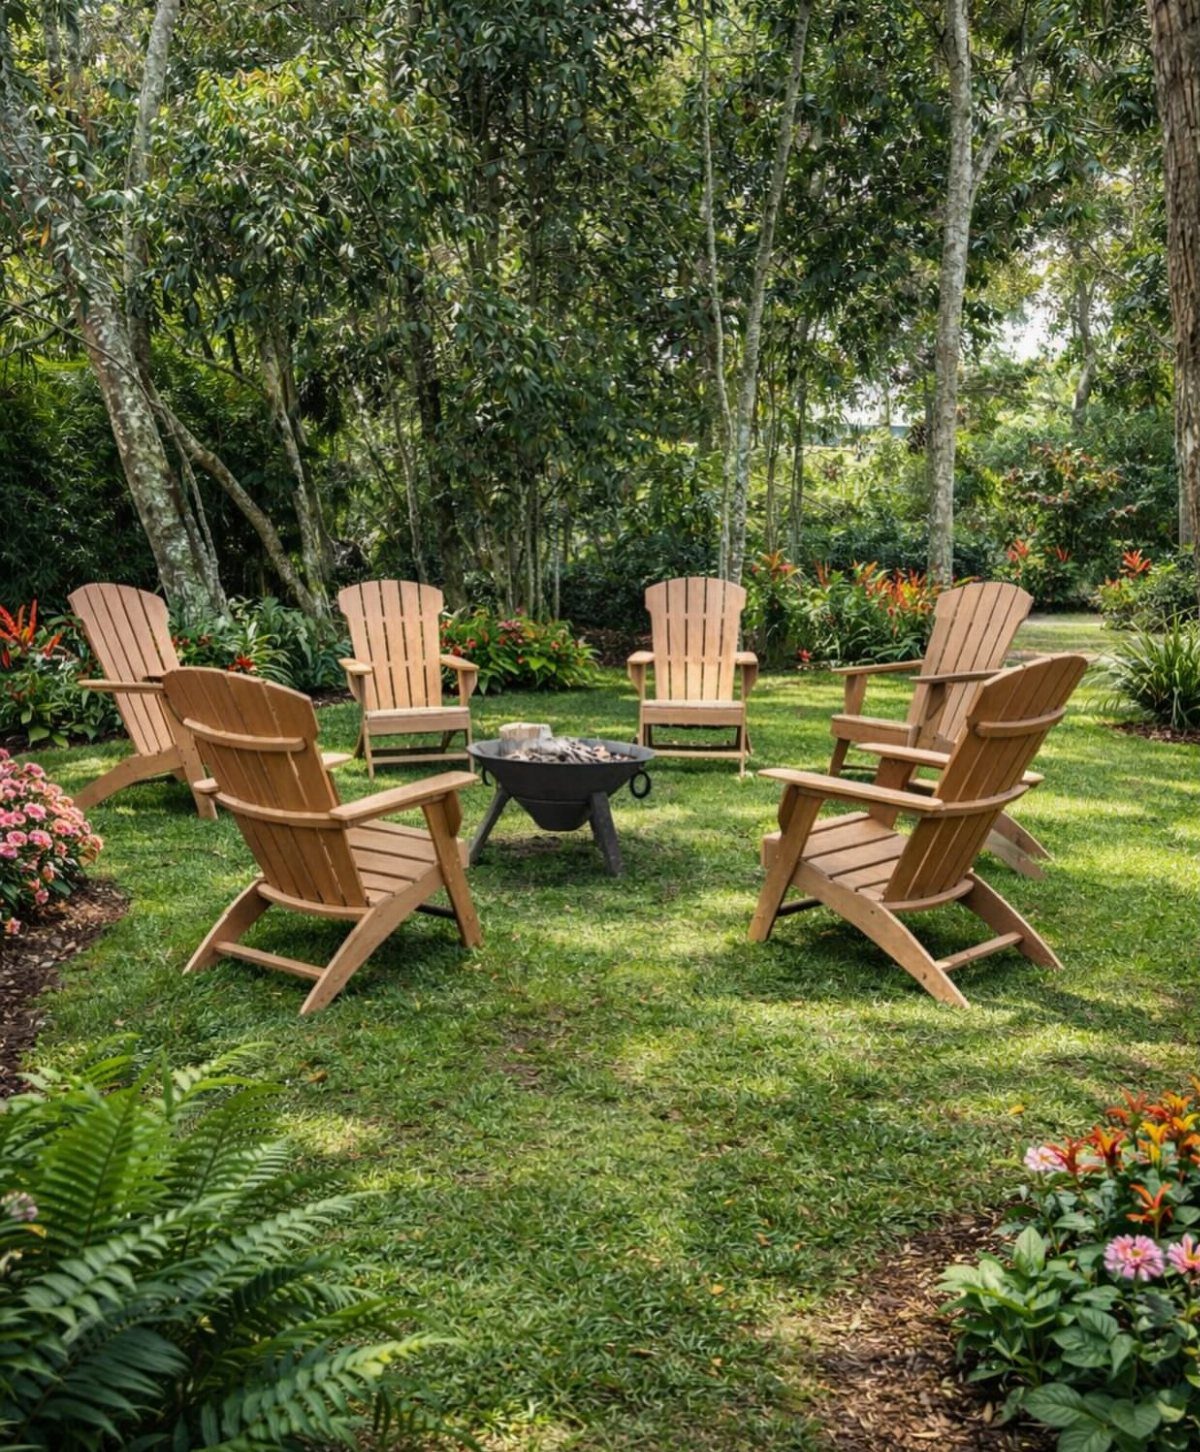
An Adirondack does its best work around a fire pit, where the wide, reclined seat gathers people in a circle. The wide, reclined seat invites a long sit, so it earns its place in a spot where friends linger.
For a budget build, I’d make one chair first and use it as a template for the rest. Trace every matching part from the first chair’s pieces, and a whole circle of chairs goes much faster than separate builds.
Keep the chairs a few feet back from the fire pit.
2. Box Frame Wooden Armchair
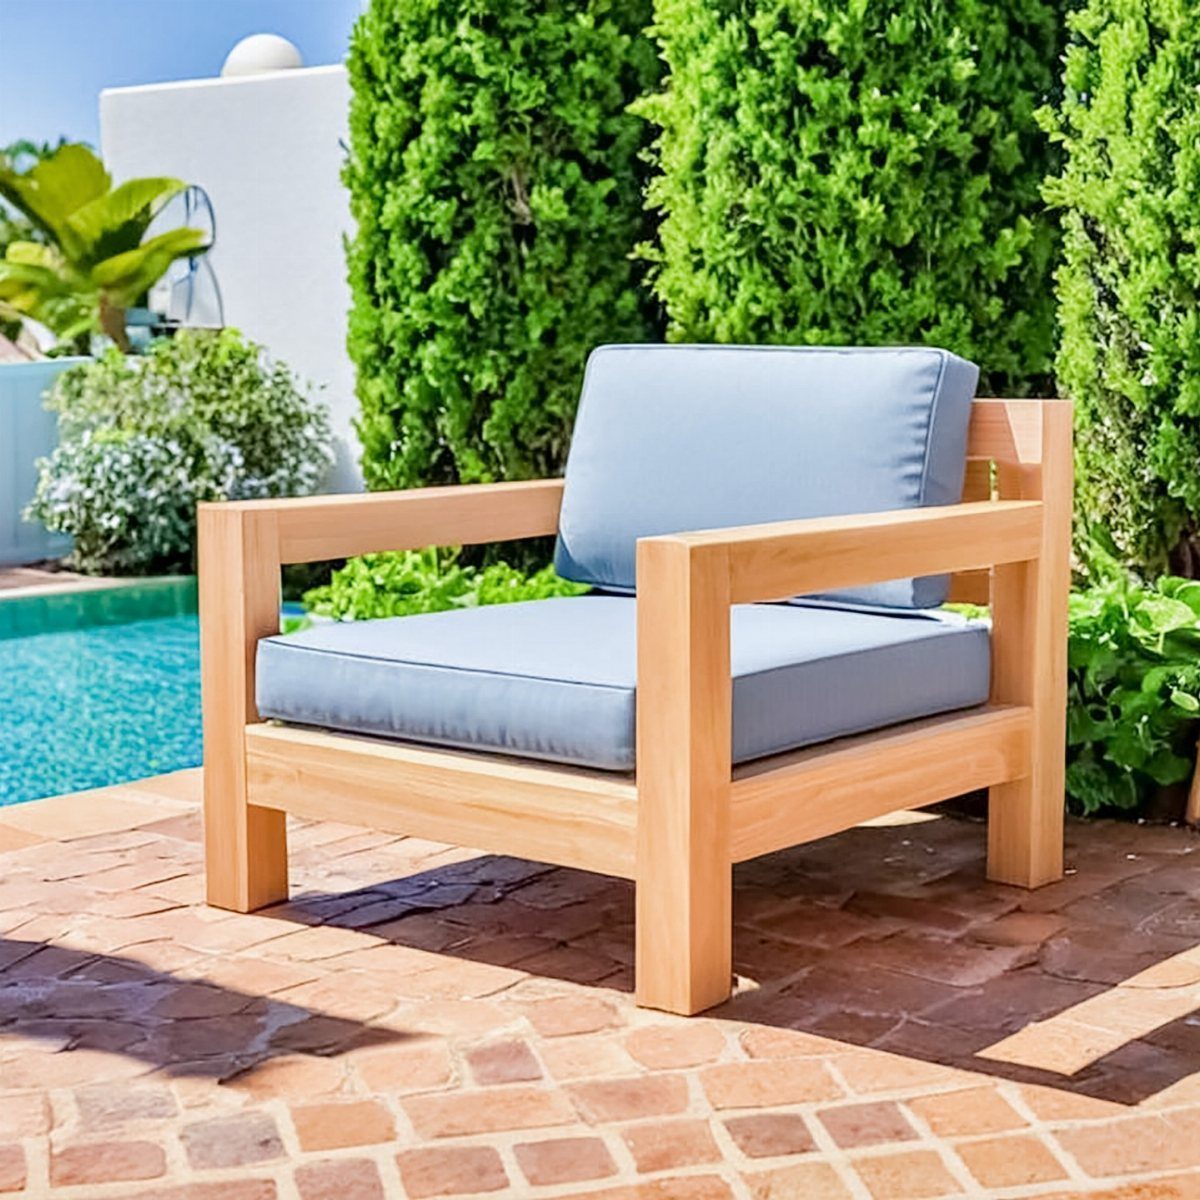
Thick square arms and legs give this armchair its look, and they also make it one of the friendlier builds for basic tools. Straight cuts and right angles are most of the job, with no curves to fuss over.
Chunky stock suits it, so a light wood with a clear or pale finish keeps the frame looking clean beside the cushions.
I’d build the frame first, then size the cushions to fit it, since store-bought ones rarely match a custom seat.
Plan on cushions you can carry indoors when rain comes.
3. Slatted Wooden Lounge Chair
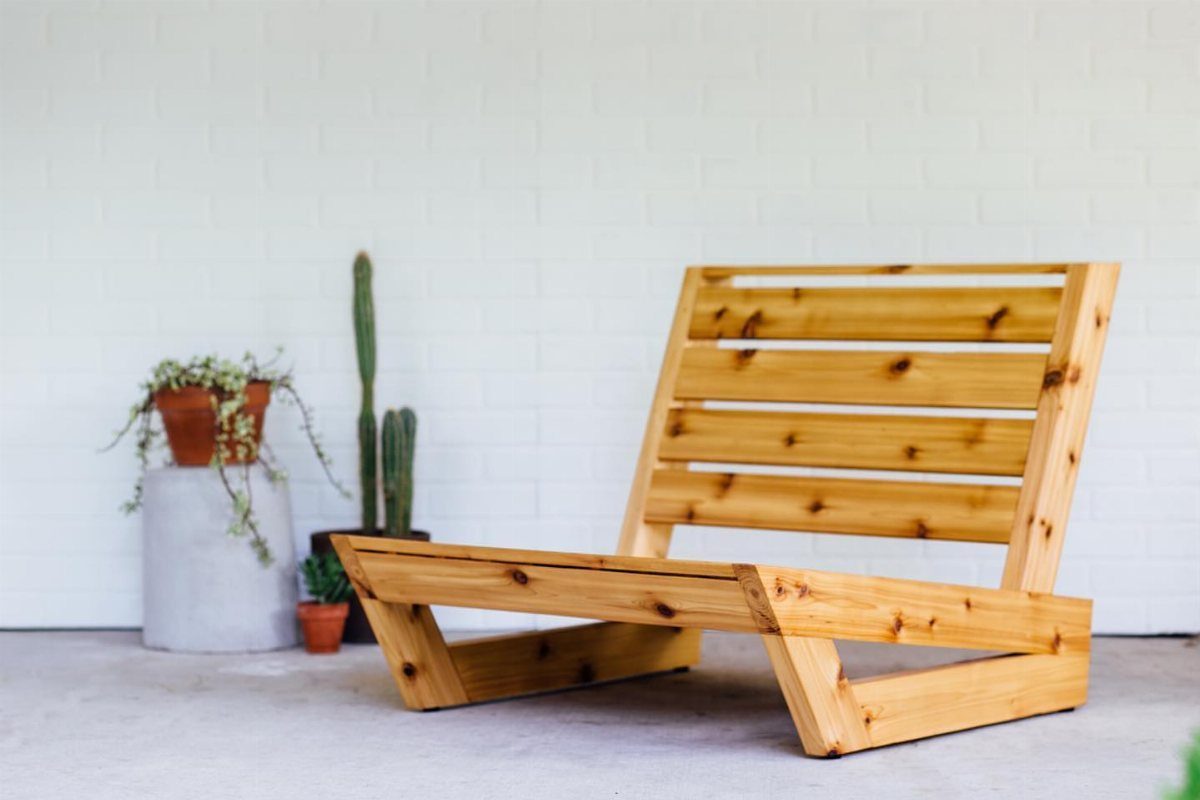
Slats do the heavy lifting here: a seat and angled back made from spaced boards, with nothing else to dress up the shape. The gaps let rain drain and air move, which is the main reason I like slats outdoors.
Use a scrap board as a spacer so every gap matches. Uneven gaps are the first thing the eye catches on a minimalist piece.
A light wood against a white wall looks calm, but sand every slat edge well, because bare skin touches them.
4. Upcycled Tire and Wood Chair
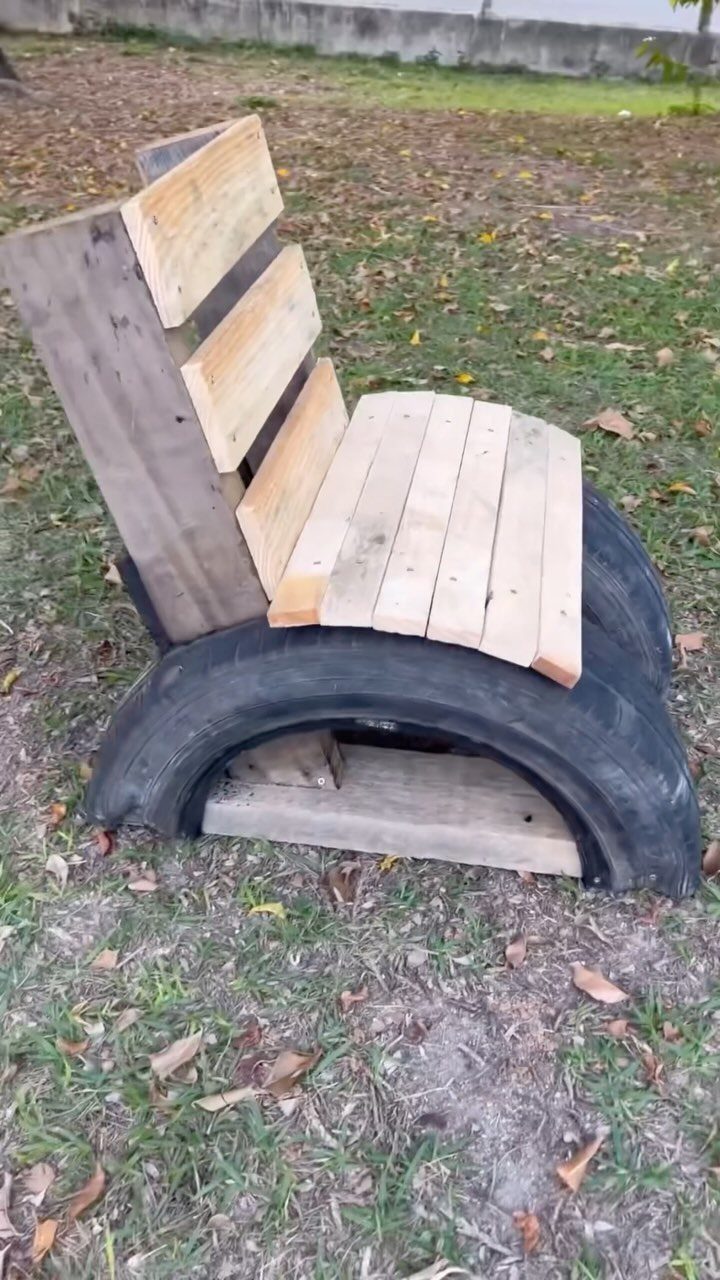
A big black tire becomes the base, and wooden slats form the seat and back. It is about as cheap as a chair gets, since the tire is usually free and the wood is the only real purchase.
The tire gives you a low, stable footprint, so the slats mostly need solid fastening to the rubber. Use screws, and check that every one sits firm before anyone sits down.
Scrub the tire well first. Rubber holds dirt, and a clean tire looks far more intentional next to fresh wood.
5. Woven Rope Metal Frame Chair
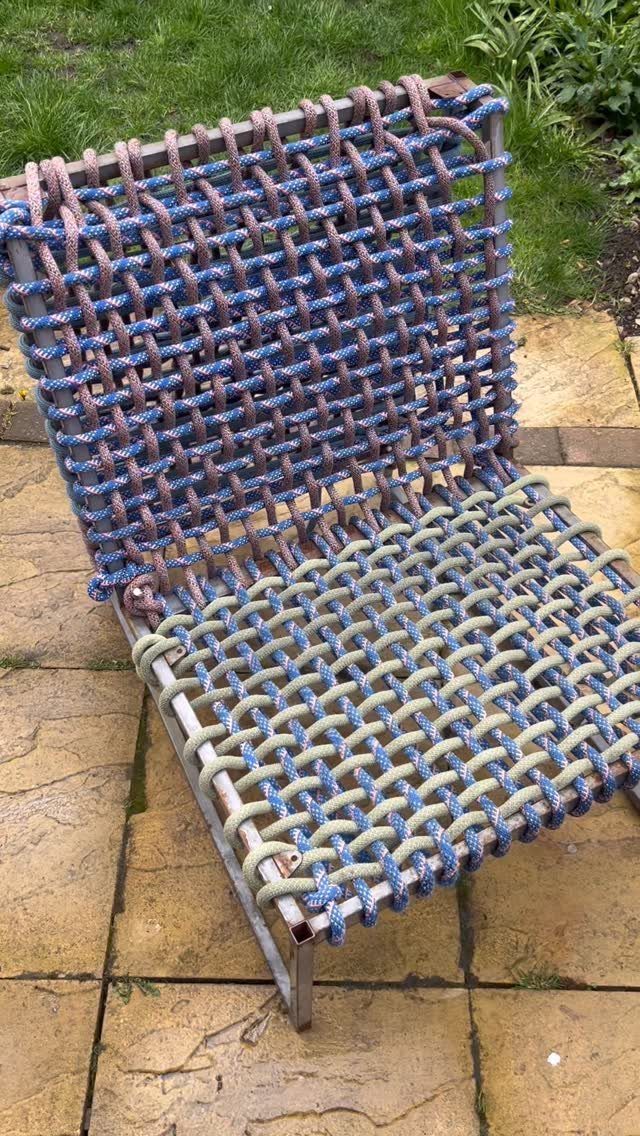
Rope can replace a wooden seat entirely: a simple metal frame, then cord woven across it to form the seat and backrest. A two-color pattern, like the blue and tan here, comes from nothing more than alternating the strands.
Pull each pass snug as you go. Slack rope sags under weight, and fixing it later means rewoven rows.
I’d pick this over wood if you already have a metal frame lying around, such as a tired chair worth reviving.
6. High-Back Wooden Patio Chair
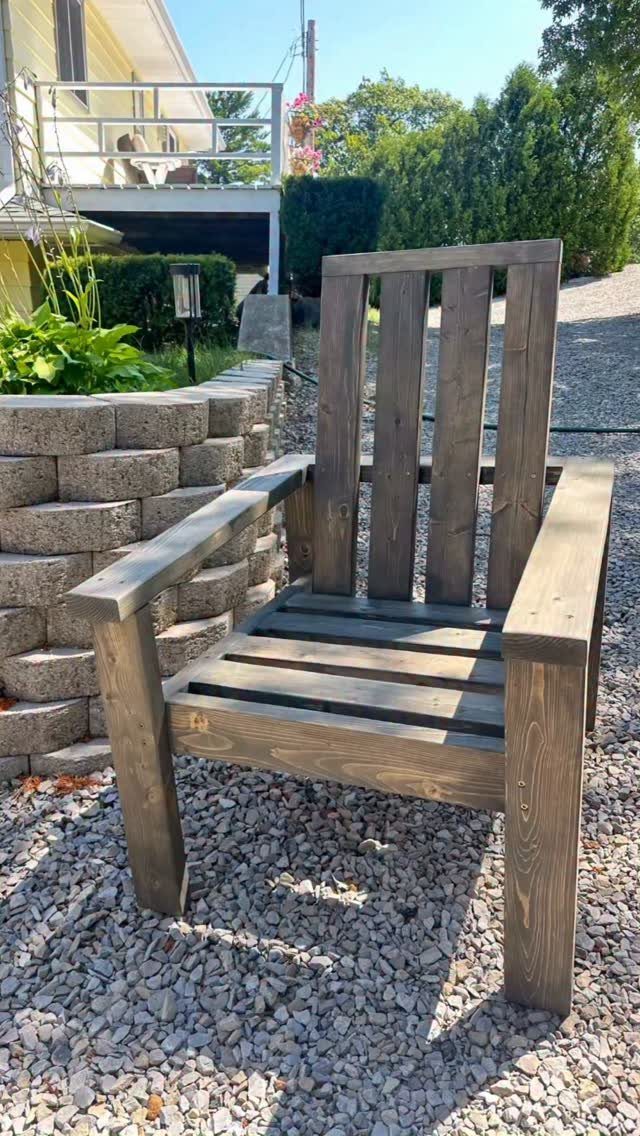
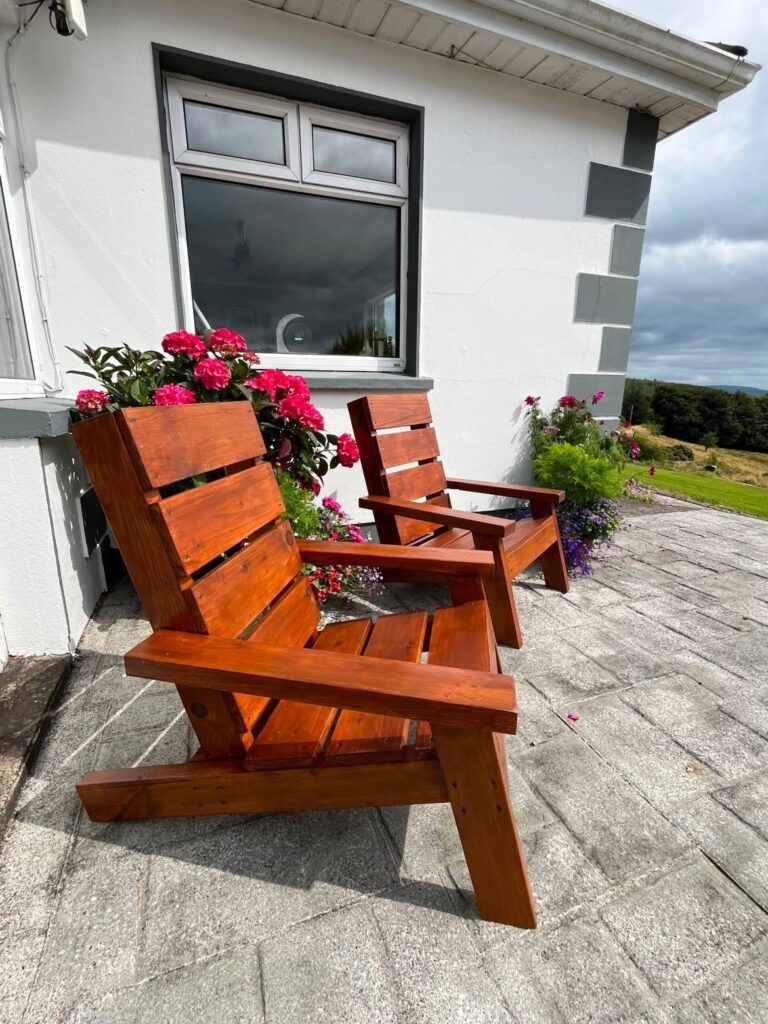
A tall back and wide armrests make this chair feel like a real lounge seat, and a dark brown stain gives it weight against gravel and stone.
The maker describes it as 5 boards, precise cuts and plenty of joining, with the character coming from custom details.
That tells me the cuts matter more than the lumber list. Measure twice, cut each board to match, and save your effort for the armrests, since they’re what people notice and rest on.
Stain deepens the wood, so test it on a scrap first.
7. Geometric X-Base Wooden Chair
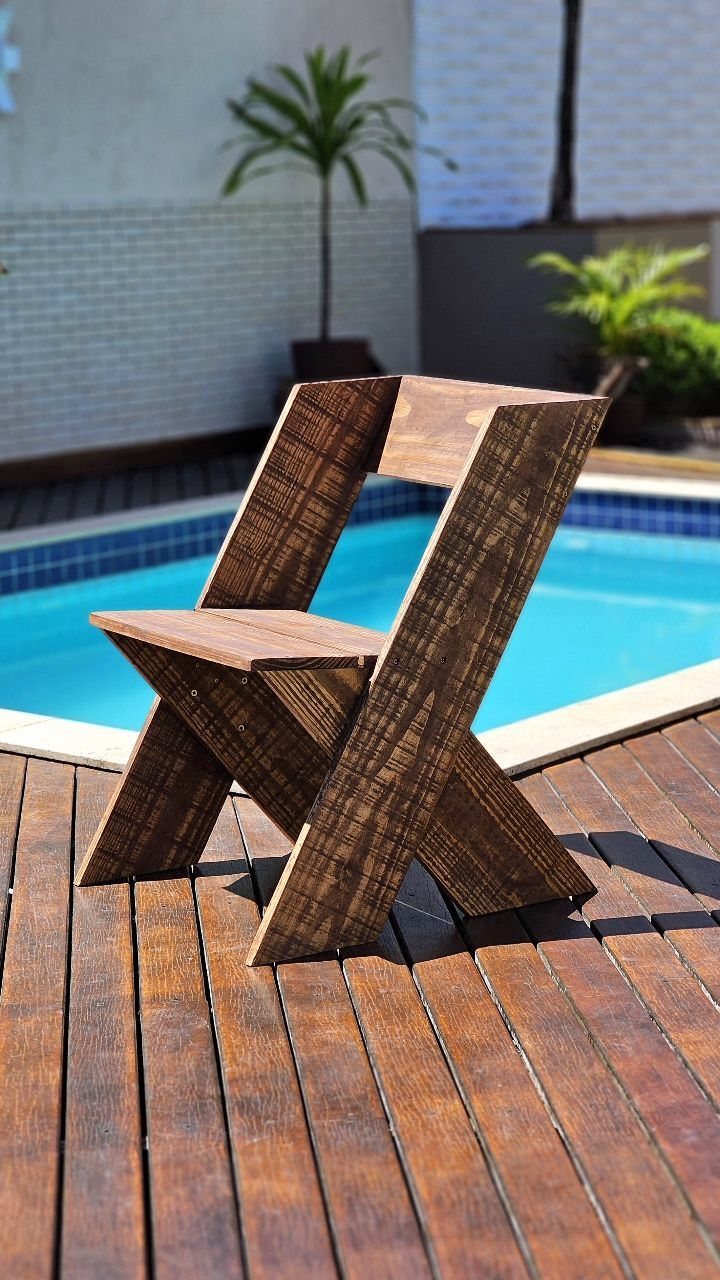
Crossed legs under the seat give this chair a modern shape, and the dark stain keeps it from looking fussy beside a pool.
The X-base is the part to get right: both legs of each X need matching angles, so cut them as a pair from one template.
A deck that gets splashed asks for a finish to match, so I’d put on a coat of stain and then a sealer made for outdoor wood.
Deep stain tones telegraph every scratch and scuff, so brush a sample onto an offcut first and judge the color before it touches the chair.
8. Two-Tone Painted Wooden Chair
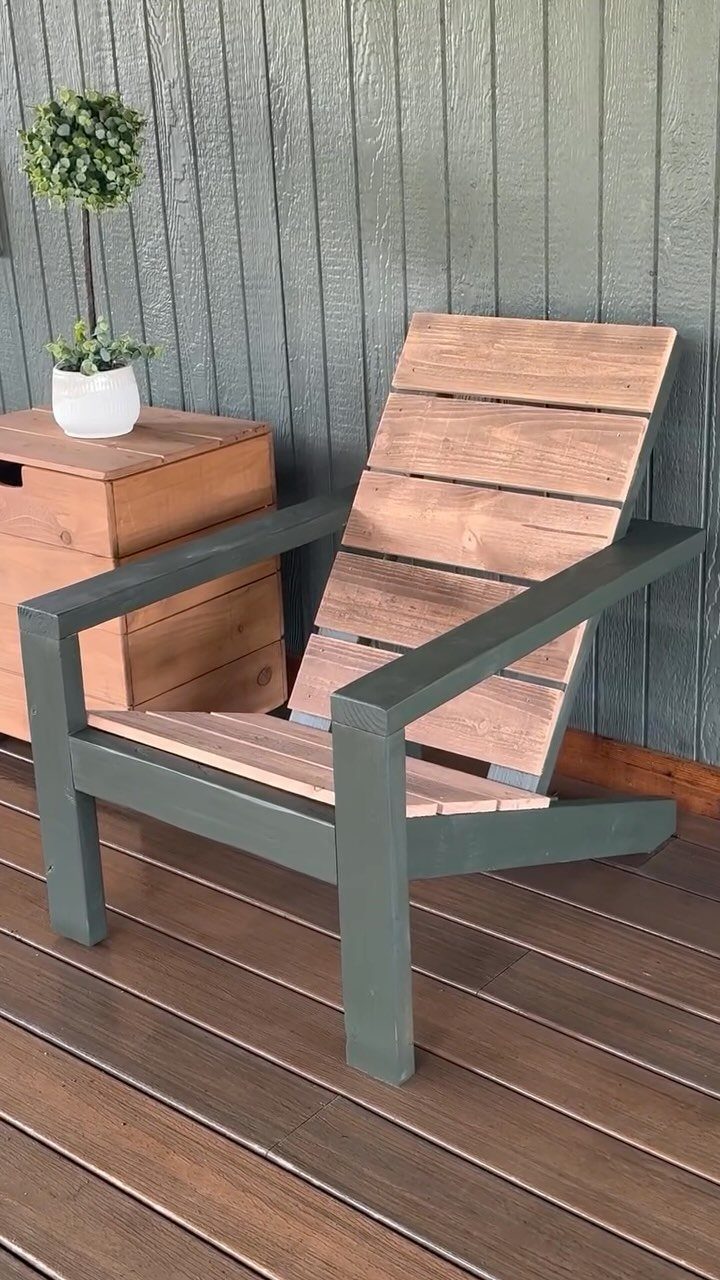
Paint the frame, leave the slats natural, and one chair gets two looks.
The maker says it takes 2x4s and cedar fence pickets, which makes this a friendly budget build: both are cheap, easy to find and simple to cut.
Paint the 2×4 frame before attaching the slats. Masking natural wood after assembly is slow, and brushing around slats is fussy.
I’d pick a grey-green like this one over bright colors, since it sits easily next to a plant and a small table.
9. VW Bus Pallet Lounge Chair
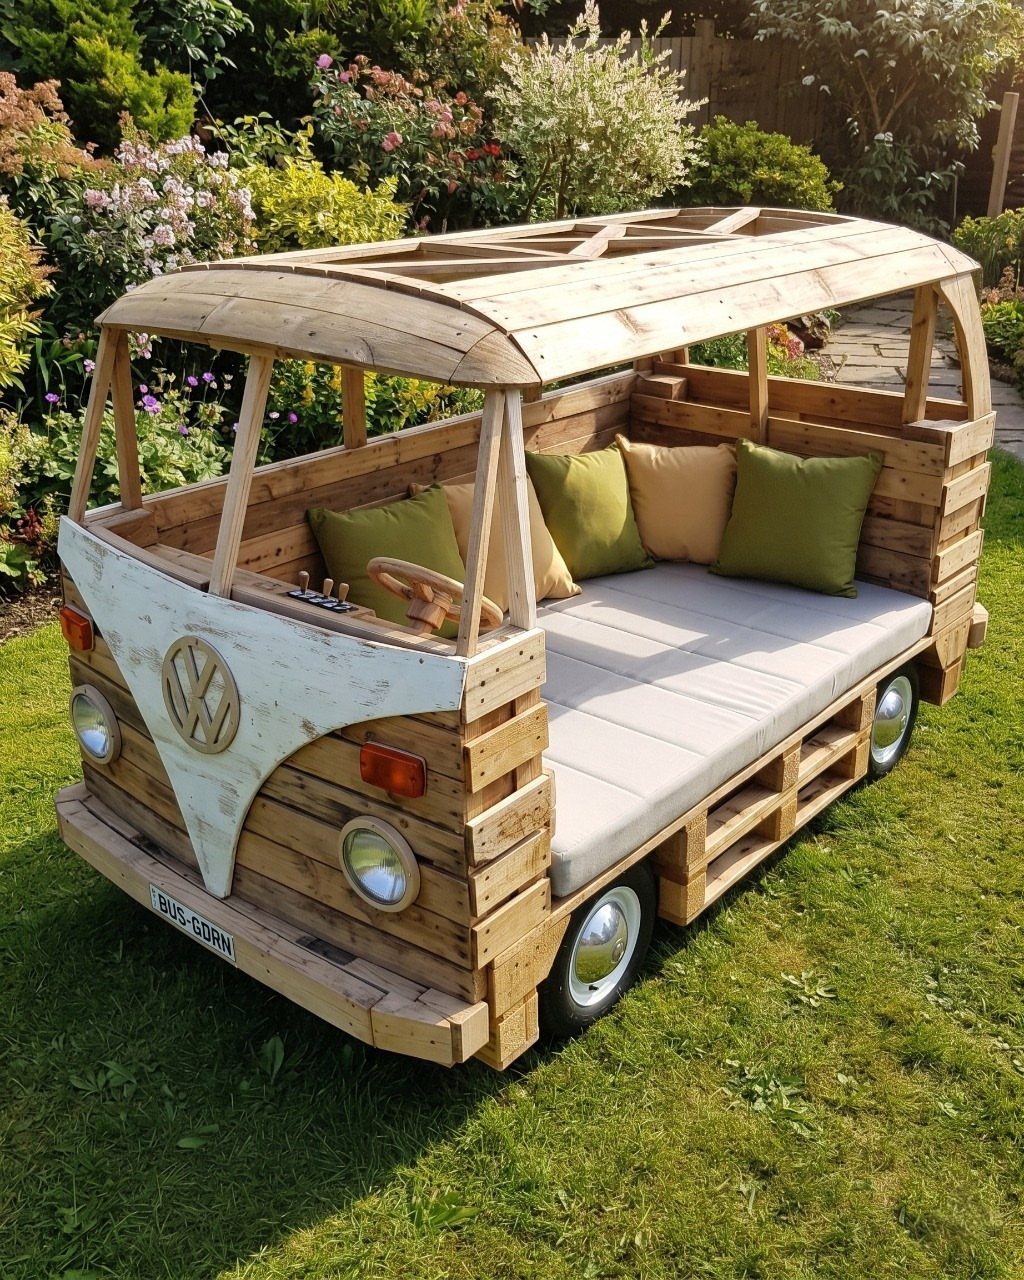
A pallet lounger built as the front of a VW bus is pure novelty, and I love it for that.
The roof, the cushions and a little license plate do the storytelling, so the pallet boards only need to form a solid seat.
Sand the pallet wood well before anything else, since rough boards snag clothes and skin. Pallets are often free, so the wood costs little.
Make the plate last. It’s the detail people will remember, and you can personalize it.
10. Simple Unfinished Plank Chair
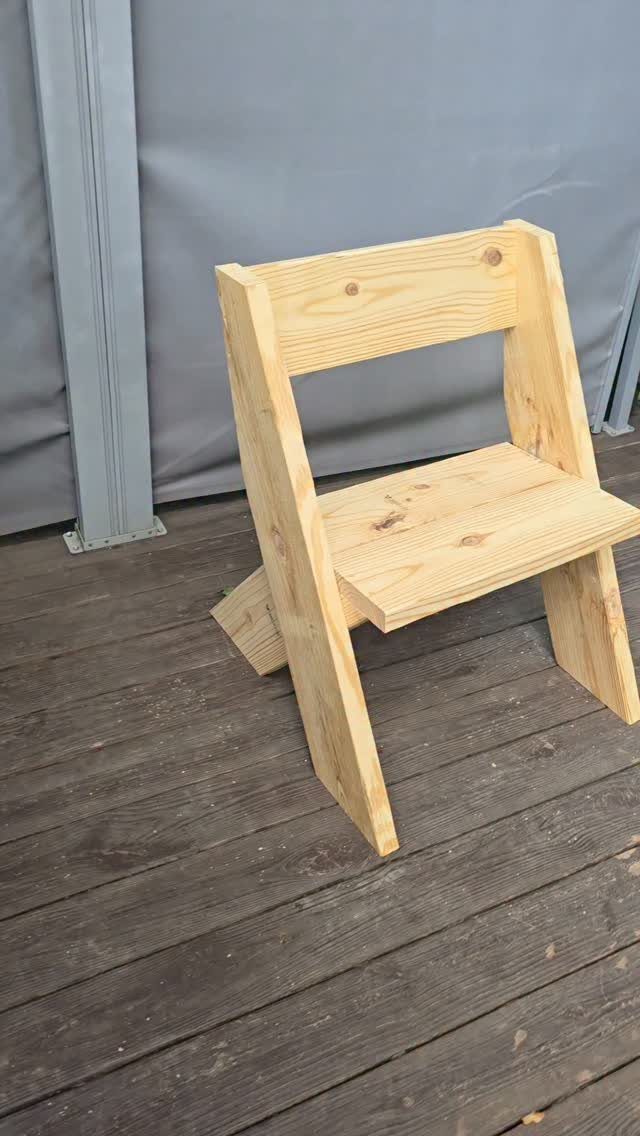
Plain planks, no stain, no paint: this is the simplest chair on the list, and the best place to start if you’ve never built one. A small size keeps the cut list short.
Light, bare wood looks good, but it will weather outdoors. I’d seal it with an outdoor finish once the chair is built, or accept the grey a bare board eventually turns.
Sand every edge before assembling, because bare boards splinter.
Choosing the Right Wood
Pine and cedar are the 2 woods worth comparing for an outdoor chair, and the choice mostly comes down to money versus upkeep.
Cedar is durable but costs more. Pine is economical, but it may require treatment, so budget for a good outdoor stain or finish and plan to apply it before the chair sees any rain.
For most afternoon builds I’d go with pine and spend the savings on the finish. If you’d rather skip the finishing step and can afford the higher price, cedar is the better pick.
Safety Tips
Wear safety gear any time a power tool is running. Safety glasses and hearing protection are the baseline, and a dust mask helps when you’re sanding or sawing.
Clear your workspace before you start. Keep cords out of walkways, sweep sawdust off the floor, and put scraps in a bin so nothing trips you mid-cut.
Organize your tools, too. Return each one to the same spot after use, and unplug a saw or sander before changing a blade or sanding disc.
Frequently Asked Questions
What tools do I need to build an outdoor chair?
A miter saw, a drill and a Kreg jig cover most outdoor chair builds.
Sawing and sanding both throw debris and noise, so a pair of safety glasses, ear protection and a dust mask belong on the bench next to the saw.
Box-frame designs with thick square parts, straight cuts and right angles go well with basic tools.
What type of wood is best for outdoor furniture?
Cedar holds up longer against rot and insects, though it runs noticeably pricier per board than pine.
Pine is the budget option, and it holds up outdoors as long as you protect it with an outdoor stain or finish before the chair sees rain.
Pine is my pick for a one-afternoon chair; the money saved on lumber goes toward a good exterior sealer, which does more for the chair’s lifespan than the wood itself.






