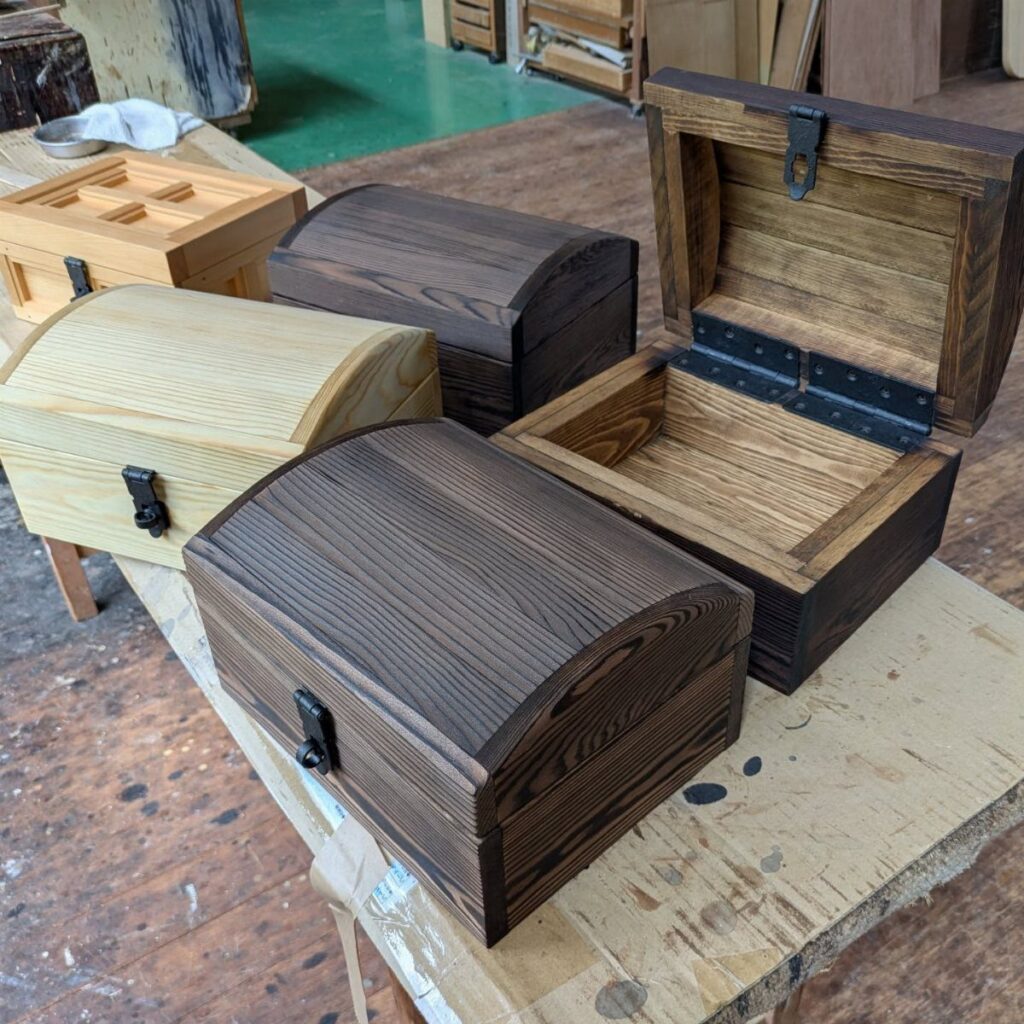
The ideas run from a plain cedar chest with brass hinges and one latch, where the raw wood does all the decorating, to a pine build with an arched barrel lid, riveted bands and gargoyle ring pulls.
How much patience you have for curves and hardware decides which build is yours, from the simple unfinished cedar box to the curved lid version.
If this is your first chest, stay with flat planks and a finish you can add later. If you like a slow bench project, the curved lid build pays you back in presence.
1. Join Boards
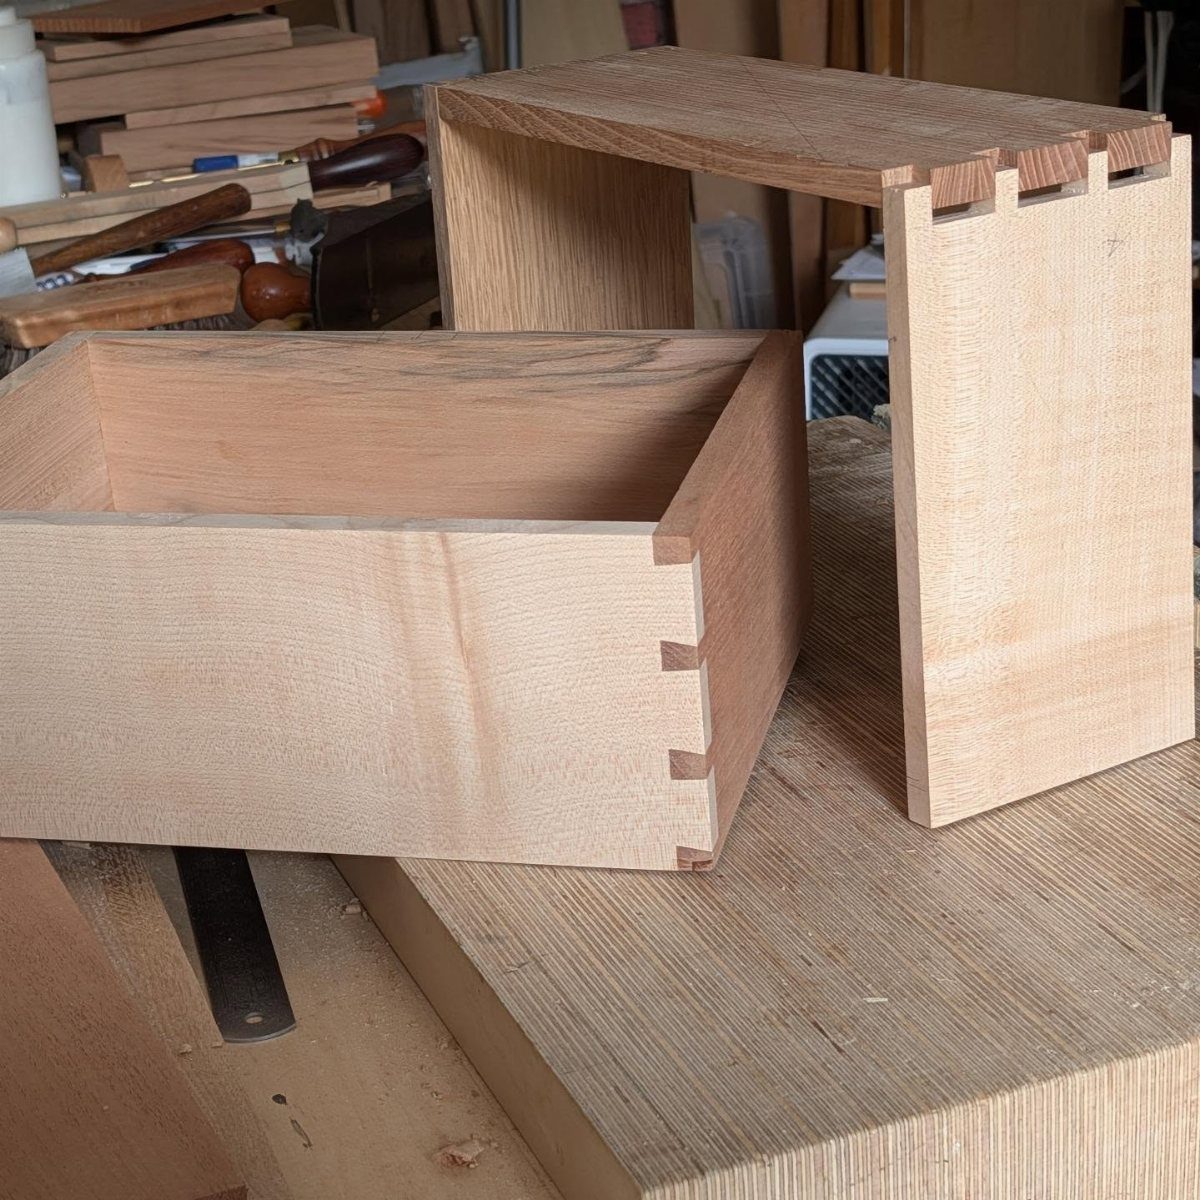
Box joints, the interlocking fingers cut into the ends of each board, give the end pieces a lot of long-grain glue surface where they meet the sides, so the corners hold up to years of lid slamming.
That matters for a chest that will be lifted and dragged around.
Spread glue on every finger face, close the joint, and clamp across the corner until it sets. Check the box for square before the glue grabs, since a twisted carcass makes a lid that never sits flat.
Cut the fingers a hair proud, then sand them flush once dry.
2. Attach Lid Slats
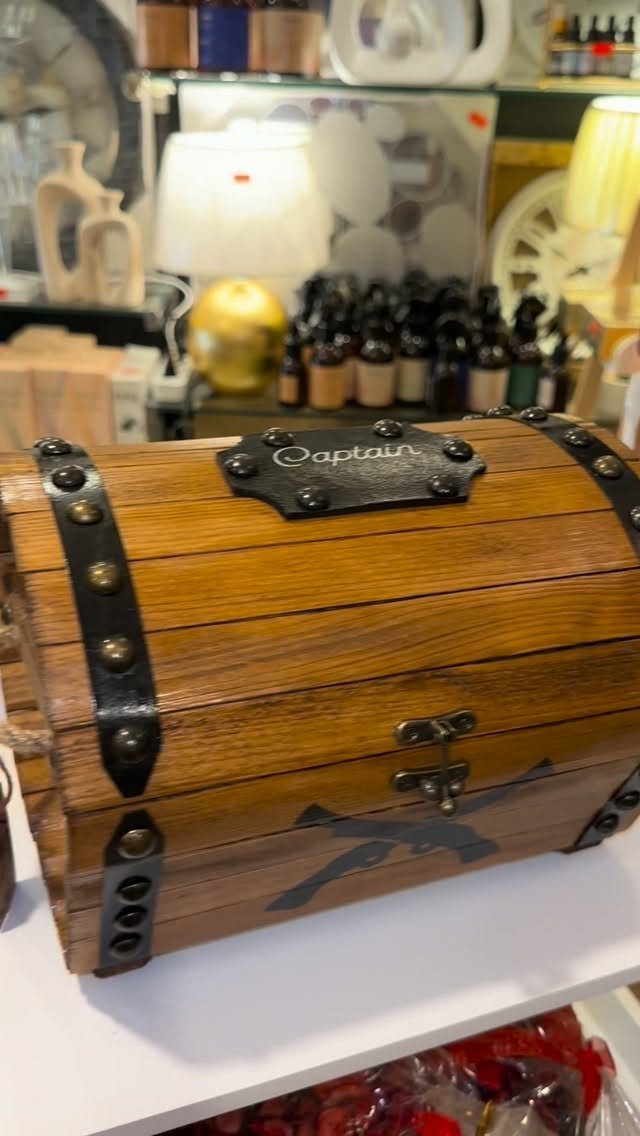
Slats turn a plain curved lid into something that looks planned. Each strip follows the curve, and the seams between them read as a deliberate pattern, especially beneath black straps like the ones on this chest.
Narrow strips bend around a curve more easily than wide ones, so I would cut them slim and keep them uniform. Glue and small brad nails hold each one while it dries.
Dry-fit the whole row before gluing anything. A gap at the last slat is far easier to fix on paper than on the lid.
3. Rope Handles and Metal Bands
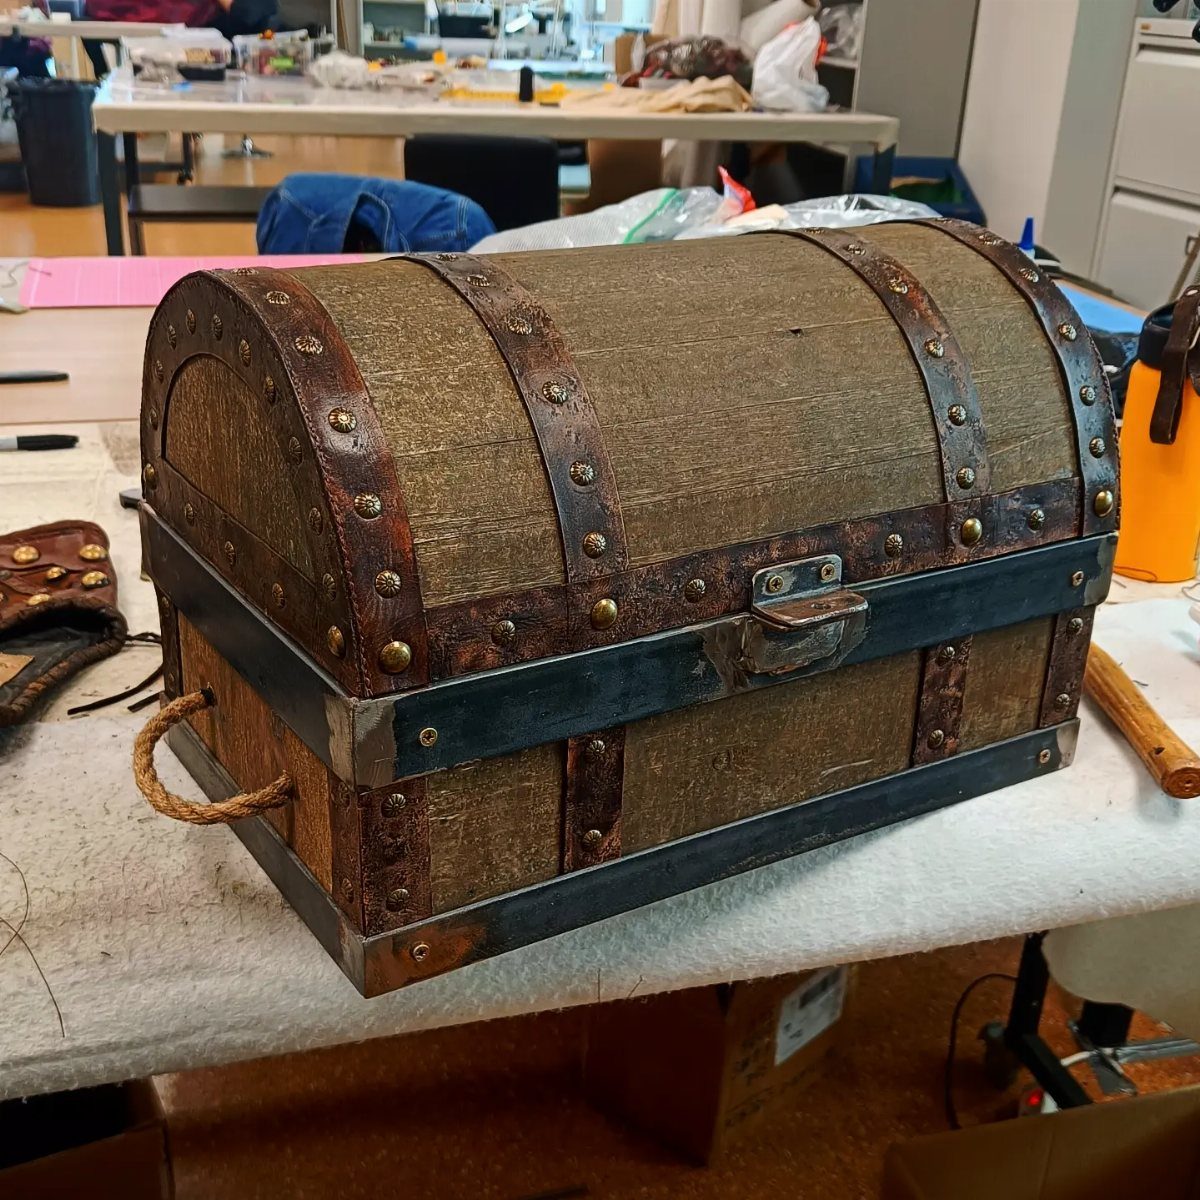
Thick rope handles and dark riveted bands give a curved-lid chest a rugged, hand-built character without any fancy joinery. For a budget build, that is a big look for little money.
Mark the band positions with the lid closed so they line up across the seam. Drill the rivet holes before fastening, then set the bands snug against the wood.
For the handles, drill a hole through each end board, pass the rope through, and knot it on the inside so the knot cannot pull out.
4. Gargoyle Ring Hardware Accents
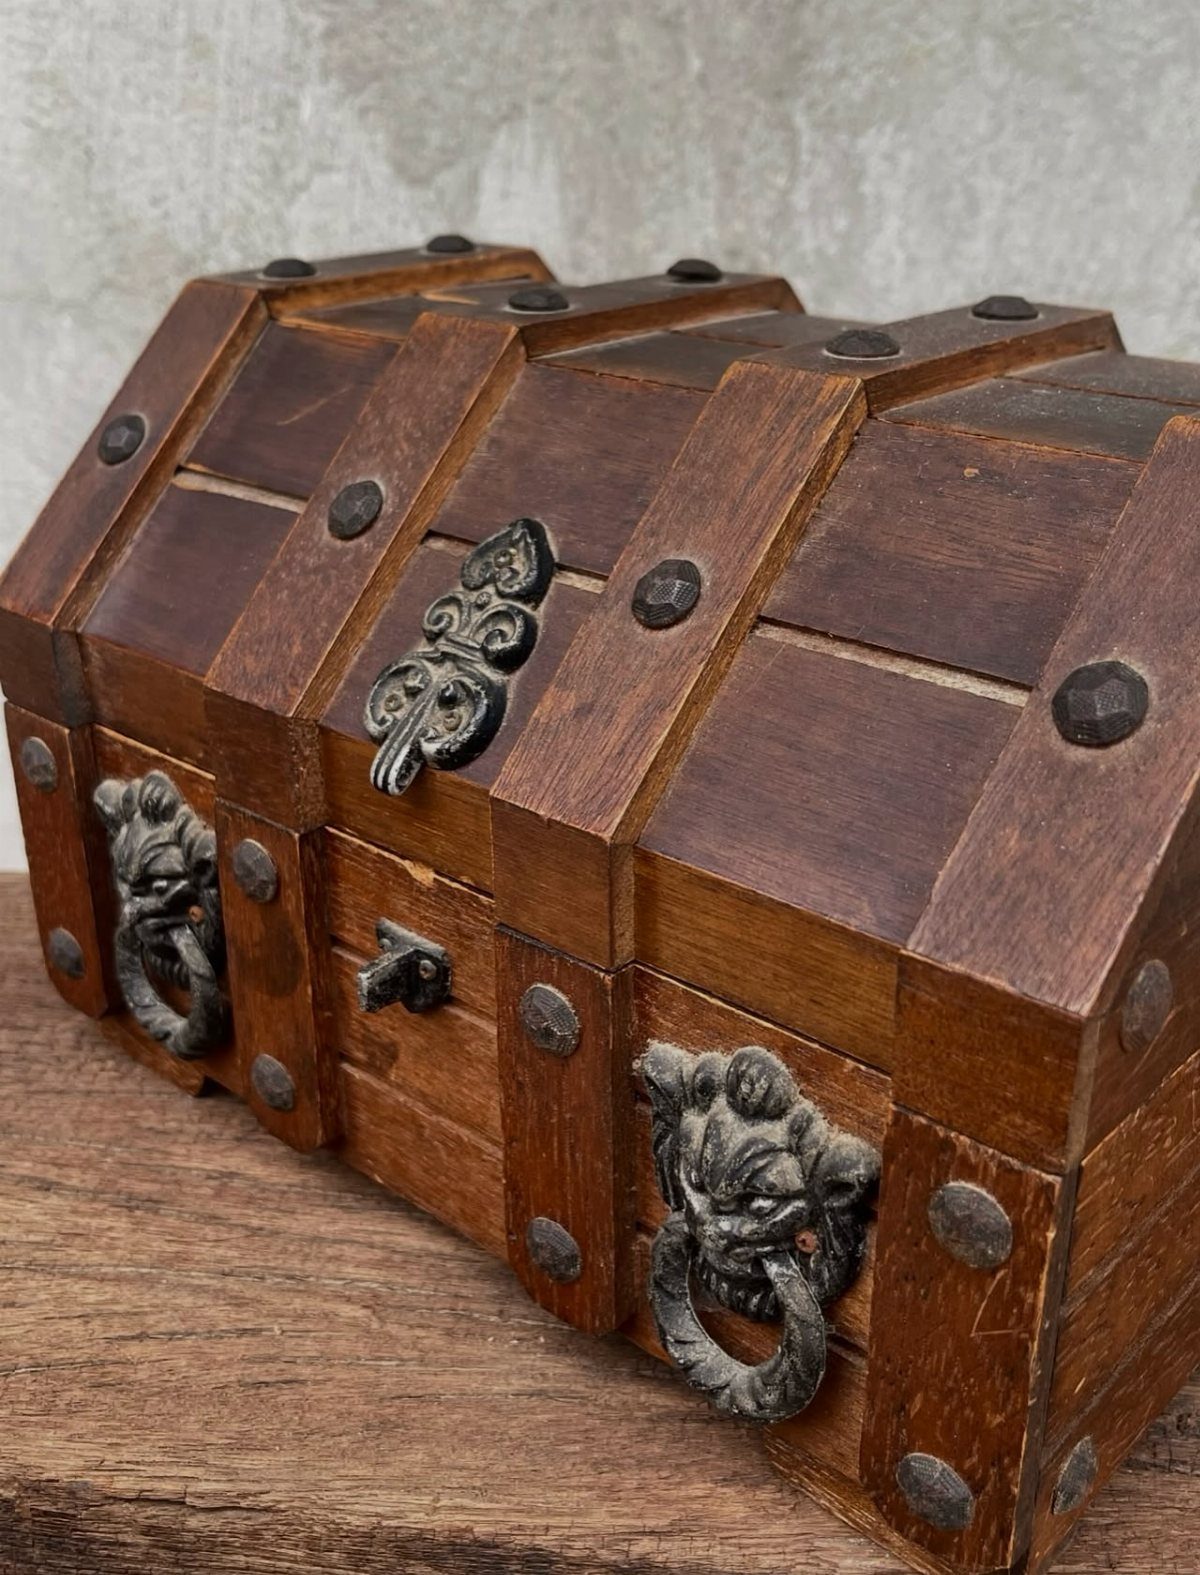
Gargoyle ring pulls are the loudest hardware you can put on a chest, and against dark stain they look right. Studs and an ornate latch back them up so the face of the chest feels finished.
Stain and seal the wood before mounting anything, because stain around installed hardware gets messy. Mark the screw holes with an awl, then drill small pilot holes so the wood does not split.
I would stick to 2 rings and let the latch be the center of attention on the front.
5. Removable Interior Tray
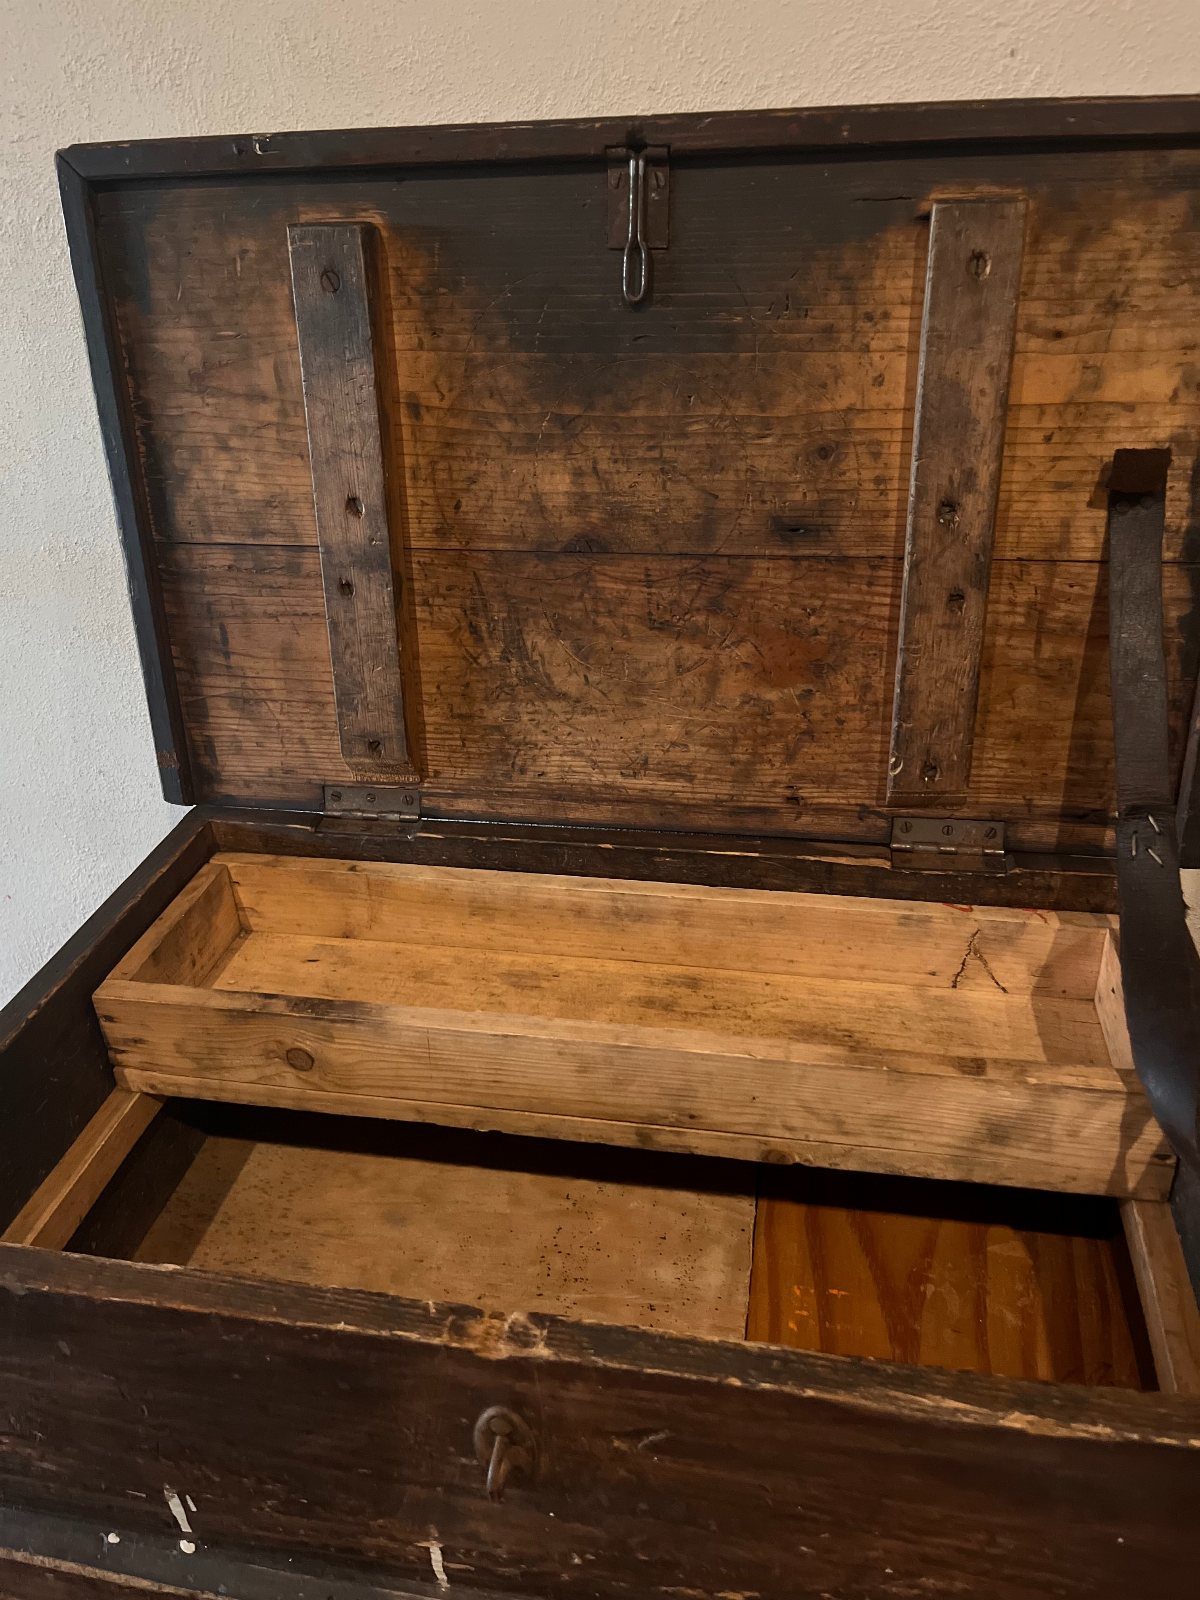
A lift-out tray gives a chest 2 levels, so small items stay on top and bulkier things sit underneath. It is also just a shallow open box, which any basic-tool builder can make from scrap.
Rest the tray on cleats screwed or glued to the inside of the end boards. Measure the inside width after the chest is assembled, then size the tray slightly smaller so it lifts out without catching.
Add a notch or a small pull on each end for your fingers.
6. Leather Strap Detailing
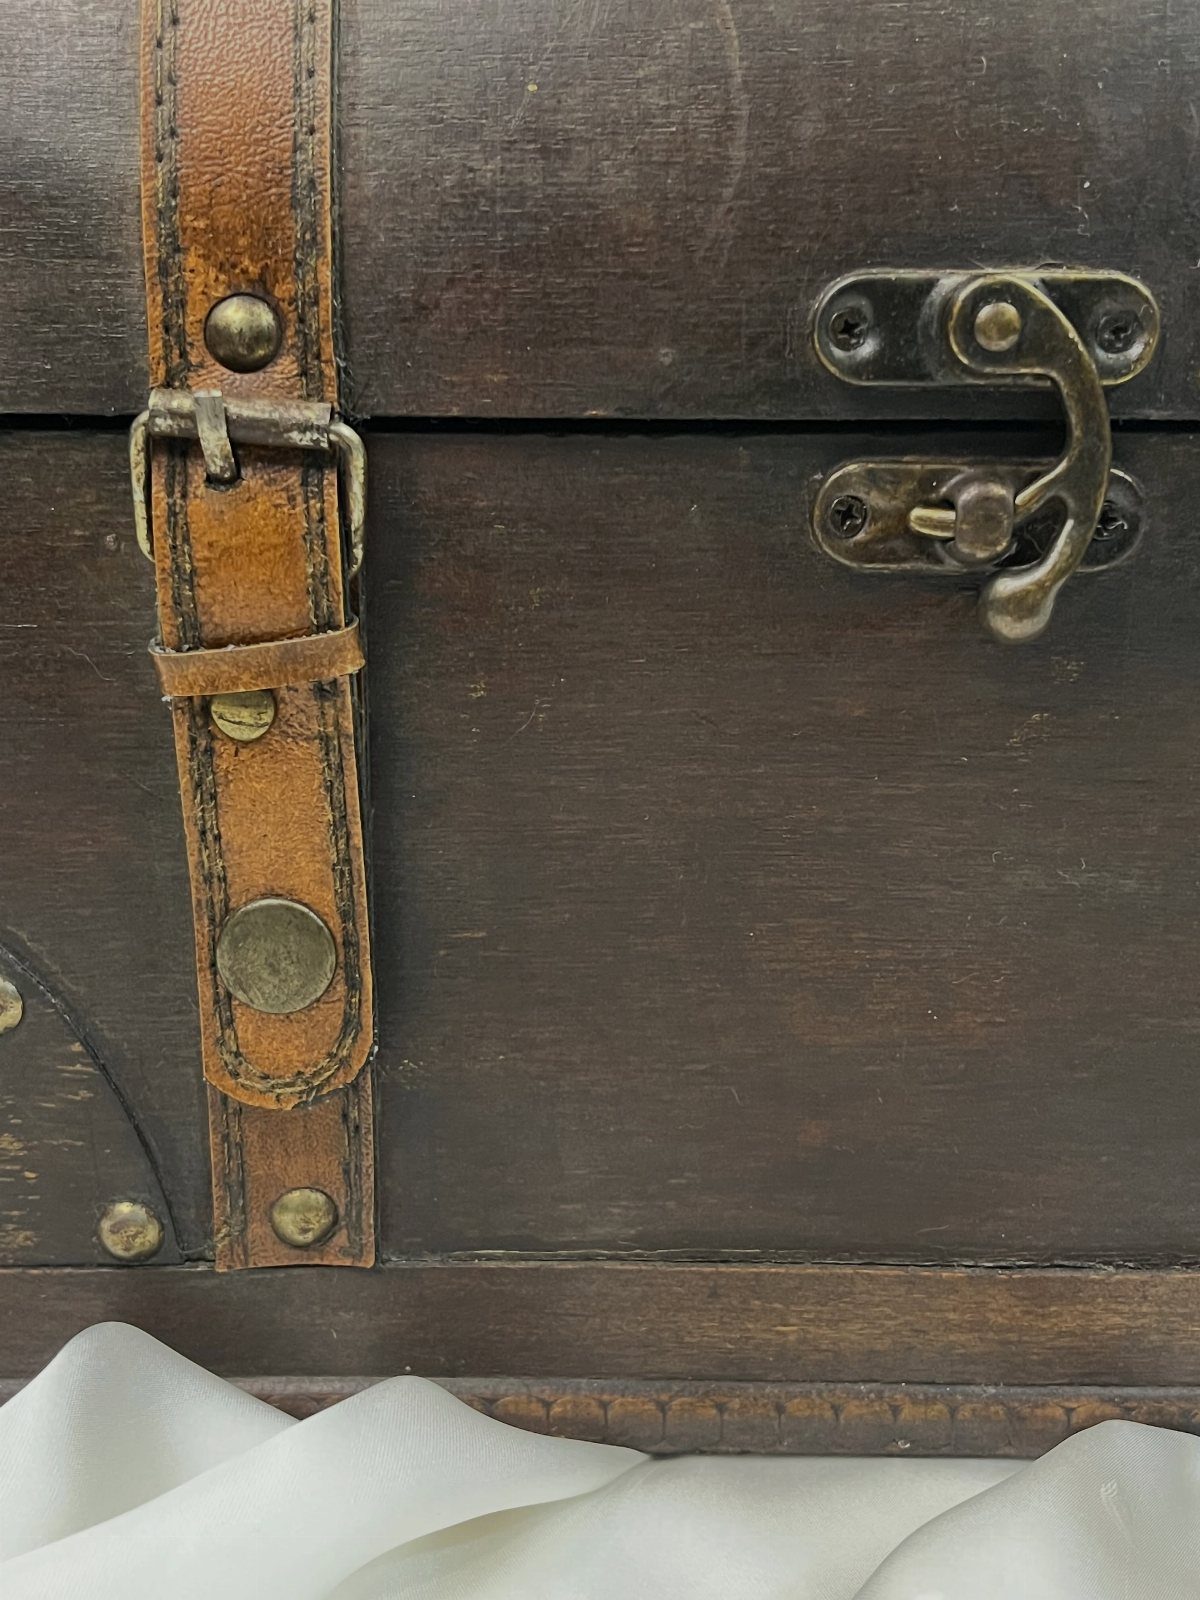
A leather strap with brass studs gives a dark wooden chest a warm contrast, and brass catches light against deep brown. It also costs far less than forged metal bands.
Studs hold the strap to the wood, so pre-drill pilot holes to keep the lid from splitting. Wrap the strap over the lid and set the brass latch where the two meet.
Test the strap length with the lid closed before cutting. You can trim leather later, but you cannot add it back.
7. Red Velvet Lined Interior
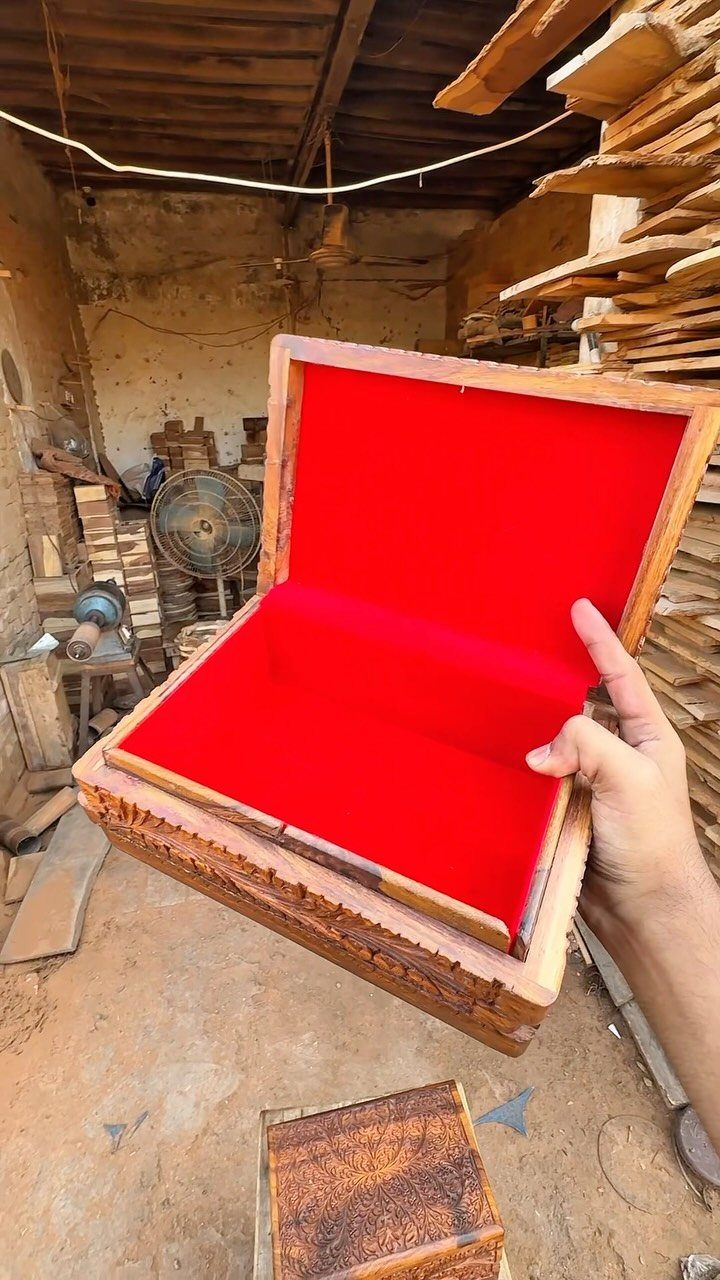
Red velvet turns a plain wooden box into something that feels like a keepsake. Against raw carved wood, the deep red makes a small chest look like it holds something worth guarding.
Cut the lining from thin cardboard or foam board, wrap each piece in fabric, and glue it in panel by panel. Wrapped panels hide uneven corners better than fabric glued straight to the wood.
Measure the inside after the chest is built, and trim each panel a hair small so it drops in easily.
8. Simple Unfinished Cedar Build
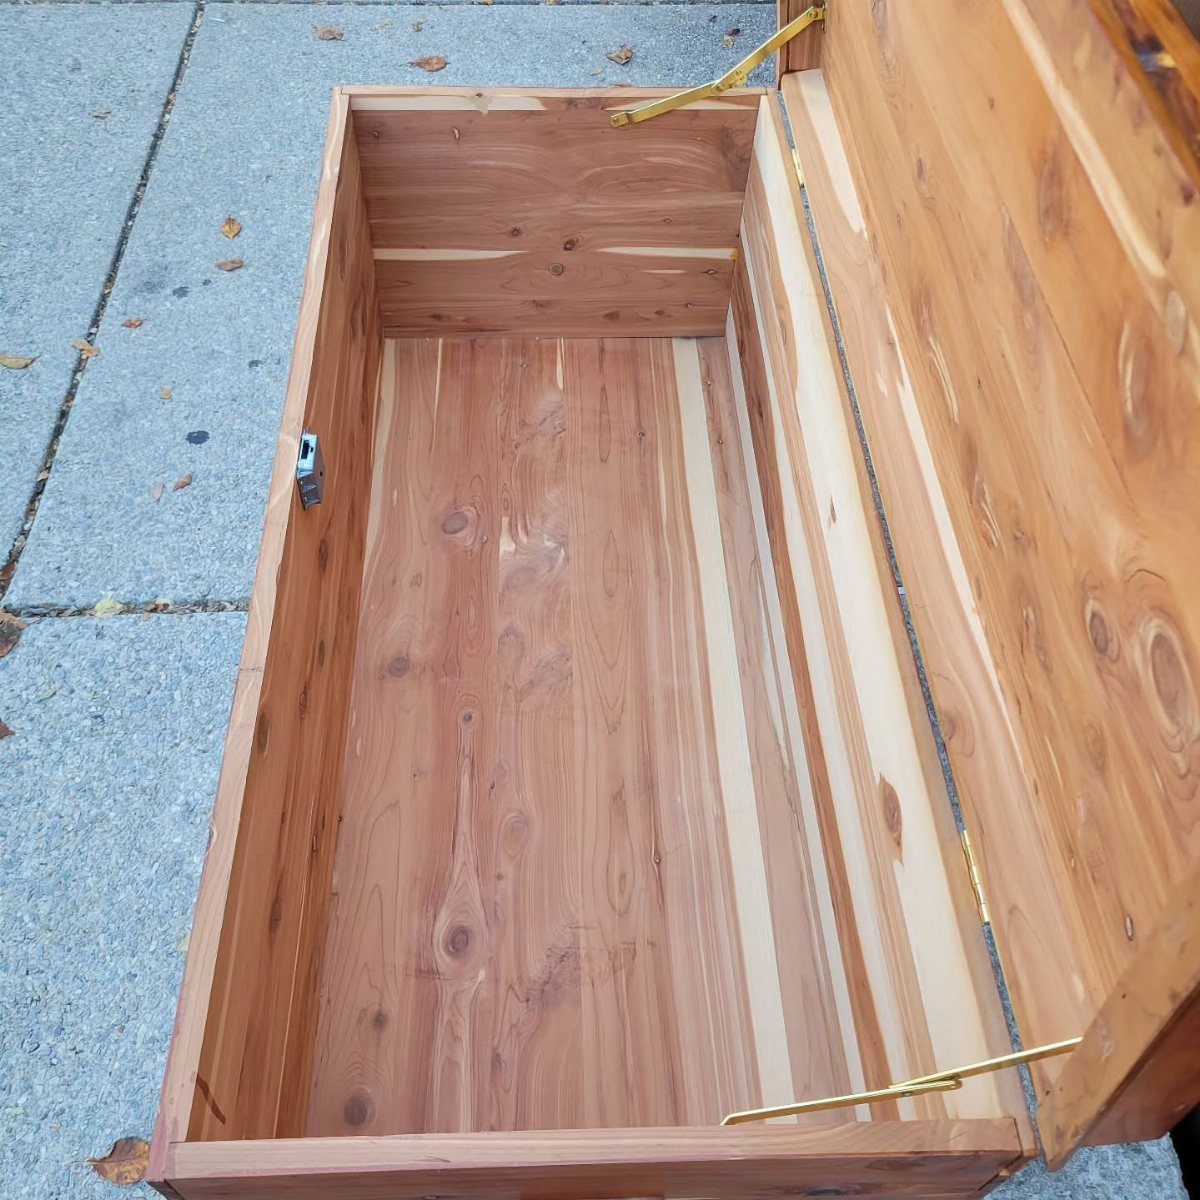
Unfinished cedar is the cheapest honest way to build a chest: plain planks, brass hinges, one metal latch, and nothing to stain or paint. The natural wood does the decorating.
Sand every surface through the grits before assembly, since bare wood shows every scratch. Set the hinges on the back edge with the lid closed, and drill pilot holes so the screws go in straight.
Leaving cedar raw is my pick for a first build. You can always add a clear finish later.
9. Curved Lid Workshop Build
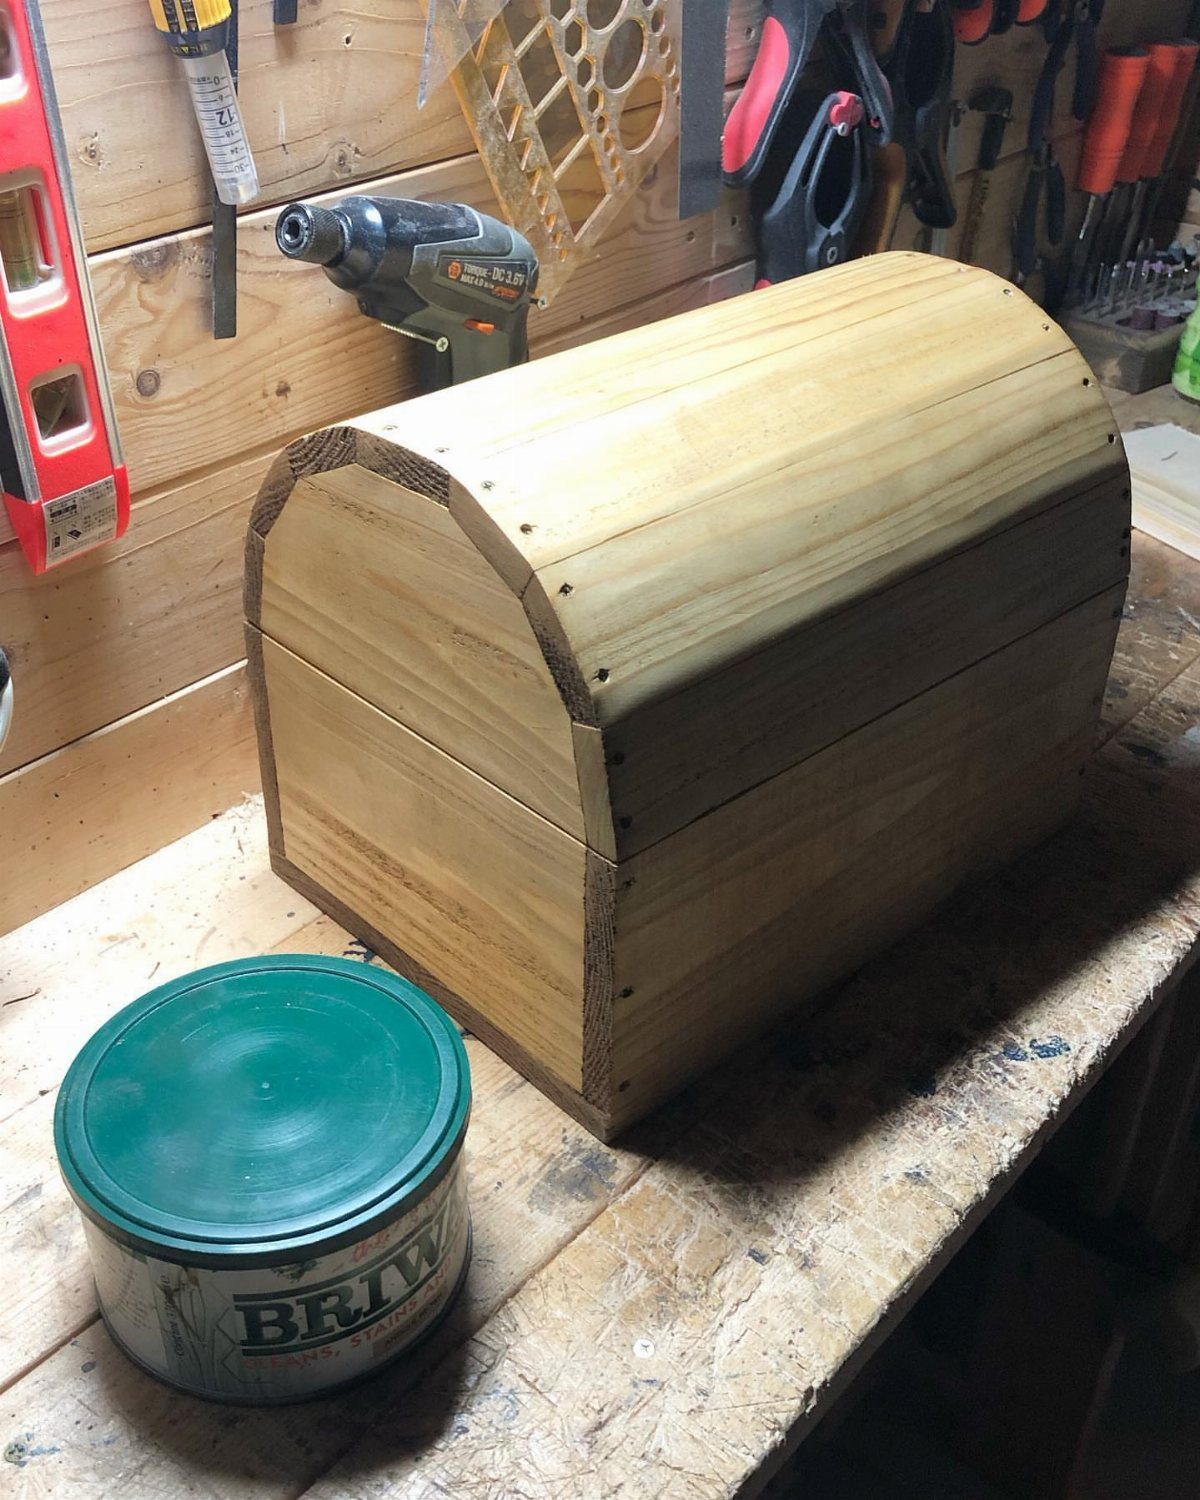
An arched barrel lid is the part of a pine chest that looks hardest and is mostly patience. Pine is soft and cheap, so it forgives mistakes, and the curve gives a plain box real presence.
Build the box first, then fit the lid to it, not the other way around. Sand the lid slowly and check the fit often.
Keep the stain, drill and clamps within reach at the bench.
Think about laminating a few layers of bending ply to do the top to avoid coopering the thing. You’ll need to use a solid piece for the front and back edges of the top to recieve the hinges and lock, though.
10. Nautical Seashell and Netting Accents
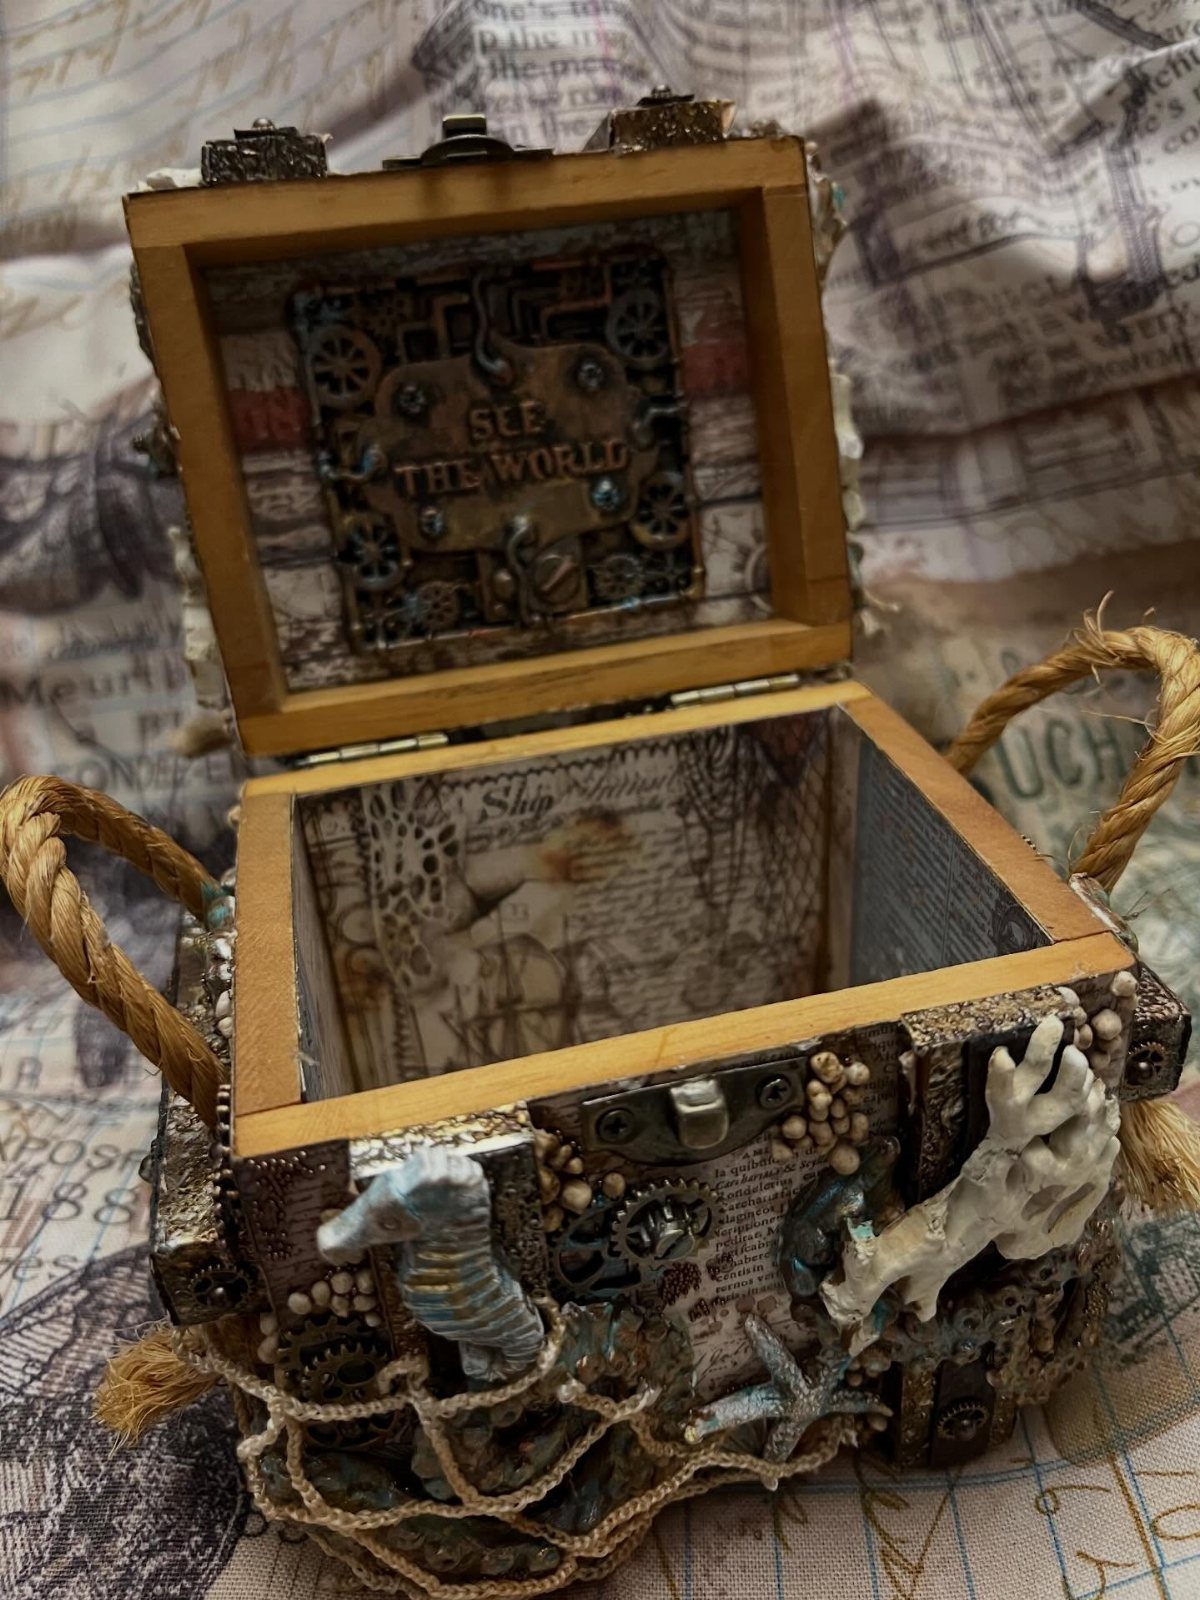
A nautical chest is a craft project more than a carpentry one, and that makes it forgiving. Seashells, a starfish, netting and vintage prints can hide rough spots in the wood.
Lay everything out dry before gluing a single piece.
Hot glue holds shells fast and sets in seconds, while decoupage medium works better for paper prints. Drape the netting last so it pins the edges of other pieces.
A short phrase printed or stenciled inside the lid is a nice touch, since it stays hidden until the chest is opened. It gives the chest a reason to be opened.
11. Two-tone Painted Finish
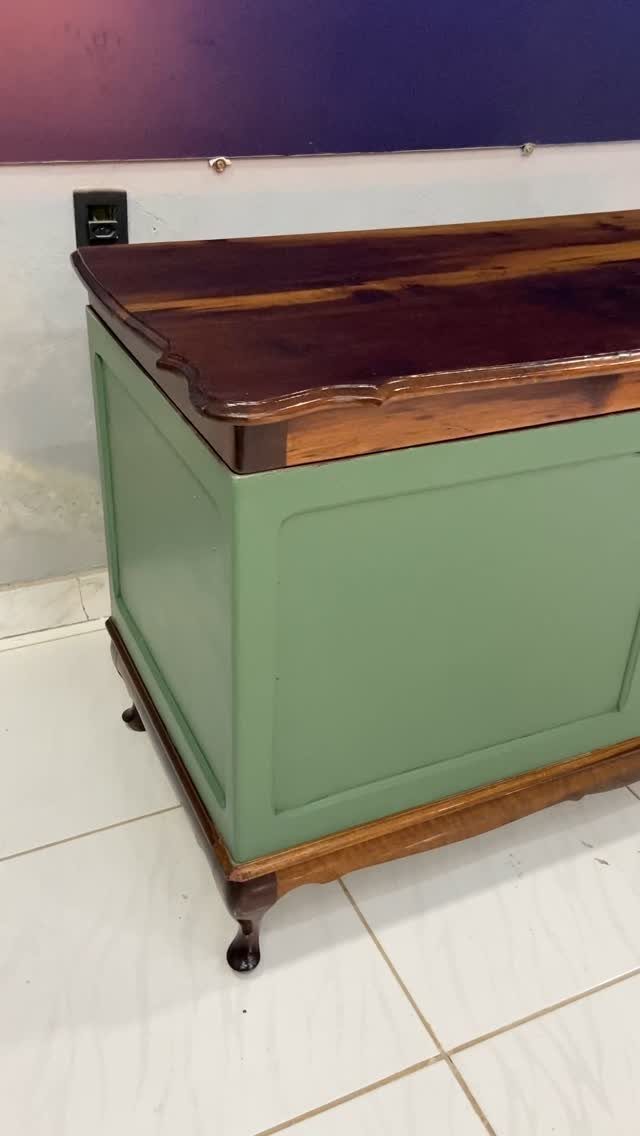
A dark stained lid over a sage green body gives a chest 2 personalities: wood grain on top, soft color below. Curved legs keep the paint from looking flat.
Paint the body and stain the lid separately before assembly, so neither finish bleeds onto the other. Tape the seam line where the two meet, and pull the tape while the paint is still slightly tacky.
Sage is a gentle color, so it suits a bedroom or entry. Two light coats beat one heavy coat.
12. Faux Gemstone Embellishments
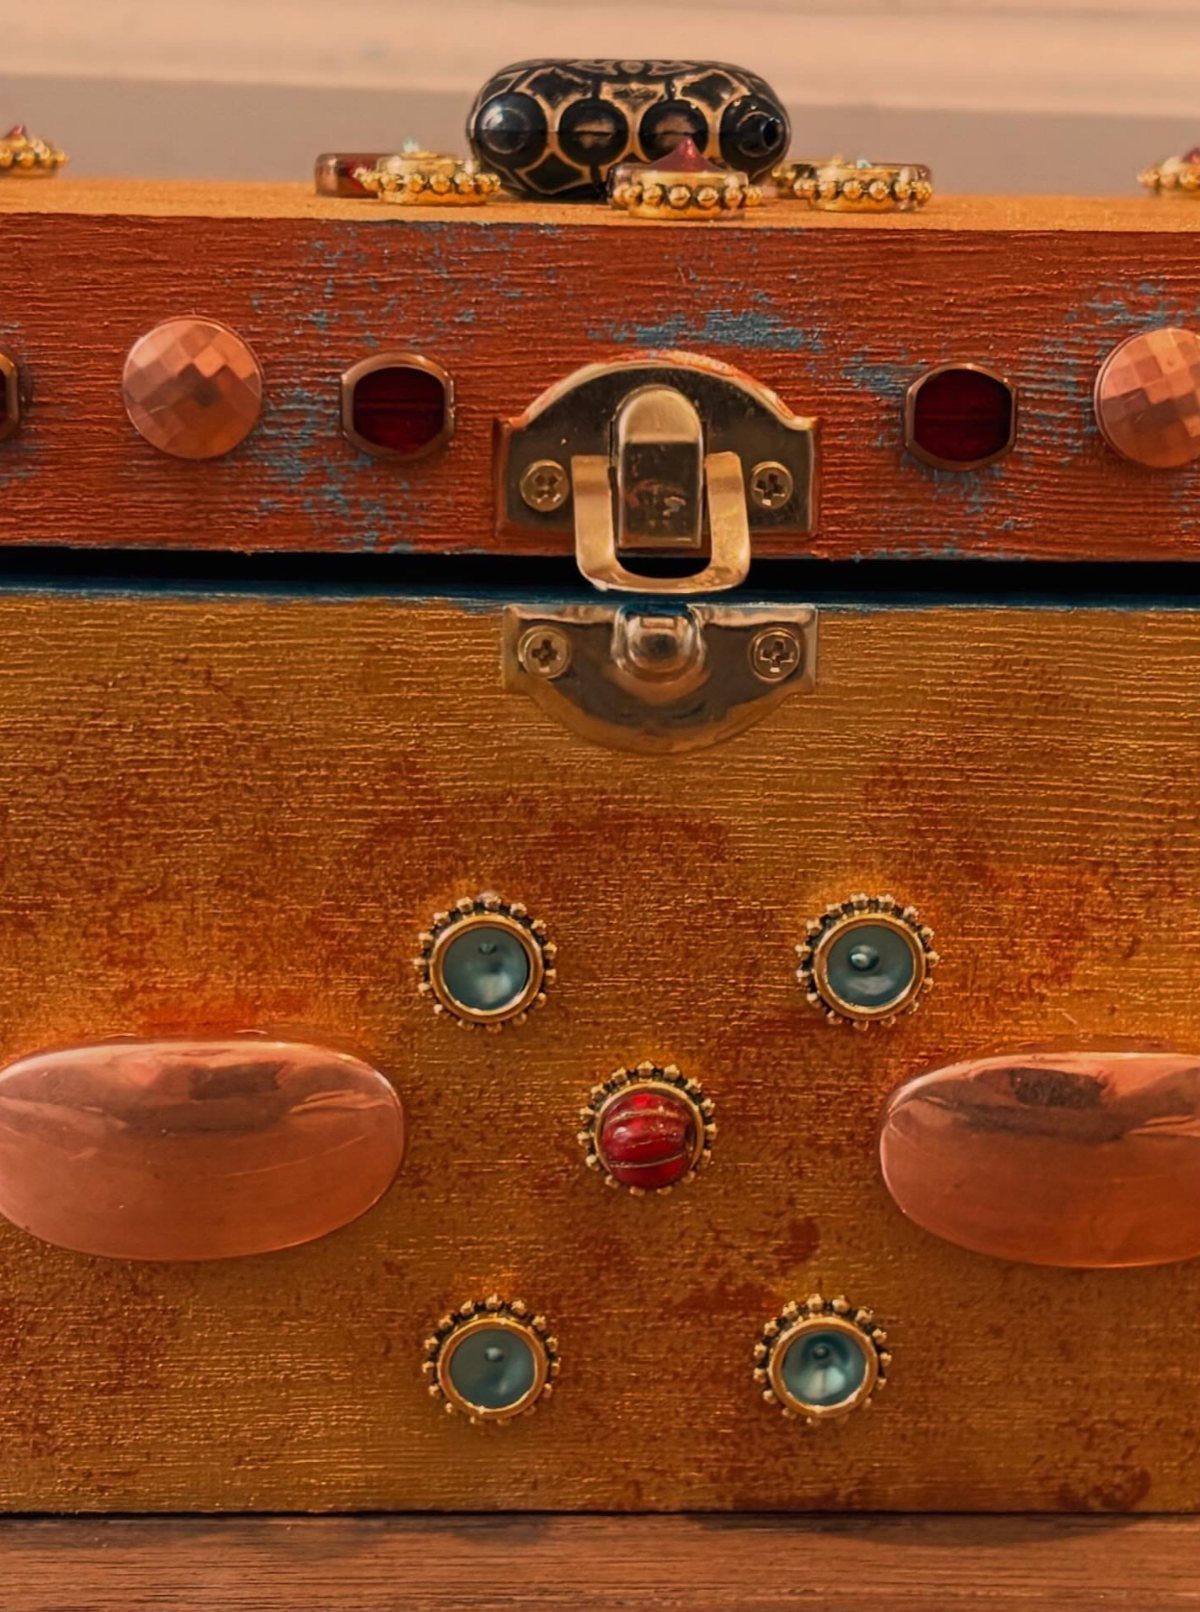
Gold and orange paint sets the stage, and faux gemstones in red and blue make a chest look like it was lifted from a pirate story. The metal latch fits right in.
Paint first and let it cure fully.
Then glue the gems on with a strong craft adhesive, pressing each one for a few seconds. Craft stores sell flat-backed gems cheaply, so a limited budget goes a long way.
Cluster the stones near the latch and space them out elsewhere. Too many at once looks cluttered.






