The size of your scrap pile decides which project is yours: a fist-sized chunk of wood makes a carved bird or snowman, a few thin offcuts become coasters or a slatted tray, and a bin or a wall planter means gluing up boards edge to edge.
The projects run from a weathered blanket ladder to small afternoon builds like coasters, garden markers and a utensil holder, and most of them cost almost nothing when the wood is already in your bin.
Pieces shorter than about 3–4 inches are hard to hold against a saw blade safely, so those go to kindling and the rest of the pile gets matched to a project.
1. Picture Frames
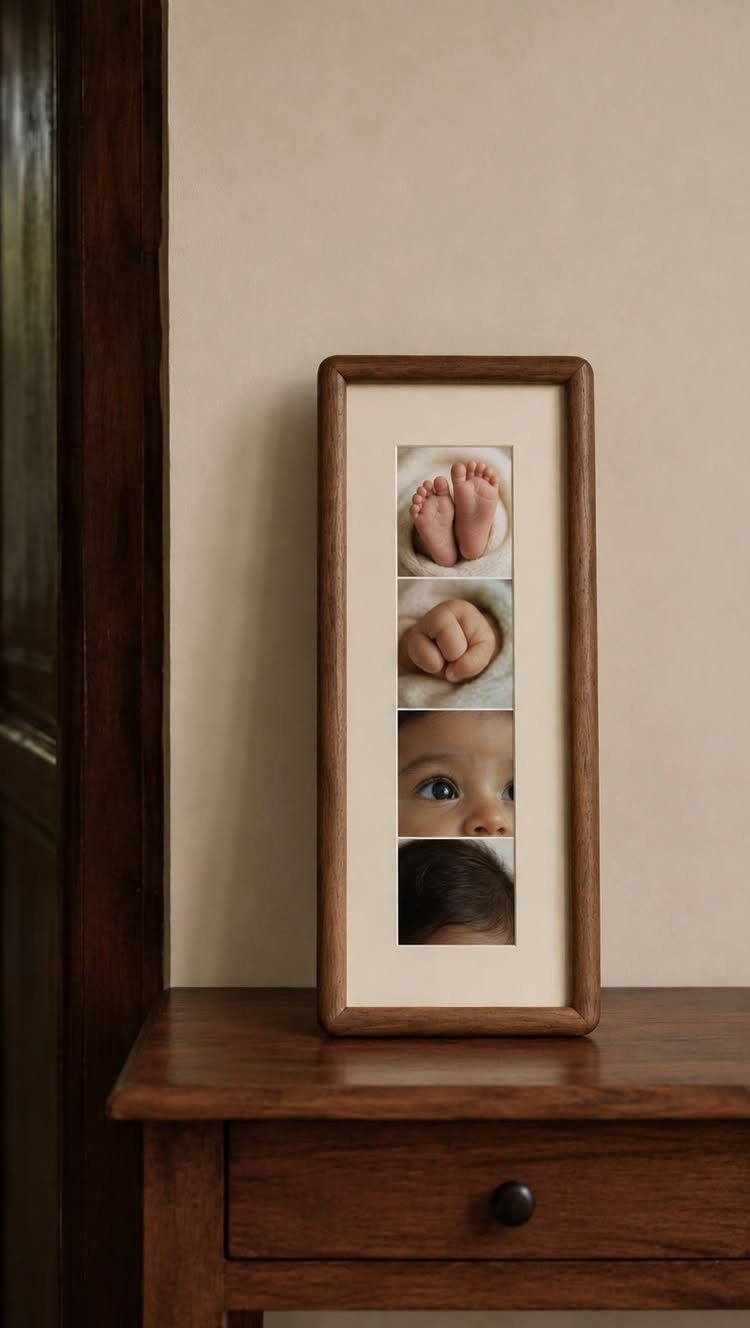
Offcuts too short for anything else find a home in a tall, narrow frame with small openings.
Strips of a single species keep the look calm, and a dark stain like the one on the table underneath makes small photos stand out.
Cut the sides with mitered corners if your saw allows it, and glue them before clamping. A tall layout like this one suits a bedside table or shelf.
2. Wooden Storage Bin
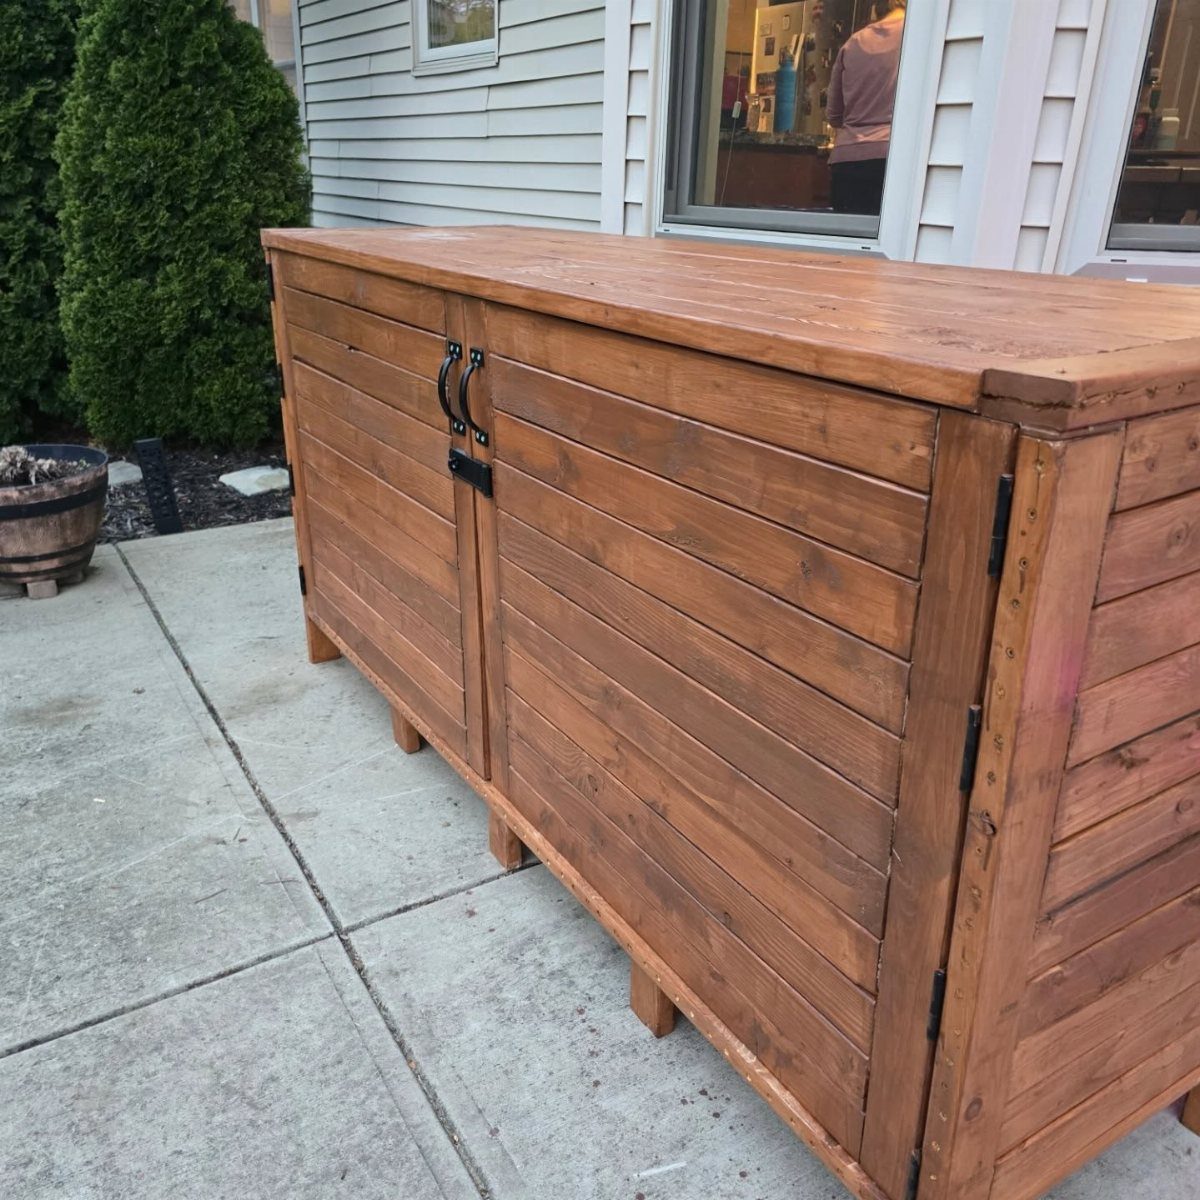
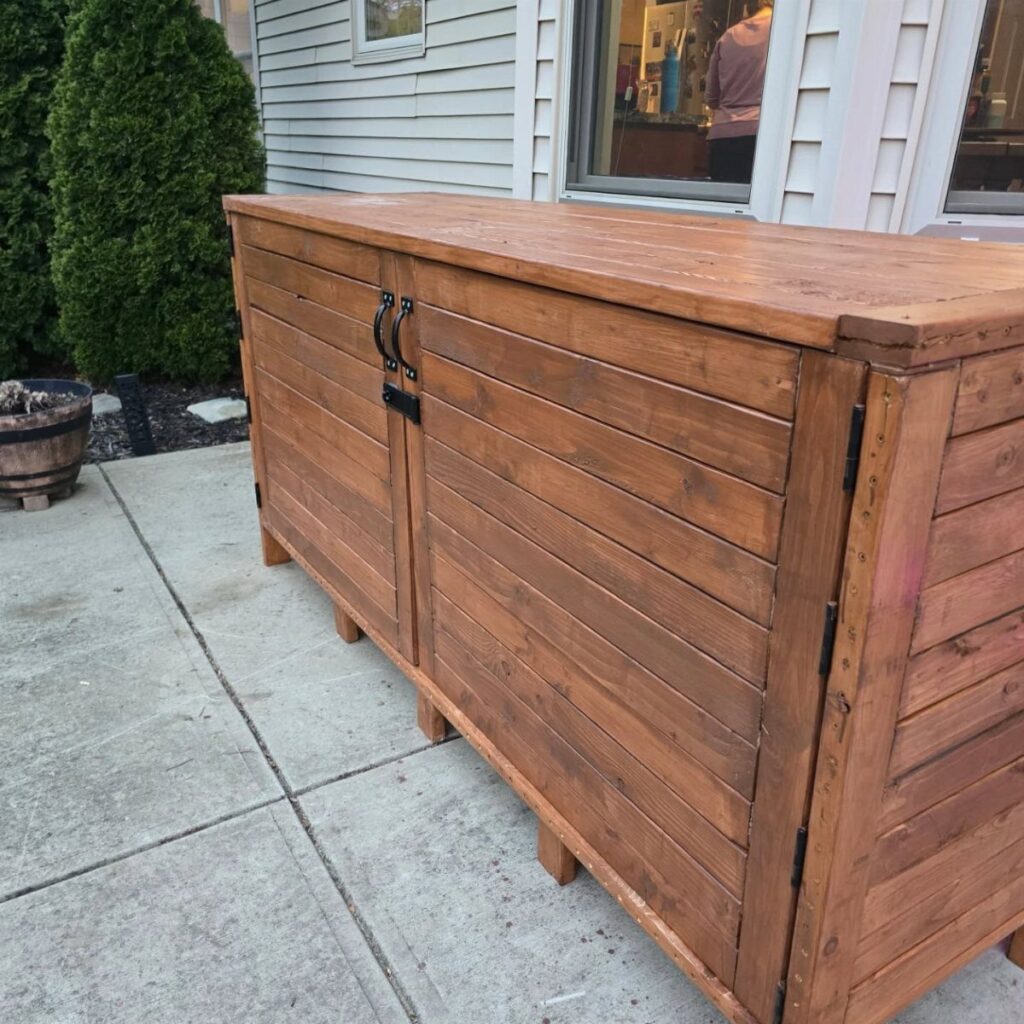
2 doors and a pair of black hardware pulls turn a plain box into something that looks built on purpose, even on a patio.
Scrap rarely stretches to a bin this large, so plan on gluing up boards edge to edge for the panels.
A brown stain evens out mismatched boards better than paint does, and it lets the grain show. Since this one sits outdoors, choose an exterior-rated finish.
3. Wooden Coasters
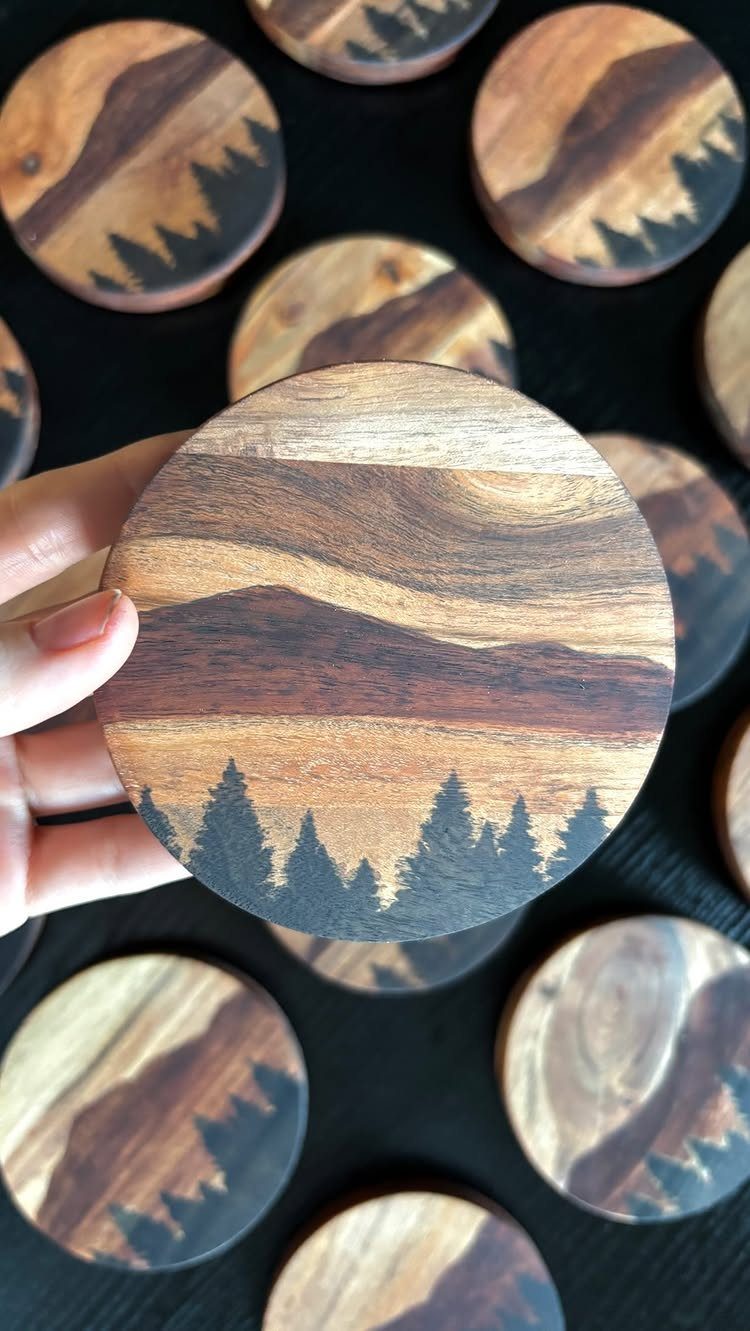
Round coasters are the quickest way I know to use up a small, flat offcut, and a set of identical ones takes one afternoon. Cut every disc from the same board thickness so they sit level with one another.
Seal the surface with a clear finish so a wet glass does not lift the paint. Cork on the underside protects the table.
Gluing up long scraps into a 4"x4" loaf of scraps and making slices for end grain coasters.
4. Phone Charging Station
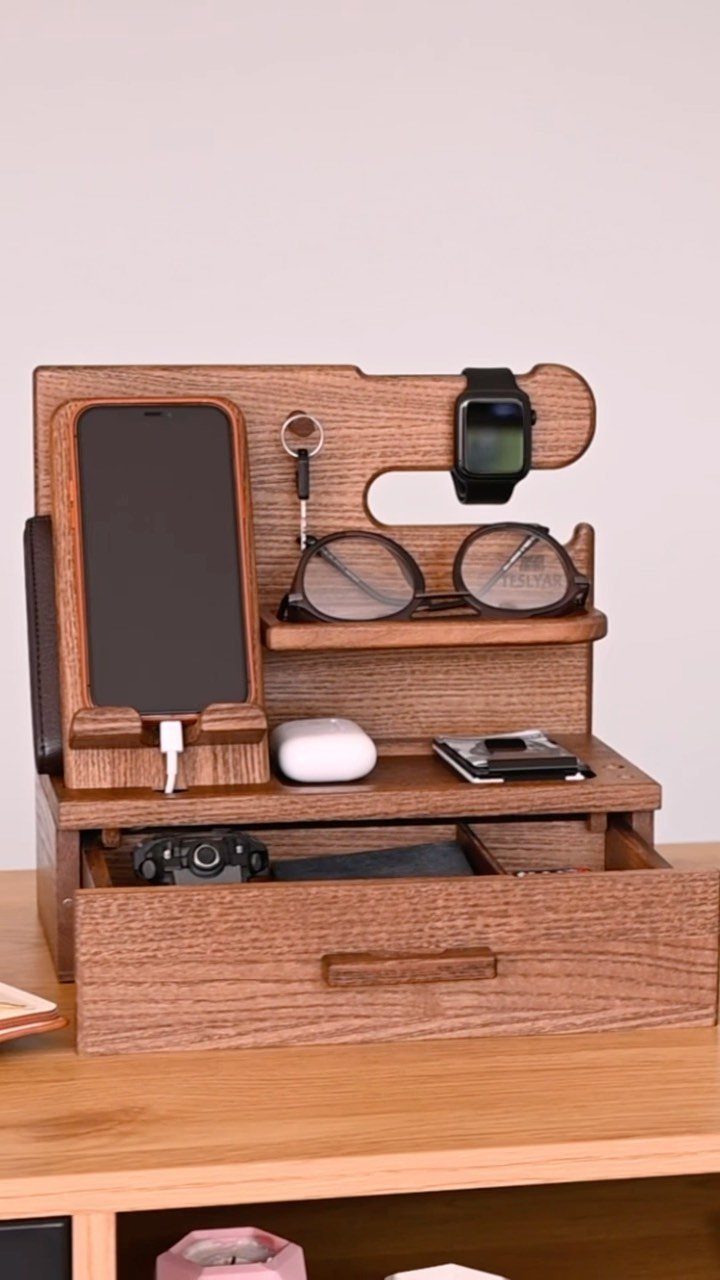
Charging stations earn their spot because they gather phone, watch, glasses, keys and earbuds in one place. The small drawer below handles the clutter that has no hook.
The maker of this one used solid wood with a non-toxic protective finish, a good standard for anything handled daily.
Cut a slot in the top for the phone, and drill a hole at the back for the cable. Thick scrap holds a phone upright better than thin boards.
5. Wooden Tool Organizer
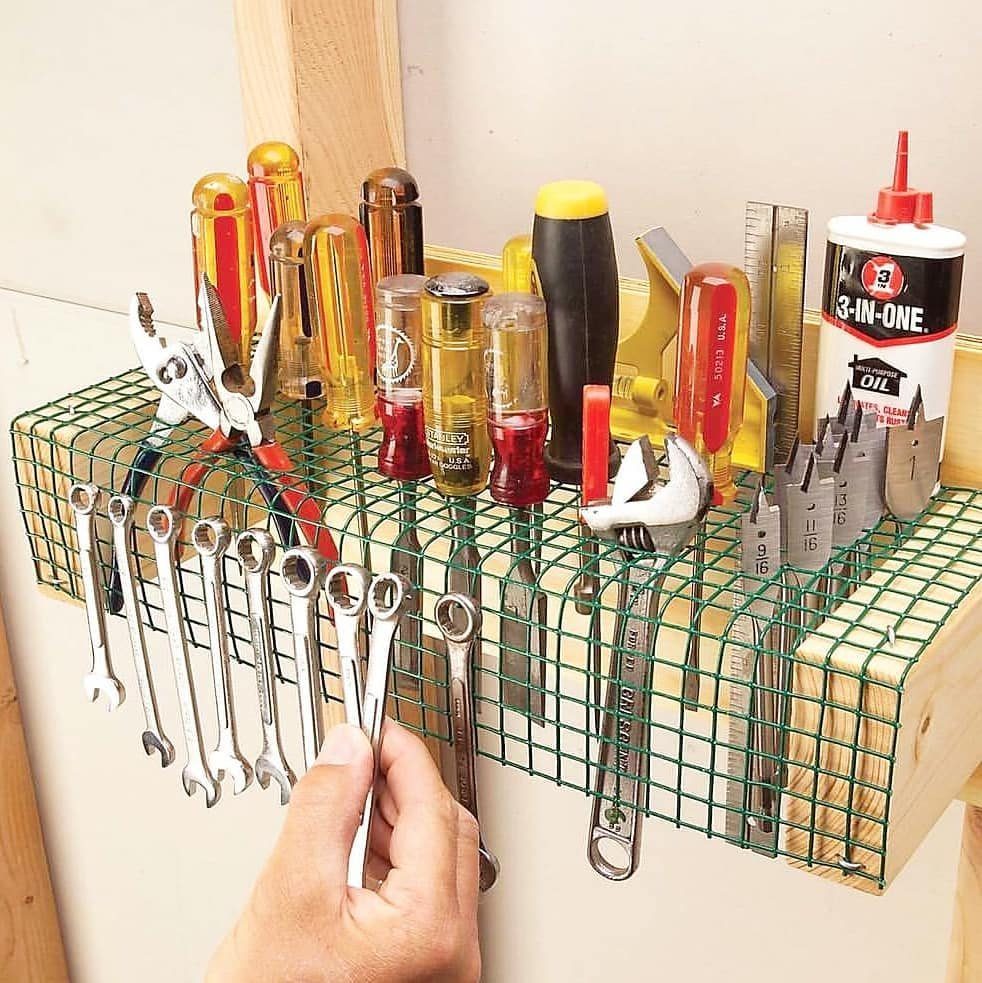
Green mesh like this is easy to find, and a frame of scrap boards keeps the cost low.
Staple or screw the mesh to the frame, then hang it over your bench. Space hooks to suit your heaviest tool first, and use a thick board for the backer so it does not flex under the weight.
6. Tiered Plant Stand
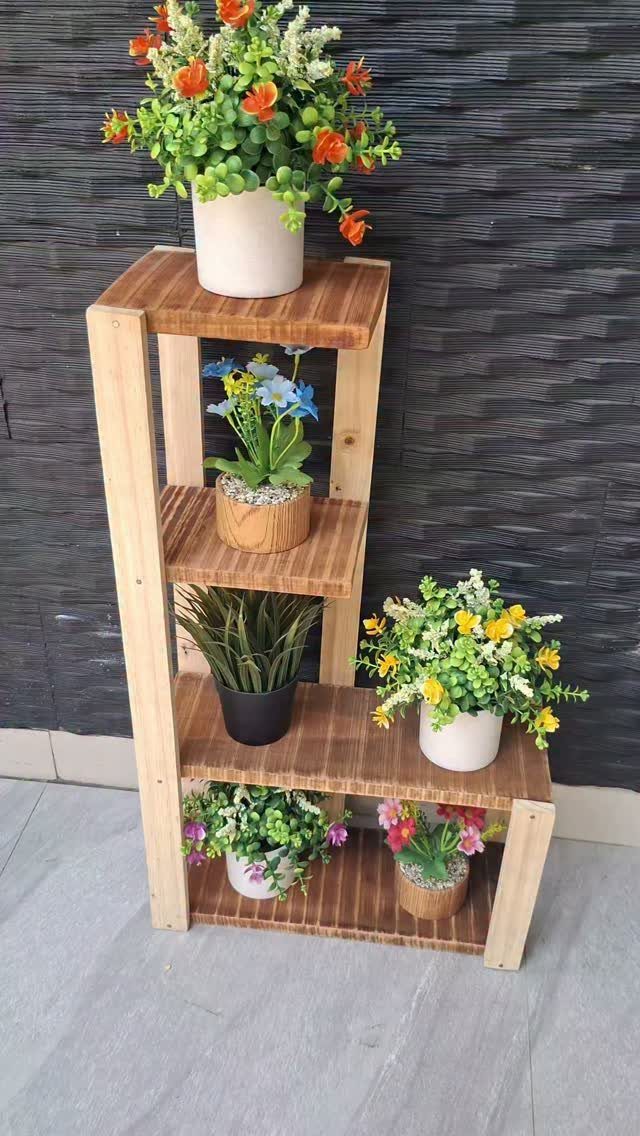
Tiers at different heights call for boards at different lengths, so a pile of mixed scrap suits this project better than one long plank.
Step the shelves so the lower ones reach farther out and every plant gets its own light.
I would screw the shelves to two angled side rails, not glue them, because pots are heavy once watered. A dark wall behind makes green leaves and blooms stand out.
7. Wooden Candle Centerpiece
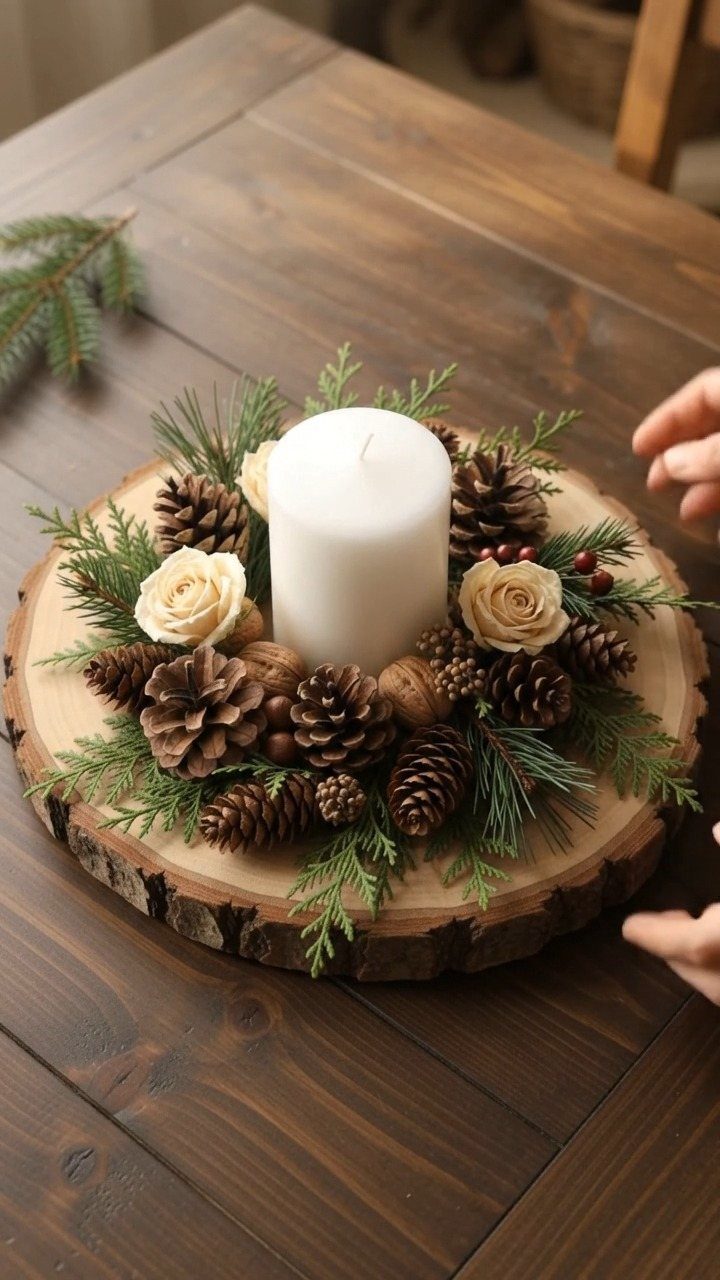
A slice of log makes a base that needs almost no work: the bark and rings do the decorating. Pick a slice thick enough to sit flat without rocking, and sand the top so a candle stands level.
Fill the space around the pillar with whatever is on hand: pinecones, evergreen sprigs and a few faux or fresh blooms all work, and tucking them in tight hides the gaps and any rough edges on the scrap base.
Keep any dried material back from the flame, and swap in an LED pillar if the table gets busy.
8. Wooden Garden Markers
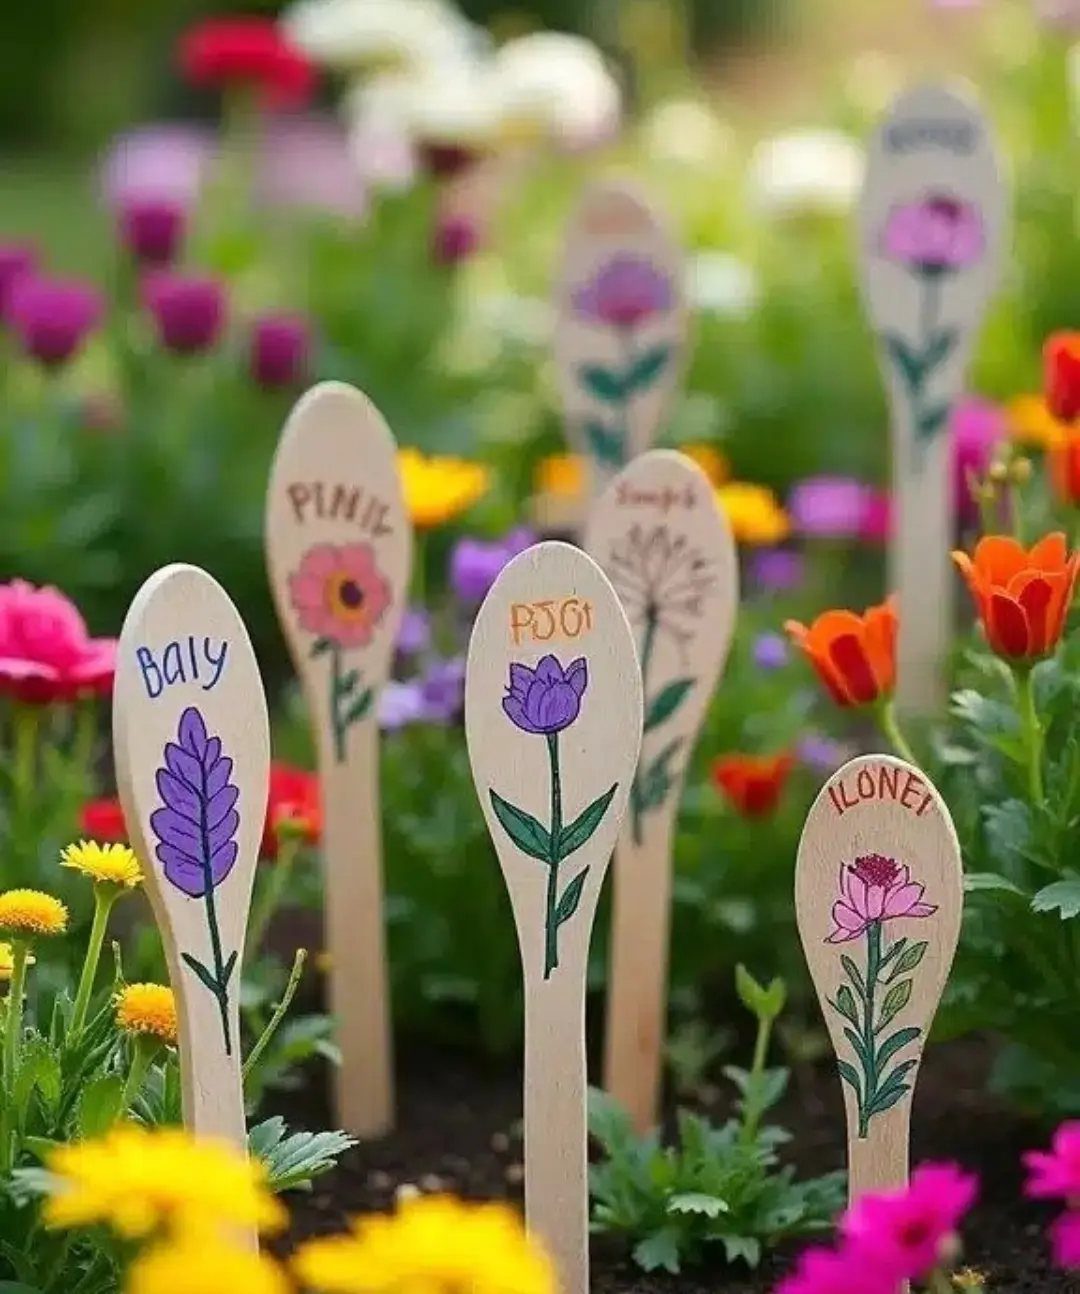
Wooden spoons are cheap, already the right shape, and a stake and a label in one. Paint a flower and a plant name on the bowl of each, and push the handle into the soil.
Acrylic paint works, but a coat of exterior clear sealer over it helps the lettering survive rain. Write the name in a dark color so it reads from a few feet away.
9. Wooden Herb Planter
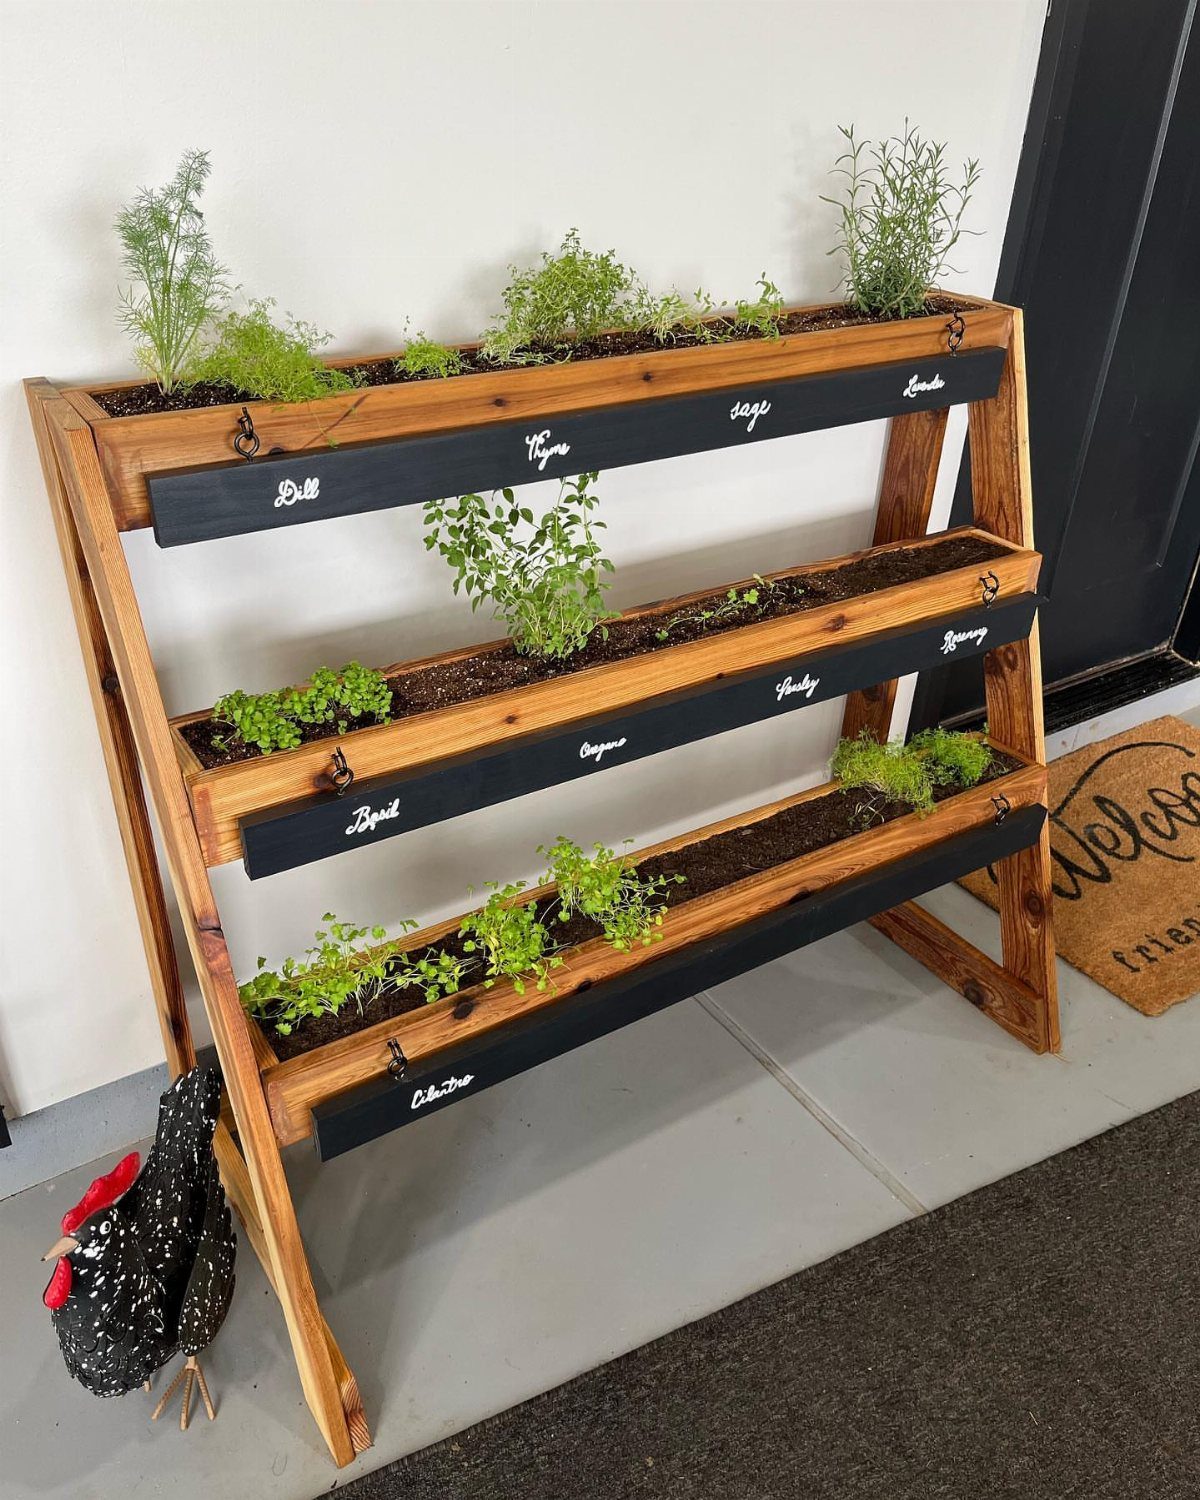
Stepped tiers put every herb at its own height, and small chalkboard labels keep basil from getting mixed up with parsley.
A planter this size fits by a door or on a patio, where you can snip a handful on the way past.
Drill drainage holes in each tier and line the inside with plastic if you want the wood to last longer. Scrap boards of different widths suit the steps well.
10. Wooden Blanket Ladder
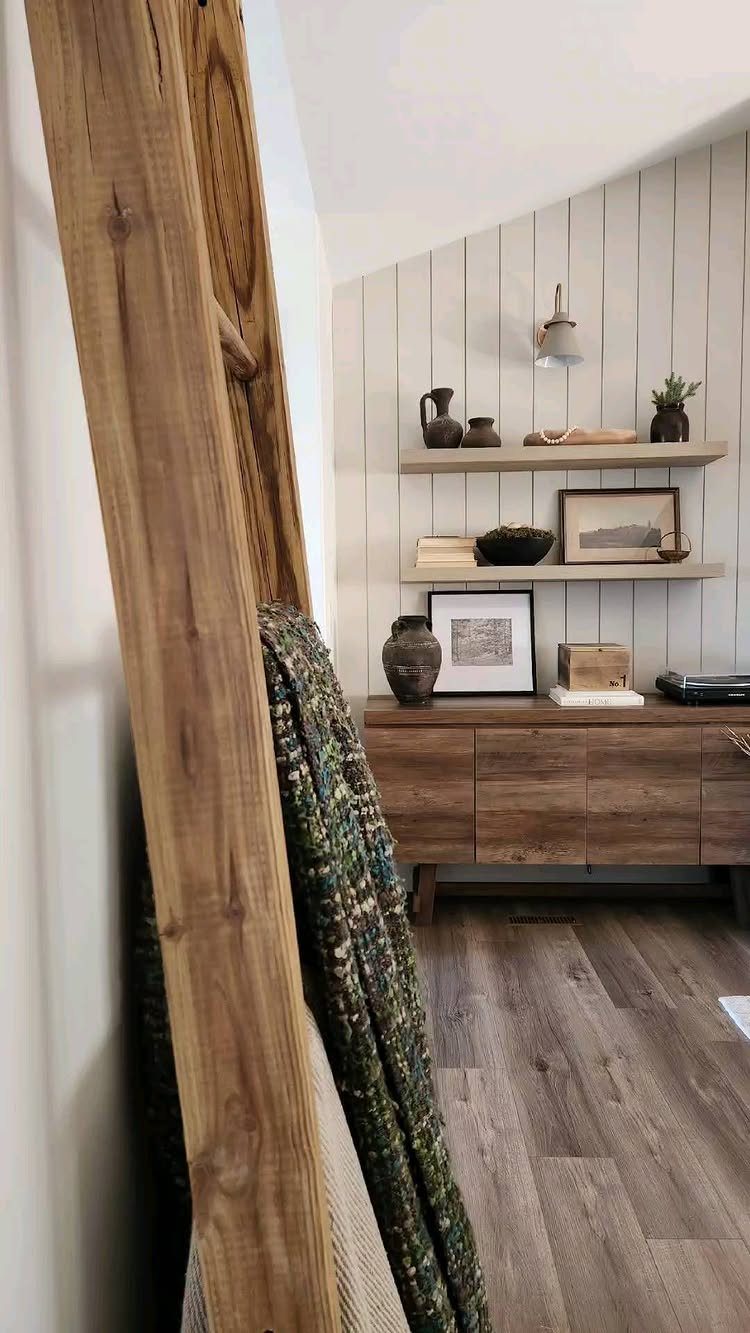
An old ladder is the fastest route to a blanket rack, and the maker of this one started with a weathered ladder that cost $10.
Sand off loose splinters, then decide whether to keep the worn finish or add a coat of wax.
Lean it against a wall at a slight angle and drape throws over the rungs. If you build from scrap instead, two long side rails and evenly spaced rungs do the same job.
11. Wall Art
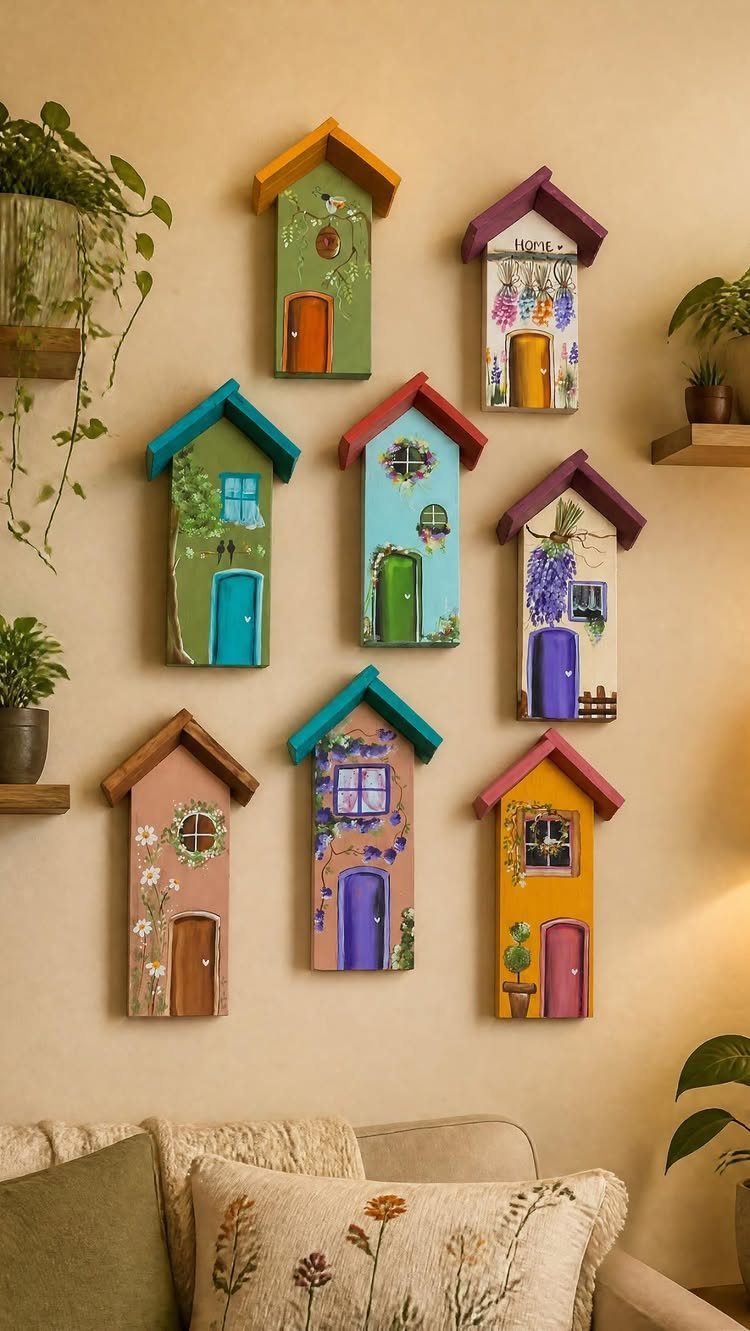
House-shaped plaques turn offcuts into a gallery wall with personality. Cut each one with a peaked roof, then paint doors, windows and flowers in a different color so the group feels lively.
Varying the sizes looks better to me than a matched set. Add a saw-tooth hanger to the back of each, and write a word like "HOME" on one as the anchor piece.
12. Multi-Colored Cutting Board
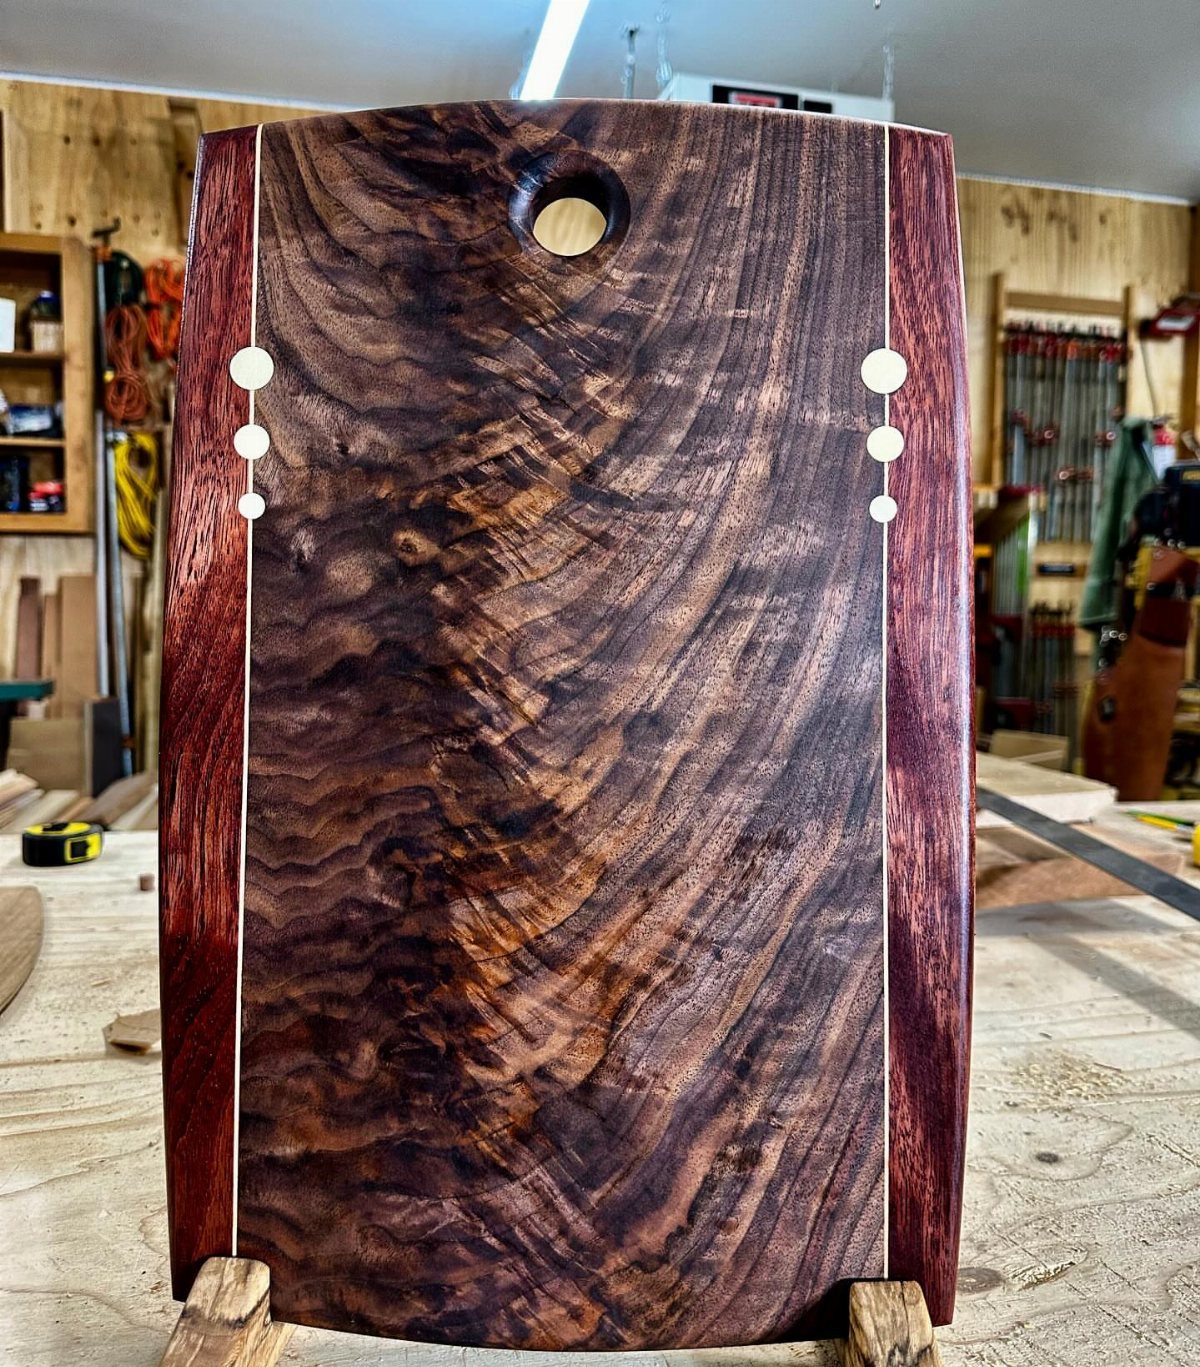
Light strips set into dark wood give a cutting board its pattern, and short offcuts of contrasting species are all you need.
Glue the strips between the dark pieces, clamp the board flat, and plane or sand it level once the glue dries.
A hole near one end lets you hang it. Finish with a food-safe oil, since this board will see knives and wet food.
13. Wooden Vases
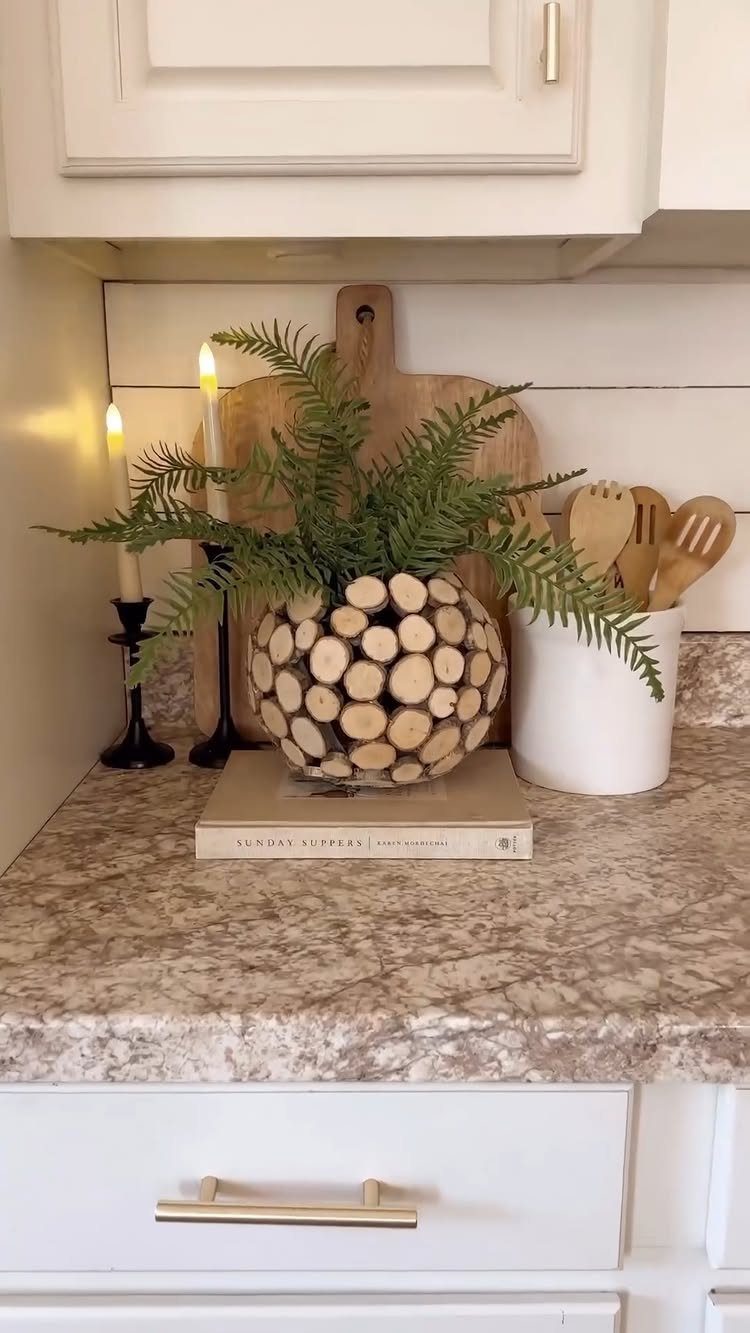
A vase built from small round log slices gives a bouquet a rustic shell, and a sphere shape suits trailing ferns and loose greenery better than tall stems.
Offcuts and branch slices are the raw material, so the cost stays low.
Glue the slices around a form, then sand the faces smooth. Keep a glass jar or plastic liner inside for water, since raw wood and standing water do not get along.
14. Wooden Serving Tray
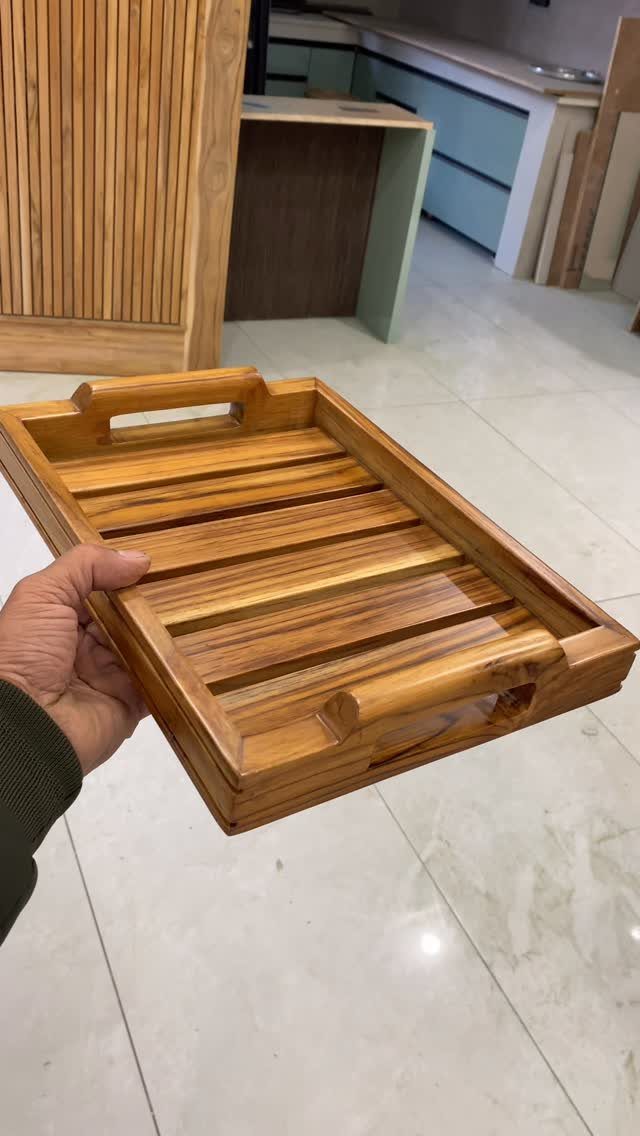
Slatted bottoms save wood. Narrow strips of scrap spaced across a frame make a tray that looks designed, and a pair of handles gives you a secure grip when your hands are full.
Sand every edge until it feels soft under your palm, because this piece gets carried and touched constantly. A coat of food-safe oil is my pick if it will ever hold snacks or cups.
15. Wooden Dog Bowl Stand
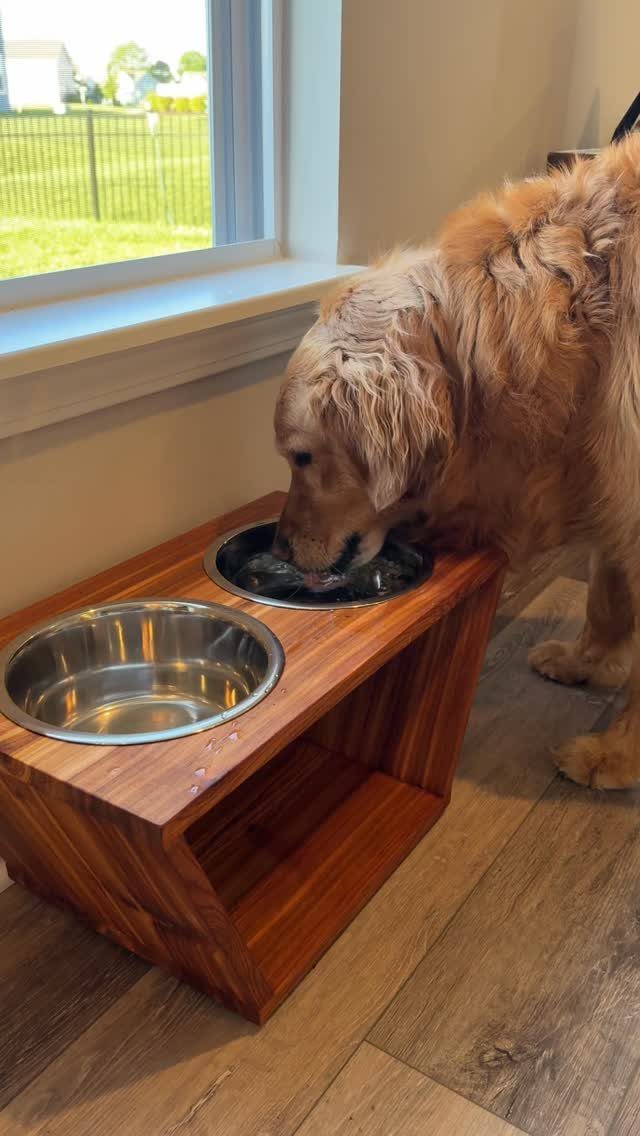
A raised stand puts the bowl at a comfortable height, and a cutout in the top lets a metal bowl drop in and stay put.
Measure your bowl’s rim first, then cut the opening slightly smaller than the rim so it hangs.
Sturdy scrap boards beat thin ones here, since a dog leans on the stand while eating. Keep the bowl removable for washing.
16. Wooden Wall Planter
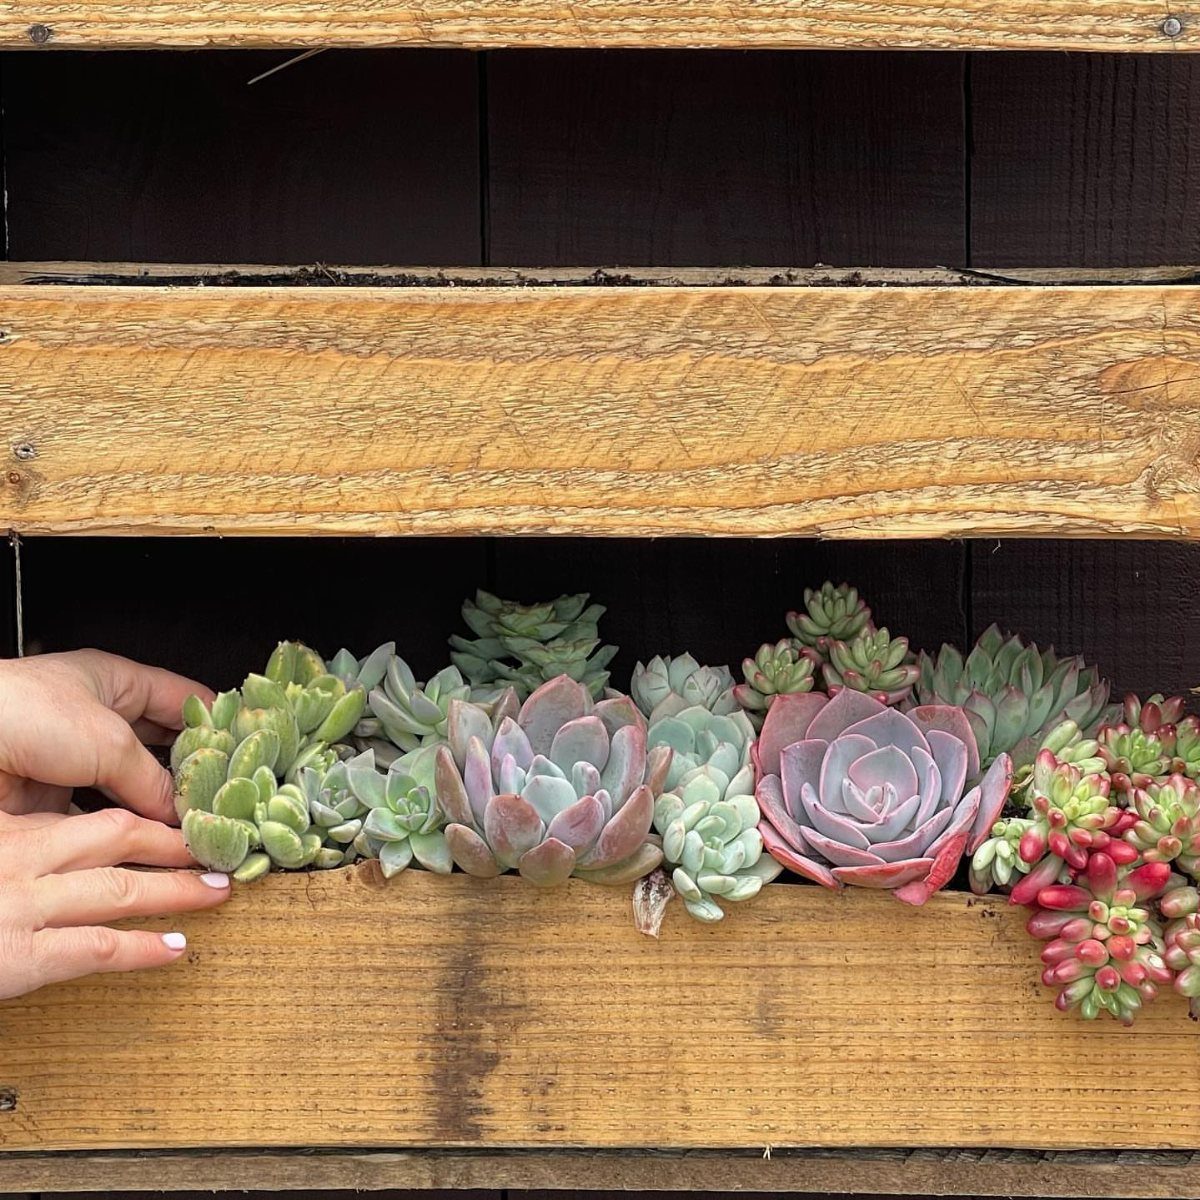
A shallow wooden box screwed to the wall is an easy way to grow succulents without using a shelf or table. Build it from scrap boards, and a rustic, unplaned look suits these plants well.
Drill a few drainage holes in the bottom and line the box before adding soil. Mount into studs or use heavy anchors, because wet soil adds more weight than you expect.
17. Wooden Utensil Holder
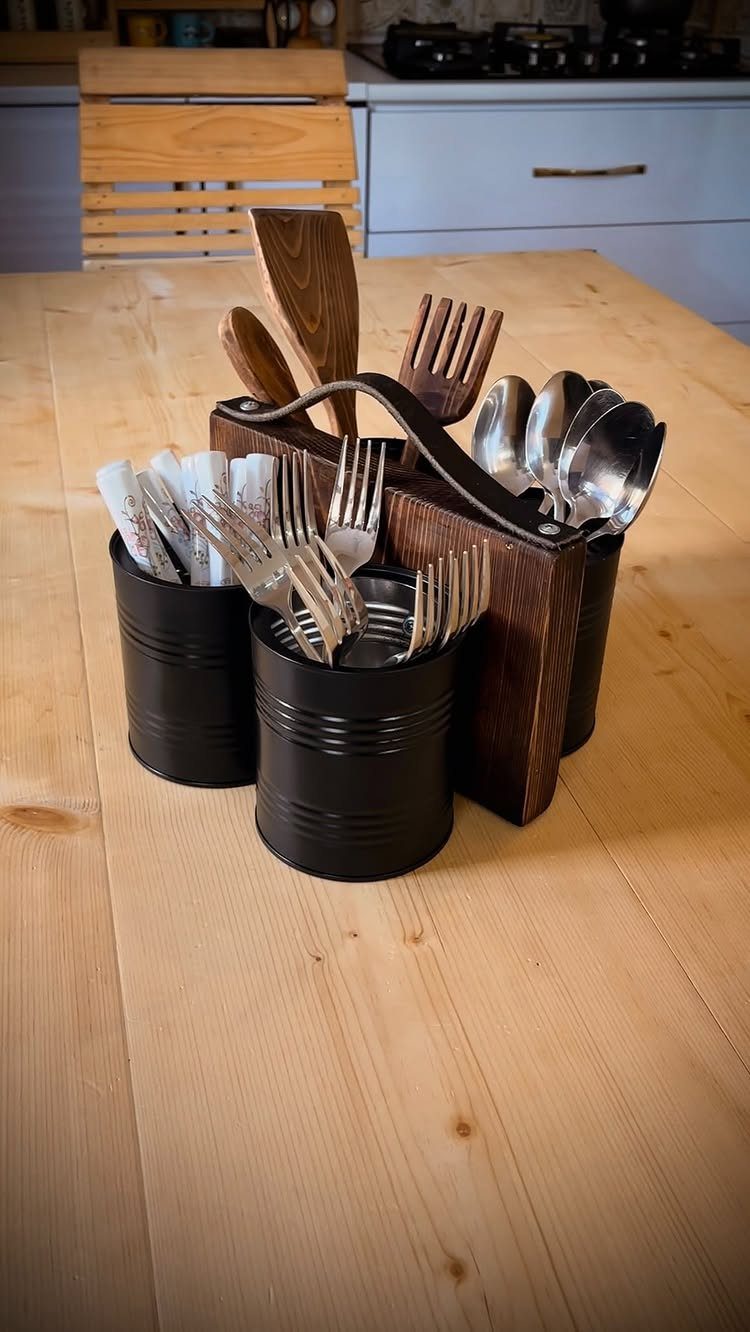
Black canisters set inside a wooden caddy keep forks, spoons and napkins in one place, while wooden cooking tools stand in the open section. Scrap lets you size the compartments to the cans you already own.
Build the dividers after setting the cans on your base board, so the fit is snug.
18. Handcrafted Wooden Board Games
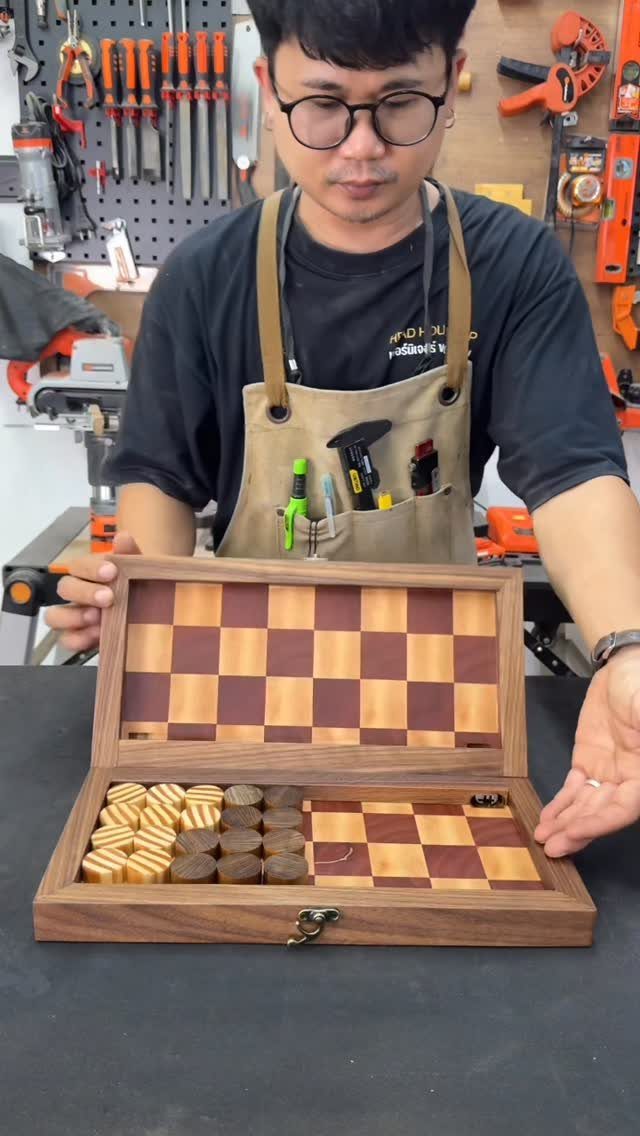
A hinged box that opens to a checkered board doubles as storage, so the cylindrical pieces never go missing. Cut the pieces from a dowel or small branch, and use two contrasting woods for the two sides.
Mark the squares with a pencil and ruler before cutting or burning.
Sand the board flat so pieces slide cleanly. Board games also make easy gifts, since a set fits in an afternoon and a scrap of hardwood goes a long way.
19. Small Carved Figurines

Small figurines suit the scrap bin better than almost any project, because a bird, a tree or a snowman needs only a chunk of wood no bigger than your fist.
Stylized shapes with simple, rounded forms are easier to finish in an afternoon than detailed realistic ones.
Sketch the outline on the block first, then remove wood in small cuts, and sand away the tool marks.
A clear finish keeps the grain visible, and I like leaving a few pieces unpainted so the wood color does the decorating. Group them on a dark shelf or table, where the pale wood stands out.
Safety Tips for Woodworking
Safety glasses go on before the saw is switched on, every time, because offcuts throw chips and splinters in unpredictable directions.
Hearing protection matters once a tool gets loud; 85 decibels is the level where it becomes necessary, and most power saws and sanders pass it.
Skip loose sleeves and dangling cuffs that a spinning blade can catch, and wear closed-toe shoes. Steel-toe boots are better still if you have a pair.
Set up the space as carefully as you set up the gear. Good ventilation, bright light, a non-slip floor and a clear bench all prevent the small accidents that end an afternoon early.
Organizing Scrap Wood
I sort scraps by species first, since oak and pine don’t mix well in a project, and then split each pile into small, medium and large.
Keep hardwoods apart from softwoods so you can find the right piece fast. Plywood and other sheet goods deserve a separate bin or shelf once a piece grows past 12 x 12 inches.
Be strict about what stays.
Pieces shorter than about 3–4 inches are hard to hold against a saw blade safely, so I throw them out or use them as kindling. Keep boards that match the projects you really build, not everything that lands in the pile.
Short boards can lie flat on a shelf, but long ones are better off upright, so they stay straight.
Vertical racks suit long pieces, bins under the workbench hold the middle sizes, and clear containers make small bits easy to spot. Label each bin.
Write the date on a piece when you store it, then check the pile again after a year and clear out what went unused.
Frequently Asked Questions
What are some easy projects I can make with scrap wood?
Coasters are the quickest: cut round discs from one board so they all share the same thickness and sit level, then seal them with clear finish and add cork underneath.
Garden markers made from wooden spoons and small carved figurines also fit an afternoon, since each needs only a small piece of wood.
Thick offcuts also make a good phone charging station, because a chunky block holds a phone upright where a thin board tips over.
What can you make out of a piece of wood?
Small offcuts become coasters, and short strips of contrasting species glue up into a patterned cutting board.
Even a scrap about the size of your fist has a bird, tree or snowman hiding in it, waiting for a carving knife. Larger pieces can become a serving tray, a dog bowl stand or a wall planter.
How do I make a cutting board from scrap wood?
Alternate light strips with dark ones from a contrasting species, clamp everything flat, then level the surface with a plane or sander after the glue cures.
Short offcuts are all you need. Rub in a food-safe oil to seal it, since knives and wet food will hit that surface, and add a drilled hole near one end for hanging.
What safety gear do I need when working with scrap wood?
Wear safety glasses every time before the saw is switched on, since offcuts throw chips and splinters unpredictably.
Most power saws and sanders hit 85 decibels or more, so earmuffs or plugs belong on your head once those tools are running. Skip loose sleeves and wear closed-toe shoes, with steel-toe boots better if you own them.






