What you store decides which one fits: loose small parts belong in the hardware storage drawer cabinet, cordless drills and their batteries suit the wall-mounted power tool rack or the recharging station, and long-handled yard tools stay put on the wooden garden tool wall rack.
The ideas run from a strip of magnet on the wall to a plywood shelf with cubbies cut around the bins you already own, and most need only a saw, a drill and wood screws.
Anything heavy, like the power tool rack, needs to be screwed into wall studs rather than drywall alone.
1. Pegboard Tool Organizer
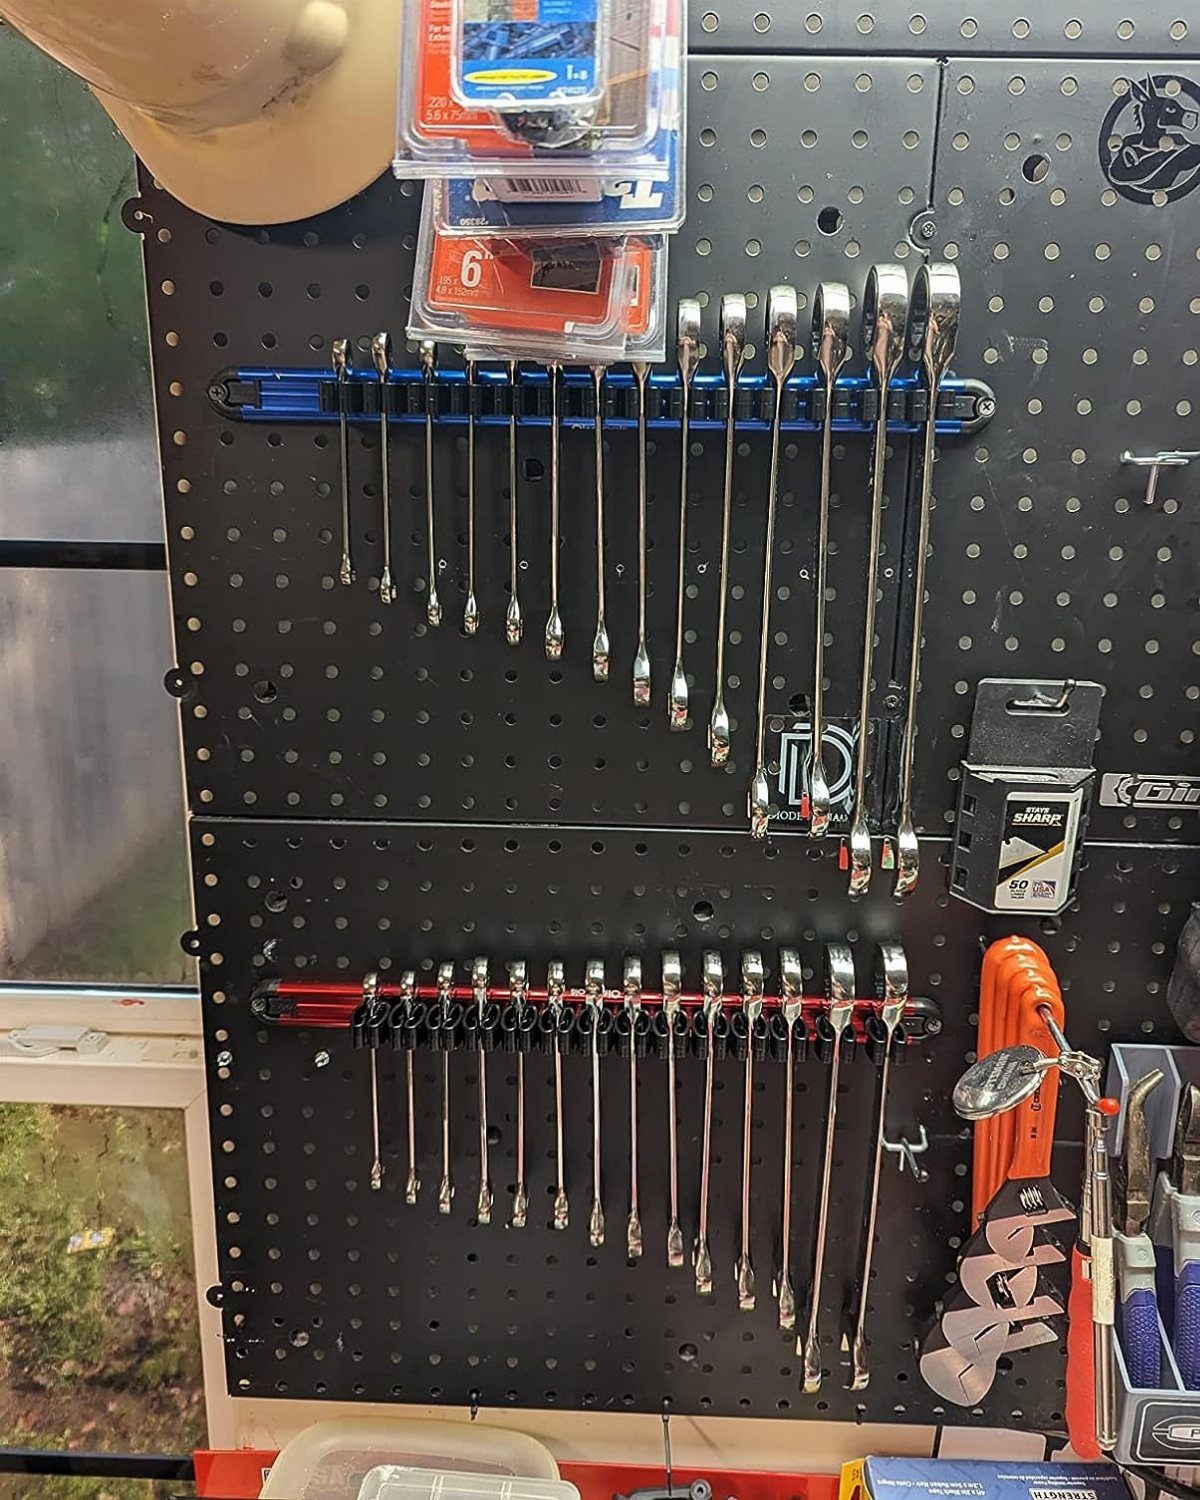
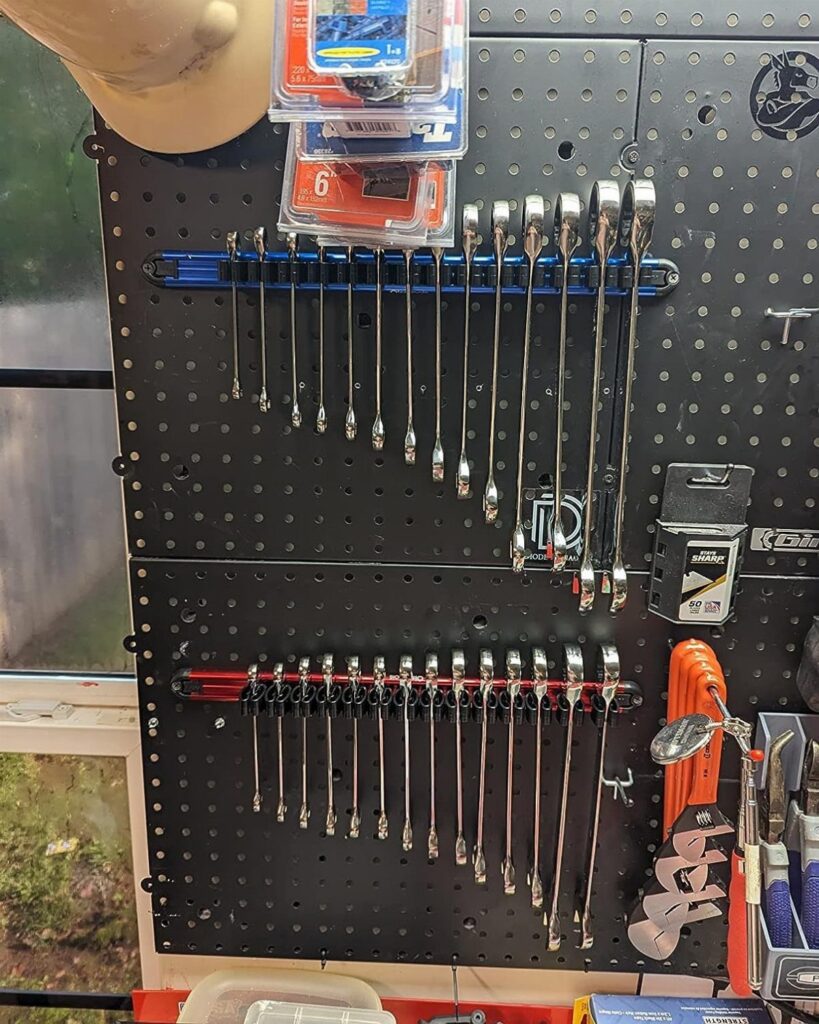
Pegboard earns its place because the layout never gets locked in. Hooks and racks slide out and back in, so the wall changes as your tool collection does.
Group by task, not by size.
Wrenches on racks, small parts in bins, and the tools you grab daily at eye level. A black board makes the silhouettes easy to spot, though any color works.
Leave a few empty rows. A pegboard that starts full has nowhere to go.
2. Magnetic Tool Holder
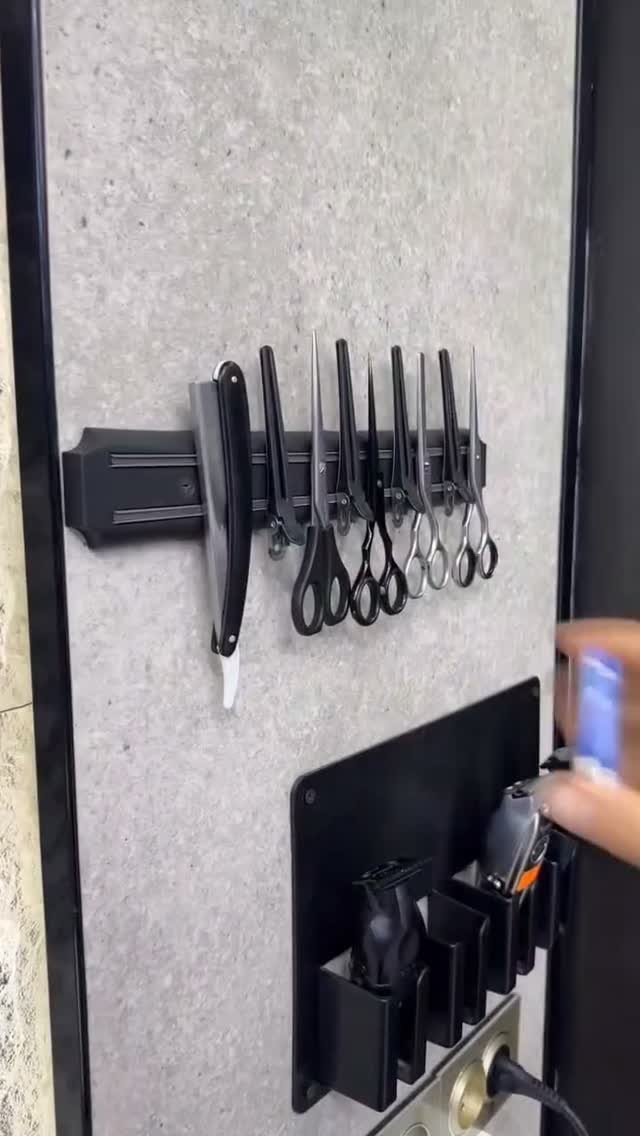
A strip of magnet on the wall is the cheapest fix for scissors, razors and utility knives that keep disappearing into drawers. Each blade hangs in sight and comes off with one hand.
Mount it at a height you can reach without stretching, and keep sharp edges facing away from where your hands naturally land. Give clippers their own holder so the grooming tools stay apart from the cutting tools.
This only works for steel. Anything aluminum, brass or plastic needs a hook instead.
3. Battery Recharging Station
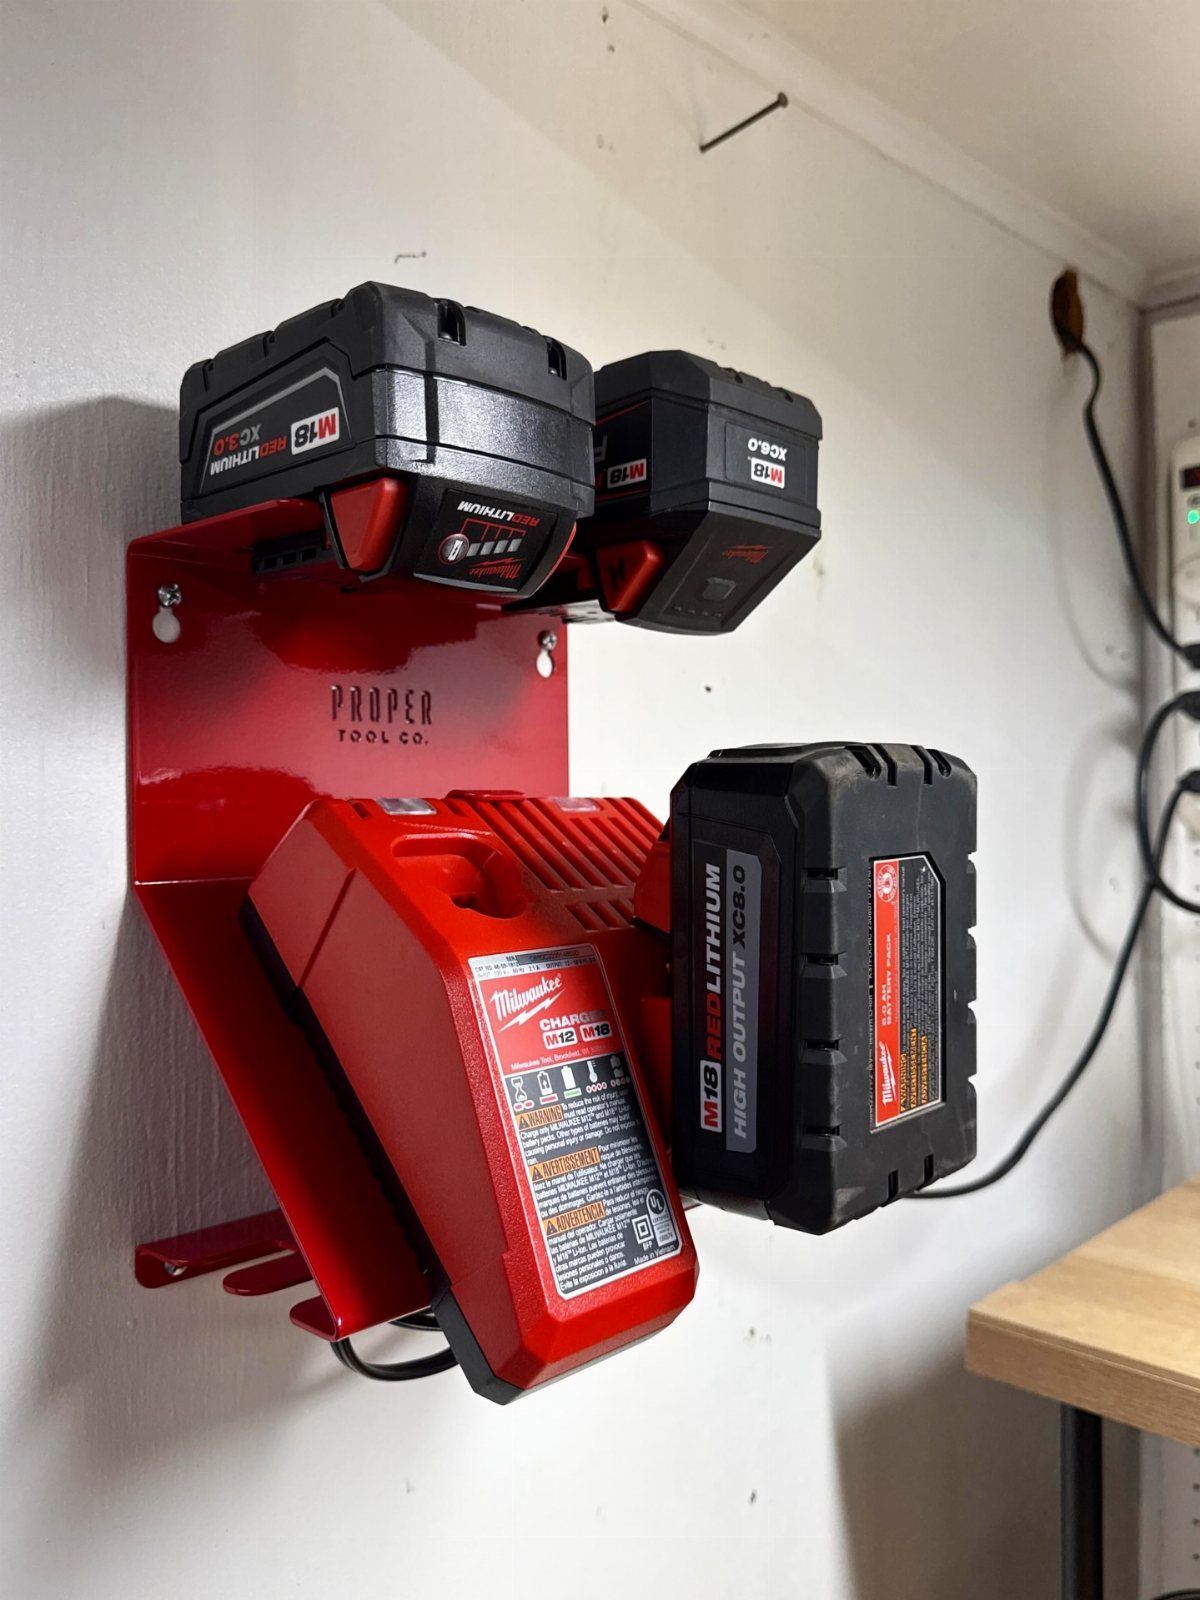
Loose batteries scatter across benches and get lost under projects. A bracket on the wall gives each one a slot, with the charger mounted right alongside.
Put it near an outlet so no cord crosses your work area.
Match the bracket to your battery brand, since slots are shaped for specific packs. 3 slots plus a charger cover a small kit of cordless tools, and a power strip behind the shelf keeps the cords tidy.
I would mount it at chest height, so a dead battery swaps for a fresh one without bending.
4. DIY Tool Shelf with Cubbies
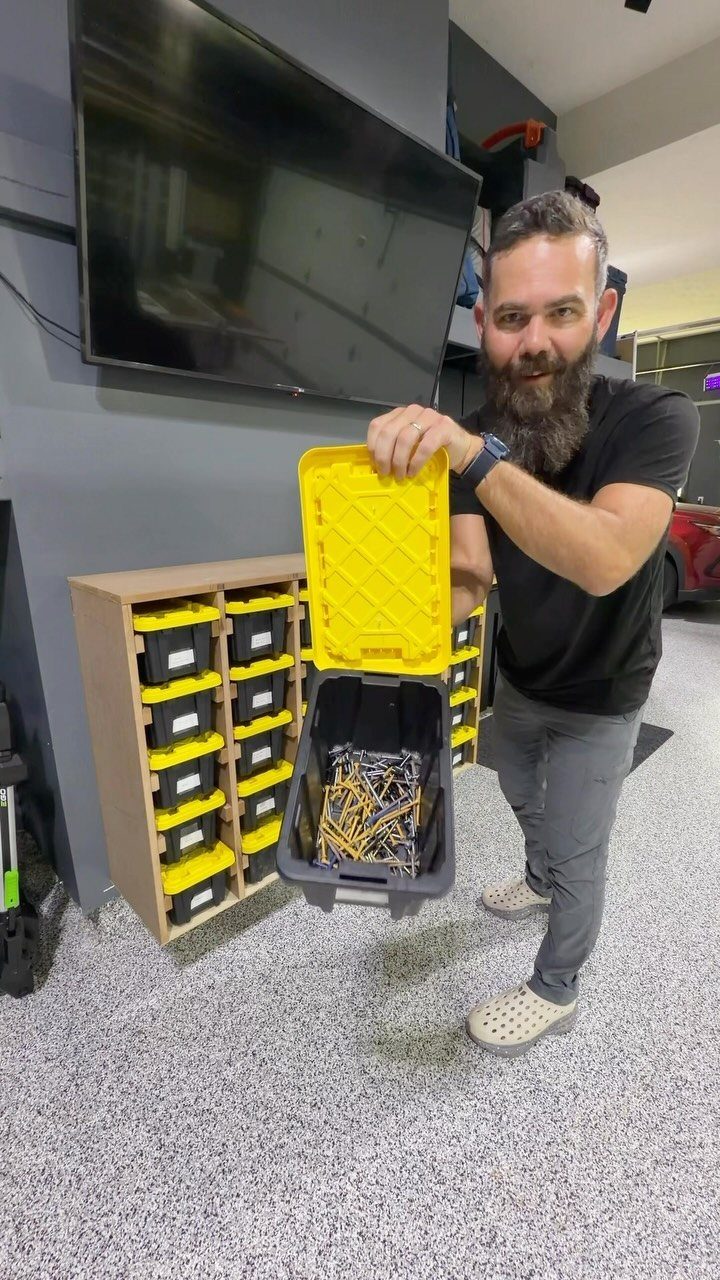
Build the cubbies around the bins you already own. Measure the widest bin, add a little clearance, and cut dividers to match so each one slides in and out without a fight.
With a saw, a drill and wood screws, a plain wooden shelf makes an easy afternoon project. Sturdy plywood or boards work well, and open fronts mean you see what is in each bin at a glance.
Label the bin fronts. Screws look alike after a month.
5. Wall-Mounted Power Tool Rack
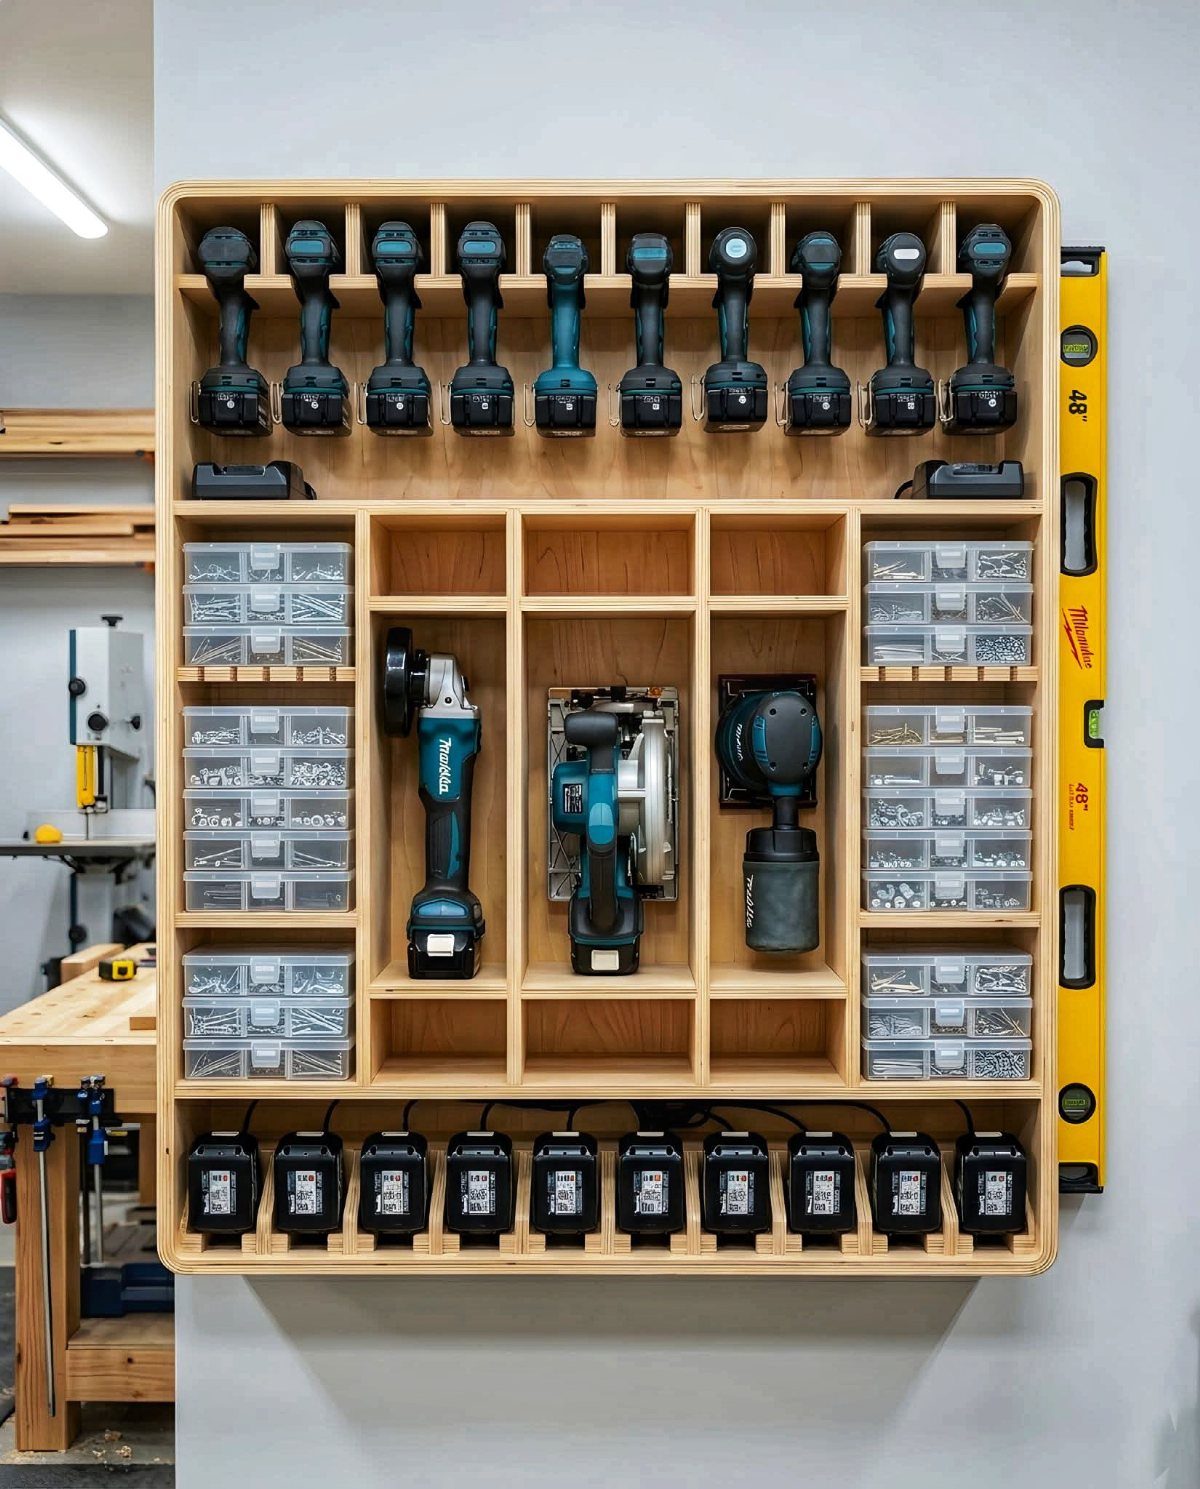
Cordless drills take up more bench than any other tool, so give them a home on the wall. A tiered unit with a slot cut for each drill keeps them upright and ready, with bins below for bits and fasteners.
Size each slot to the tool it holds, measuring the body and the battery base. Cutting slots a bit generous makes a drill easy to drop in one-handed.
Attach the unit to wall studs, since a loaded rack is heavy. Fix a level to the side of the rack and it uses space that would otherwise go to waste, with a level always at hand for hanging shelves.
6. Wooden Garden Tool Wall Rack
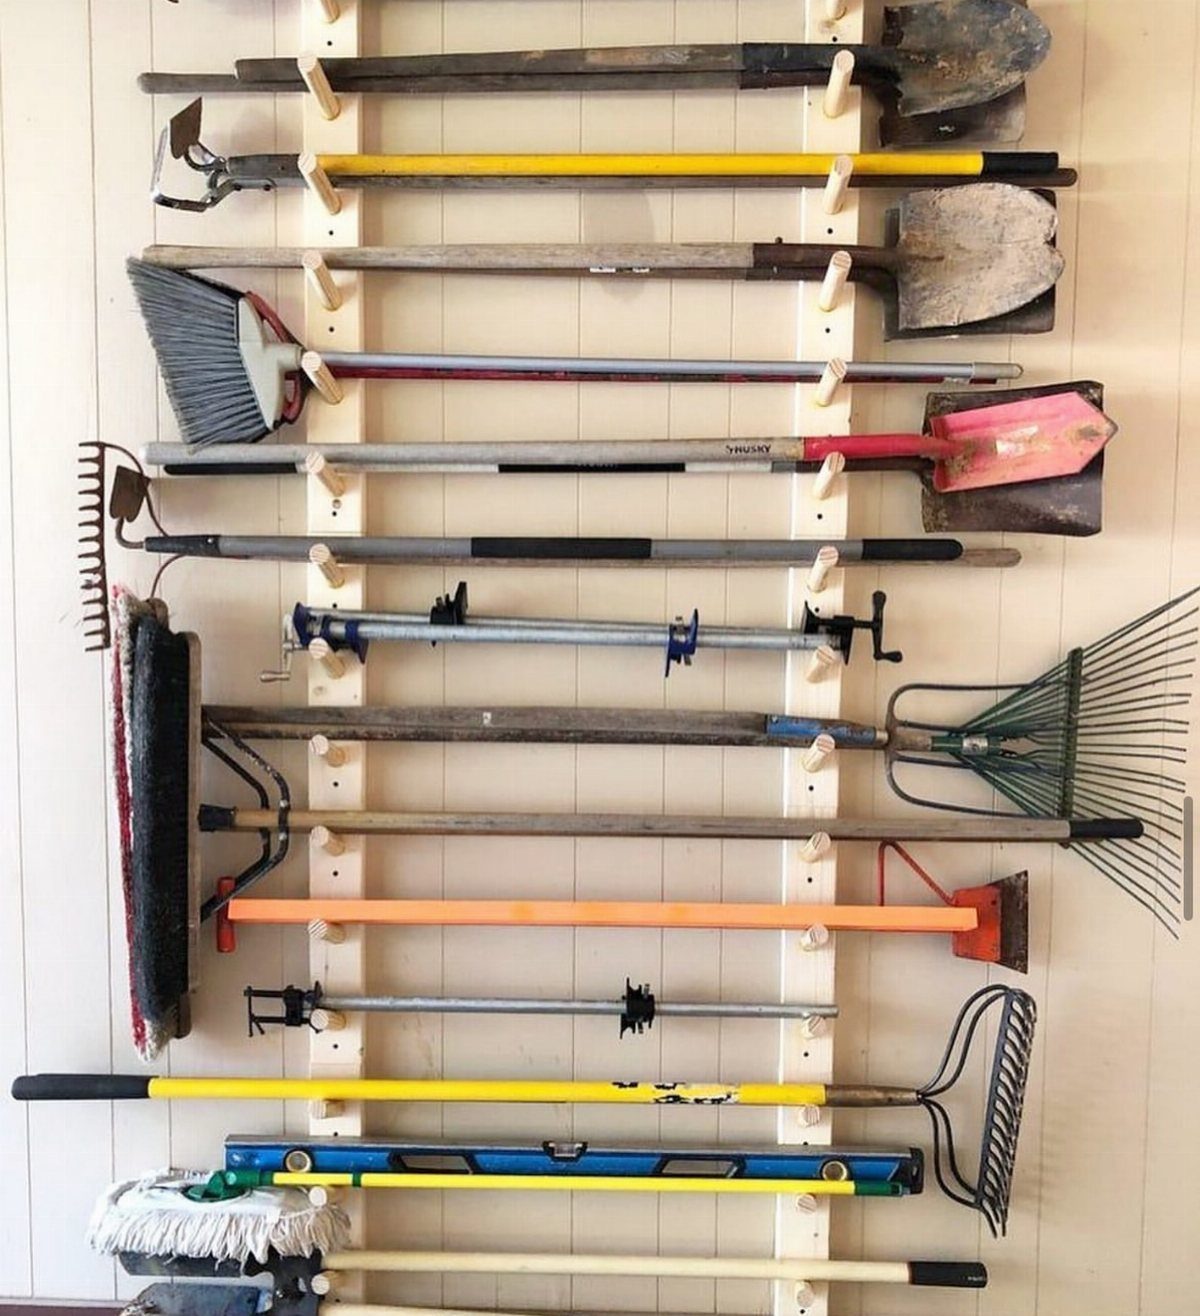
Shovels, rakes and brooms lean, slide and fall when they stand in a corner. Horizontal pegs fix that by letting each handle rest across the rack.
Space the pegs wide enough that the tool heads do not tangle. Vertical supports screwed into the wall give the pegs something solid to hold, and wood is easy to cut and drill with basic tools.
Put the heaviest tools lowest, so lifting them out takes less effort. Brooms can go on the top pegs.
7. Hardware Storage Drawer Cabinet
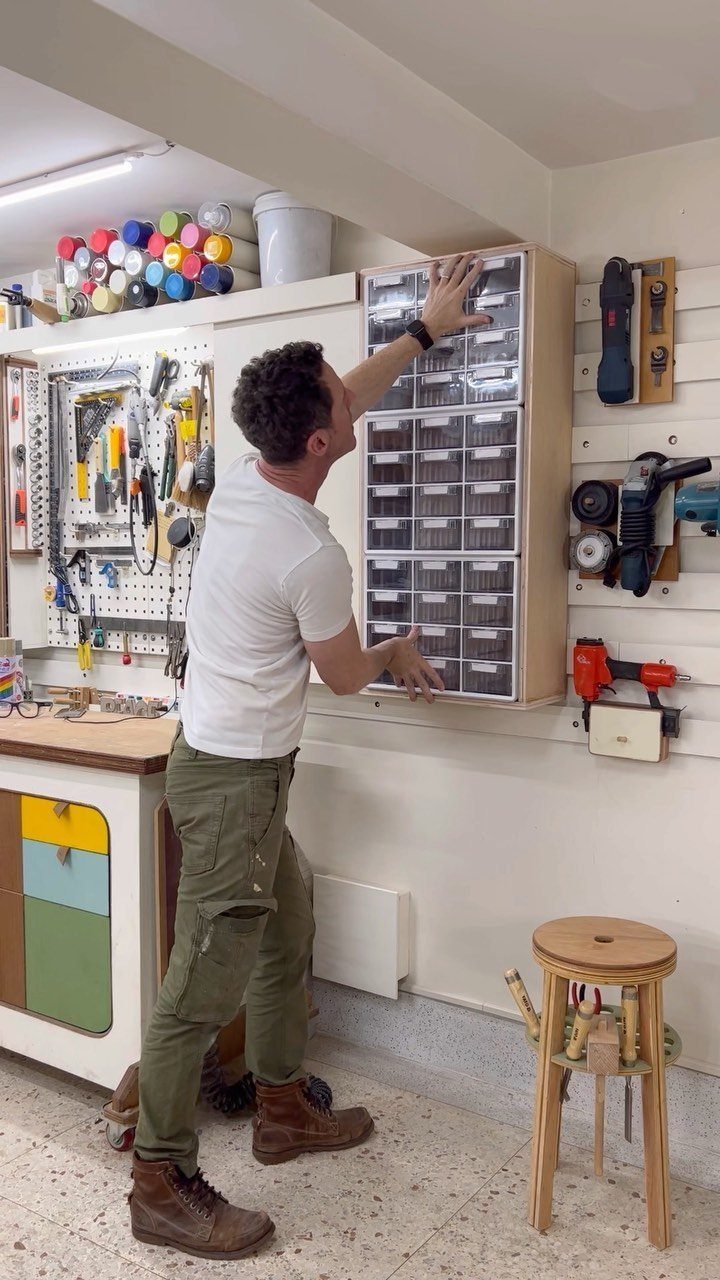
Dozens of small clear drawers in one tall wooden cabinet will hold more loose hardware than any shelf of coffee cans.
Give screws, anchors, washers and nuts each their own drawer, and choose a cabinet with clear fronts so you can see what is inside before you pull anything open.
Sort before you fill.
Group by type first, then by size, so screws of different lengths never share a drawer with drywall anchors. Stick a small label on each front anyway, because clear plastic still hides the difference between 2 similar screws.
A cabinet this tall stands on the floor, so it suits a workshop wall with room beside it. Anchor it to the wall so it cannot tip when several drawers are open.
Organizing Tips
Sort your tools by the job they do before you build anything: the layout tools together, the fastening tools together, and the sanding supplies in their own spot.
Inside each group, line them up by size, smallest to biggest or the reverse, so a missing one stands out right away.
In a drawer, dividers or inserts give every tool a designated spot. A rubber liner on the drawer bottom stops everything from sliding around each time you open and close it.
Put the tools you reach for most in the top drawers and the rarely used ones in the lower drawers. Label the drawer fronts if you like things particular.
Then keep it going with 2 habits: return each tool to its spot after every use, and declutter on a regular schedule.
There is no universal answer to the tool storage problem. Every do-it-yourselfer has a collection of tools at home that might use some organization, and there are a few ingenious solutions.
Essential Tools
A starter kit is shorter than most people expect. A solid hammer belongs at the top of the list, since it sinks nails, pulls them back out, and taps a stubborn joint into line.
Add screwdrivers in the common types: Phillips, Robertson, flat head and hex head. Adjustable wrenches, pliers, an Allen key set and a socket wrench set cover most nuts and bolts.
Round things out with a few utility knives, a tape measure, a handsaw and a circular saw.
Buy what your next project calls for rather than the whole list at once. Every garage ends up different.
Safety Considerations
Mount a fire extinguisher within a few steps of the workbench, and check the label to confirm it covers electrical and chemical fires (look for a multipurpose ABC rating). A first-aid kit belongs nearby too.
Ventilation matters once you sand, finish or cut. Open windows or an exhaust fan keep dust and fumes from building up.
Wear goggles, ear protection, gloves and a face mask. Work on a sturdy bench that will not shift under you.
Hang sharp and heavy tools securely on the wall or keep them in locked storage. Keep the floor clear, and wipe up spills, melted snow and ice dripping off vehicles, and heavy sawdust before they cause a slip.
Frequently Asked Questions
What are some effective tool storage solutions?
Pegboard adapts better than any other wall system I know, since hooks, bins and racks pull out and reset whenever the tool collection grows or changes.
Cabinets and mobile carts also work well. A magnetic strip suits steel blades, a wall bracket holds batteries beside a charger, and a wooden shelf with cubbies fits the bins you already own.
Pick by what you store: tools you grab daily belong at eye level on open storage, and small parts belong in bins or drawers.
How can I organize small tools and fasteners?
Use small clear bins or drawers for fasteners and a magnetic strip for small steel tools.
Group screws, anchors, washers and nuts by type, then split each group by size so a 1-inch screw never ends up mixed in with a 2-inch one.
Labels still belong on every drawer or bin front, because even clear plastic makes 2 near-identical screws look the same from a few feet away. Stackable bins or bins mounted to pegboard work if drawers don’t suit your space.
What is the best way to store tools on a wall?
Pegboard is the best all-around wall option, since you can rearrange hooks, racks and bins whenever your tools change.
Group by task, put daily tools at eye level, and leave a few empty rows for growth. For heavy items like a drill rack, screw the unit into wall studs so the load stays secure.
What can I hang on a magnetic tool holder?
Steel tools such as scissors, razors and utility knives hang well on a magnetic strip. Magnets ignore aluminum, brass and plastic, so tools made from those materials need a hook or a clip.
Set the strip at an easy arm’s reach, and turn blades and other sharp edges away from the spot where a hand would normally land.






